cocos2d-x游戏开发(十五)游戏载入动画loading界面
这个资源载入的loading界面demo是在玩客网做逆转三国的时候随手写的,尽管我在那仅仅待了2个礼拜。可是也算參与了一个商业游戏项目了,学到不少东西。当时使用的cocos2d-x还是1.0版的,我用2.1.2的调试过了。
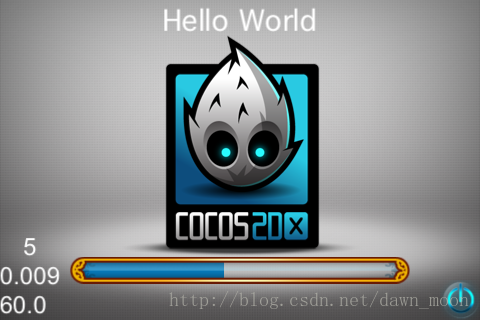
上图:
好了,非常easy,代码有凝视
上代码:
- #include "HelloWorldScene.h"
- #include "SimpleAudioEngine.h"
- using namespace cocos2d;
- using namespace CocosDenshion;
- CCScene* HelloWorld::scene()
- {
- // 'scene' is an autorelease object
- CCScene *scene = CCScene::create();
- // 'layer' is an autorelease object
- HelloWorld *layer = HelloWorld::create();
- // add layer as a child to scene
- scene->addChild(layer);
- // return the scene
- return scene;
- }
- // on "init" you need to initialize your instance
- bool HelloWorld::init()
- {
- //////////////////////////////
- // 1. super init first
- if ( !CCLayer::init() )
- {
- return false;
- }
- m_iLoadIdex = 0;
- /////////////////////////////
- // 2. add a menu item with "X" image, which is clicked to quit the program
- // you may modify it.
- // add a "close" icon to exit the progress. it's an autorelease object
- CCMenuItemImage *pCloseItem = CCMenuItemImage::create(
- "CloseNormal.png",
- "CloseSelected.png",
- this,
- menu_selector(HelloWorld::menuCloseCallback) );
- pCloseItem->setPosition( ccp(CCDirector::sharedDirector()->getWinSize().width - 20, 20) );
- // create menu, it's an autorelease object
- CCMenu* pMenu = CCMenu::create(pCloseItem, NULL);
- pMenu->setPosition( CCPointZero );
- this->addChild(pMenu, 1);
- /////////////////////////////
- // 3. add your codes below...
- // add a label shows "Hello World"
- // create and initialize a label
- CCLabelTTF* pLabel = CCLabelTTF::create("Hello World", "Thonburi", 34);
- // ask director the window size
- CCSize size = CCDirector::sharedDirector()->getWinSize();
- // position the label on the center of the screen
- pLabel->setPosition( ccp(size.width / 2, size.height - 20) );
- // add the label as a child to this layer
- this->addChild(pLabel, 1);
- // add "HelloWorld" splash screen"
- CCSprite* pSprite = CCSprite::create("HelloWorld.png");
- // position the sprite on the center of the screen
- pSprite->setPosition( ccp(size.width/2, size.height/2) );
- // add the sprite as a child to this layer
- this->addChild(pSprite, 0);
- // loading边框
- m_progressFrame = CCSprite::create("loading_fr.png");
- addChild(m_progressFrame,1);
- m_progressFrame->setPosition(ccp(240, 50));
- // loading的动作条
- m_progressBar = CCProgressTimer::create(CCSprite::create("loading_bar.png"));
- m_progressBar->setType(kCCProgressTimerTypeBar);
- addChild(m_progressBar);
- m_progressBar->setVisible(true);
- m_progressBar->setPosition(ccp(241, 51));
- // 进度动画运动方向,从左到右
- m_progressBar->setMidpoint(ccp(0, 0));
- // 宽高变化,这里是宽度变化
- m_progressBar->setBarChangeRate(ccp(1, 0));
- m_progressBar->setPercentage(0);
- // loading动画,没有逻辑处理,实际情况则凝视掉
- CCProgressTo *to = CCProgressTo::create(10, 100);
- m_progressBar->runAction(to);
- // 实际的loading逻辑,能够在这里加入
- // scheduleUpdate();
- return true;
- }
- void HelloWorld::update(float dt)
- {
- m_iLoadIdex++;
- if (m_iLoadIdex <= 50) {
- loadResource(m_iLoadIdex);
- m_progressBar->setPercentage(m_iLoadIdex * 100.0 / 50);
- }
- if (m_iLoadIdex >=50) {
- unscheduleUpdate();
- }
- }
- // 实际的loading逻辑。载入资源能够在这里加入。
- // 这里仅仅用了sleep来模拟
- void HelloWorld::loadResource(int index)
- {
- CCLog("loading ....");
- switch (index) {
- case 0:
- break;
- default:
- sleep(1.0);
- break;
- }
- }
- void HelloWorld::menuCloseCallback(CCObject* pSender)
- {
- CCDirector::sharedDirector()->end();
- #if (CC_TARGET_PLATFORM == CC_PLATFORM_IOS)
- exit(0);
- #endif
- }
东西太简单,还须要上传demo源代码么。要的留言
cocos2d-x游戏开发(十五)游戏载入动画loading界面的更多相关文章
- cocos2d-x游戏开发(十五)游戏加载动画loading界面
个人原创,欢迎转载:http://blog.csdn.net/dawn_moon/article/details/11478885 这个资源加载的loading界面demo是在玩客网做逆转三国的时候随 ...
- unity3D游戏开发十八之NGUI动画
我们先来看下帧动画,顾名思义,就是一帧帧的图片组成的动画,我们须要用到UISprite Animation组件,它的属性例如以下: Framerate:播放速率,也就是每秒钟播放的帧数 Name Pr ...
- 【读书笔记《Android游戏编程之从零开始》】19.游戏开发基础(游戏音乐与音效)
在一款游戏中,除了华丽的界面 UI 直接吸引玩家外,另外重要的就是游戏的背景音乐与音效:合适的背景音乐以及精彩的音效搭配会令整个游戏上升一个档次. 在 Android 中.常用于播放游戏背景音乐的类是 ...
- Unity 4.2.0 官方最新破解版(Unity3D 最新破解版,3D游戏开发工具和游戏引擎套件)
Unity是一款跨平台的游戏开发工具,从一开始就被设计成易于使用的产品.作为一个完全集成的专业级应用,Unity还包含了价值数百万美元的功能强大的游戏引擎.Unity作为一个游戏开发工具,它的设计主旨 ...
- Unity 2D游戏开发教程之游戏精灵的开火状态
Unity 2D游戏开发教程之游戏精灵的开火状态 精灵的开火状态 “开火”就是发射子弹的意思,在战争类型的电影或者电视剧中,主角们就爱这么说!本节打算为精灵添加发射子弹的能力.因为本游戏在后面会引入敌 ...
- Unity 2D游戏开发教程之游戏中精灵的跳跃状态
Unity 2D游戏开发教程之游戏中精灵的跳跃状态 精灵的跳跃状态 为了让游戏中的精灵有更大的活动范围,上一节为游戏场景添加了多个地面,于是精灵可以从高的地面移动到低的地面处,如图2-14所示.但是却 ...
- 《C++游戏开发》笔记十一 平滑动画:不再颤抖的小雪花
本系列文章由七十一雾央编写,转载请注明出处. http://blog.csdn.net/u011371356/article/details/9430645 作者:七十一雾央 新浪微博:http:/ ...
- STC8H开发(十五): GPIO驱动Ci24R1无线模块
目录 STC8H开发(一): 在Keil5中配置和使用FwLib_STC8封装库(图文详解) STC8H开发(二): 在Linux VSCode中配置和使用FwLib_STC8封装库(图文详解) ST ...
- [Unity3D]Unity3D游戏开发Lua随着游戏的债券(于)
---------------------------------------------------------------------------------------------------- ...
随机推荐
- create user
create创建的用户,只有usage权限,即,连接数据库的权限,最低的权限. # 1.新建用户,这里的用户是由user_name 和ip一起唯一确定一个用户.# 2.若省略ip表达式,则表示%,即所 ...
- Node.js Error: Cannot find module express的解决办法(转载)
1.全局安装express框架,cmd打开命令行,输入如下命令: npm install -g express express 4.x版本中将命令工具分出来,安装一个命令工具,执行命令: npm in ...
- [转]json对象详解
json(javascript object notation)全称是javascript对象表示法,它是一种数据交换的文本格式,而不是一种编程语言,用于读取结构化数据.2001年由Douglas C ...
- 使用Charles在iOS6上进行抓包
抓取Web页面的网络请求很容易,Chrome和Firefox都很容易做到.iOS APP如何抓包呢?其实也很容易,我比较喜欢使用 Charles. 我用的是Mac电脑,首先建立一个热点,然后让iOS设 ...
- AutoMapper introduction
http://automapper.org/ A convention-based object-object mapper映射. 100% organic and gluten-free. Take ...
- 对BOM的总结
参考:JavaScript半知半解 TG著 BOM对象 Window对象是客户端JavaScript程序的全局对象. Window对象使得JavaScript与浏览器进行交互. 所有的JavaScri ...
- Java 类与类之间的调用
方法1. 新建一个类. 然后在调用类中先进行被调用类实例化,然后通过实例化的对象访问. 例如: //先定义一个类 import static java.lang.System.out; public ...
- Oracle删除当前用户下所有的表的方法1
1.如果有plsql客户端,则可以使用该用户登录,选中所有表 右键Drop即可. 2.如果有删除用户的权限,则可以: ? 1 drop user user_name cascade; 加了cascad ...
- Oracle中给表主键、外键收集
1.创建表的同时创建主键约束 (1)无命名 create table student ( studentid int primary key not null, studentname varchar ...
- Linux监听的网络服务$ netstat -ntlp$ netstat -nulp$ netstat -nxlp
我一般都分开运行这三个命令,不想一下子看到列出一大堆所有的服务.netstat -nalp倒也可以.不过我绝不会用 numeric 选项 (鄙人一点浅薄的看法:IP 地址看起来更方便). 找到所有正在 ...