
Centos7 配置subversion
CentOS7:配置SVN服务器
Posted on 2016-11-10 15:17 eastson 阅读(4266) 评论(0) 编辑 收藏
	</div>

	<div class="postbody"><div id="cnblogs_post_body"><h3>1. 安装</h3>
CentOS通过yum安装subversion。
$ sudo yum install subversion
subversion安装在/bin目录:
$ which svnserve

/bin/svnserve
检查一下subversion是否安装成功。

$ svnserve --version

svnserve, version 1.7. (r1542130)

   compiled Nov  , ::

Copyright (C)  The Apache Software Foundation.


This software consists of contributions made by many people; see the NOTICE


file for more information.


Subversion is open source software, see http://subversion.apache.org/


The following repository back-end (FS) modules are available:

* fs_base : Module for working with a Berkeley DB repository.


* fs_fs : Module for working with a plain file (FSFS) repository.

Cyrus SASL authentication is available.
2. 建立版本库
subversion默认以/var/svn作为数据根目录,可以通过/etc/sysconfig/svnserve修改这个默认位置。
$ systemctl cat svnserve.service
# /usr/lib/systemd/system/svnserve.service
[Unit]
Description=Subversion protocol daemon
After=syslog.target network.target [Service]
Type=forking
EnvironmentFile=/etc/sysconfig/svnserve
ExecStart=/usr/bin/svnserve --daemon --pid-file=/run/svnserve/svnserve.pid $OPTIONS [Install]
WantedBy=multi-user.target $ cat /etc/sysconfig/svnserveOPTIONS is used to pass command-line arguments to svnserve.
Specify the repository location in -r parameter:
OPTIONS="-r /var/svn"
我们修改/etc/sysconfig/svnserver将默认目录指定到/opt/svn。
$ cat /etc/sysconfig/svnserve

OPTIONS="-r /opt/svn"
使用svnadmin建立版本库spring-hello-world。
$ sudo mkdir -p /opt/svn

$ sudo svnadmin create /opt/svn/spring-hello-world

$ ll /opt/svn/


drwxr-xr-x.  root root  Nov  : spring-hello-world

$ ll /opt/svn/spring-hello-world/


drwxr-xr-x.  root root    Nov  : conf


drwxr-sr-x.  root root  Nov  : db


-r--r--r--.  root root     Nov  : format


drwxr-xr-x.  root root  Nov  : hooks


drwxr-xr-x.  root root    Nov  : locks


-rw-r--r--.  root root   Nov  : README.txt
3. 配置
编辑用户文件passwd,新增两个用户:admin和guest。
$ cat /opt/svn/spring-hello-world/conf/passwd

[users]

admin = admin

guest = guest
编辑权限文件authz,用户admin设置可读写权限,guest设置只读权限。
$ cat /opt/svn/spring-hello-world/conf/authz

[/]

admin = rw

guest = r
编辑svnserve.conf:
$ cat /opt/svn/spring-hello-world/conf/svnserve.conf

[general]

anon-access = none                     #控制非鉴权用户访问版本库的权限

auth-access = write                    #控制鉴权用户访问版本库的权限

password-db = passwd                   #指定用户名口令文件名

authz-db = authz                       #指定权限配置文件名

realm = spring-hello-world             #指定版本库的认证域,即在登录时提示的认证域名称
4. SVN服务
启动SVN服务。
$ sudo systemctl start svnserve.service
检查服务是否启动成功。
$ ps aux | grep svn

root        0.0  0.1     ?        Ss   :   : /usr/bin/svnserve --daemon --pid-file=/run/svnserve/svnserve.pid -r /opt/svn
通过netstat可以看到SVN打开了3690端口。
$ sudo netstat -tnlp

Proto Recv-Q Send-Q Local Address           Foreign Address         State       PID/Program name

tcp               0.0.0.0:            0.0.0.0:*               LISTEN      /svnserve
设置成开机启动。
$ sudo systemctl enable svnserve.service
5. 客户端测试
客户端可以通过TortoriseSVN测试。
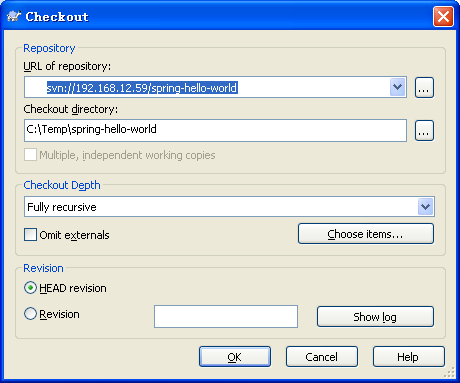
这时候可能会防火墙问题。如果是防火墙问题,会提示无法连接。
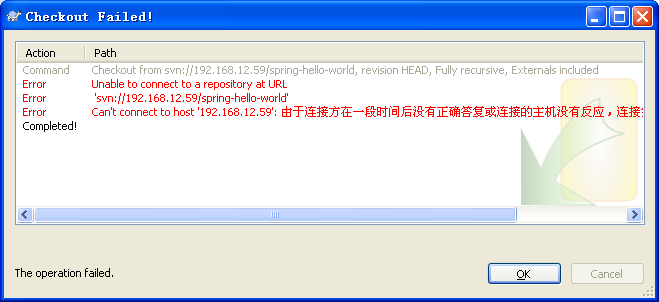
客户端用telnet无法连接。
C:\Temp>telnet 192.168.12.59
用systemctl检查服务器的防火墙配置:
$ firewall-cmd --list-all

public (default, active)

  interfaces: eno16777736 eno33554984

  sources:

  services: dhcpv6-client ssh

  ports:

  masquerade: no

  forward-ports:

  icmp-blocks:

  rich rules:
可以看到,没有telnet服务和3690端口。增加telnet服务器和3690端口:
$ sudo firewall-cmd --permanent --add-service=telnet

$ sudo firewall-cmd --permanent --add-port=/tcp

$ sudo firewall-cmd --reload
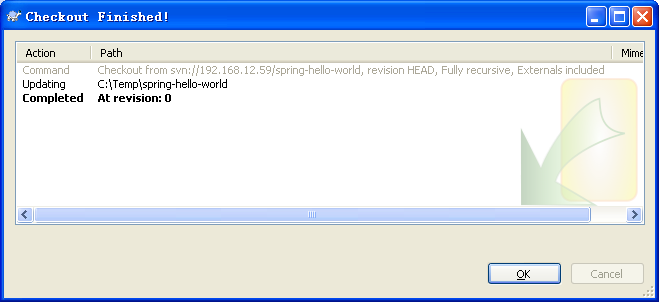
客户端再用telnet,应该就可以了。




		</div>

	</td>
参考文章: http://www.cnblogs.com/eastson/p/6050710.html
Centos7 配置subversion的更多相关文章
- 三·管理和配置Subversion(基于Centos7)
基于上一篇文章 二·安装Subversion(基于Centos7)中安装的Subversion,本篇文章讲述Subversion的管理和配置 1.添加环境变量 输入命令vi /etc/profile ...
- Centos7 配置网络步奏详解
Centos7 配置网络步奏详解 编辑网卡配置文件 vi /etc/sysconfig/network-script/ifcfg-ens01 备注:这里的ens01不是所有系统都叫这个,有的可能叫其他 ...
- Linux 安装配置Subversion edge
2014-04-14:修正部分描述.添加JAVA_HOME报错处理步骤.添加配置sudoers 系统:CentOS 5.8 ,6.4 Subversion版本:Subversion Edge 4.0. ...
- centos7配置开启无线网卡,重启防火墙
centos7配置无线网卡: 在虚拟机为nat的网络连接下(就是默认的那个),centos7默认网卡未激活. 可以设置 文件 /etc/sysconfig/network-scripts/ifcfg- ...
- Centos7配置JAVA_HOME
Centos7配置JAVA_HOME http://blog.csdn.net/zzpzheng/article/details/73613838 在Centos7上,通过yum install ja ...
- Centos7配置NFS
centos7配置nfs yum -y install nfs-utils rpcbind 设置服务开机启动: systemctl enable rpcbind systemctl enable nf ...
- Centos7 配置ssh连接
Centos7 配置ssh连接 1.检查是否安装openssh-server:#yum list installed | grep openssh-server 安装openssh-server:#y ...
- CentOS7 配置静态 ip
1. 为 CentOS7 配置静态 ip 1.1 修改文件/etc/sysconfig/network-scripts/ifcfg-ens33 sudo vi /etc/sysconfig/netwo ...
- virtualbox 最小化安装centos7 配置双网卡(nat和桥接)记录----已经过期
该文章已经过期 请参考另一篇文章:virtualbox 安装centos7 配置桥接网卡,实现主机和虚拟机互通,虚拟机可以访问外网,解决无法上网问题 先说明一下为什么要配置双网卡? 配置nat ...
随机推荐
- vue-webpack模板升级到webpack4
本文仅简单记录下基于vue-webpack模板升级到webpack4的过程 快速部署 Vue CLI 的包名称由 vue-cli 改成了 @vue/cli # 全局安装 vue-cli $ npm i ...
- LVS DR实验!
=========================================================================== 操作图 设备:两台节点模拟机,一台调度机 调度机 ...
- Linux下Nginx1.9.9的安装
1.环境安装 yum install gcc-c++ .yum -y install pcre*.yum -y install openssl* (安装顺序安装) 2.下载压缩包(这里我使用的是老本 ...
- 使用pycharm创建Django项目,'django-admin' 不是内部或外部命令
报错信息如下: (笔者的电脑为win10,python3.7,django 2.2.6 ) 第一种情况的解决方案:没有配置环境变量,Django安装之后,需要配置环境变量,命令django-admin ...
- Manjaro 与 Windows 双系统时间相差8小时
Manjaro 与 Windows 双系统时间相差8小时 产生原因: Windows 将本地硬件时间作为设定时区(如 UTC+8)的区时,而 Linux 默认将其作为 UTC 时间. 解决方式: 让 ...
- Qt应用程序的打包
Windows系统下打包: qt用realse版本编译然后打包发行 debug编译后的文件比realse版本大很多先在编译好的debug或者realse执行程序的目录下将执行该城西对应的所有dell文 ...
- 关于OSPF LSA不稳定!
Issue 1 Solution It is important that you understand the error message during attempts to troublesho ...
- CPI 3.0磁盘空间不足!
当使用Cisco PI的时候,有的时候可能出现diskspace不够的情况,这种情况可能是前期部署PI的时候,提供的空间太小了,或者目前缓存的数据太多了. 如下是一个例子: 在CLI中检查时,PI数据 ...
- vue下canvas绘制矩形
起因:根据项目需求本人写了一个绘制矩形的组件.功能:在图片中绘制矩形,根据图片大小进行自适应展示,获取图片矩形坐标.思路:首先定义一个固定大小的DIV,DIV标签中有监测鼠标变化的四个事件moused ...
- C语言笔记 12_可变参数&内存管理&命令行参数
可变参数 有时,您可能会碰到这样的情况,您希望函数带有可变数量的参数,而不是预定义数量的参数.C 语言为这种情况提供了一个解决方案,它允许您定义一个函数,能根据具体的需求接受可变数量的参数.下面的实例 ...