
用drawRect以及CAReplicatorLayer绘制动态水波纹
用drawRect以及CAReplicatorLayer绘制动态水波纹
大大简化了写水波纹效果的难度,你可以根据示例自己组装水波纹效果,本设计是几个工具组合在一起完成的效果, DrawRectObject 以及 ReplicatorLineAnimationView 均可以独立完成更复杂的功能.
说明
1. 用sine计算正玄曲线
2. 用CAReplicatorLayer实现重复移动的效果
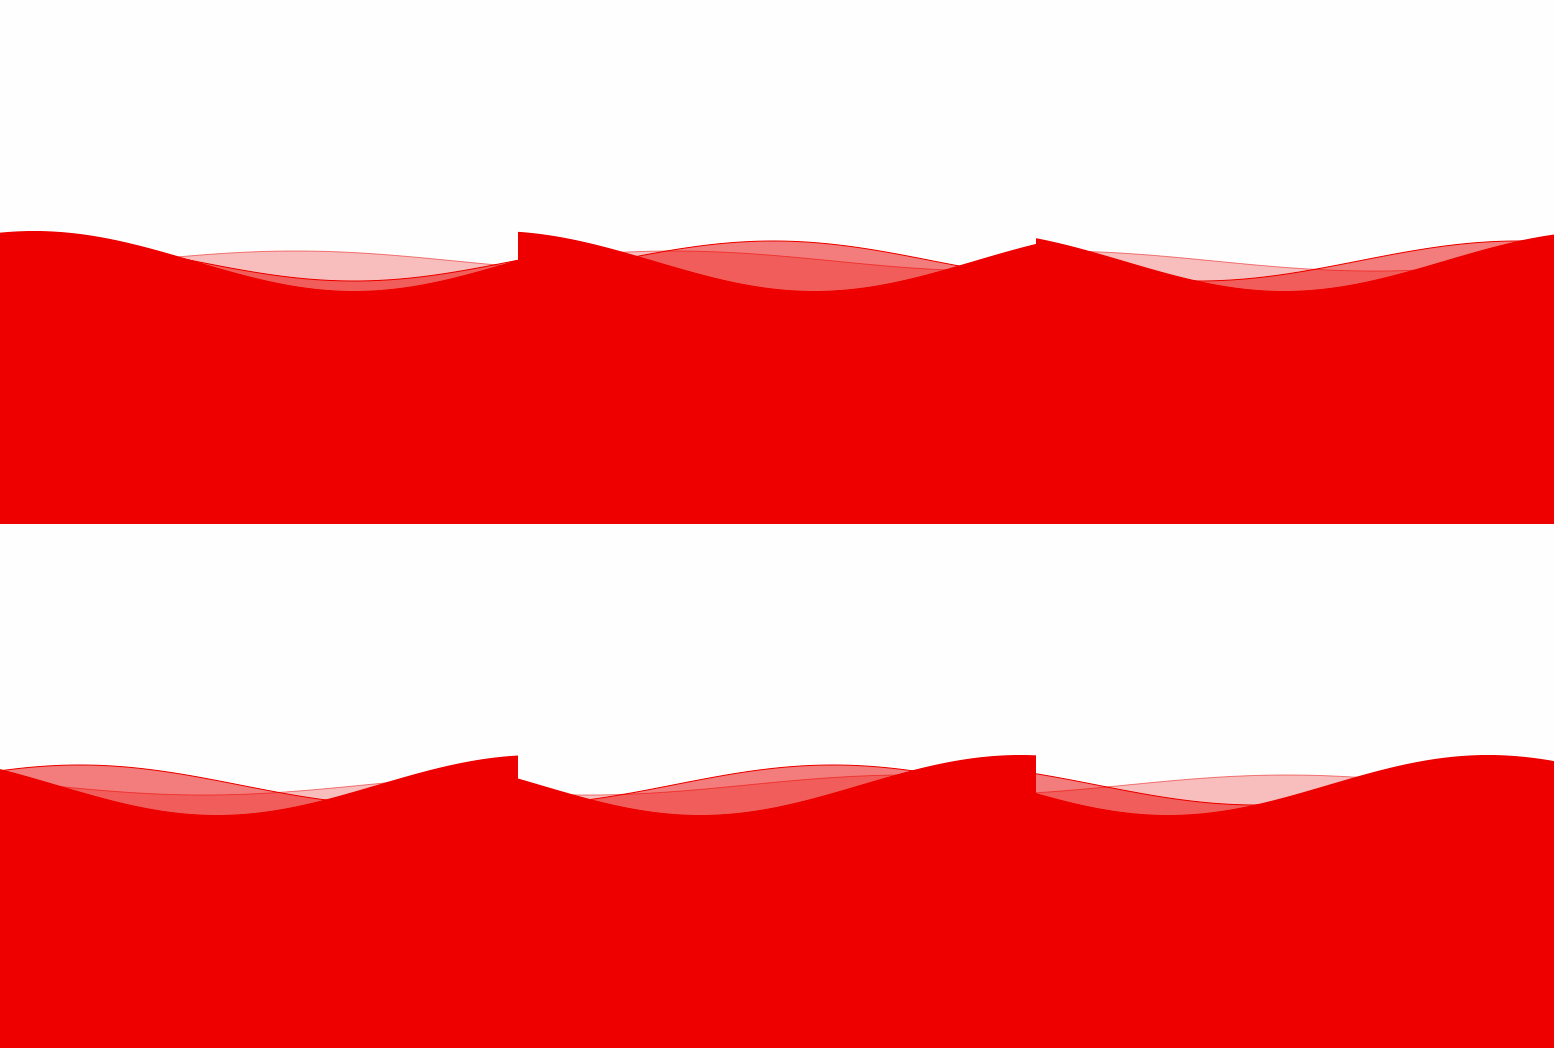
效果
源码
https://github.com/YouXianMing/UI-Component-Collection 中的 DrawRectObject
//

//  WaveView.h

//  DrawRectObject

//

//  Created by YouXianMing on 16/8/1.

//  Copyright © 2016年 YouXianMing. All rights reserved.

//

#import "CustomDrawingView.h"

typedef enum : NSUInteger {

    kStrokeWave = 1 << 2,

    kFillWave   = 1 << 3 ,

} EWaveViewType;

@interface WaveView : CustomDrawingView

/**

 *  Wave type, default is kFillWave.

 */

@property (nonatomic) EWaveViewType type;

/**

 *  Sine phase, default is 0.

 */

@property (nonatomic) CGFloat  phase;

/**

 *  Wave crest height, Default is 10.

 */

@property (nonatomic) CGFloat  waveCrest;

/**

 *  Full wave count,  default is 1.

 */

@property (nonatomic) NSInteger waveCount;

/**

 *  The fill style.

 */

@property (nonatomic, strong) DrawingStyle *fillStyle;

/**

 *  The stroke style.

 */

@property (nonatomic, strong) DrawingStyle *strokeStyle;

@end
//

//  WaveView.m

//  DrawRectObject

//

//  Created by YouXianMing on 16/8/1.

//  Copyright © 2016年 YouXianMing. All rights reserved.

//

#import "WaveView.h"

@implementation WaveView

- (instancetype)initWithFrame:(CGRect)frame {

    if (self = [super initWithFrame:frame]) {

        self.waveCrest = 10.f;

        self.waveCount = 1;

        self.phase     = 0.f;

        self.type      = kFillWave;

        DrawingStyle *fillStyle = [DrawingStyle new];

        fillStyle.fillColor     = [DrawingColor colorWithUIColor:[[UIColor redColor] colorWithAlphaComponent:0.5f]];

        self.fillStyle          = fillStyle;

        DrawingStyle *strokeStyle = [DrawingStyle new];

        strokeStyle.strokeColor   = [DrawingColor colorWithUIColor:[UIColor redColor]];

        strokeStyle.lineWidth     = 0.5f;

        self.strokeStyle          = strokeStyle;

    }

    return self;

}

- (void)drawRect:(CGRect)rect {

    NSParameterAssert(self.fillStyle);

    NSParameterAssert(self.strokeStyle);

    [super drawRect:rect];

    CGFloat width  = self.frame.size.width;

    CGFloat height = self.frame.size.height;

    if (self.type & kFillWave) {

        [self.drawRectObject useDrawingStyle:_fillStyle drawFillBlock:^(DrawRectObject *drawRectObject) {

            for (CGFloat x = 0; x <= width; x++) {

                if (x == 0) {

                    [drawRectObject moveToStartPoint:CGPointMake(x, _waveCrest * sin((2 * M_PI) * _waveCount / width * x + _phase) + height / 2.f)];

                    continue;

                } else {

                    [drawRectObject addLineToPoint:CGPointMake(x, _waveCrest * sin((2 * M_PI) * _waveCount / width * x + _phase) + height / 2.f)];

                }

            }

            [drawRectObject addLineToPoint:CGPointMake(width, height)];

            [drawRectObject addLineToPoint:CGPointMake(0, height)];

            [drawRectObject addLineToPoint:CGPointMake(0, _waveCrest * sin((2 * M_PI) * _waveCount / width * 0 + _phase) + height / 2.f)];

        }];

    }

    if (self.type & kStrokeWave) {

        [self.drawRectObject useDrawingStyle:_strokeStyle drawStrokeBlock:^(DrawRectObject *drawRectObject) {

            for (CGFloat x = 0; x <= width; x++) {

                if (x == 0) {

                    [drawRectObject moveToStartPoint:CGPointMake(x, _waveCrest * sin((2 * M_PI) * _waveCount / width * x + _phase) + height / 2.f)];

                    continue;

                } else {

                    [drawRectObject addLineToPoint:CGPointMake(x, _waveCrest * sin((2 * M_PI) * _waveCount / width * x + _phase) + height / 2.f)];

                }

            }

        }];

    }

}

@end
//

//  ViewController.m

//  DrawRectObject

//

//  Created by YouXianMing on 16/7/30.

//  Copyright © 2016年 YouXianMing. All rights reserved.

//

#import "ViewController.h"

#import "WaveView.h"

#import "ReplicatorLineAnimationView.h"

#import "UIView+SetRect.h"

@interface ViewController ()

@end

@implementation ViewController

- (void)viewDidLoad {

    [super viewDidLoad];

    // Wave 1

    {

        WaveView *waveView = [[WaveView alloc] initWithFrame:CGRectMake(0, 0, Width, Height)];

        waveView.phase     = 0.f;

        waveView.waveCrest = 5.f;

        waveView.waveCount = 1;

        waveView.type      = kStrokeWave | kFillWave;

        {

            DrawingStyle *fillStyle = [DrawingStyle new];

            fillStyle.fillColor     = [DrawingColor colorWithUIColor:[[UIColor redColor] colorWithAlphaComponent:0.25f]];

            waveView.fillStyle      = fillStyle;

            DrawingStyle *strokeStyle = [DrawingStyle new];

            strokeStyle.strokeColor   = [DrawingColor colorWithUIColor:[[UIColor redColor] colorWithAlphaComponent:0.5f]];

            strokeStyle.lineWidth     = 0.5f;

            waveView.strokeStyle      = strokeStyle;

        }

        ReplicatorLineAnimationView *replicatorLineView = [[ReplicatorLineAnimationView alloc] initWithFrame:waveView.bounds];

        replicatorLineView.direction   = kReplicatorLeft;

        replicatorLineView.speed       = 0.1f;

        replicatorLineView.contentView = waveView;

        [replicatorLineView startAnimation];

        [self.view addSubview:replicatorLineView];

    }

    // Wave 2

    {

        WaveView *waveView = [[WaveView alloc] initWithFrame:CGRectMake(0, 0, Width, Height)];

        waveView.phase     = 0.f;

        waveView.waveCrest = 10.f;

        waveView.waveCount = 1;

        waveView.type      = kStrokeWave | kFillWave;

        {

            DrawingStyle *fillStyle = [DrawingStyle new];

            fillStyle.fillColor     = [DrawingColor colorWithUIColor:[[UIColor redColor] colorWithAlphaComponent:0.5f]];

            waveView.fillStyle      = fillStyle;

            DrawingStyle *strokeStyle = [DrawingStyle new];

            strokeStyle.strokeColor   = [DrawingColor colorWithUIColor:[UIColor redColor]];

            strokeStyle.lineWidth     = 0.5f;

            waveView.strokeStyle      = strokeStyle;

        }

        ReplicatorLineAnimationView *replicatorLineView = [[ReplicatorLineAnimationView alloc] initWithFrame:waveView.bounds];

        replicatorLineView.direction = kReplicatorLeft;

        replicatorLineView.speed     = 0.3f;

        replicatorLineView.contentView = waveView;

        [replicatorLineView startAnimation];

        [self.view addSubview:replicatorLineView];

    }

    // Wave 3

    {

        WaveView *waveView = [[WaveView alloc] initWithFrame:CGRectMake(0, 0, Width, Height)];

        waveView.phase     = 10.f;

        waveView.waveCrest = 15.f;

        waveView.waveCount = 1;

        waveView.type      = kFillWave;

        {

            DrawingStyle *fillStyle = [DrawingStyle new];

            fillStyle.fillColor     = [DrawingColor colorWithUIColor:[UIColor redColor]];

            waveView.fillStyle      = fillStyle;

        }

        ReplicatorLineAnimationView *replicatorLineView = [[ReplicatorLineAnimationView alloc] initWithFrame:waveView.bounds];

        replicatorLineView.direction   = kReplicatorLeft;

        replicatorLineView.speed       = 0.5f;

        replicatorLineView.contentView = waveView;

        [replicatorLineView startAnimation];

        [self.view addSubview:replicatorLineView];

    }

}

@end
用drawRect以及CAReplicatorLayer绘制动态水波纹的更多相关文章
- 自定义view实现水波纹效果
水波纹效果: 1.标准正余弦水波纹: 2.非标准圆形液柱水波纹: 虽说都是水波纹,但两者在实现上差异是比较大的,一个通过正余弦函数模拟水波纹效果,另外一个会运用到图像的混合模式(PorterDuffX ...
- Android 自定义view实现水波纹效果
http://blog.csdn.net/tianjian4592/article/details/44222565 在实际的开发中,很多时候还会遇到相对比较复杂的需求,比如产品妹纸或UI妹纸在哪看了 ...
- 用path动画绘制水波纹
用path动画绘制水波纹 效果 源码 // // ViewController.m // PathAnimation // // Created by YouXianMing on 15/7/3. / ...
- 手把手教你画一个 逼格满满圆形水波纹loadingview Android
才没有完结呢o( ̄︶ ̄)n .大家好,这里是番外篇. 拜读了爱哥的博客,又学到不少东西.爱哥曾经说过: 要站在巨人的丁丁上. 那么今天,我们就站在爱哥的丁丁上来学习制作一款自定义view(开个玩笑,爱 ...
- Android -- 贝塞尔实现水波纹动画(划重点!!)
1,昨天看到了一个挺好的ui效果,是使用贝塞尔曲线实现的,就和大家来分享分享,还有,在写博客的时候我经常会把自己在做某种效果时的一些问题给写出来,而不是像很多文章直接就给出了解决方法,这里给大家解释一 ...
- Android特效专辑(一)——水波纹过渡特效(首页)
Android特效专辑(一)--水波纹过渡特效(首页) 也是今天看到的一个特效,感觉挺漂亮的,最近也一直在筹划一个APP,就想把他当做APP的首页,然后加些处理,关于首页APP的特效等我完工了再贴出来 ...
- 适配移动端的在图片上生成水波纹demo
<!DOCTYPE html> <html lang="zh"> <head> <meta charset="UTF-8&q ...
- Android自定义控件-Path之贝赛尔曲线和手势轨迹、水波纹效果
从这篇开始,我将延续androidGraphics系列文章把图片相关的知识给大家讲完,这一篇先稍微进阶一下,给大家把<android Graphics(二):路径及文字>略去的quadTo ...
- 三角函数之美-水波纹载入LoadingView
一.前言 学习是要总结的.近期几天学习了画图相关的,可是使用的机会较少,如今又快要遗忘了,这次看了水波纹的绘制.认为十分有意思,还是 把实现的方法记录下来.技术无他,为手熟尔.还是要多练习,空淡误国, ...
随机推荐
- C# wpf 阻止*和|的输入
private void texBox_KeyDown(object sender, KeyEventArgs e) { if (Keyboard.Modifiers == ModifierKeys. ...
- Laravel 的 JSON API 接口自动化测试
Laravel 自带了两种测试类型 Feature Test: 功能测试.针对类似接口这种流程性的测试. Unit Test: 单元测试.针对单个函数这种输入输出结果的测试. 新建一个 Feature ...
- JavaScript——双向链表实现
本文版权归博客园和作者吴双本人共同所有,转载和爬虫请注明原文链接 http://www.cnblogs.com/tdws/ 下午分享了JavaScript实现单向链表,晚上就来补充下双向链表吧.对链表 ...
- 【IObit】五大软件激活码( Advanced Systemcare....)
IObit Malware Fighter 6Pro 破解: 打开软件安装位置,下载替换dll文件 链接: https://pan.baidu.com/s/1Euz87MCANuCnRqZsMQ_w4 ...
- 004.MySQL主库手动复制至从库
一 主库手动复制至从库 1.1 Master主库锁表 mysql> flush tables with read lock; Query OK, 0 rows affected (0.00 se ...
- Ubuntu安装及卸载brew
网站:http://linuxbrew.sh/ 一.安装: 不能在root下运行 $sh -c "$(curl -fsSL https://raw.githubusercontent.com ...
- JAVAEE——SpringBoot入门:简介、微服务、环境准备、helloworld与探究、快速构建项目
一.Spring Boot 入门 1.Spring Boot 简介 简化Spring应用开发的一个框架: 整个Spring技术栈的一个大整合: J2EE开发的一站式解决方案: 2.微服务 2014,m ...
- 多线程学习笔记六之并发工具类CountDownLatch和CyclicBarrier
目录 简介 CountDownLatch 示例 实现分析 CountDownLatch与Thread.join() CyclicBarrier 实现分析 CountDownLatch和CyclicBa ...
- IP基础知识与分配实现
一.IP寻址 1.划分网络ID和主机ID的最初方案是使用地址分类. 2.A类:0.0.0.0-127.255.255.255 B类:128.0.0.0-191.255.255.255 C类:192.0 ...
- 关于js操作符需要注意的地方
本文仅仅介绍部分js操作符在实际应用中需要注意的地方. 布尔操作符: //1.逻辑与操作属于短路操作,即如果第一个操作数能够决定结果那么就不会再对第二个操作数求值 var found=true; va ...