
CentOS 7.9 安装 nginx-1.22.0
一、CentOS 7.9 安装 nginx-1.22.0
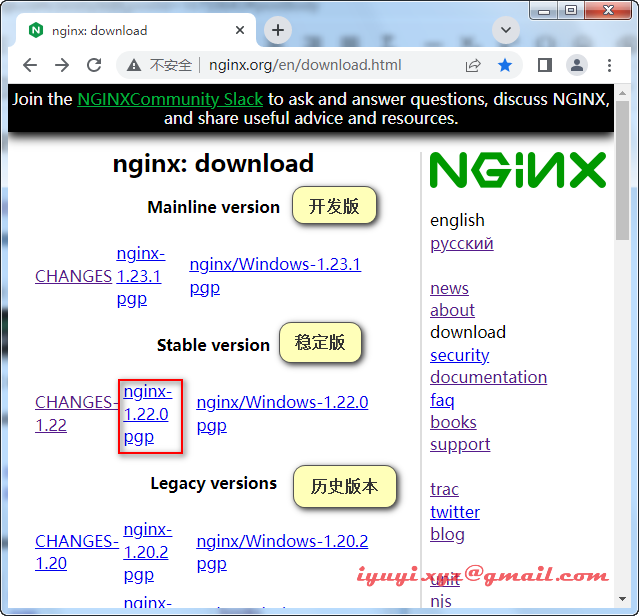
下载地址:http://nginx.org/en/download.html
2 安装前的准备
# 操作系统内核版本

uname -a

# 操作系统发行版本

cat /etc/redhat-release
在安装Nginx之前,我们需要确保安装Nginx所依赖的其他程序,执行下面的命令,安装或更新相应的程序。
yum install -y make zlib zlib-devel gcc-c++ libtool openssl openssl-devel pcre pcre-devel libxslt-devel geoip-devel gd gd-devel执行完成后,如果之前未安装的,则会自动安装,如果之前已经安装有旧的版本,则会被新的版本代替。
3 wget下载
# 推荐wget下载

yun install -y wget

wget http://nginx.org/download/nginx-1.22.0.tar.gz
4 创建用户和组
useradd nginxxyz -s /sbin/nologin

id nginxxyz二、解压
tar -zxvf /opt/software/nginx-1.22.0.tar.gz -C /opt/    # 解压

cd /opt/nginx-1.22.0    # 进入nginx目录
三、配置编译模块
使用 ll 可以看到目录下有 configure 的可执行文件,这个文件的作用,就是根据你系统的情况,生成makefile的,以便于下一步的编译和安装
cd /opt/nginx-1.22.0

./configure   # 不带参数,默认会安装到 /usr/local/nginx 目录,也可以 指定参数。

./configure --prefix=/usr/local/nginx  # 则会在安装的时候,安装到 /usr/data/nginx 的目录  。
./configure \
--user=nginxxyz \
--group=nginxxyz \
--with-threads \
--with-file-aio \
--with-http_ssl_module \
--with-http_v2_module \
--with-http_realip_module \
--with-http_addition_module \
--with-http_xslt_module=dynamic \
--with-http_image_filter_module=dynamic \
--with-http_geoip_module=dynamic \
--with-http_sub_module \
--with-http_dav_module \
--with-http_flv_module \
--with-http_mp4_module \
--with-http_gunzip_module \
--with-http_gzip_static_module \
--with-http_auth_request_module \
--with-http_random_index_module \
--with-http_secure_link_module \
--with-http_degradation_module \
--with-http_slice_module \
--with-http_stub_status_module \
--with-stream=dynamic \
--with-stream_ssl_module \
--with-stream_realip_module \
--with-stream_geoip_module=dynamic \
--with-stream_ssl_preread_module \
--with-compat \
--with-pcre-jit \
--prefix=/usr/local/nginx四、编译&安装
make

make install         # 这两行可以分开执行,也可以在同一行执行

make && make install # 同一行执行
五、修改环境变量
将nginx服务加入环境变量
在文件中添加 nginx 的安装路径下的bin 目录
vim /etc/profile

export PATH=$PATH:/usr/local/nginx/sbin

# 使配置文件生效

source /etc/profile
六、启动
# 启动nginx

nginx

# 重启nginx

nginx -s reload

# 停止nginx

nginx -s stop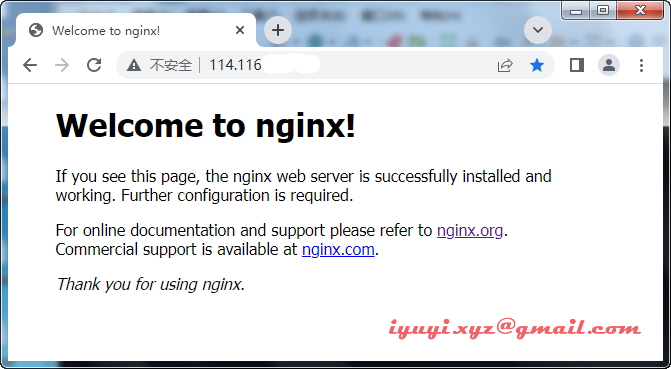
七、自启动
很多时候,我们为了方便管理,在服务器重启后,需要nginx自动启动,那么我们可以添加 nginx 的服务
# 创建 nginx 服务文件

vim /lib/systemd/system/nginx.service
nginx 的服务文件配置可参考如下:
[Unit]

Description=nginx

After=network.target

[Service]

Type=forking

ExecStart=/usr/local/nginx/sbin/nginx

ExecReload=/usr/local/nginx/sbin/nginx -s reload

ExecStop=/usr/local/nginx/sbin/nginx -s stop

PrivateTmp=true

[Install]

WantedBy=multi-user.target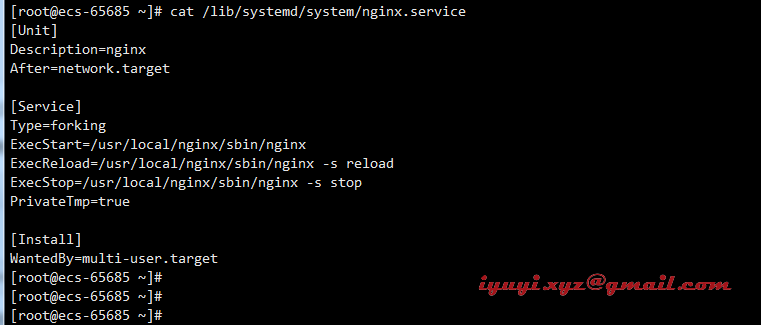
完成后,按ESC键,输入:wq 保存并退出,上面的nginx 相应的目录,需要改为你自己的目录。
服务文件配置好了,接下来要把它添加到服务里面。
systemctl enable nginx.service执行完后,系统会在下方提示:
Created symlink from /etc/systemd/system/multi-user.target.wants/nginx.service to /usr/lib/systemd/system/nginx.service.看到这个,nginx 的服务就已经完成添加,但这个时候,还没有启动的,我们可以通过下面的命令来操作nginx。
# 查看运行状态

systemctl status nginx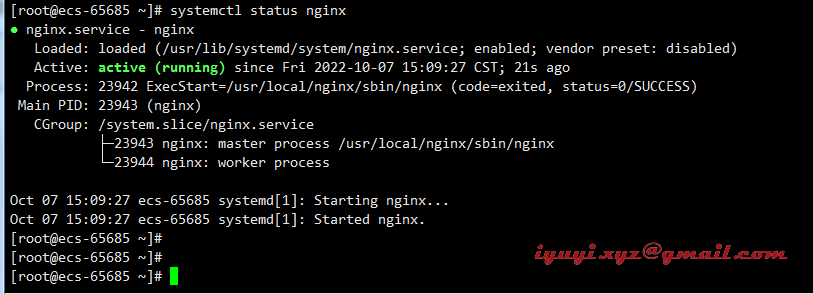
其他命令
# 启动 nginx

systemctl start nginx

# 停止 nginx

systemctl stop nginx

# 重新加载 nginx

systemctl reload nginx
如果重新修改 nginx.service 配置文件后,则需要使用下面的命令来重新加载服务的配置文件。
# 重新加载服务的配置文件

systemctl daemon-reload
八、nginx 配置
使用源码安装方式,nginx的配置文件,通常会在 /usr/local/nginx/conf/nginx.conf 这个位置,可以通过 vi 或 vim 修改。
# 打开配置文件

vim /usr/local/nginx/conf/nginx.conf
九、防火墙
# 关闭防火墙

systemctl stop firewalld

# 开放3306端口命令

firewall-cmd --zone=public --add-port=3306/tcp --permanent

# 配置立即生效

firewall-cmd --reload
云主机需配置安全组(默认已放行,可省略)
在入方向规则,允许80放行

十、问题记录
错误:./configure: error: the HTTP rewrite module requires the PCRE library.
解决:安装pcre-devel:yum -y install pcre-devel
错误:./configure: error: the HTTP cache module requires md5 functions
from OpenSSL library. You can either disable the module by using
–without-http-cache option, or install the OpenSSL library into the system,
or build the OpenSSL library statically from the source with nginx by using
–with-http_ssl_module –with-openssl= options.
解决:yum -y install openssl openssl-devel
错误:./configure: error: the HTTP XSLT module requires the libxml2/libxslt 缺少libxml2
解决:yum -y install libxml2 libxml2-devel && yum -y install libxslt-devel
错误信息:./configure: error: the HTTP image filter module requires the GD library. You can either do not enable the module or install the libraries.
解决方法:http_image_filter_module是nginx提供的集成图片处理模块,需要gd-devel的支持 yum -y install gd-devel
错误信息:./configure: error: perl module ExtUtils::Embed is required 缺少ExtUtils
解决方法:yum -y install perl-devel perl-ExtUtils-Embed
错误信息:./configure: error: the GeoIP module requires the GeoIP library. You can either do not enable the module or install the library. 缺少GeoIP
解决方法:yum -y install GeoIP GeoIP-devel GeoIP-data
错误信息:./configure: error: the Google perftools module requires the Google perftools
library. You can either do not enable the module or install the library.
解决方法:yum -y install gperftools
CentOS 7.9 安装 nginx-1.22.0的更多相关文章
- CentOS 7.4安装Nginx 1.14.0
一.安装所需环境 1.gcc 安装 yum install gcc-c++
- CentOS 6.5安装Erlang/OTP 17.0
CentOS 6.5安装Erlang/OTP 17.0 作者:chszs,转载需注明.博客主页:http://blog.csdn.net/chszs Erlang眼下已经是Fedora和Debian/ ...
- Linux系统运维笔记(四),CentOS 6.4安装Nginx
Linux系统运维笔记(四),CentOS 6.4安装Nginx 1,安装编译工具及库文件 yum -y install make zlib zlib-devel gcc-c++ libtool op ...
- Centos 7下安装nginx,使用yum install nginx,提示没有可用的软件包
Centos 7下安装nginx,使用yum install nginx,提示没有可用的软件包. 18 (flaskApi) [root@67 flaskDemo]# yum -y install n ...
- CentOS 6 中安装Node.js 4.0 版本或以上
如果想在CentOS 6 中安装Node.js >4.0,如果通过以往的方式安装: wget http://nodejs.org/dist/v4.0.0/node-v4.0.0.tar.gz t ...
- 在CentOS 7中安装nginx服务器
简要地介绍一下,如何在CentOS 7中安装nginx服务器 下载对应当前系统版本的nginx包(package) # wget http://nginx.org/packages/centos/ ...
- 如何在 CentOS 7 上安装 Nginx
本文首发:开发指南:如何在 CentOS 7 上安装 Nginx Nginx 读作 engine x, 是一个免费的.开源的.高性能的 HTTP 和反向代理服务,主要负责负载一些访问量比较大的站点. ...
- CentOS 7 源代码安装Nginx
本篇简要介绍CentOS 7 源代码安装Nginx. Preface # yum install epel-release -y # yum group install "Developme ...
- centos 下yum 安装nginx
centos 下yum 安装nginx 1. 直接yum install nginx不行,要先处理下源: rpm -ivh http://nginx.org/packages/centos/6/noa ...
- centos 7 安装 git 2.22.0
1.安装所需软件包 yum install curl-devel expat-devel gettext-devel openssl-devel zlib-devel yum install gcc ...
随机推荐
- BufferedWriter字符缓冲输出流和BufferedReader字符缓冲输入流
package com.yang.Test.BufferedStudy; import java.io.BufferedWriter; import java.io.FileWriter; impor ...
- Spark: Cluster Computing with Working Sets
本文是对spark作者早期论文<Spark: Cluster Computing with Working Sets>做的翻译(谷歌翻译),文章比较理论,阅读起来稍微有些吃力,但读完之后总 ...
- 【深入学习.Net】.泛型集合【体检管理系统】
基于泛型List的体检管理系统(蜗牛爬坡) 第五章[体检管理系统] 一.项目展示图(基于.net core6.0) 二.首先准备两个Model类 HealthCheckItem(项目类):Name(项 ...
- Luogu1527 [国家集训队]矩阵乘法 (整体二分)(Unfinished)
全线RE的代码... 先搁这吧,下次再说.flag //#include <iostream> #include <cstdio> //#include <cstring ...
- Spring源码 11 IOC refresh方法6
参考源 https://www.bilibili.com/video/BV1tR4y1F75R?spm_id_from=333.337.search-card.all.click https://ww ...
- 慢SQL,压垮团队的最后一根稻草!
一.什么是慢 SQL 什么是慢SQL?顾名思义,运行时间较长的 SQL 语句即为慢 SQL! 那问题来了,多久才算慢呢? 这个慢其实是一个相对值,不同的业务场景下,标准要求是不一样的. 我们都知道,我 ...
- 面试突击75:SpringBoot 有几种读取配置文件的方法?
Spring Boot 中读取配置文件有以下 5 种方法: 使用 @Value 读取配置文件. 使用 @ConfigurationProperties 读取配置文件. 使用 Environment 读 ...
- C# 使用SIMD向量类型加速浮点数组求和运算(1):使用Vector4、Vector<T>
作者: 目录 一.缘由 二.使用向量类型 2.1 基本算法 2.2 使用大小固定的向量(如 Vector4) 2.2.1 介绍 2.2.2 用Vector4编写浮点数组求和函数 2.3 使用大小与硬件 ...
- Unity3D学习笔记12——渲染纹理
目录 1. 概述 2. 详论 3. 问题 1. 概述 在文章<Unity3D学习笔记11--后处理>中论述了后处理是帧缓存(Framebuffer)技术实现之一:而另外一个帧缓存技术实现就 ...
- 对DDD使用的一些建议
群里经常看到类似于"看了DDD之后就不会写代码了"的情况,趁最近学车的间隙,写写我的看法. 关于这个事儿,我是觉得:当没有DDD的时候,如果你知道怎么做,那就那么做好了,不要考虑D ...