32. Springboot 系列(八)动态Banner与图片转字符图案的手动实现
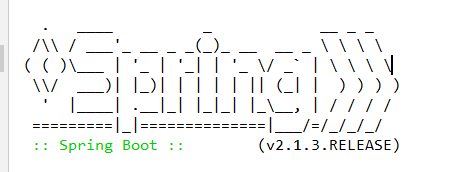
使用过 Springboot 的对上面这个图案肯定不会陌生,Springboot 启动的同时会打印上面的图案,并带有版本号。查看官方文档可以找到关于 banner 的描述
The banner that is printed on start up can be changed by adding a banner.txt file to your classpath or by setting
the spring.banner.location property to the location of such a file. If the file has an encoding other than UTF-8,
you can set spring.banner.charset. In addition to a text file, you can also add a banner.gif, banner.jpg,
or banner.png image file to your classpath or set the spring.banner.image.location property.
Images are converted into an ASCII art representation and printed above any text banner.
就不翻译了,直接有道翻译贴过来看个大概意思。
可以通过向类路径中添加一个banner.txt文件或设置spring.banner来更改在start up上打印的banner。属性指向此类文件的位置。如果文件的编码不是UTF-8,
那么可以设置spring.banner.charset。除了文本文件,还可以添加横幅。将gif、banner.jpg或banner.png图像文件保存到类路径或设置spring.banner.image。位置属性。
图像被转换成ASCII艺术形式,并打印在任何文本横幅上面。
springboot2版本

spring:

  banner:

    image:

      location: classpath:img/cang.jpg
但是效果没出来
1. 自定义 banner
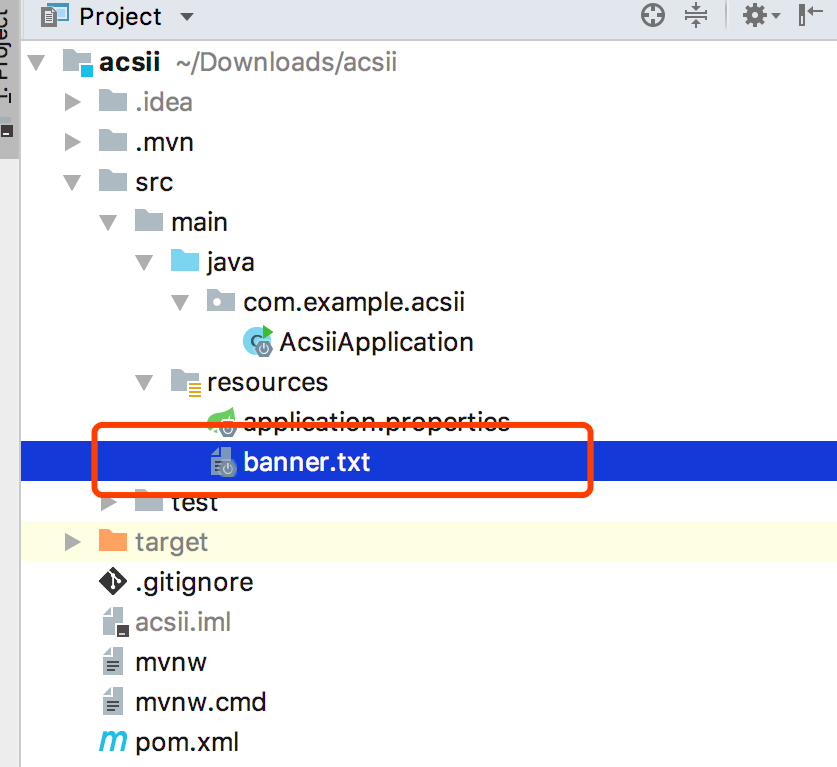
根据官方的描述,可以在类路径中自定义 banner 图案,我们进行尝试在放 resouce 目录下新建文件 banner.txt 并写入内容(在线字符生成)。
   (_)

  _ __  _ _   _ _ __ ___   ___   ___

 | '_ \| | | | | '_ ` _ \ / _ \ / _ \

 | | | | | |_| | | | | | | (_) | (_) |

 |_| |_|_|\__,_|_| |_| |_|\___/ \___/ 版本:${spring-boot.formatted-version}
启动 Springboot 在控制台看到下面的输出。
     (_)

  _ __  _ _   _ _ __ ___   ___   ___

 | '_ \| | | | | '_ ` _ \ / _ \ / _ \

 | | | | | |_| | | | | | | (_) | (_) |

 |_| |_|_|\__,_|_| |_| |_|\___/ \___/ 版本:(v2.1.3.RELEASE)

2019-02-25 14:00:31.289  INFO 12312 --- [           main] net.codingme.banner.BannerApplication    : Starting BannerApplication on LAPTOP-L1S5MKTA with PID 12312 (D:\IdeaProjectMy\springboot-git\springboot-banner\target\classes started by Niu in D:\IdeaProjectMy\springboot-git\springboot-banner)

2019-02-25 14:00:31.291  INFO 12312 --- [           main] net.codingme.banner.BannerApplication    : No active profile set, falling back to default profiles: default

2019-02-25 14:00:32.087  INFO 12312 --- [           main] o.s.b.w.embedded.tomcat.TomcatWebServer  : Tomcat initialized with port(s): 8080 (http)
发现自定义 banner 已经生效了,官方文档的介绍里说还可以放置图片,下面放置图片 banner.jpg 测试。
网上随便找了一个图片。
 再次启动观察输出。
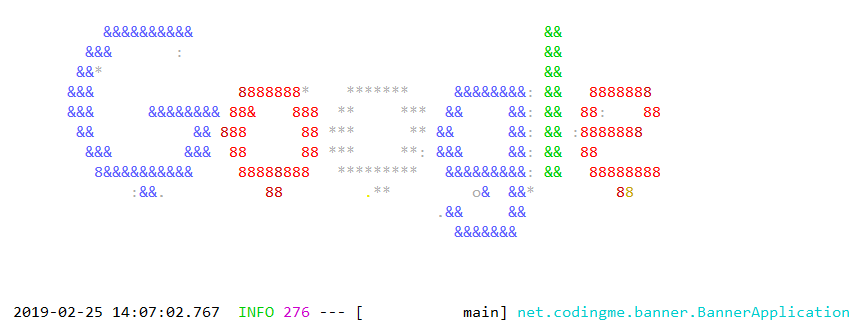
Springboot 把图案转成了 ASCII 图案。
2. ASCII 图案生成原理
看了上面的例子,发现 Springboot 可以把图片转换成 ASCII 图案,那么它是怎么做的呢?我们或许可以想象出一个大概流程。
- 获取图片。
- 遍历图片像素点。
- 分析像素点,每个像素点根据颜色深度得出一个值,根据明暗度匹配不同的字符。
- 输出图案。
Springboot 对图片 banner 的处理到底是不是我们上面想想的那样呢?直接去源码中寻找答案。
/** 位置:org.springframework.boot.SpringApplicationBannerPrinter */

//方法1:

public Banner print(Environment environment, Class<?> sourceClass, Log logger) {

        // 获取 banner  调用方法记为2

        Banner banner = getBanner(environment);

        try {

            logger.info(createStringFromBanner(banner, environment, sourceClass));

        }

        catch (UnsupportedEncodingException ex) {

            logger.warn("Failed to create String for banner", ex);

        }

        // 打印 banner

        return new PrintedBanner(banner, sourceClass);

}

// 方法2

private Banner getBanner(Environment environment) {

        Banners banners = new Banners();

        // 获取图片banner,我们只关注这个,调用方法记为3

        banners.addIfNotNull(getImageBanner(environment));

        banners.addIfNotNull(getTextBanner(environment));

        if (banners.hasAtLeastOneBanner()) {

            return banners;

        }

        if (this.fallbackBanner != null) {

            return this.fallbackBanner;

        }

        return DEFAULT_BANNER;

    }

// 方法3

/** 获取自定义banner文件信息 */

private Banner getImageBanner(Environment environment) {

    // BANNER_IMAGE_LOCATION_PROPERTY = "spring.banner.image.location";

        String location = environment.getProperty(BANNER_IMAGE_LOCATION_PROPERTY);

        if (StringUtils.hasLength(location)) {

            Resource resource = this.resourceLoader.getResource(location);

            return resource.exists() ? new ImageBanner(resource) : null;

        }

        // IMAGE_EXTENSION = { "gif", "jpg", "png" };

        for (String ext : IMAGE_EXTENSION) {

            Resource resource = this.resourceLoader.getResource("banner." + ext);

            if (resource.exists()) {

                return new ImageBanner(resource);

            }

        }

        return null;

}
上面是寻找自定义图片 banner 文件源码,如果把图片转换成 ASCII 图案继续跟进,追踪方法1中的PrintedBanner(banner, sourceClass)方法。最终查找输出图案的主要方法。
// 位置:org.springframework.boot.ImageBanner#printBanner

private void printBanner(BufferedImage image, int margin, boolean invert,

            PrintStream out) {

        AnsiElement background = invert ? AnsiBackground.BLACK : AnsiBackground.DEFAULT;

        out.print(AnsiOutput.encode(AnsiColor.DEFAULT));

        out.print(AnsiOutput.encode(background));

        out.println();

        out.println();

        AnsiColor lastColor = AnsiColor.DEFAULT;

        // 图片高度遍历

        for (int y = 0; y < image.getHeight(); y++) {

            for (int i = 0; i < margin; i++) {

                out.print(" ");

            }

            // 图片宽度遍历

            for (int x = 0; x < image.getWidth(); x++) {

                // 获取每一个像素点

                Color color = new Color(image.getRGB(x, y), false);

                AnsiColor ansiColor = AnsiColors.getClosest(color);

                if (ansiColor != lastColor) {

                    out.print(AnsiOutput.encode(ansiColor));

                    lastColor = ansiColor;

                }

                // 像素点转换成字符输出,调用方法记为2

                out.print(getAsciiPixel(color, invert));

            }

            out.println();

        }

        out.print(AnsiOutput.encode(AnsiColor.DEFAULT));

        out.print(AnsiOutput.encode(AnsiBackground.DEFAULT));

        out.println();

    }

// 方法2,像素点转换成字符

    private char getAsciiPixel(Color color, boolean dark) {

        // 根据 color 算出一个亮度值

        double luminance = getLuminance(color, dark);

        for (int i = 0; i < PIXEL.length; i++) {

            // 寻找亮度值匹配的字符

            if (luminance >= (LUMINANCE_START - (i * LUMINANCE_INCREMENT))) {

                // PIXEL = { ' ', '.', '*', ':', 'o', '&', '8', '#', '@' };

                return PIXEL[i];

            }

        }

        return PIXEL[PIXEL.length - 1];

    }
3.自己实现图片转 ASCII字符
根据上面的分析,总结一下思路,我们也可以手动写一个图片转 ASCII 字符图案。
思路如下:
- 图片大小缩放,调整到合适大小。
- 遍历图片像素。
- 获取图片像素点亮度(RGB颜色通过公式可以得到亮度数值)。
- 匹配字符。
- 输出图案。
上面的5个步骤直接使用 Java 代码就可以完整实现,下面是编写的源码。
import java.awt.*;

import java.awt.image.BufferedImage;

import java.io.File;

import java.io.FileOutputStream;

import java.io.IOException;

import javax.imageio.ImageIO;

/**

 * <p>

 * 根据图片生成字符图案

 * 1.图片大小缩放

 * 2.遍历图片像素点

 * 3.获取图片像素点亮度

 * 4.匹配字符

 * 5.输出图案

 *

 * @author  niujinpeng

 * @website www.codingme.net

 * @date 2019-02-25 23:03:01

 */

public class GeneratorTextImage {

    private static final char[] PIXEL = {'@', '#', '8', '&', 'o', ':', '*', '.', ' '};

    public static void main(String[] args) throws Exception {

        // 图片缩放

        BufferedImage bufferedImage = makeSmallImage("src/main/resources/banner.jpg");

        // 输出

        printImage(bufferedImage);

    }

    public static void printImage(BufferedImage image) throws IOException {

        int width = image.getWidth();

        int height = image.getHeight();

        for (int i = 0; i < height; i++) {

            for (int j = 0; j < width; j++) {

                int rgb = image.getRGB(j, i);

                Color color = new Color(rgb);

                int red = color.getRed();

                int green = color.getGreen();

                int blue = color.getBlue();

                // 一个用于计算RGB像素点亮度的公式

                Double luminace = 0.2126 * red + 0.7152 * green + 0.0722 * blue;

                double index = luminace / (Math.ceil(255 / PIXEL.length) + 0.5);

                System.out.print(PIXEL[(int)(Math.floor(index))]);

            }

            System.out.println();

        }

    }

    public static BufferedImage makeSmallImage(String srcImageName) throws Exception {

        File srcImageFile = new File(srcImageName);

        if (srcImageFile == null) {

            System.out.println("文件不存在");

            return null;

        }

        FileOutputStream fileOutputStream = null;

        BufferedImage tagImage = null;

        Image srcImage = null;

        try {

            srcImage = ImageIO.read(srcImageFile);

            int srcWidth = srcImage.getWidth(null);// 原图片宽度

            int srcHeight = srcImage.getHeight(null);// 原图片高度

            int dstMaxSize = 90;// 目标缩略图的最大宽度/高度,宽度与高度将按比例缩写

            int dstWidth = srcWidth;// 缩略图宽度

            int dstHeight = srcHeight;// 缩略图高度

            float scale = 0;

            // 计算缩略图的宽和高

            if (srcWidth > dstMaxSize) {

                dstWidth = dstMaxSize;

                scale = (float)srcWidth / (float)dstMaxSize;

                dstHeight = Math.round((float)srcHeight / scale);

            }

            srcHeight = dstHeight;

            if (srcHeight > dstMaxSize) {

                dstHeight = dstMaxSize;

                scale = (float)srcHeight / (float)dstMaxSize;

                dstWidth = Math.round((float)dstWidth / scale);

            }

            // 生成缩略图

            tagImage = new BufferedImage(dstWidth, dstHeight, BufferedImage.TYPE_INT_RGB);

            tagImage.getGraphics().drawImage(srcImage, 0, 0, dstWidth, dstHeight, null);

            return tagImage;

        } finally {

            if (fileOutputStream != null) {

                try {

                    fileOutputStream.close();

                } catch (Exception e) {

                }

                fileOutputStream = null;

            }

            tagImage = null;

            srcImage = null;

            System.gc();

        }

    }

}
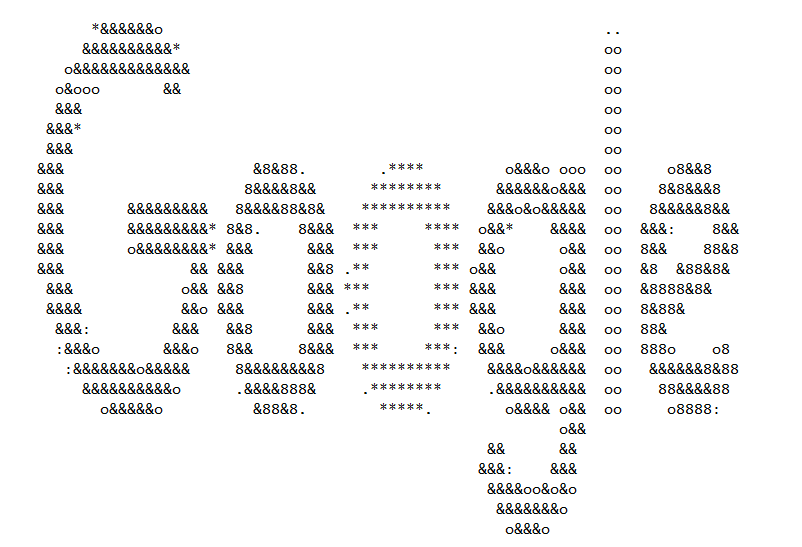
还是拿上面的 Google log 图片作为实验对象,运行得到字符图案输出。
32. Springboot 系列(八)动态Banner与图片转字符图案的手动实现的更多相关文章
- Springboot 系列(八)动态Banner与图片转字符图案的手动实现
使用过 Springboot 的对上面这个图案肯定不会陌生,Springboot 启动的同时会打印上面的图案,并带有版本号.查看官方文档可以找到关于 banner 的描述 The banner tha ...
- [转]SpringBoot系列——花里胡哨的banner.txt
Creating ASCII Text Banners from the Linux Command Line In Ubuntu, Debian, Linux Mint etc. $ sudo ap ...
- SpringBoot系列——花里胡哨的banner.txt
前言 我们注意到springboot项目启动时,控制台会打印自带的banner,然后对于部分IT骚年来说,太单调太普通太一般了:所以,是时候表演真正的技术了 项目结构 我们只需要在springboot ...
- springboot系列八、springboot整合kafka
背景: 当业务在同一时间出现高并发的时候,这个时候我们不想无限的增加服务器,但是又想提高吞吐量.这时可以考虑使用消息异步处理,进行消峰填谷:同时还可以降低耦合度.常见的消息中间件有kafka,rabb ...
- SpringBoot系列八:SpringBoot整合消息服务(SpringBoot 整合 ActiveMQ、SpringBoot 整合 RabbitMQ、SpringBoot 整合 Kafka)
声明:本文来源于MLDN培训视频的课堂笔记,写在这里只是为了方便查阅. 1.概念:SpringBoot 整合消息服务 2.具体内容 对于异步消息组件在实际的应用之中会有两类: · JMS:代表作就是 ...
- katalon系列八:Katalon Studio图片识别
Katalon Studio自带集成了图片识别功能,有2个比较有用的图片识别相关的命令:Wait For Image Present和Click Image.这里重点讲下Click Image命令: ...
- SpringBoot系列(八)分分钟学会Springboot多种解决跨域方式
SpringBoot系列(八) 分分钟学会SpringBoot多种跨域解决方式 往期推荐 SpringBoot系列(一)idea新建Springboot项目 SpringBoot系列(二)入门知识 s ...
- SpringBoot系列——动态定时任务
前言 定时器是我们项目中经常会用到的,SpringBoot使用@Scheduled注解可以快速启用一个简单的定时器(详情请看我们之前的博客<SpringBoot系列--定时器>),然而这种 ...
- C#编译器优化那点事 c# 如果一个对象的值为null,那么它调用扩展方法时为甚么不报错 webAPI 控制器(Controller)太多怎么办? .NET MVC项目设置包含Areas中的页面为默认启动页 (五)Net Core使用静态文件 学习ASP.NET Core Razor 编程系列八——并发处理
C#编译器优化那点事 使用C#编写程序,给最终用户的程序,是需要使用release配置的,而release配置和debug配置,有一个关键区别,就是release的编译器优化默认是启用的.优化代码 ...
随机推荐
- String Reconstruction (并查集)
并查集维护和我这个位置的字母连续的已经被填充的字母能到达的最右边的第一个还没有填充的位置,然后把这个位置填上应该填的东西,然后把这个位置和下一个位置连接起来,如果下一个位置还没有填,我就会把下一个位置 ...
- base64加密图片处理
场景:下载html中内嵌的base64加密图片 举个例子,博客园的插入图片有两种方式,一是引用图片链接,二是直接粘贴2进制图片文件.以第二种方式的图片则是以base64加密的方式内嵌在html页面中. ...
- 20165223 结对编程之四则运算week1-阶段性总结
目录 一.结对对象 二.需求分析 三.设计思路 四.功能截图 五.结对感受 一.结对对象 担任角色 驾驶员(Driver):20165223 蔡霓(是控制键盘输入的人) 领航员(Navigator): ...
- 关于angular1与angular2的应用区别
angular1.0的这些繁杂的api,还有它的执行速度,运行效率,学习曲线,都被人吐槽,最近一直在用ng1,实在很想吐槽. 最近写ng2的项目,写了一些ng2基础的应用(包括angular-cli, ...
- [学习笔记]FWT——快速沃尔什变换
解决涉及子集配凑的卷积问题 一.介绍 1.基本用法 FWT快速沃尔什变换学习笔记 就是解决一类问题: $f[k]=\sum_{i\oplus j=k}a[i]*b[j]$ 基本思想和FFT类似. 首先 ...
- springboot 通过 hibernate 连接sqlserver 空间数据 位置数据
示例代码:https://github.com/bigben0123/spring-boot-spatial-example 1,配置application.properties #sqlserver ...
- JavaScript面向对象--记录防忘记(一)
1.理解对象: 创建自定义对象最简单的方式就是创建一个object实例,再给他添加属性和方法. let person = new Object(); person.name = 'zhangsan'; ...
- C# Winfrom 发送邮件验证码&Timer控件
邮件发送: //定义一个全局的string类型的验证码: string yzm = ""; //定义一个字符串,这里面包含所有需要的验证码的元素: string a = " ...
- 洛谷P3975 弦论
题意:求一个串的字典序第k小的子串/本质不同第k小的子串. 解:一开始我的想法是在后缀树上找,但是不知道后缀树上的边对应的是哪些字符... 然而可以不用fail树转移,用转移边转移即可. 先建一个后缀 ...
- 【CH0103】最短哈密顿路径
题目大意:给定一个 N 个点的无向图,点有点权,求从 0 号点走到 N-1 号点的最短哈密顿路径是多少. 题解:由于哈密顿路径的定义是每个顶点必须经过且仅能经过一次,因此,可用当前是否经过了这些点和当 ...