[React] 05 - Route: connect with ExpressJS
基础:
初步理解:Node.js Express 框架
参见:[Node.js] 08 - Web Server and REST API
进阶:
Ref: 如何系统地学习 Express?【该网页有一些不错的资源】
express是一个基于node的web框架(集成web服务器+mvc),当然其实不用框架,使用node自己弄一个web服务器和mvc框架也不是很麻烦(Node为网络而生,当然强大的不止这点),但是有优秀的express,封装了很多常用功能,推荐用。
express主要依赖connect(基于node的http服务器框架,提供大量的中间件帮助用户构建强大灵活的web server),所以深入connect也是有必要的。
视频课程:Node.js + Express + MongoDB【中文版,有comment】from rails365编程学院
比较实用,简短,也是本篇的学习重点。
Several popular Node.js frameworks are built on Express:
- Feathers: Build prototypes in minutes and production ready real-time apps in days.
- ItemsAPI: Search backend for web and mobile applications built on Express and Elasticsearch.
- KeystoneJS: Website and API Application Framework / CMS with an auto-generated React.js Admin UI.
- Kraken: Secure and scalable layer that extends Express by providing structure and convention.
- LEAN-STACK: The Pure JavaScript Stack.
- LoopBack: Highly-extensible, open-source Node.js framework for quickly creating dynamic end-to-end REST APIs.
- MEAN: Opinionated fullstack JavaScript framework that simplifies and accelerates web application development.
- Sails: MVC framework for Node.js for building practical, production-ready apps.
- Bottr: Framework that simplifies building chatbot applications.
- Hydra-Express: Hydra-Express is a light-weight library which facilitates building Node.js Microservices using ExpressJS.
- Blueprint: Highly-configurable MVC framework for composing production-ready services from reusable components
- Locomotive: Powerful MVC web framework for Node.js from the maker of Passport.js
- graphql-yoga: Fully-featured, yet simple and lightweight GraphQL server
- Express Gateway: Fully-featured and extensible API Gateway using Express as foundation
磨刀不误砍柴工
第二次,则以轻松学 nodejs - 基础篇为底料,结合之前的学习,再屡一下思路:
[Node.js] 01 - How to learn node.js【1】
[Node.js] 02 - Read Eval Print Loop【2-】
* 命令行交互,子命令
* 新建进程 - child_process模块 ----> 详见 [Node.js] 06
* shell模式
[Node.js] 03 - Buffer, Stream and File IO【2-】
* Buffer类操作
* 文件操作 - 异步同步
* 文件流操作
* 管道操作
* os模块
[Node.js] 04 - Event and Callback【2+】
其实就是“监听器”:
* 回调函数,比如:异步读取文件的回调函数
* 观察者监视事件,
* 结合setTimeout构成“延时触发”,还有setInterval。
* 继承 EventEmitter
* Error 事件,遇到异常的时候通常会触发。
[Node.js] 05 - Modules and Function【2+】
* 常用模块
* 自定义模块
* 函数作为参数
* 全局对象:global 的属性,若干常用属性,console 方法。
* 常用工具 - util
[Node.js] 06 - Multi-thread and process module
* (略,另附专题)
[Node.js] 08 - Web Server and REST API
* Node.js RESTful API
* Node.js 路由,功能分离判断url
* GET / POST 请求上传表单
* 服务端如何response html? file? stream?
* Node.js Express 框架有什么不同和优势?这是本篇接下来打算详述的内容。
[Node.js] 09 - Connect with Database
- 其他:NPM, package json and nodemon
npm install express
npm install -g webpack
global:全局性的安装,以后可以直接使用webpack命令。
yarn是另一个较新的包管理器。
安装了什么包?通过package json来记录。
node_modules的内容很大,不是源码的一部分。
npm install // 安装dependencies中的包在node_modules中
npm install --save express
npm install --save-dev gulp
npm run start // 安装好了start中的内容,并修改相应的信息 in package.json.

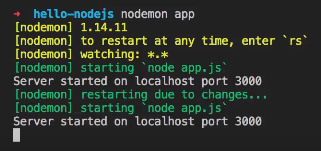
dodemon,修改后自动更新网页,方便开发调试。
npm install -g nodemon,然后执行,开始自动监控所有文件的变化。
Nodejs + Express + MongoDB 基础篇
通过分装,相对于纯nodejs更有效率,表达更加简洁。
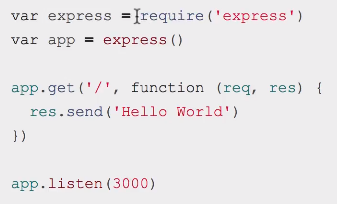
var express = require('express');

var app = express();

app.get('/', function(req, res) {

    res.send("this is the homepage");  // 分装了包的建立,所以便捷性

            // 也可以发送其他类型:json,数组,对象等
});

app.listen(3000);

console.log('listening to port 3000');
Express的路由比较强大!
- 路由支持正则表达式
var express = require('express');

var app     = express();

app.get('/profile/:id/user/:name', function(req, res) {

    console.dir(req.params);

    res.send("You requested to see a profile with the name of " + req.params.name);

});


// 支持正则表达式

app.get('/ab?cd', function(req, res) {

    res.send('/ab?cd');

})

app.listen(3000);

console.log('listening to port 3000');
- 处理url中的参数
var express = require('express');

var app     = express();

app.get('/', function(req, res) {
    /* .dir 显示一个对象所有的属性和方法 */

    console.dir(req.query);

    res.send("home page: " + req.query.find);


});
app.get('/profile/:id/user/:name', function(req, res) {

    console.dir(req.params);

    res.send("You requested to see a profile with the name of " + req.params.name);

});

app.get('/ab?cd', function(req, res) {

    res.send('/ab?cd');

})

app.listen(3000);

console.log('listening to port 3000');
- Post请求 - 表单上传
npm install body-parser --save
结合postman发送伪数据包来进行测试。
var express = require('express');

var bodyParser = require('body-parser')

var app = express();

// create application/json parser

var jsonParser = bodyParser.json()

// create application/x-www-form-urlencoded parser

var urlencodedParser = bodyParser.urlencoded({ extended: false })  //

app.get('/', function(req, res) {

    console.dir(req.query);

    res.send("home page: " + req.query.find);

});

app.post('/', urlencodedParser, function(req, res) {

    console.dir(req.body);

    res.send(req.body.name);

});


------------------------------------------------------------------

app.post('/upload', jsonParser, function(req, res) {

    console.dir(req.body);

    res.send(req.body.name);

});

app.get('/profile/:id/user/:name', function(req, res) {

    console.dir(req.params);

    res.send("You requested to see a profile with the name of " + req.params.name);

});

app.get('/ab?cd', function(req, res) {

    res.send('/ab?cd');

})

app.listen(3000);

console.log('listening to port 3000');
- Post请求 - 文件上传
参见:[Node.js] 08 - Web Server and REST API - Node.js Express 框架
* Switch请求各种资源
* 如果获得的是静态文件
* GET 方法
* POST 方法
* 文件上传
* Cookie 管理
推荐参考:Nodejs进阶:基于express+multer的文件上传
* 环境初始化
* 基础例子:单图上传
* 基础例子:多图上传
* 获取上传的图片的信息
* 自定义文件上传路径、名称
- EJS,一个模板引擎
(1) 原始方法,看上去复杂,因为竟然有两行,而不是一行。

(2) 可以直接使用sendFile。

(3) 继续添加变量。
npm install ejs --save
需要达到的效果:

Ref: 将模板引擎用于 Express【使用了 pug 例子,本篇则使用 EJS】
. / server.js
var express = require('express');
var bodyParser = require('body-parser');
var fs = require('fs');
var app = express();
app.set('view engine', 'ejs');
var multer = require('multer');
var createFolder = function(folder) {
try {
fs.accessSync(folder);
} catch (e) {
fs.mkdirSync(folder);
}
};
var uploadFolder = './upload/';
createFolder(uploadFolder);
var storage = multer.diskStorage({
destination: function(req, file, cb) {
cb(null, uploadFolder);
},
filename: function(req, file, cb) {
cb(null, file.originalname);
}
});
var upload = multer({ storage: storage });
// create application/json parser
var jsonParser = bodyParser.json()
// create application/x-www-form-urlencoded parser
var urlencodedParser = bodyParser.urlencoded({ extended: false })
app.get('/', function(req, res) {
console.dir(req.query);
res.send("home page: " + req.query.find);
});
-----------------------------------------------------------------------------------
模板引擎,在HTML中动态的嵌入变量
-----------------------------------------------------------------------------------
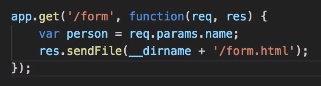
app.get('/form/:name', function(req, res) {
var person = req.params.name;
res.render('form', { person: person }); // ---->
});
可见,不用再写.html了,成了动态变量。
 -----------------------------------------------------------------------------------
app.post('/', urlencodedParser, function(req, res) {

    console.dir(req.body);

    res.send(req.body.name);

});

app.post('/upload', upload.single('logo'), function(req, res) {

    console.dir(req.file);

    res.send({ 'ret_code': 0 });

});

app.get('/profile/:id/user/:name', function(req, res) {

    console.dir(req.params);

    res.send("You requested to see a profile with the name of " + req.params.name);

});

app.get('/ab?cd', function(req, res) {

    res.send('/ab?cd');

})

app.listen(3000);

console.log('listening to port 3000');
. / views / form.ejs
<!DOCTYPE html>

<html lang="en">

<head>

    <meta charset="UTF-8">

    <meta name="viewport" content="width=device-width, initial-scale=1.0">

    <meta http-equiv="X-UA-Compatible" content="ie=edge">

    <title>Document</title>

</head>

<body>

    <h1>

        <%= person %>

    </h1>

    <form action="/upload" method="post" enctype="multipart/form-data">

        <h2>单图上传</h2>

        <input type="file" name="logo">

        <input type="submit" value="提交">

    </form>

</body>

</html>
Ref: Node.js + Express + MongoDB 基础篇 #8 使用模板引擎
server.js
var express = require('express');

var bodyParser = require('body-parser');

var fs = require('fs');

var app = express();

app.set('view engine', 'ejs');

var multer = require('multer');

var createFolder = function(folder) {

    try {

        fs.accessSync(folder);

    } catch (e) {

        fs.mkdirSync(folder);

    }

};

var uploadFolder = './upload/';

createFolder(uploadFolder);

var storage = multer.diskStorage({

    destination: function(req, file, cb) {

        cb(null, uploadFolder);

    },

    filename: function(req, file, cb) {

        cb(null, file.originalname);

    }

});

var upload = multer({ storage: storage });

// create application/json parser

var jsonParser = bodyParser.json()

// create application/x-www-form-urlencoded parser

var urlencodedParser = bodyParser.urlencoded({ extended: false })

app.get('/', function(req, res) {

    console.dir(req.query);

    res.send("home page: " + req.query.find);

});

app.get('/form/:name', function(req, res) {

    var data = { age: 29, job: "programmer", hobbie: ['eating', 'fighting', 'fishing'] };

    res.render('form', { data: data });

});

app.get('/about', function(req, res) {

    res.render('about');

});

app.post('/', urlencodedParser, function(req, res) {

    console.dir(req.body);

    res.send(req.body.name);

});

app.post('/upload', upload.single('logo'), function(req, res) {

    console.dir(req.file);

    res.send({ 'ret_code': 0 });

});

app.get('/profile/:id/user/:name', function(req, res) {

    console.dir(req.params);

    res.send("You requested to see a profile with the name of " + req.params.name);

});

app.get('/ab?cd', function(req, res) {

    res.send('/ab?cd');

})

app.listen(3000);

console.log('listening to port 3000');
form.ejs
<!DOCTYPE html>

<html lang="en">

<head>

    <meta charset="UTF-8">

    <meta name="viewport" content="width=device-width, initial-scale=1.0">

    <meta http-equiv="X-UA-Compatible" content="ie=edge">

    <title>Document</title>

</head>

<body>

    <%- include('partials/header.ejs') -%>

        <h1>

            <%= data.age %>

                <h2>hobbie</h2>

                <ul>

                    <% data.hobbie.forEach(function(item) { %>

                        <li>

                            <%= item %>

                        </li>

                        <% }) %>

                </ul>

        </h1>

        <form action="/upload" method="post" enctype="multipart/form-data">

            <h2>单图上传</h2>

            <input type="file" name="logo">

            <input type="submit" value="提交">

        </form>

</body>

</html>
about.ejs
<!DOCTYPE html>

<html lang="en">

<head>

    <meta charset="UTF-8">

    <meta name="viewport" content="width=device-width, initial-scale=1.0">

    <meta http-equiv="X-UA-Compatible" content="ie=edge">

    <title>Document</title>

</head>

<body>

    <%- include('partials/header.ejs') -%>

        <p>about page</p>

</body>

</html>
header.ejs
<nav>

    <ul>

        <li><a href="">home</a></li>

        <li><a href="">about</a></li>

    </ul>

</nav>
Unfinished...
[React] 05 - Route: connect with ExpressJS的更多相关文章
- [React] React Router: Route Parameters
A router library is no good if we have to hardcode every single route in our application. In this le ...
- [React] 06 - Route: koa makes your life easier
听说koa比express更傻瓜化,真的? Koa 框架教程 本身代码只有1000多行,所有功能都通过插件实现,很符合 Unix 哲学. 搭建简单服务器 Koa, 架设一个简单的服务器 // demo ...
- react dva 的 connect 与 @connect
https://dvajs.com/guide/introduce-class.html#connect-方法 connect的作用是将组件和models结合在一起.将models中的state绑定到 ...
- [Full-stack] 快速上手开发 - React
故事背景 [1] 博客笔记结合<React快速上手开发>再次系统地.全面地走一遍. [2] React JS Tutorials:包含了JS --> React --> Red ...
- [React] 08 - Tutorial: evolution of code-behind
有了七篇基础学习,了解相关的知识体系,之后便是系统地再来一次. [React] 01 - Intro: javaScript library for building user interfaces ...
- [React] 10 - Tutorial: router
Ref: REACT JS TUTORIAL #6 - React Router & Intro to Single Page Apps with React JS Ref: REACT JS ...
- [Code::Blocks] Install wxWidgets & openCV
The open source, cross platform, free C++ IDE. Code::Blocks is a free C++ IDE built to meet the most ...
- 本人SW知识体系导航 - Programming menu
将感悟心得记于此,重启程序员模式. js, py, c++, java, php 融汇之全栈系列 [Full-stack] 快速上手开发 - React [Full-stack] 状态管理技巧 - R ...
- React Route
有幸你能看来我的这篇文章,这篇文章是继React后面写的Reactroute,所以你需要看看我前面整理的React笔记再来看Reactroute可能更容易 All the work we've don ...
随机推荐
- 如何实现跨域获取iframe子页面动态的url
有的时候iframe的子页面会动态的切换页面,我们在父页面通过iframe1.contentWindow.window.location只能获取同源的子页面的信息.获取跨域的子页面信息会报错. 这时可 ...
- float类型数保留一位小数
float类型数保留一位小数 float a = 2.5f; float b = 1.2f; System.out.println(a/b); System.out.println((float)(M ...
- getOutputStream() has already been called for this response解释以及解决方法
异常:getOutputStream() has already been called for this response 的解决方法 今天在第一次接触使用“验证码”功能时,在执行时出现了异常信息: ...
- Javascript:自己写模板引擎
背景 因为JS没有提供“字符串插入”和“多行字符串”特性,传统的拼凑字符串容易出错.性能不高和不容易理解代码,为了应对这些问题,很多个人和团队开发了模板引擎,现在主流的JS框架几乎都提供此类功能了. ...
- linux 监控工具netdata
1. 背景 工作的关系,需要使用netdata将服务器信息实时.动态展示. 调研了netdata工具,记录一下,方便后续使用. 2. netdata介绍 2.1 netdata 能做什么? 可以参考: ...
- 基于php5.5使用PHPMailer-5.2发送邮件
PHPMailer - A full-featured email creation and transfer class for PHP. 在PHP环境中可以使用PHPMailer来创建和发送邮件. ...
- Dictionary简洁
mydic_ShuiFei = new Dictionary<string, string>() { {"00000336","南京市 ...
- C++ 中的位操作
定义二进制变量: 一般是以八进制或者十六进制来定义,八进制数以0开头,十六进制数以0x开头 例如int a = 0x80, 这里的80只能表示8个二进制位,它表示的是int的低8位,前面的24个二进 ...
- oracle访问不同用户的表不添加用户名前缀
问题的出现,是技术的不断推进.为了更好地实现价值的提升! 01.用视图 create view tab1 select * from B.tab1; //在A用户下执行 02.同义词 gr ...
- LightCapture for Mac(流程化截图工具)破解版安装
1.软件简介 LightCapture 是 macOS 系统上的截图软件.LightCapture Mac 版号称是用最简洁的方式来截图,其的界面也确实非常简单整洁,不过功能同样出色,一键截屏. ...