Mybatis-Plus03 代码自动生成器
先看完Mybatis-Plus01和Mybatis-Plus02再看Mybatis-Plus03
AutoGenerator 是 MyBatis-Plus 的代码生成器,通过 AutoGenerator 可以快速生成 dao、pojo、service、controller 等各个模块的代码,极大的提升了开发效率。
注意
MyBatis-Plus 从 3.0.3 之后移除了代码生成器与模板引擎的默认依赖,需要手动添加相关依赖:
- 添加 代码生成器 依赖(与mybatis-plus 版本相同),如果没有添加你会发现没有
AutoGenerator这个类
<dependency>

    <groupId>com.baomidou</groupId>

    <artifactId>mybatis-plus-generator</artifactId>

    <version>3.4.0</version>

</dependency>
- 添加 模板引擎 依赖,MyBatis-Plus 支持 Velocity(默认)、Freemarker、Beetl,用户可以选择自己熟悉的模板引擎,如果都不满足您的要求,可以采用自定义模板引擎。
如果模板引擎不添加依赖会出错如下报错
Caused by: java.lang.ClassNotFoundException: org.apache.velocity.context.Context
Velocity(默认):
<dependency>

    <groupId>org.apache.velocity</groupId>

    <artifactId>velocity-engine-core</artifactId>

    <version>2.2</version>

</dependency>
编码
package com.jmu;

import com.baomidou.mybatisplus.annotation.FieldFill;

import com.baomidou.mybatisplus.annotation.IdType;

import com.baomidou.mybatisplus.annotation.TableField;

import com.baomidou.mybatisplus.generator.AutoGenerator;

import com.baomidou.mybatisplus.generator.config.DataSourceConfig;

import com.baomidou.mybatisplus.generator.config.GlobalConfig;

import com.baomidou.mybatisplus.generator.config.PackageConfig;

import com.baomidou.mybatisplus.generator.config.StrategyConfig;

import com.baomidou.mybatisplus.generator.config.po.TableFill;

import com.baomidou.mybatisplus.generator.config.rules.DateType;

import com.baomidou.mybatisplus.generator.config.rules.NamingStrategy;

import java.util.ArrayList;

public class AutoCode {

    public static void main(String[] args) {

        //需要构建一个代码自动生成器的对象

        AutoGenerator autoGenerator = new AutoGenerator();

        //配置策略

        //1.全局配置

        //注意不要导错包

        GlobalConfig gc = new GlobalConfig();

        String projectPath = System.getProperty("user.dir");

        gc.setOutputDir(projectPath+"/src/main/java");

        gc.setAuthor("DJ同学");

        gc.setOpen(false);//生成完文件,是否打开资源管理器

        gc.setFileOverride(true);//是否覆盖原来生成的文件

        gc.setServiceName("%sService");

        gc.setIdType(IdType.ASSIGN_ID);

        gc.setDateType(DateType.ONLY_DATE);

        autoGenerator.setGlobalConfig(gc);

        //2.设置数据源

        DataSourceConfig dsc = new DataSourceConfig();

        dsc.setUrl("jdbc:mysql://localhost:3306/mybatis_plus?useUnicode=true&useSSL=false&characterEncoding=utf8");

        dsc.setDriverName("com.mysql.jdbc.Driver");

        dsc.setUsername("root");

        dsc.setPassword("123456");

        autoGenerator.setDataSource(dsc);

        //3.包的配置

        PackageConfig pc = new PackageConfig();

        pc.setModuleName("demo");

        pc.setParent("com.jmu");

        pc.setEntity("pojo");

        pc.setMapper("mapper");

        pc.setService("service");

        pc.setController("controller");

        autoGenerator.setPackageInfo(pc);

        //4.策略

        // 策略配置

        StrategyConfig strategy = new StrategyConfig();

        strategy.setInclude("user");//设置要映射的表

        strategy.setNaming(NamingStrategy.underline_to_camel);//包命名 驼峰命名

        strategy.setColumnNaming(NamingStrategy.underline_to_camel);//

        strategy.setEntityLombokModel(true);

        strategy.setLogicDeleteFieldName("deleted");//逻辑删除

        //自动填充

        TableFill createTime = new TableFill("create_time", FieldFill.INSERT_UPDATE);

        TableFill updateTime = new TableFill("update_time", FieldFill.UPDATE);

        ArrayList<TableFill> tableFills = new ArrayList<>();

        tableFills.add(createTime);

        tableFills.add(updateTime);

        strategy.setTableFillList(tableFills);

        //乐观锁

        strategy.setVersionFieldName("version");

        autoGenerator.setStrategy(strategy);

        autoGenerator.execute();//执行

    }

}
下面这个比较全,但是这个基于的版本是mybatis-plus3.0.5,****表示需要修改的地方
import com.baomidou.mybatisplus.annotation.DbType;

import com.baomidou.mybatisplus.annotation.IdType;

import com.baomidou.mybatisplus.generator.AutoGenerator;

import com.baomidou.mybatisplus.generator.config.DataSourceConfig;

import com.baomidou.mybatisplus.generator.config.GlobalConfig;

import com.baomidou.mybatisplus.generator.config.PackageConfig;

import com.baomidou.mybatisplus.generator.config.StrategyConfig;

import com.baomidou.mybatisplus.generator.config.rules.DateType;

import com.baomidou.mybatisplus.generator.config.rules.NamingStrategy;

import org.junit.Test;

public class CodeGenerator {

    @Test

    public void run() {

        // 1、创建代码生成器

        AutoGenerator mpg = new AutoGenerator();

        // 2、全局配置

        GlobalConfig gc = new GlobalConfig();

        String projectPath = System.getProperty("user.dir");

        //建议直接换成绝对路径  不然有时候会出错

        //****

        gc.setOutputDir("D:\\Project\\new\\guli_parent\\service\\service-edu" + "/src/main/java");

        //****

        gc.setAuthor("DJ同学");

        gc.setOpen(false); //生成后是否打开资源管理器

        gc.setFileOverride(false); //重新生成时文件是否覆盖

        gc.setServiceName("%sService");	//去掉Service接口的首字母I

        //如果数据库中的主键是str ID_WORKER_STR int ID_WORKER

        //****

        gc.setIdType(IdType.ID_WORKER_STR); //主键策略

        gc.setDateType(DateType.ONLY_DATE);//定义生成的实体类中日期类型

        gc.setSwagger2(true);//开启Swagger2模式

        mpg.setGlobalConfig(gc);

        // 3、数据源配置

        //****

        DataSourceConfig dsc = new DataSourceConfig();

        dsc.setUrl("jdbc:mysql://localhost:3306/guli?serverTimezone=GMT%2B8");

        dsc.setDriverName("com.mysql.cj.jdbc.Driver");

        dsc.setUsername("root");

        dsc.setPassword("123456");

        dsc.setDbType(DbType.MYSQL);

        mpg.setDataSource(dsc);

        // 4、包配置

        PackageConfig pc = new PackageConfig();

        //com.edu.eduservice

        //****

        pc.setParent("com.edu");

        //****

        pc.setModuleName("eduservice"); //模块名

        //com.edu.eduservice.controller

        pc.setController("controller");

        pc.setEntity("entity");

        pc.setService("service");

        pc.setMapper("mapper");

        mpg.setPackageInfo(pc);

        // 5、策略配置

        StrategyConfig strategy = new StrategyConfig();

        //**** 表名

        strategy.setInclude("edu_teacher");

        strategy.setNaming(NamingStrategy.underline_to_camel);//数据库表映射到实体的命名策略

        strategy.setTablePrefix(pc.getModuleName() + "_"); //生成实体时去掉表前缀

        strategy.setColumnNaming(NamingStrategy.underline_to_camel);//数据库表字段映射到实体的命名策略

        strategy.setEntityLombokModel(true); // lombok 模型 @Accessors(chain = true) setter链式操作

        strategy.setRestControllerStyle(true); //restful api风格控制器

        strategy.setControllerMappingHyphenStyle(true); //url中驼峰转连字符

        mpg.setStrategy(strategy);

        // 6、执行

        mpg.execute();

    }

}
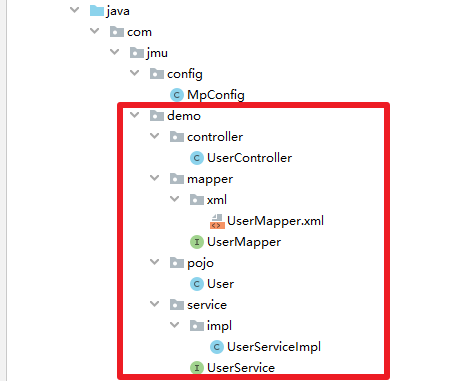
执行结果
Mybatis-Plus03 代码自动生成器的更多相关文章
- MyBatis-plus 代码自动生成器
MyBatis-plus 代码自动生成器 1.添加pom文件依赖 <!-- Mybatis-Plus 自动生成实体类--> <dependency> <groupId& ...
- MyBatisPlus性能分析插件,条件构造器,代码自动生成器详解
性能分析插件 我们在平时的开发中,会遇到一些慢sql,测试,druid MP(MyBatisPlus)也提供性能分析插件,如果超过这个时间就停止 不过官方在3.2版本的时候取消了,原因如下 条件构造器 ...
- Mybatis-plus<一> Springboot框架使用MybatisPlus代码自动生成器
Mybatis-plus<一> Springboot框架使用MybatisPlus代码自动生成器 Mybatis-plus官网: https://mp.baomidou.com/ Demo ...
- 专门为小白准备的入门级mybatis-plus-generator代码自动生成器,提高开发效率。值得收藏
引入依赖 <dependency> <groupId>com.baomidou</groupId> <artifactId>mybatis-plus-g ...
- 基于eclipse的mybatis映射代码自动生成的插件
基于eclipse的mybatis映射代码自动生成的插件 分类: JAVA 数据库 工具相关2012-04-29 00:15 2157人阅读 评论(9) 收藏 举报 eclipsegeneratori ...
- 基于eclipse的mybatis映射代码自动生成的插件http://blog.csdn.net/fu9958/article/details/7521681
基于eclipse的mybatis映射代码自动生成的插件 分类: JAVA 数据库 工具相关2012-04-29 00:15 2157人阅读 评论(9) 收藏 举报 eclipsegeneratori ...
- Mybatis Generator代码自动生成(实体类、dao层、映射文件)
写了一段时间增删改查有点厌烦,自己找了下网上的例子鼓捣了下自动生成. 首先得有一个配置文件: generatorConfig.xml <?xml version="1.0" ...
- MyBatis Generator代码自动生成工具的使用
MyBatis Generator MyBatis Generator有三种使用方式,分别是maven插件形式.命令行形式以及eclipse插件形式.我在这里使用的是命令行的形式(主要是命令行形式比较 ...
- 用mybatis的代码自动生成工具,炒鸡好用,推荐一下别人的操作
http://www.cnblogs.com/smileberry/p/4145872.html
随机推荐
- [WC2014]时空穿梭
这才叫莫比乌斯反演题. 一.题目 点此看题 二.解法 也没有什么好的思路,我们不妨把暴力柿子写出来,我们想枚举直线,但是这道题不能枚举直线的斜率,所以就要用整数来表示直线,我们不妨枚举出发点和终止点的 ...
- 记一次jstack命令定位问题
今天天气不错,但是赶上恶意加班心情就不爽,怀着不爽的心情干活,总能创造出更多的问题,这不,今天就自己挖了一个坑,自己跳进去了,好在上来了 经过是这样的,开始调试canal采集binlog时,由于添加了 ...
- NET 5.0 Swagger API 自动生成MarkDown文档
目录 1.SwaggerDoc引用 主要接口 接口实现 2.Startup配置 注册SwaggerDoc服务 注册Swagger服务 引用Swagger中间件 3.生成MarkDown 4.生成示例 ...
- 归一化(Normalization)和标准化(Standardization)
归一化和标准化是机器学习和深度学习中经常使用两种feature scaling的方式,这里主要讲述以下这两种feature scaling的方式如何计算,以及一般在什么情况下使用. 归一化的计算方式: ...
- 基于sinc的音频重采样(一):原理
我在前面的文章<音频开源代码中重采样算法的评估与选择>中说过sinc方法是较好的音频重采样方法,缺点是运算量大.https://ccrma.stanford.edu/~jos/resamp ...
- 在swoole中制作一款仿制laravel的框架
首先需要确定一下思路:我希望基于swoole的扩展开发的代码在run起来的时候,在接收到ws或是tcp等消息时,自动路由到某个类上,同时类可以实现加载类的依赖注入功能.目前市面上占据主流的一款框架La ...
- certutil绕过
一般进内网过后我都会使用certutil下载文件,但在最近打一台内网机子的时候出现了certutil拒绝访问的情况,在本地搭建了一个环境尝试绕过certutil下载文件. 安装杀软更新到最新版本,开启 ...
- Android学习之Layoutinflater的用法
•她的第一次 话说,那是一个风雪交加的夜晚,看着她独自一个人走在漆黑的小道上,我抓紧跟了过去: 那晚,我们...... 记得第一次接触这个 Layoutinflater 应该是在学习 ListView ...
- Python基础之:Python中的类
目录 简介 作用域和命名空间 class 类对象 类的实例 实例对象的属性 方法对象 类变量和实例变量 继承 私有变量 迭代器 生成器 简介 class是面向对象编程的一个非常重要的概念,python ...
- 单链表c语言实现的形式
包括初始化,创建,查询,长度,删除,清空,销毁等操作 代码如下: #include<stdio.h> #include<stdlib.h> //定义单链表的数据类型 typed ...