吴裕雄 python 神经网络——TensorFlow实现AlexNet模型处理手写数字识别MNIST数据集
import tensorflow as tf # 输入数据
from tensorflow.examples.tutorials.mnist import input_data mnist = input_data.read_data_sets("E:\\MNIST_data", one_hot=True) # 定义网络的超参数
learning_rate = 0.001
training_iters = 200000
batch_size = 128
display_step = 5 # 定义网络的参数
# 输入的维度 (img shape: 28*28)
n_input = 784
# 标记的维度 (0-9 digits)
n_classes = 10
# Dropout的概率,输出的可能性
dropout = 0.75 # 输入占位符
x = tf.placeholder(tf.float32, [None, n_input])
y = tf.placeholder(tf.float32, [None, n_classes])
#dropout (keep probability)
keep_prob = tf.placeholder(tf.float32) # 定义卷积操作
def conv2d(name,x, W, b, strides=1):
# Conv2D wrapper, with bias and relu activation
x = tf.nn.conv2d(x, W, strides=[1, strides, strides, 1], padding='SAME')
x = tf.nn.bias_add(x, b)
# 使用relu激活函数
return tf.nn.relu(x,name=name) # 定义池化层操作
def maxpool2d(name,x, k=2):
# MaxPool2D wrapper
return tf.nn.max_pool(x, ksize=[1, k, k, 1], strides=[1, k, k, 1],padding='SAME',name=name) # 规范化操作
def norm(name, l_input, lsize=4):
return tf.nn.lrn(l_input, lsize, bias=1.0, alpha=0.001 / 9.0,beta=0.75, name=name) # 定义所有的网络参数
weights = {
'wc1': tf.Variable(tf.random_normal([11, 11, 1, 96])),
'wc2': tf.Variable(tf.random_normal([5, 5, 96, 256])),
'wc3': tf.Variable(tf.random_normal([3, 3, 256, 384])),
'wc4': tf.Variable(tf.random_normal([3, 3, 384, 384])),
'wc5': tf.Variable(tf.random_normal([3, 3, 384, 256])),
'wd1': tf.Variable(tf.random_normal([4*4*256, 4096])),
'wd2': tf.Variable(tf.random_normal([4096, 1024])),
'out': tf.Variable(tf.random_normal([1024, n_classes]))
}
biases = {
'bc1': tf.Variable(tf.random_normal([96])),
'bc2': tf.Variable(tf.random_normal([256])),
'bc3': tf.Variable(tf.random_normal([384])),
'bc4': tf.Variable(tf.random_normal([384])),
'bc5': tf.Variable(tf.random_normal([256])),
'bd1': tf.Variable(tf.random_normal([4096])),
'bd2': tf.Variable(tf.random_normal([1024])),
'out': tf.Variable(tf.random_normal([n_classes]))
} # 定义整个网络
def alex_net(x, weights, biases, dropout):
# 向量转为矩阵 Reshape input picture
x = tf.reshape(x, shape=[-1, 28, 28, 1]) # 第一层卷积
# 卷积
conv1 = conv2d('conv1', x, weights['wc1'], biases['bc1'])
# 下采样
pool1 = maxpool2d('pool1', conv1, k=2)
# 规范化
norm1 = norm('norm1', pool1, lsize=4) # 第二层卷积
# 卷积
conv2 = conv2d('conv2', norm1, weights['wc2'], biases['bc2'])
# 最大池化(向下采样)
pool2 = maxpool2d('pool2', conv2, k=2)
# 规范化
norm2 = norm('norm2', pool2, lsize=4) # 第三层卷积
# 卷积
conv3 = conv2d('conv3', norm2, weights['wc3'], biases['bc3'])
# 规范化
norm3 = norm('norm3', conv3, lsize=4) # 第四层卷积
conv4 = conv2d('conv4', norm3, weights['wc4'], biases['bc4']) # 第五层卷积
conv5 = conv2d('conv5', conv4, weights['wc5'], biases['bc5'])
# 最大池化(向下采样)
pool5 = maxpool2d('pool5', conv5, k=2)
# 规范化
norm5 = norm('norm5', pool5, lsize=4) # 全连接层1
fc1 = tf.reshape(norm5, [-1, weights['wd1'].get_shape().as_list()[0]])
fc1 =tf.add(tf.matmul(fc1, weights['wd1']),biases['bd1'])
fc1 = tf.nn.relu(fc1)
# dropout
fc1=tf.nn.dropout(fc1,dropout) # 全连接层2
fc2 = tf.reshape(fc1, [-1, weights['wd2'].get_shape().as_list()[0]])
fc2 =tf.add(tf.matmul(fc2, weights['wd2']),biases['bd2'])
fc2 = tf.nn.relu(fc2)
# dropout
fc2=tf.nn.dropout(fc2,dropout) # 输出层
out = tf.add(tf.matmul(fc2, weights['out']) ,biases['out'])
return out # 构建模型
pred = alex_net(x, weights, biases, keep_prob) # 定义损失函数和优化器
cost = tf.reduce_mean(tf.nn.softmax_cross_entropy_with_logits(logits=pred, labels=y)) optimizer = tf.train.AdamOptimizer(learning_rate=learning_rate).minimize(cost) # 评估函数
correct_pred = tf.equal(tf.argmax(pred,1), tf.argmax(y,1))
accuracy = tf.reduce_mean(tf.cast(correct_pred, tf.float32)) # 初始化变量
init = tf.global_variables_initializer() # 开启一个训练
with tf.Session() as sess:
sess.run(init)
step = 1
# 开始训练,直到达到training_iters,即200000
while step * batch_size < training_iters:
#获取批量数据
batch_x, batch_y = mnist.train.next_batch(batch_size)
sess.run(optimizer, feed_dict={x: batch_x, y: batch_y, keep_prob: dropout})
if step % display_step == 0:
# 计算损失值和准确度,输出
loss,acc = sess.run([cost,accuracy], feed_dict={x: batch_x, y: batch_y, keep_prob: 1.})
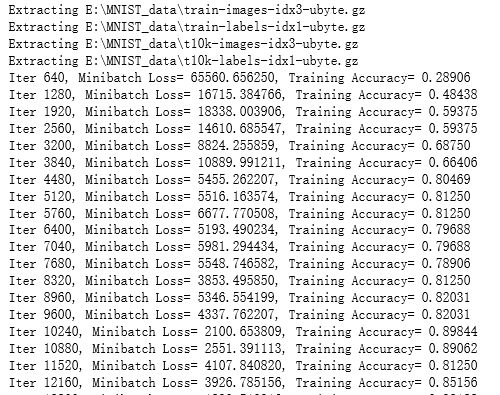
print ("Iter " + str(step*batch_size) + ", Minibatch Loss= " + "{:.6f}".format(loss) + ", Training Accuracy= " + "{:.5f}".format(acc))
step += 1
print ("Optimization Finished!")
# 计算测试集的精确度
print ("Testing Accuracy:",sess.run(accuracy, feed_dict={x: mnist.test.images[:256],y: mnist.test.labels[:256],keep_prob: 1.}))
吴裕雄 python 神经网络——TensorFlow实现AlexNet模型处理手写数字识别MNIST数据集的更多相关文章
- 吴裕雄 python 神经网络TensorFlow实现LeNet模型处理手写数字识别MNIST数据集
import tensorflow as tf tf.reset_default_graph() # 配置神经网络的参数 INPUT_NODE = 784 OUTPUT_NODE = 10 IMAGE ...
- 吴裕雄 python 神经网络——TensorFlow实现回归模型训练预测MNIST手写数据集
import tensorflow as tf from tensorflow.examples.tutorials.mnist import input_data mnist = input_dat ...
- 吴裕雄 PYTHON 神经网络——TENSORFLOW 滑动平均模型
import tensorflow as tf v1 = tf.Variable(0, dtype=tf.float32) step = tf.Variable(0, trainable=False) ...
- 吴裕雄 python 神经网络——TensorFlow 实现LeNet-5模型处理MNIST手写数据集
import os import numpy as np import tensorflow as tf from tensorflow.examples.tutorials.mnist import ...
- TensorFlow 之 手写数字识别MNIST
官方文档: MNIST For ML Beginners - https://www.tensorflow.org/get_started/mnist/beginners Deep MNIST for ...
- 吴裕雄 python 神经网络——TensorFlow训练神经网络:全模型
import tensorflow as tf from tensorflow.examples.tutorials.mnist import input_data INPUT_NODE = 784 ...
- 吴裕雄 python 神经网络——TensorFlow 循环神经网络处理MNIST手写数字数据集
#加载TF并导入数据集 import tensorflow as tf from tensorflow.contrib import rnn from tensorflow.examples.tuto ...
- 吴裕雄 python 神经网络——TensorFlow 使用卷积神经网络训练和预测MNIST手写数据集
import tensorflow as tf import numpy as np from tensorflow.examples.tutorials.mnist import input_dat ...
- 吴裕雄 python 神经网络——TensorFlow 训练过程的可视化 TensorBoard的应用
#训练过程的可视化 ,TensorBoard的应用 #导入模块并下载数据集 import tensorflow as tf from tensorflow.examples.tutorials.mni ...
随机推荐
- 汉语诗词 LaTeX 排版样式
清世何须忧庙廊——汉语诗词 LaTeX 排版样式 作者想一些中国古典诗歌,发现大多数早期的例子都是为了英文诗而创作的环境. 下面是作者给出唐诗选集的布局实例. 它不是一般解决方案,而只是一个特定的例子 ...
- g++运行c++程序提示main()找不到
/usr/lib/gcc/x86_64-linux-gnu/5/../../../x86_64-linux-gnu/crt1.o: In function `_start': (.text+0x20) ...
- oneshot和周期性shot
计数器的使用,oneshot:时刻. 有误差,日.每一些间隔可以产生周期性shot(多个持续性时刻)
- (转)数据索引BTree
.B-tree 转自:http://blog.csdn.net/hbhhww/article/details/8206846 B-tree又叫平衡多路查找树.一棵m阶的B-tree (m叉树)的特性如 ...
- python3 yield实现假的多并发
import time def fun1(): while True: print("fun1") time.sleep(0.1) yield def fun2(): while ...
- python3练习100题——010
第10天了,今天的题目跟009类似,都比较水,有时间的话再做一道- 链接:http://www.runoob.com/python/python-exercise-example10.html 题目: ...
- C#画图超出屏幕的部分无法显示的解决方法
C#画图超出屏幕的部分无法显示,通过AutoScrollMinSize属性及相关方法解决问题. 可以实现 到 的转变. 代码如下: using System.Drawing; using System ...
- kali2018.4 下载地址
https://www.linuxidc.com/Linux/2018-10/155088.htm
- 在 JavaScript 中为什么 typeof null 的结果是 object?
java 中的 null:既是对象,又不是对象,史称「薛定谔的对象」. typeof null==='object'; ..//true null instanceof Object //fals ...
- 转载:HRTF virtaul surround
https://blog.csdn.net/Filwl_/article/details/50503558 https://blog.csdn.net/lwsas1/article/details/5 ...