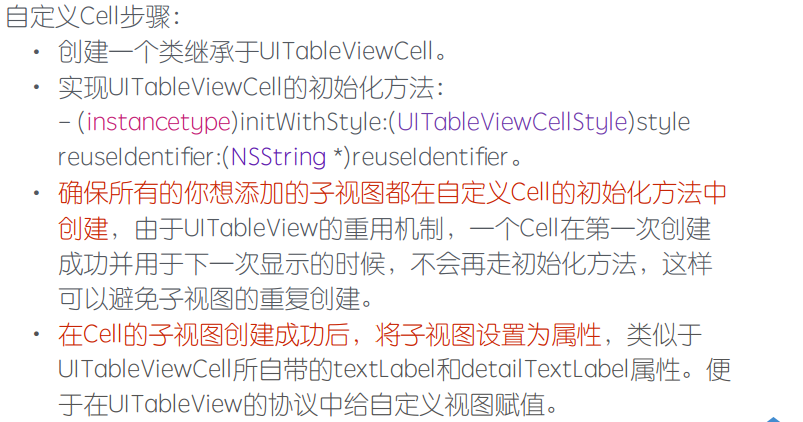
UITableViewCell自定义


.png)
.png)
UITableViewCellStyleDefault
UITableViewCellStyleValue1
UITableViewCellStyleValue2
objectAtIndex:indexPath.row];
//根据model属性划分
if (model.type == 0) {
FirstTableViewCell *cell = [tableView dequeueReusableCellWithIdentifier:firstIdentify];
return cell;
}
if (model.type == 1) {
SecondTableViewCell *cell = [tableView dequeueReusableCellWithIdentifier:secondIdentify];
return cell;
if (indexPath.row == 0) {
FirstTableViewCell *cell = [tableView dequeueReusableCellWithIdentifier:firstIdentify];
return cell;
}
// 第⼆⾏显⽰第⼆种Cell
if (indexPath.row == 1) {
SecondTableViewCell *cell = [tableView dequeueReusableCellWithIdentifier:secondIdentify];
return cell;
- 文本自适应高度 根据⽂本内容设定Label⾼度
// 获得字体样式属性
NSDictionary *att = @{NSFontAttributeName:[UIFont systemFontOfSize:17.0]};
// 根据字体样式属性获得⾼度
CGRect rect = [str boundingRectWithSize:CGSizeMake(200, 10000) options:NSStringDrawingUsesLineFragmentOrigin attributes:att context:nil];
- 图片自适应高度 根据图⽚宽度进⾏等⽐例缩放
// 获得图⽚真实⾼度和宽度
CGFloat height = aImage.size.height;
CGFloat width = aImage.size.width;
// 缩放后宽度固定为200
CGFloat scale = width / 200;
@property (nonatomic, retain) UILabel *nameLabel;//姓名
@property (nonatomic, retain) UILabel *genderLabel;//性别
self = [super initWithStyle:style reuseIdentifier:reuseIdentifier];
if (self) {
_headerImageView = [[UIImageView alloc] initWithFrame:CGRectZero];
_headerImageView.backgroundColor = [UIColor orangeColor];
_nameLabel = [[UILabel alloc] initWithFrame:CGRectZero];
_nameLabel.backgroundColor = [UIColor yellowColor];
_genderLabel = [[UILabel alloc] initWithFrame:CGRectZero];
_genderLabel.backgroundColor = [UIColor cyanColor];
_ageLabel = [[UILabel alloc] initWithFrame:CGRectZero];
_ageLabel.backgroundColor = [UIColor purpleColor];
//自定义cell内部添加子视图, 不能使用self,应该是使用sele.contentView
[self.contentView addSubview:_nameLabel];
[self.contentView addSubview:_genderLabel];
[self.contentView addSubview:_ageLabel];
[self.contentView addSubview:_headerImageView];
}
return self;
[super layoutSubviews];
_headerImageView.frame = CGRectMake(5, 5, 50, 80);
_nameLabel.frame = CGRectMake(65, 5, 100, 20);
_genderLabel.frame = CGRectMake(65, 35, 100, 20);
_ageLabel.frame = CGRectMake(65, 65, 100, 20);
if (_modelStu != modelStu) {
[_modelStu release];
_modelStu = [modelStu retain];
_genderLabel.text = _modelStu.gender;
_ageLabel.text = _modelStu.age;
}
+ (CGFloat)heightForString:(NSString *)string {
NSDictionary *dic = [NSDictionary dictionaryWithObjectsAndKeys:[UIFont systemFontOfSize:17], NSFontAttributeName, nil];
CGRect rect = [string boundingRectWithSize:CGSizeMake(3 *kImageWidth, 1000) options:NSStringDrawingUsesLineFragmentOrigin attributes:dic context:nil];
return rect.size.height;
}
//返回cell的高度
+ (CGFloat)cellHeightForStudent:(Student *)student {
CGFloat totalHeight = 65 + [BoyTableViewCell heightForString:student.introduce];
return totalHeight > 120 ? totalHeight : 120;
[_nameLabel release];
[_genderLabel release];
[_ageLabel release];
[_headerImageView release];
[_modelStu release];
[super dealloc];
//先获取模型
Student *student = _dataArray[indexPath.row];
if ([student.sex isEqualToString:@"男"]) {
return [BoyTableViewCell cellHeightForStudent:student];
} else if ([student.sex isEqualToString:@"女"]) {
return [GirlTableViewCell cellHeightForStudent:student];
}
return 0;
}
UITableViewCell自定义的更多相关文章
- ##DAY12 UITableViewCell自定义
##DAY12 UITableViewCell自定义 #pragma mark -------自定义视图步骤--------- 自定义视图步骤: 1)在自定义cell类中,将所有cell要显示的子视图 ...
- iOS学习31之UITableVIewCell自定义
1. 自定义Cell 1> 为什么要自定义Cell UITableView 中系统的Cell共提供了四种默认样式, 分别是: UITableViewCellStyleDefault UITab ...
- iOS:UITableViewCell自定义单元格
UITableViewCell:自定义的单元格,可以在xib中创建单元格,也可以在storyBorad中创建单元格.有四种创建方式 <1>在storyBorad中创建的单元格,它是静态的单 ...
- UITableViewCell 自定义绘制 性能高
// // FoodListTableViewCellB.m // BabyFood // // Created by zhuang chaoxiao on 16/3/7. // Copyri ...
- 纯代码自定义不等高cell
数据模型.plist解析这里就不过多赘述. 错误思路之一: 通过在heightForRowAtIndexPath:方法中调用cellForRowAtIndexPath:拿到cell,再拿到cell的子 ...
- UITableViewCell Property “icon” cannot be found in forward class object “DJWeiBo”
UITableViewCell 自定义表格 实体属性不显示错误 Property “icon” cannot be found in forward class object “DJWeiBo”引入实 ...
- UITabelViewCell自定义(zhuan)
很多时候,我们需要自定义UITableView来满足我们的特殊要求.这时候,关于UITableView和cell的自定义和技巧太多了,就需要不断的总结和归纳. 1.添加自定义的Cell. 这个 ...
- IOS之UI -- UITableView -- 2 -- 等高的Cell
内容大纲: 1.纯代码 添加子控件 2.Autolayout纯代码 -- Masonry框架的使用 3.自定义等高的cell -- storyboard的使用(更加简单) 4.静态cell 等高的Ce ...
- 关于直接创建视图UITableViewController显示(初学)
今天渣渣想直接创建一个UITableView视图作为根视图来用结果发现有警告,才明白TableView和view是不能直接作为根视图的,需要放在ViewController上.做个笔记详细了解下. 参 ...
随机推荐
- Sie sind das Essen und wir sind die Jaeger!
WCF http://www.cnblogs.com/iamlilinfeng/archive/2012/09/25/2700049.html HTTP 数据库分库分表 读写分离 负载均衡 wind ...
- java mybatis 中sql 模糊查询
示例: like concat('%',#{groupName},'%') //-------------- <select id="findList" resultType ...
- [ThinkPHP]打开页面追踪调试
页面追踪调试 要打开它,需要: 1.在配置文件中,加入配置项 'SHOW_PAGE_TRACE'=>true, 2.控制器中需要 class IndexController ex ...
- 【笔记】after,before,insertAfter,insertBefore的作用
这几个方法的作用是插入外部节点,所谓外部插入节点就是我们平常在网页编程中手动添加代码到某一句语句的前面或后面,如图: 红色框的P是在蓝色框span的前面插入的外部节点,反过来说蓝色框的span是在红色 ...
- Monkey之环境搭建完全版
图文版将在后期补充. 如果想要搭建好Monkey的测试环境,首先几个必要的步骤和环境不能少,分别是java相关环境.Android SDK环境,启动android虚拟机或连接真机.执行monkey测试 ...
- Android APK反编译easy 详解
在学习Android开发的过程你,你往往会去借鉴别人的应用是怎么开发的,那些漂亮的动画和精致的布局可能会让你爱不释手,作为一个开发者,你可能会很想知道这些效果界面是怎么去实现的,这时,你便可以对改应用 ...
- WPF:设置弹出子菜单的是否可用状态及效果
需求: 设置弹出子菜单(二级)项仅首项可用,其他项均不可用:不可用是呈灰色效果. 注: 菜单项都是依据层级数据模板.具体格式如下: StackBlock{TextBlock{Image}.TextBl ...
- java 将list 按长度分割
public static <T> List<List<T>> splitList(List<T> list, int pageSize) { ...
- App.xaml.cs
using System.Windows; namespace HelloWorld { /// <summary> /// Interaction logic for App.xaml ...
- 指定页面配置https(apache/tomcat)
apache/tomcat服务器下配置https apache下配置https: 首先在网站根目录下,找到.htaccess文件(如果没有则新建),apache ...
