Qml 实现仿前端的 Notification (悬浮出现页面上的通知消息)
【写在前面】
经常接触前端的朋友应该经常见到下面的控件:
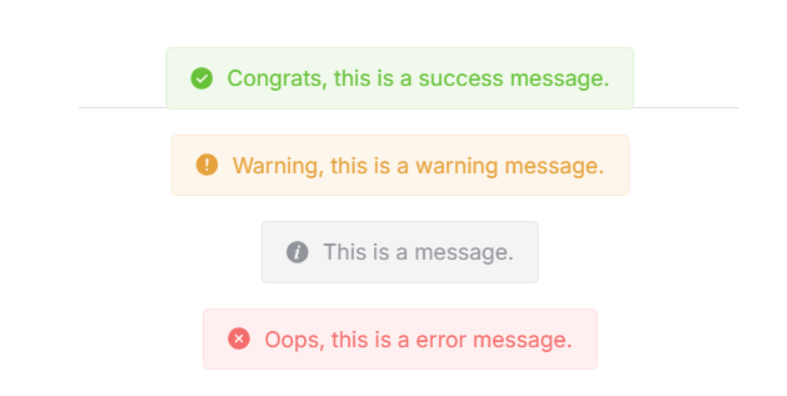
在前端中一般称它为 Notification 或 Message,但本质是一种东西,即:悬浮弹出式的消息提醒框。
这种组件一般具有以下特点:
1、全局/局部显示:它不依赖于具体的页面元素,可以在整个页面的任意位置显示。
2、自动消失:默认情况下,消息会在一定时间后自动消失,也可以设置为不自动消失。
3、多种类型:支持多种类型的消息,如成功(Success)、警告(Warning)、错误(Error)和 消息(Message)等。
4、可配置:可以自定义消息的显示位置、持续时间、内容等。
然鹅 Qml 中并未提供类似的组件,因此我便仿照前端实现了出来,并且更加简单易用。
【正文开始】
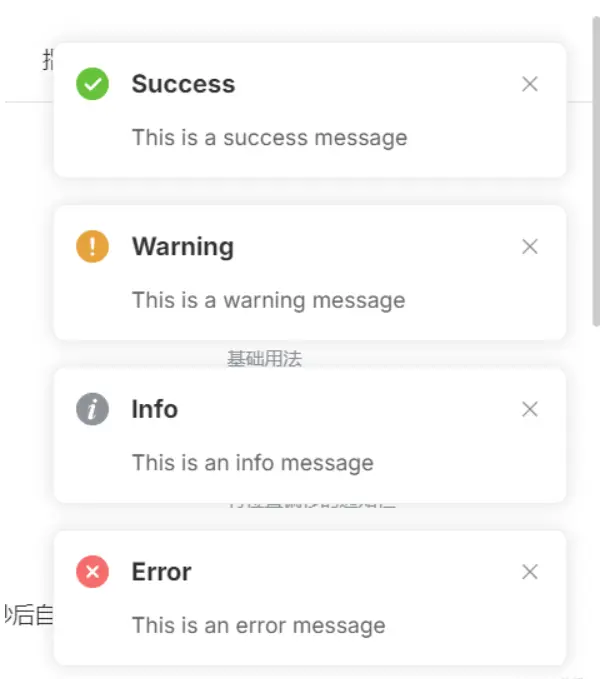
先来看看 Qml Notification 效果图:
实现起来相当简单,只需要 Column + Repeater 即可:
    Column {

        anchors.top: parent.top

        anchors.topMargin: 10

        anchors.horizontalCenter: parent.horizontalCenter

        spacing: 10

        Repeater {

            id: repeater

            model: ListModel {

                id: listModel

            }

            delegate: Rectangle {

                width: root.backgroundWidth

                height: __column.height + root.topMargin + root.bottomMargin

                radius: root.backgroundRadius

                color: root.backgroundColor

                clip: true

                Component.onCompleted: {

                    __timer.interval = timeout;

                    __timer.start();

                }

                NumberAnimation on height {

                    id: __removeAniamtion

                    to: 0

                    running: false

                    duration: 500

                    alwaysRunToEnd: true

                    onFinished: {

                        listModel.remove(index);

                    }

                }

                Timer {

                    id: __timer

                    onTriggered: {

                        __removeAniamtion.start();

                    }

                }

                Column {

                    id: __column

                    width: parent.width

                    anchors.centerIn: parent

                    spacing: root.titleSpacing

                    Row {

                        anchors.horizontalCenter: parent.horizontalCenter

                        spacing: 5

                        Text {

                            id: __icon

                            font.family: fontAwesome.name

                            font.pointSize: root.titleFont.pointSize

                            color: {

                                switch (type) {

                                case Notification.Success: return "green";

                                case Notification.Warning: return "orange";

                                case Notification.Message: return "gray";

                                case Notification.Error: return "red";

                                default: return "";

                                }

                            }

                            text: {

                                switch (type) {

                                case Notification.Success: return "\uf058";

                                case Notification.Warning: return "\uf071";

                                case Notification.Message: return "\uf05a";

                                case Notification.Error: return "\uf057";

                                default: return "";

                                }

                            }

                        }

                        Text {

                            id: __title

                            font: root.titleFont

                            color: root.titleColor

                            text: title

                            wrapMode: Text.WrapAnywhere

                        }

                    }

                    Text {

                        id: __message

                        width: parent.width - 16

                        anchors.horizontalCenter: parent.horizontalCenter

                        font: root.messageFont

                        color: root.messageColor

                        text: message

                        horizontalAlignment: Text.AlignHCenter

                        wrapMode: Text.WrapAnywhere

                    }

                }

                Text {

                    anchors.right: parent.right

                    anchors.top: parent.top

                    anchors.margins: 6

                    text: "×"

                    font.bold: true

                    MouseArea {

                        anchors.fill: parent

                        onClicked: {

                            __timer.stop();

                            __removeAniamtion.restart();

                        }

                    }

                }

            }

        }

    }
然后使用 notify() 来添加通知消息:
    function notify(title, message, type = Notification.None, timeout = 3000) {

        listModel.append({

                             title: title,

                             message: message,

                             type: type,

                             timeout: timeout

                         });

    }
其中参数说明:
title:标题,即通知顶端的标题。message:消息,即通知中间的内容。type:类型,即该通知的类型。timeout:超时,即该通知显示的时长,-1 则是无限。
【如何使用】
import QtQuick 2.15

import QtQuick.Controls 2.15

import QtQuick.Window 2.15

Window {

    width: 800

    height: 600

    visible: true

    title: qsTr("Notification Test")

    Notification {

        id: topNotification

        z: 100

        backgroundWidth: 240

        anchors.top: parent.top

        anchors.horizontalCenter: parent.horizontalCenter

        titleFont.pointSize: 11

        messageFont.pointSize: 11

    }

    Column {

        anchors.centerIn: parent

        spacing: 10

        Row {

            spacing: 10

            Button {

                text: qsTr("成功")

                onClicked: {

                    topNotification.notify(qsTr("成功"), qsTr("这是一条成功的提示消息"), Notification.Success);

                }

            }

            Button {

                text: qsTr("警告")

                onClicked: {

                    topNotification.notify(qsTr("警告"), qsTr("这是一条警告的提示消息"), Notification.Warning);

                }

            }

            Button {

                text: qsTr("消息")

                onClicked: {

                    topNotification.notify(qsTr("消息"), qsTr("这是一条消息的提示消息"), Notification.Message);

                }

            }

            Button {

                text: qsTr("错误")

                onClicked: {

                    topNotification.notify(qsTr("错误"), qsTr("这是一条错误的提示消息"), Notification.Error);

                }

            }

        }

    }

}
Notification 可放置在任意位置,然后设置字体背景等等即可。
当然,这种方式是悬浮在当前页面的,如果想要悬浮在全局页面,则必须将其置于主窗口的顶部,具体方法如下:
import QtQuick 2.15

import QtQuick.Controls 2.15

import QtQuick.Window 2.15

Window {

    width: 800

    height: 600

    visible: true

    title: qsTr("Notification Test")

    Page { z: 1 }

    Page { z: 1 }

    Notification {

        id: topNotification

        z: 100

        backgroundWidth: 240

        anchors.top: parent.top

        anchors.horizontalCenter: parent.horizontalCenter

        titleFont.pointSize: 11

        messageFont.pointSize: 11

    }

}
需要保证其他页面 z-order 小于 Notification 组件。
【结语】
最后:项目链接(多多star呀.._):
Github 地址:https://github.com/mengps/QmlControls/tree/master/Notification
Qml 实现仿前端的 Notification (悬浮出现页面上的通知消息)的更多相关文章
- Android桌面悬浮窗效果实现,仿360手机卫士悬浮窗效果
大家好,今天给大家带来一个仿360手机卫士悬浮窗效果的教程,在开始之前请允许我说几句不相干的废话. 不知不觉我发现自己接触Android已有近三个年头了,期间各种的成长少不了各位高手的帮助,总是有很多 ...
- (转)在SAE使用Apple Push Notification Service服务开发iOS应用, 实现消息推送
在SAE使用Apple Push Notification Service服务开发iOS应用, 实现消息推送 From: http://saeapns.sinaapp.com/doc.html 1,在 ...
- 使用Ajax+jQuery来实现前端收到的数据在console上显示+简单的主页设计与bootstrap插件实现图片轮播
1.实现前端输入的数据在console上显示 上一篇是解决了在前端的输入信息在cygwin上显示,这次要给前台们能看见的数据,因为数据库里插入的数据少,所以写的语句翻来覆去就那几个词,emmm···当 ...
- Notification的功能和用法 加薪通知
实现通知栏消息的生成和消除 MainActivity.java public class MainActivity extends Activity { static f ...
- 用nginx的反向代理机制解决前端跨域问题在nginx上部署web静态页面
用nginx的反向代理机制解决前端跨域问题在nginx上部署web静态页面 1.什么是跨域以及产生原因 跨域是指a页面想获取b页面资源,如果a.b页面的协议.域名.端口.子域名不同,或是a页面为ip地 ...
- Angular14 利用Angular2实现文件上传的前端、利用springBoot实现文件上传的后台、跨域问题
一.angular2实现文件上传前端 Angular2使用ng2-file-upload上传文件,Angular2中有两个比较好用的上传文件的第三方库,一个是ng2-file-upload,一个是ng ...
- Vue2.0仿饿了么webapp单页面应用
Vue2.0仿饿了么webapp单页面应用 声明: 代码源于 黄轶老师在慕课网上的教学视频,我自己用vue2.0重写了该项目,喜欢的同学可以去支持老师的课程:http://coding.imooc.c ...
- Android中使用Notification在状态栏上显示通知
场景 状态栏上显示通知效果 注: 博客: https://blog.csdn.net/badao_liumang_qizhi关注公众号 霸道的程序猿 获取编程相关电子书.教程推送与免费下载. 实现 新 ...
- cursor CSS属性定义鼠标指针悬浮在元素上时的外观。
1 1 cursor CSS属性定义鼠标指针悬浮在元素上时的外观. https://developer.mozilla.org/zh-CN/docs/Web/CSS/cursor 概述 cursor ...
- Android仿360手机卫士悬浮窗效果
请看下图: 首先是一个小的悬浮窗显示的是当前使用了百分之多少的内存,点击一下小悬浮窗,就会弹出一个大的悬浮窗,可以一键加速.好,我们现在就来模拟实现一下 ...
随机推荐
- SQL注入漏洞攻击
l-> 对于用户登录的实现,提供SQL语句 •-> select * from 表名 where uid=- and pwd=- •-> 使用字符串拼接 l-> 提供密码为:' ...
- springboot项目分层
springboot项目分层 一般的项目模块中都有DAO.Entity.Service.Controller层. Entity层:实体层 数据库在项目中的类 Entity层是实体层,也就是所谓的mod ...
- RS232转PN协议网关模块连接PLC和霍尼韦尔条码扫描器通信
为了更快地输入信息,许多设备都配备了条码扫描器,但条码扫描器不能直接与CPU通信.最直接和方便的方法是加RS232转PN协议网关模块(BT-PNR20).本文将深入研究如何利用巴图自动化的RS232转 ...
- [oeasy]python0072_修改字体前景颜色_foreground_color_font
修改颜色 回忆上次内容 m 可以改变字体样式 0-9 之间设置的都是字体效果 0 重置为默认 1 变亮 2 变暗 3 斜体 4 下划线 5 慢闪 6 快闪 7 前景背景互换 8 隐藏 9 中划线 叠加 ...
- ABC341
E link 这个题目中所说的好的其实就是像\(010101\)这样一个\(0\),一个\(1\)的字符串. 那么不好的就是两个\(0\)或两个\(1\)在一起,所以判断一个区间好不好只需要判断一个区 ...
- 解锁Nginx日志的宝藏:GoAccess——你的实时、交互式Web日志分析神器!
在当今数字化的时代,网站的流量和用户行为数据就像是一座蕴藏着无尽秘密的宝藏.而如何有效地挖掘和分析这些数据,成为了许多网站管理者和开发者头疼的问题.GoAccess,一款开源的实时Web日志分析工具, ...
- 青少年CTF擂台挑战赛 2024 #Round 1
青少年CTF擂台挑战赛 2024 #Round 1 crypto 1.解个方程 题目: 欢迎来到青少年CTF,领取你的题目,进行解答吧!这是一道数学题!! p = 474356125652182661 ...
- Docker镜像构建:技术深度解析与实践指南
本文深入分析了Docker镜像构建的技术细节,从基础概念到高级技术,涵盖了多阶段构建.安全性优化.性能提升及实战案例.旨在为专业人士提供全面的技术洞察和实用指导,以提升Docker镜像构建的效率和安全 ...
- 测试工程师-年终总结PPT
2022年年终总结-xxx 一.首页 2022年年终总结暨2023年工作计划 汇报人:测试组-xxx 日期: 2023.1.13 二.目录 1.年度工作概述 2.工作亮点展示 3.持续精进点 4.明年 ...
- Python中FastAPI项目使用 Annotated的参数设计
在FastAPI中,你可以使用PEP 593中的Annotated类型来添加元数据到类型提示中.这个功能非常有用,因为它允许你在类型提示中添加更多的上下文信息,例如描述.默认值或其他自定义元数据. F ...