pytest-xdist分布式执行测试用例
前言
平常我们手工测试用例非常多时,比如有1千条用例,假设每个用例执行需要1分钟。如果一个测试人员执行需要1000分钟才能执行完,当项目非常紧急的时候,
我们会用测试人力成本换取时间成本,这个时候多找个小伙伴把任务分成2部分,于是时间缩减一半。如果是十个人一起执行,1000个用例理论上只需100分钟就能完成,时间缩短到了1/10。大大节省的测试时间,为项目节省了时间成本。
同样道理,当我们测试用例非常多的时候,一条条执行,很显然会比较慢,那么如何让测试用例并行执行呢,这就是我们接下来要讲的pytest分布式执行插件pytest-xdist
pytest-xdist
cmd里面使用pip安装,目前版本号Version: 1.23.2
pip install pytest-xdist
>pip show pytest-xdist

Name: pytest-xdist

Version: 1.23.2

Summary: pytest xdist plugin for distributed testing and loop-on-failing modes

Home-page: https://github.com/pytest-dev/pytest-xdist

Author: holger krekel and contributors

Author-email: pytest-dev@python.org,holger@merlinux.eu

License: MIT

Location: e:\python36\lib\site-packages

Requires: execnet, pytest-forked, six, pytestpytest-xdist官网地址:【Home-page: https://github.com/pytest-dev/pytest-xdist】
该pytest-xdist插件扩展了一些独特的测试执行模式pytest:
测试运行并行化:如果有多个CPU或主机,则可以将它们用于组合测试运行。会加快运行速度
- --looponfail:在子进程中重复运行测试。每次运行之后,pytest会等待,直到项目中的文件发生更改,然后重新运行以前失败的测试。
重复此过程直到所有测试通过,之后再次执行完整运行。 多平台覆盖:您可以指定不同的Python解释器或不同的平台,并在所有平台上并行运行测试。
在远程运行测试之前,pytest有效地将您的程序源代码“rsyncs”到远程位置。报告所有测试结果并显示给您的本地终端。您可以指定不同的Python版本和解释器。
如果您想知道pytest-xdist如何在幕后工作,可以看这里【OVERVIEW】
并行测试
多cpu并行执行用例,直接加个-n参数即可,后面num参数就是并行数量,比如num设置为3
pytest -n 3
运行以下代码,项目结构如下
web_conf_py是项目工程名称

│  conftest.py

│  __init__.py

│

├─baidu

│  │  conftest.py

│  │  test_1_baidu.py

│  │  test_2.py

│  │  __init__.py

│

├─blog

│  │  conftest.py

│  │  test_2_blog.py

│  │  __init__.py
代码参考:
# web_conf_py/conftest.py

import pytest

@pytest.fixture(scope="session")

def start():

    print("\n打开首页")

    return "yoyo"

# web_conf_py/baidu/conftest.py

import pytest

@pytest.fixture(scope="session")

def open_baidu():

    print("打开百度页面_session")

# web_conf_py/baidu/test_1_baidu.py

import pytest

import time

def test_01(start, open_baidu):

    print("测试用例test_01")

    time.sleep(1)

    assert start == "yoyo"

def test_02(start, open_baidu):

    print("测试用例test_02")

    time.sleep(1)

    assert start == "yoyo"

if __name__ == "__main__":

    pytest.main(["-s", "test_1_baidu.py"])

# web_conf_py/baidu/test_2.py

import pytest

import time

def test_06(start, open_baidu):

    print("测试用例test_01")

    time.sleep(1)

    assert start == "yoyo"

def test_07(start, open_baidu):

    print("测试用例test_02")

    time.sleep(1)

    assert start == "yoyo"

if __name__ == "__main__":

    pytest.main(["-s", "test_2.py"])

# web_conf_py/blog/conftest.py

import pytest

@pytest.fixture(scope="function")

def open_blog():

    print("打开blog页面_function")

# web_conf_py/blog/test_2_blog.py

import pytest

import time

def test_03(start, open_blog):

    print("测试用例test_03")

    time.sleep(1)

    assert start == "yoyo"

def test_04(start, open_blog):

    print("测试用例test_04")

    time.sleep(1)

    assert start == "yoyo"

def test_05(start, open_blog):

    '''跨模块调用baidu模块下的conftest'''

    print("测试用例test_05,跨模块调用baidu")

    time.sleep(1)

    assert start == "yoyo"

if __name__ == "__main__":

    pytest.main(["-s", "test_2_blog.py"])
正常运行需要消耗时间:7.12 seconds
E:\YOYO\web_conf_py>pytest

============================= test session starts =============================

platform win32 -- Python 3.6.0, pytest-3.6.3, py-1.5.4, pluggy-0.6.0

rootdir: E:\YOYO\web_conf_py, inifile:

plugins: xdist-1.23.2, metadata-1.7.0, html-1.19.0, forked-0.2

collected 7 items

baidu\test_1_baidu.py ..                                                 [ 28%]

baidu\test_2.py ..                                                       [ 57%]

blog\test_2_blog.py ...                                                  [100%]

========================== 7 passed in 7.12 seconds ===========================
设置并行运行数量为3,消耗时间:3.64 seconds,大大的缩短了用例时间
E:\YOYO\web_conf_py>pytest -n 3

============================= test session starts =============================

platform win32 -- Python 3.6.0, pytest-3.6.3, py-1.5.4, pluggy-0.6.0

rootdir: E:\YOYO\web_conf_py, inifile:

plugins: xdist-1.23.2, metadata-1.7.0, html-1.19.0, forked-0.2

gw0 [7] / gw1 [7] / gw2 [7]

scheduling tests via LoadScheduling

.......                                                                  [100%]

========================== 7 passed in 3.64 seconds ===========================
测试报告
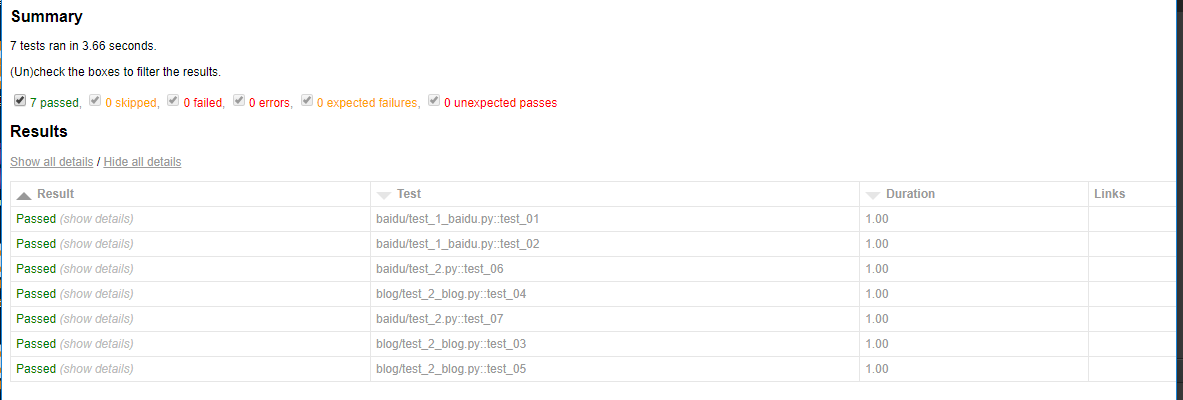
使用pytest-xdist插件也能生成html报告,完美支持pytest-html插件
pytest -n 3 --html=report.html --self-contained-html
转载自:https://www.cnblogs.com/yoyoketang/p/9775646.html
pytest-xdist分布式执行测试用例的更多相关文章
- pytest多进程/多线程执行测试用例
前言: 实际项目中的用例数量会非常多,几百上千:如果采用单进程串行执行的话会非常耗费时间.假设每条用例耗时2s,1000条就需要2000s $\approx$ 33min:还要加上用例加载.测试前/后 ...
- Python单元测试框架之pytest 1 ---如何执行测试用例
From: https://www.cnblogs.com/fnng/p/4765112.html 介绍 pytest是一个成熟的全功能的Python测试工具,可以帮助你写出更好的程序. 适合从简 ...
- Selenium_多线程执行测试用例
多线程执行测试用例 这里以百度搜索为例,通过不同的浏览器来启动不同的线程. #!/usr/bin/env python # _*_ coding:utf-8 _*_ __author__ = 'Yin ...
- pytest文档27-pytest分布式执行(pytest-xdist)
前言 平常我们手工测试用例非常多时,比如有1千条用例,假设每个用例执行需要1分钟.如果一个测试人员执行需要1000分钟才能执行完,当项目非常紧急的时候, 我们会用测试人力成本换取时间成本,这个时候多找 ...
- pytest分布式执行(pytest-xdist)
前言 平常我们手工测试用例非常多时,比如有1千条用例,假设每个用例执行需要1分钟.如果一个测试人员执行需要1000分钟才能执行完,当项目非常紧急的时候, 我们会用测试人力成本换取时间成本,这个时候多找 ...
- Pytest(15)pytest分布式执行用例
前言 平常我们功能测试用例非常多时,比如有1千条用例,假设每个用例执行需要1分钟,如果单个测试人员执行需要1000分钟才能跑完 当项目非常紧急时,会需要协调多个测试资源来把任务分成两部分,于是执行时间 ...
- pytest测试框架 -- skip跳过执行测试用例
跳过执行测试用例 1.@pytest.mark.skip(reason=" ") -- 跳过执行测试函数 可传入一个非必须参数reason表示原因 import pytest@ ...
- Pytest(16)随机执行测试用例pytest-random-order
前言 通常我们认为每个测试用例都是相互独立的,因此需要保证测试结果不依赖于测试顺序,以不同的顺序运行测试用例,可以得到相同的结果. pytest默认运行用例的顺序是按模块和用例命名的 ASCII 编码 ...
- 『德不孤』Pytest框架 — 6、Mark分组执行测试用例
目录 1.Pytest中的Mark介绍 2.Mark的使用 3.Mark的注册和使用 4.使用Mark完成失败重试 5.扩展 1.Pytest中的Mark介绍 Mark主要用于在测试用例/测试类中给用 ...
随机推荐
- Django---项目
1.项目介绍 2.前期项目配置 3.用户注册---用户类创建和短信验证码的功能实现
- Android使用https与服务器交互的正确姿势
HTTPS 使用 SSL 在客户端和服务器之间进行加密通信,错误地使用 SSL ,将会导致其它人能够拦截网络上的应用数据. 使用一个包含公钥及与其匹配的私钥的证书配置服务器,作为 SSL 客户端与服务 ...
- 【Linux】Mac Centos install VMware Tools
can't use yum: vi /etc/sysconfig/network-scripts/ifcfg-enp4s0 yum -y install lshw pciutils gdisk sys ...
- python集合set相关操作
定义: 1.不同元素组成 2.无序 3.集合中的元素必须是不可变类型 创建集合 1 s = {1,2,3,4,5,6,7,8} 1.定义可变集合 1 2 3 >>> set_test ...
- MVC模式笔记
参见:https://martinfowler.com/eaaCatalog/modelViewController.html 企业应用架构模式(P of EAA)第14章Web表现模式第一节MVC笔 ...
- NetCore2.0下使用EF CodeFirst创建数据库
本文所使用的VS版本:VS2017 15.3.0 首先新建一个.net core项目 取名NetCoreTask 使用模型视图控制器方式 新建Model层 在Model层下新建一个user实体类 1 ...
- angular2--Tour of Heroes学习和分析--路由
引入路由模块时的一个报错 No base href set. Please provide a value for the APP_BASE_HREF token or add a base elem ...
- JSON 是个什么??!!!
json就是字符串! json就是字符串! json就是字符串! 重要的事情说三遍!json本质就是字符串,经过序列化的字符串.json的出现只是方便传输.你可以将所有的数据类型用序列化函数序列化js ...
- 洛谷 K短路(魔法猪学院)
A*+迪杰特斯拉... 第十一个点卡爆 不管了 #include<iostream> #include<algorithm> #include<cstring> # ...
- echart的x轴换行
<!DOCTYPE html> <html> <head> <meta charset="utf-8"> <title> ...