android——卡片式布局
一、CardView
<android.support.v7.widget.CardView

    xmlns:android="http://schemas.android.com/apk/res/android"

    xmlns:app="http://schemas.android.com/apk/res-auto"

    android:layout_width="match_parent"

    android:layout_height="wrap_content"

    android:layout_margin="5dp"

    app:cardCornerRadius="4dp">

        <TextView

            android:id="@+id/overwatch_name"

            android:layout_width="wrap_content"

            android:layout_height="wrap_content"

            android:layout_gravity="center_horizontal"

            android:layout_margin="5dp"

            android:textSize="16sp"/>

</android.support.v7.widget.CardView>
这是一个CardView的简单布局,app:cardCornerRadius这个属性指定了卡片圆角的弧度,另外还可以通过app:elevation指定卡片的高度,改变卡片的阴影效果。
要使用CardView需要添加相应的库,在app/build.gradle中:
    compile 'com.android.support:recyclerview-v7:26.+'

    compile 'com.android.support:cardview-v7:26.+'

    compile 'com.github.bumptech.glide:glide:4.0.0'
第一行是RecyclerView需要的库,第二行就是CardView,第三行是一个Glide的库,Glide是一个超级强大的图片加载库,一行代码就能实现图片加载功能。
首先在主活动的布局中加入RecyclerView:
        <android.support.v7.widget.RecyclerView

            android:id="@+id/recycler_view"

            android:layout_height="match_parent"

            android:layout_width="match_parent" />
然后为RecyclerView的子项指定一个自定义的布局,在layout目录下新建overwatch_item.xml:
<android.support.v7.widget.CardView

    xmlns:android="http://schemas.android.com/apk/res/android"

    xmlns:app="http://schemas.android.com/apk/res-auto"

    android:layout_width="match_parent"

    android:layout_height="wrap_content"

    android:layout_margin="5dp"

    app:cardCornerRadius="4dp">

    <LinearLayout

        android:orientation="vertical"

        android:layout_width="match_parent"

        android:layout_height="wrap_content">

        <ImageView

            android:id="@+id/overwatch_image"

            android:layout_width="match_parent"

            android:layout_height="100dp"

            android:scaleType="centerCrop"/>

        <TextView

            android:id="@+id/overwatch_name"

            android:layout_width="wrap_content"

            android:layout_height="wrap_content"

            android:layout_gravity="center_horizontal"

            android:layout_margin="5dp"

            android:textSize="16sp"/>

    </LinearLayout>

</android.support.v7.widget.CardView>
然后新建一个OverWatch类:
public class OverWatch {

    private String name;

    private int imageID;

    public OverWatch(String name, int imageID) {

        this.imageID = imageID;

        this.name = name;

    }

    public String getName() {

        return name;

    }

    public int getImageID() {

        return imageID;

    }

}
这个类就是每个卡片的内容了。name代表名字,imageID代表图片资源ID。
然后就需要为RecyclerView准备一个适配器:
 public class OverWatchAdapter extends RecyclerView.Adapter<OverWatchAdapter.ViewHolder> {

     private Context mContext;

     private List<OverWatch> mOverWatch;

     static class ViewHolder extends RecyclerView.ViewHolder{

         CardView cardView;

         ImageView overwatchImage;

         TextView overwatchName;

         public ViewHolder(View view){

             super(view);

             cardView = (CardView) view;

             overwatchImage = (ImageView) view.findViewById(R.id.overwatch_image);

             overwatchName = (TextView) view.findViewById(R.id.overwatch_name);

         }

     }

     public OverWatchAdapter(List<OverWatch> OverWatchList){

         mOverWatch = OverWatchList;

     }

     public ViewHolder onCreateViewHolder(ViewGroup parent, int viewType) {

         if(mContext == null){

             mContext = parent.getContext();

         }

         View view = LayoutInflater.from(mContext).inflate(R.layout.overwatch_item,parent,false);

         return  new ViewHolder(view);

     }

     public void onBindViewHolder(ViewHolder viewHolder, int position) {

         OverWatch overWatch = mOverWatch.get(position);

         viewHolder.overwatchName.setText(overWatch.getName());

         Glide.with(mContext).load(overWatch.getImageID()).into(viewHolder.overwatchImage);

     }

     public int getItemCount() {

         return mOverWatch.size();

     }

 }
第35行就是Glide加载图片的方法,首先是调用Glide.with()方法传入一个Context参数,然后调用load()方法去加载图片,参数可以是URI,也可以使一个本地路径,或者是一个资源ID,然后再调用into()方法将图片设置到某一个ImageView中去。
然后就是主活动的java代码:
 public class MainActivity extends AppCompatActivity {

     private DrawerLayout mDrawerLayout;

     private OverWatch[] overWatches = {new OverWatch("猎空",R.drawable.img_1),new OverWatch("猎空",R.drawable.img_2),

             new OverWatch("猎空",R.drawable.img_3),new OverWatch("猎空",R.drawable.img_5),

             new OverWatch("猎空",R.drawable.img_6),new OverWatch("猎空",R.drawable.img_7),

             new OverWatch("猎空",R.drawable.img_8),new OverWatch("猎空",R.drawable.img_9),

             new OverWatch("猎空",R.drawable.img_10),new OverWatch("猎空",R.drawable.img_11)};

     private List<OverWatch> overWatchList = new ArrayList<>();

     private OverWatchAdapter overWatchAdapter;

     @Override

     protected void onCreate(Bundle savedInstanceState) {

         super.onCreate(savedInstanceState);

         setContentView(R.layout.activity_main);

  ...

         //图片加载

         initOverWatch();

         RecyclerView reccyclerView = (RecyclerView) findViewById(R.id.recycler_view);

         GridLayoutManager layoutManager = new GridLayoutManager(MainActivity.this,2);

         reccyclerView.setLayoutManager(layoutManager);

         overWatchAdapter = new OverWatchAdapter(overWatchList);

         reccyclerView.setAdapter(overWatchAdapter);

     }

 ...

     }

 ...

     //存放图片

     private  void initOverWatch(){

         overWatchList.clear();

         for (int i = 0; i < 50; i++){

             Random random = new Random();

             int index = random.nextInt(overWatches.length);

             overWatchList.add(overWatches[index]);

         }

     }

 }
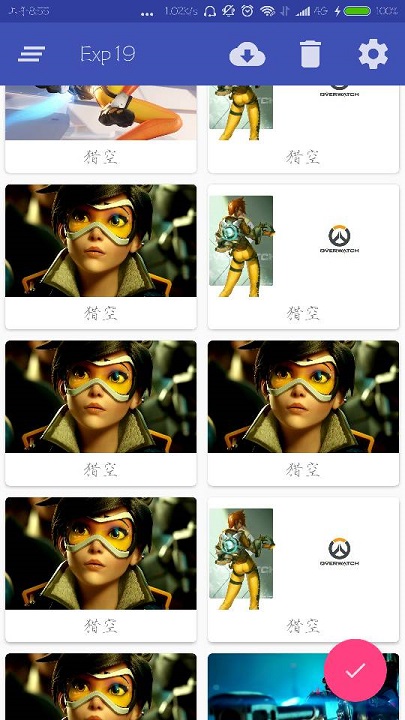
运行程序:

二、AppBarLayout
刚刚的RecyclerView把Toolbar挡住了.从布局xml中看:
    <android.support.design.widget.CoordinatorLayout

        android:layout_width="match_parent"

        android:layout_height="match_parent">

        <android.support.v7.widget.Toolbar

            android:id="@+id/toolbar"

            android:layout_width="match_parent"

            android:layout_height="?attr/actionBarSize"

            android:background="?attr/colorPrimary"

            android:theme="@style/ThemeOverlay.AppCompat.Dark.ActionBar"

            app:popupTheme="@style/ThemeOverlay.AppCompat.Light"/>

        <android.support.v7.widget.RecyclerView

            android:id="@+id/recycler_view"

            android:layout_height="match_parent"

            android:layout_width="match_parent" />

        <android.support.design.widget.FloatingActionButton

            android:id="@+id/fab"

            android:layout_width="wrap_content"

            android:layout_height="wrap_content"

            android:background="@drawable/fab"

            android:layout_gravity="bottom|end"

            android:layout_margin="16dp"

            android:src="@drawable/ic_done"

            app:elevation="8dp" />

    </android.support.design.widget.CoordinatorLayout>
Toolbar、RecyclerView、FloatingActionButton都是放置在CoordinatorLayout中的,因为CoordinatorLayout就是一个加强版的FrameLayout,从上到下的布局会逐渐覆盖,所以我们可以把Toolbar的布局代码下移试试:
但是这样Toolbar又把RecyclerView的一部分覆盖住了,所以再试试在CoordinatorLayout中嵌套一个LinearLayout:
    <android.support.design.widget.CoordinatorLayout

        android:layout_width="match_parent"

        android:layout_height="match_parent">

        <LinearLayout

            android:orientation="vertical"

            android:layout_width="match_parent"

            android:layout_height="match_parent">

            <android.support.v7.widget.Toolbar

                android:id="@+id/toolbar"

                android:layout_width="match_parent"

                android:layout_height="?attr/actionBarSize"

                android:background="?attr/colorPrimary"

                android:theme="@style/ThemeOverlay.AppCompat.Dark.ActionBar"

                app:popupTheme="@style/ThemeOverlay.AppCompat.Light"/>

            <android.support.v7.widget.RecyclerView

                android:id="@+id/recycler_view"

                android:layout_height="match_parent"

                android:layout_width="match_parent" />

        </LinearLayout>

        <android.support.design.widget.FloatingActionButton

            android:id="@+id/fab"

            android:layout_width="wrap_content"

            android:layout_height="wrap_content"

            android:background="@drawable/fab"

            android:layout_gravity="bottom|end"

            android:layout_margin="16dp"

            android:src="@drawable/ic_done"

            app:elevation="8dp" />

    </android.support.design.widget.CoordinatorLayout>
然后就完成了:

然后其实这里想讲的是AppBarLayout,其实AppBarLayout就是垂直方向上的LinearLayout不过是在其内部做了很多滚动事件的封装,所以可以用AppBarLayout避免这个遮挡
先把Toolbar嵌套到AppBarLayout中,然后给RecyclerView指定一个布局行为:
    <android.support.design.widget.CoordinatorLayout

        android:layout_width="match_parent"

        android:layout_height="match_parent">

        <android.support.design.widget.AppBarLayout

            android:layout_width="match_parent"

            android:layout_height="wrap_content">

            <android.support.v7.widget.Toolbar

                android:id="@+id/toolbar"

                android:layout_width="match_parent"

                android:layout_height="?attr/actionBarSize"

                android:background="?attr/colorPrimary"

                android:theme="@style/ThemeOverlay.AppCompat.Dark.ActionBar"

                app:popupTheme="@style/ThemeOverlay.AppCompat.Light"/>

        </android.support.design.widget.AppBarLayout>

        <android.support.v7.widget.RecyclerView

            android:id="@+id/recycler_view"

            android:layout_height="match_parent"

            android:layout_width="match_parent"

            app:layout_behavior="@string/appbar_scrolling_view_behavior"/>

        <android.support.design.widget.FloatingActionButton

            android:id="@+id/fab"

            android:layout_width="wrap_content"

            android:layout_height="wrap_content"

            android:background="@drawable/fab"

            android:layout_gravity="bottom|end"

            android:layout_margin="16dp"

            android:src="@drawable/ic_done"

            app:elevation="8dp" />

    </android.support.design.widget.CoordinatorLayout>
效果和使用LinearLayout一样。但是AppBarLayout做了一些滚动事件的封装。比如这样改:
<android.support.design.widget.AppBarLayout

        android:layout_width="match_parent"

        android:layout_height="wrap_content">

        <android.support.v7.widget.Toolbar

            android:id="@+id/toolbar"

            android:layout_width="match_parent"

            android:layout_height="?attr/actionBarSize"

            android:background="?attr/colorPrimary"

            android:theme="@style/ThemeOverlay.AppCompat.Dark.ActionBar"

            app:popupTheme="@style/ThemeOverlay.AppCompat.Light"

            app:layout_scrollFlags="scroll|enterAlways|snap"/>

    </android.support.design.widget.AppBarLayout>
app:layout_scrollFlags这个属性的值指定为scroll就是,当RecyclerView向上滚动的时候,Toolbar会随着滚动而隐藏,enterAlways是指向下滚动的时候,snap指根据滚动的距离,自动选择隐藏还是显示。
三、下拉刷新
使用的是SwipeRefreshLayout然某个控件实现下拉刷新:
        <android.support.v4.widget.SwipeRefreshLayout

            android:id="@+id/swip_refresh"

            android:layout_width="match_parent"

            android:layout_height="match_parent"

            app:layout_behavior="@string/appbar_scrolling_view_behavior">

            <android.support.v7.widget.RecyclerView

                android:id="@+id/recycler_view"

                android:layout_height="match_parent"

                android:layout_width="match_parent" />

        </android.support.v4.widget.SwipeRefreshLayout>
将想要实现下拉刷新的某控件嵌套在SwipeRefreshLayout就行了,这里要注意把app:layout_behavior="@string/appbar_scrolling_view_behavior"这个属性移到SwipeRefreshLayout。
然后是JAVA代码:
public class MainActivity extends AppCompatActivity {

...

    private SwipeRefreshLayout swipeRefresh;

    @Override

    protected void onCreate(Bundle savedInstanceState) {

        super.onCreate(savedInstanceState);

        setContentView(R.layout.activity_main);

...

        //下拉刷新

        swipeRefresh = (SwipeRefreshLayout) findViewById(R.id.swip_refresh);

        swipeRefresh.setColorSchemeResources(R.color.colorPrimary);

        swipeRefresh.setOnRefreshListener(new SwipeRefreshLayout.OnRefreshListener() {

            @Override

            public void onRefresh() {

                refreshOverWatch();

            }

        });

    }

 ...

    //刷新图片

    private  void refreshOverWatch(){

        new Thread(new Runnable() {

            @Override

            public void run() {

                try{

                    Thread.sleep(1000);

                }catch (InterruptedException e){

                    e.printStackTrace();

                }

                runOnUiThread(new Runnable() {

                    @Override

                    public void run() {

                        initOverWatch();

                        overWatchAdapter.notifyDataSetChanged();

                        swipeRefresh.setRefreshing(false);

                    }

                });

            }

        }).start();

    }

}
具体步骤就是:
1、获取SwipeRefreshLayout的实例。
2、设置监听器。
3、编写刷新的使用的方法
在这里要注意的有,setColorSchemeResources()这个方法设置的是刷新时进度条的颜色,Thread.sleep(1000)先让线程沉睡一秒,让,然后改变数据,接着调用overWatchAdapter.notifyDataSetChanged()方法通知数据发生了变化,swipeRefresh.setRefreshing(false)用于表示刷新事件结束,并隐藏进度条。
android——卡片式布局的更多相关文章
- CollapsingToolbarLayoutDemo【可折叠式标题栏,顺便带有CardView卡片式布局】
版权声明:本文为HaiyuKing原创文章,转载请注明出处! 前言 CollapsingToolBarLayout是一个作用于ToolBar基础之上的布局,它也是由Design Support库提供的 ...
- CardView卡片式布局
CardView适用于实现卡片式布局效果的重要控件,由appcompat-v7库提供,实际上CardView也是一个FrameLayout,只是额外提供了圆角和阴影效果,看上去有立体的感觉.一般Car ...
- [Android] Android 卡片式控件CardView的优雅使用
[Android] Android 卡片式控件CardView的优雅使用 CardView是在安卓5.0提出的卡片式控件 其具体用法如下: 1.在app/build.gradle 文件中添加 comp ...
- Android零基础入门第71节:CardView简单实现卡片式布局
还记得我们一共学过了多少UI控件了吗?都掌握的怎么样啊. 安卓中一些常用控件学习得差不多了,今天再来学习一个新的控件CardView,在实际开发中也有非常高的地位. 一.CardView简介 Card ...
- Android 性能优化---布局优化
Android 性能优化---布局优化 Android 布局绘制原理 布局加载过程 setContentView() --> inflate() -- > getLayout()(I/O操 ...
- 树莓派Odroid等卡片式电脑上搭建NAS教程系列6-miniDLNA
目录: 1. 树莓派Odroid等卡片式电脑上搭建NAS教程系列1-Ubuntu系统安装 2. 树莓派Odroid等卡片式电脑上搭建NAS教程系列2-SSH连接访问 3. 树莓派Odroid等卡片式电 ...
- Android菜鸟成长记7 -- Android的五大布局
Android五大布局,相信android的都了解过,今天我根据自己的学习整理一下五大布局,主要介绍的是线性布局(LiearLayout),因为,其他的布局使用率不是很高. Android的五大布局 ...
- 无废话Android之常见adb指令、电话拨号器、点击事件的4种写法、短信发送器、Android 中各种布局(1)
1.Android是什么 手机设备的软件栈,包括一个完整的操作系统.中间件.关键的应用程序,底层是linux内核,安全管理.内存管理.进程管理.电源管理.硬件驱动 2.Dalvik VM 和 JVM ...
- 14.Android之Layout布局学习
Android布局主要有5种,接下来学习总结下. 1) 最常见的线性布局 LinearLayout 线性布局是Android布局中最简单的布局,也是最常用,最实用的布局. android:orient ...
随机推荐
- Oracle数据库常用脚本命令(二)
--创建学生信息表create table student( sid number(8,0), name varchar2(20), sex char(2), birthday date, addre ...
- [Usaco2007 Open]Fliptile 翻格子游戏题解
问题 B: [Usaco2007 Open]Fliptile 翻格子游戏 时间限制: 5 Sec 内存限制: 128 MB 题目描述 Farmer John knows that an intell ...
- UVA1152- 枚举 /二分查找
The SUM problem can be formulated as follows: given four lists A,B,C,D of integer values, compute ho ...
- c++小游戏——五子棋
#include<iostream> #include<iomanip> #include<cstring> using namespace std; const ...
- 个人永久性免费-Excel催化剂功能第70波-工作薄外部链接维护管理
Excel在数据领域万物互联的特性,其中一个使用场景是连接非本工作薄的外部性文件内容,如其他Excel工作薄文件里的内容或直接用OLE对象的方式嵌入一个文件链接,使其在不离开Excel环境,也可提供类 ...
- 个人永久性免费-Excel催化剂功能第30波-工作表快捷操作(批量创建、命名、排序、工作表目录)
日常使用Excel过程中,最多的操作无外乎单元格和工作表的操作,单元格的操作在前面已经有详细的辅助功能提供,此篇提供工作表相关的操作.这两项的操作若能有提速,日常大量的工作叠加起来真是省下不少时间. ...
- webService 的使用
webService Web service是一个平台独立的,低耦合的,自包含的.基于可编程的web的应用程序,可使用开放的XML(标准通用标记语言下的一个子集)标准来描述.发布.发现.协调和配置这些 ...
- 调用百度API进行文本纠错
毕设做的是文本纠错方面,然后今天进组见研究生导师 .老师对我做的东西蛮感兴趣.然后介绍自己现在做的一些项目,其中有个模块需要有用到文本纠错功能. 要求1:有多人同时在线编辑文档,然后文档功能有类似Wo ...
- JavaSE总结(一)
一.Java 简介 Java是由Sun Microsystems公司于1995年5月推出的Java面向对象程序设计语言和Java平台的总称.由James Gosling和同事们共同研发,并在1995年 ...
- MyEclipse 2016 Stable 1.0破解教程
一.下载所需文件 1. Windows最新版: MyEclipse 2016 Stable 1.0离线安装包(文件大小:1.52GB)--完整安装包,无需在线下载http://pan.baidu.co ...