React-Native 之 GD (三)近半小时热门
1.设置页面跳转
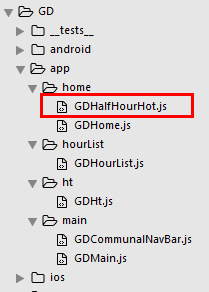
半小时热门组件 GDHalfHourHot.js
/**

 * 近半小时热门

 */

import React, { Component } from 'react';

import {

    StyleSheet,

    Text,

    View,

    TouchableOpacity,

    Image,

} from 'react-native';

// 引入自定义导航栏组件

import CommunalNavBar from '../main/GDCommunalNavBar';

export default class GDHalfHourHot extends Component {

    // 返回中间按钮

    renderTitleItem() {

        return(

            <Text style={styles.navbarTitleItemStyle}>近半小时热门</Text>

        );

    }

    // 返回右边按钮

    renderRightItem() {

        return(

            <TouchableOpacity>

                <Text style={styles.navbarRightItemStyle}>关闭</Text>

            </TouchableOpacity>

        );

    }

    render() {

        return (

            <View style={styles.container}>

                {/* 导航栏样式 */}

                <CommunalNavBar

                    titleItem = {() => this.renderTitleItem()}

                    rightItem = {() => this.renderRightItem()}

                />

            </View>

        );

    }

}

const styles = StyleSheet.create({

    container: {

        flex: 1,

        alignItems: 'center',

        backgroundColor: '#F5FCFF',

    },

    navbarTitleItemStyle: {

        fontSize:17,

        color:'black',

        marginLeft:50

    },

    navbarRightItemStyle: {

        fontSize:17,

        color:'rgba(123,178,114,1.0)',

        marginRight:15

    },

});
首页调用 GDHome.js
/**

 * 首页

 */

import React, { Component } from 'react';

import {

    StyleSheet,

    Text,

    View,

    TouchableOpacity,

    Image,

} from 'react-native';

// 引入自定义导航栏组件

import CommunalNavBar from '../main/GDCommunalNavBar';

// 引入 近半小时热门组件

import HalfHourHot from './GDHalfHourHot';

export default class GDHome extends Component {

    // 跳转到近半小时热门

    pushToHalfHourHot() {

        // this.props 可以获取所有组件属性

        this.props.navigator.push({

            component: HalfHourHot,

        })

    }

    // 返回左边按钮

    renderLeftItem() {

        // 将组件返回出去

        return(

            <TouchableOpacity

                onPress={() => {this.pushToHalfHourHot()}}

            >

                <Image source={{uri:'hot_icon_20x20'}} style={styles.navbarLeftItemStyle} />

            </TouchableOpacity>

        );

    }

    // 返回中间按钮

    renderTitleItem() {

        return(

            <TouchableOpacity>

                <Image source={{uri:'navtitle_home_down_66x20'}} style={styles.navbarTitleItemStyle} />

            </TouchableOpacity>

        );

    }

    // 返回右边按钮

    renderRightItem() {

        return(

            <TouchableOpacity>

                <Image source={{uri:'search_icon_20x20'}} style={styles.navbarRightItemStyle} />

            </TouchableOpacity>

        );

    }

    render() {

        return (

            <View style={styles.container}>

                {/* 导航栏样式 */}

                <CommunalNavBar

                    leftItem = {() => this.renderLeftItem()}

                    titleItem = {() => this.renderTitleItem()}

                    rightItem = {() => this.renderRightItem()}

                />

            </View>

        );

    }

}

const styles = StyleSheet.create({

    container: {

        flex: 1,

        alignItems: 'center',

        backgroundColor: '#F5FCFF',

    },

    navbarLeftItemStyle: {

        width:20,

        height:20,

        marginLeft:15,

    },

    navbarTitleItemStyle: {

        width:66,

        height:20,

    },

    navbarRightItemStyle: {

        width:20,

        height:20,

        marginRight:15,

    },

});
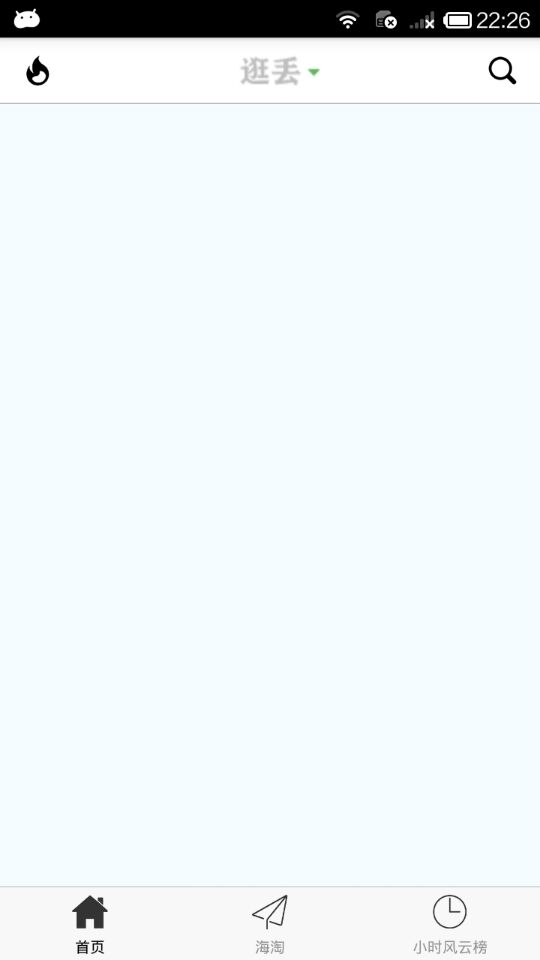
效果图:

2.先从 半小时热门 开始,像这样的数据展示,我们肯定是优先选择 ListView ,其中,cell 的样式分解如下:
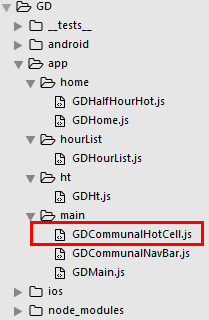
GDCommunalHotCell.js
/**

 * 近半小时热门 cell

 */

import React, { Component, PropTypes } from 'react';

import {

    StyleSheet,

    Text,

    View,

    Dimensions,

    Platform,

    Image,

} from 'react-native';

// 获取屏幕宽高

const {width, height} = Dimensions.get('window');

export default class GDCommunalHotCell extends Component {

	// 定义成员属性

	static propTypes = {

		image: PropTypes.string,  // 外部传字符串

		title: PropTypes.string,

	}

    render() {

        return (

            <View style={styles.container}>

            	{/* 左边的图片 */}

            	<Image source={{uri:this.props.image}} style={styles.imageStyle} />

            	{/* 中间的文字 */}

            	<View>

            		<Text numberOfLines={3} style={styles.titleStyle}>{this.props.title}</Text>

            	</View>

            	{/* 右边的箭头 */}

            	<Image source={{uri:'icon_cell_rightArrow'}} style={styles.arrowStyle} />

            </View>

        );

    }

}

const styles = StyleSheet.create({

    container: {

    	flexDirection:'row',

    	alignItems:'center',

    	justifyContent:'space-between',

    	backgroundColor:'white',

        height:100,

        width:width,

        borderBottomWidth:0.5,

        borderBottomColor:'gray',

        marginLeft:15

    },

    imageStyle: {

    	width:70,

    	height:70,

    },

    titleStyle: {

        width:width*0.65,

    },

    arrowStyle: {

    	width:10,

    	height:10,

        marginRight:30

    }

});
在 GDHalfHourHot.js 引入组件
/**

 * 近半小时热门

 */

import React, { Component } from 'react';

import {

    StyleSheet,

    Text,

    View,

    TouchableOpacity,

    Image,

    ListView,

    Dimensions,

} from 'react-native';

// 获取屏幕宽高

const {width, height} = Dimensions.get('window');

// 引入自定义导航栏组件

import CommunalNavBar from '../main/GDCommunalNavBar';

// 引入 cell

import CommunalHotCell from '../main/GDCommunalHotCell';

export default class GDHalfHourHot extends Component {

    // 构造

    constructor(props) {

        super(props);

        // 初始状态

        this.state = {

            dataSource: new ListView.DataSource({rowHasChanged:(r1, r2) => r1 !== r2}), // 数据源 优化

        };

        // 绑定

        this.fetchData = this.fetchData.bind(this);

    }

    // 网络请求

    fetchData() {

        fetch('http://guangdiu.com/api/gethots.php')  // 请求地址

            .then((response) => response.json())  // 定义名称 将数据转为json格式

            .then((responseData) => { // 处理数据

                // 修改dataSource的值

                this.setState({

                    dataSource: this.state.dataSource.cloneWithRows(responseData.data)

                });

            })

            .done() // 结束

    }

    popToHome() {

        this.props.navigator.pop();

    }

    // 返回中间按钮

    renderTitleItem() {

        return(

            <Text style={styles.navbarTitleItemStyle}>近半小时热门</Text>

        );

    }

    // 返回右边按钮

    renderRightItem() {

        return(

            <TouchableOpacity>

                <Text style={styles.navbarRightItemStyle}>关闭</Text>

            </TouchableOpacity>

        );

    }

    // 返回每一行cell的样式

    renderRow(rowData) {

        // 使用cell组件

        return(

            <CommunalHotCell

                image={rowData.image}

                title={rowData.title}

            />

        );

    }

    // 生命周期 组件渲染完成 已经出现在dom文档里

    componentDidMount() {

        // 请求数据

        this.fetchData();

    }

    render() {

        return (

            <View style={styles.container}>

                {/* 导航栏样式 */}

                <CommunalNavBar

                    titleItem = {() => this.renderTitleItem()}

                    rightItem = {() => this.renderRightItem()}

                />

                {/* 商品列表 */}

                <ListView

                    dataSource={this.state.dataSource}  // 数据源 通过判断dataSource是否有变化,来判断是否要重新渲染、

                    renderRow={this.renderRow}

                    showsHorizontalScrollIndicator={false} // 隐藏水平线

                    style={styles.listViewStyle}

                />

            </View>

        );

    }

}

const styles = StyleSheet.create({

    container: {

        flex:1,

        alignItems: 'center',

    },

    navbarTitleItemStyle: {

        fontSize:17,

        color:'black',

        marginLeft:50

    },

    navbarRightItemStyle: {

        fontSize:17,

        color:'rgba(123,178,114,1.0)',

        marginRight:15

    },

    listViewStyle: {

        width:width,

    }

});
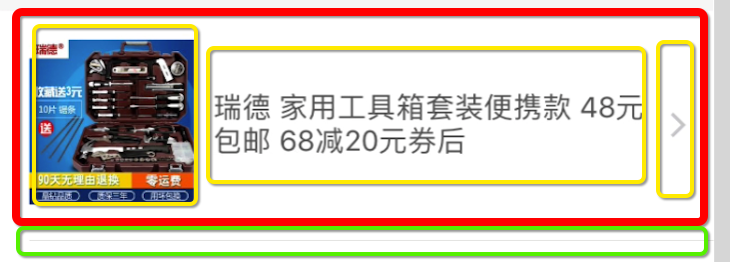
3.效果图

React-Native 之 GD (三)近半小时热门的更多相关文章
- React-Native 之 GD (十二)海淘半小时热门 及 获取最新数据个数功能 (角标)
1.海淘半小时热门 基本功能和首页相似 GDHt.js /** * 海淘折扣 */ import React, { Component } from 'react'; import { Style ...
- React Native学习(三)—— 使用导航器Navigation跳转页面
本文基于React Native 0.52 参考文档https://reactnavigation.org/docs/navigators/navigation-prop 一.基础 1.三种类型 Ta ...
- 基于React Native的跨三端应用架构实践
作者|陈子涵 编辑|覃云 “一次编写, 到处运行”(Write once, run anywhere ) 是很多前端团队孜孜以求的目标.实现这个目标,不但能以最快的速度,将应用推广到各个渠道,而且还能 ...
- React Native组件(三)Text组件解析
相关文章 React Native探索系列 React Native组件系列 前言 此前介绍了最基本的View组件,接下来就是最常用的Text组件,对于Text组件的一些常用属性,这篇文章会给出简单的 ...
- ORACLE 查询近一天,近半小时内的数据
SELECT 字段 FROM 表名 WHERE 时间字段 BETWEEN SYSDATE-1 AND SYSDATE; //查询一天内的数据 sysdate+1 加一天sysdate+1/24 ...
- SQL TUNING——从近半小时到几十毫秒的一次优化
昨天,一个用户的现场人员打电话紧急求助,说他们的一个系统卡了,半天不出结果,严重的影响了他们的使用,我简单的问了几句:什么时候的事儿?答:就今天下午的事儿.问:数据库软硬件最近动过没?答:没动过.问: ...
- React Native 之 项目实战(一)
前言 本文有配套视频,可以酌情观看. 文中内容因各人理解不同,可能会有所偏差,欢迎朋友们联系我. 文中所有内容仅供学习交流之用,不可用于商业用途,如因此引起的相关法律法规责任,与我无关. 如文中内容对 ...
- Airbub 弃用React Native
弃用 React Native ? 最近的技术圈尤为热闹,Google 发布了首个 Flutter 预览版.Vue.js 在 GitHub 上的 star 数量超过了 React.js,而如今全球著名 ...
- React Native初探
前言 很久之前就想研究React Native了,但是一直没有落地的机会,我一直认为一个技术要有落地的场景才有研究的意义,刚好最近迎来了新的APP,在可控的范围内,我们可以在上面做任何想做的事情. P ...
随机推荐
- ^A '\001' 分隔符
^A 分隔符符号\001,使用组合按键“ctrl+V+A”获得
- java常用类之BigDecimal
BigDecimal 小数计算丢失精度问题 在计算机中,所有文件都是以二进制存储的,数字运算也是使用二进制进行计算的,因为计算机中不存在小数点,所以我们通常说的浮点数如float.double都是计算 ...
- catch that cow POJ 3278 搜索
catch that cow POJ 3278 搜索 题意 原题链接 john想要抓到那只牛,John和牛的位置在数轴上表示为n和k,john有三种移动方式:1. 向前移动一个单位,2. 向后移动一个 ...
- [LeetCode] 103. 二叉树的锯齿形层次遍历
题目链接 : https://leetcode-cn.com/problems/binary-tree-zigzag-level-order-traversal/ 题目描述: 给定一个二叉树,返回其节 ...
- django学习笔记(四)
1.请求周期 url> 路由 > 函数或类 > 返回字符串或者模板语言? Form表单提交: 提交 -> url > 函数或类中的方法 - .... HttpRespon ...
- localStorage的使用和vuex的拆分
问题1:在隐身模式.或者用户未启用的情况下,使用localStorage可能会导致浏览器直接报错,怎么办? 方法:使用try-catch包裹 代码示例: store.jsimport Vue from ...
- linux MySql 的主从复制部署
MySql 复制 mysql 复制:将某一台主机上的 Mysql 数据复制到其它主机(slaves)上,并重新执行一遍从而实现 当前主机上的 mysql 数据与(master)主机上数据保持一致的过程 ...
- 3Linux - 常用 Linux 命令的基本使用
常用 Linux 命令的基本使用 转自 目标 理解学习 Linux 终端命令的原因 常用 Linux 命令体验 01. 学习 Linux 终端命令的原因 Linux 刚面世时并没有图形界面,所有的操作 ...
- selenium定位
https://www.cnblogs.com/programer-xinmu78/p/10881766.html https://www.cnblogs.com/eastonliu/p/908830 ...
- linux软件操作
操作 命令 ubuntu 源操作 源配置 https://www.cnblogs.com/wenlin-gk/p/11146228.html 源更新 sudo apt-get update 查看源中包 ...