13_CXF和Spring整合发布服务
【服务端】
第一步:建立一个Web项目
第二步:填充CXF jar包
第三步:创建接口及服务类
【工程截图(对比之前的WebService_CXF_Server00)】
【applicationContext.xml】
<?xml version="1.0" encoding="UTF-8"?>

<beans xmlns="http://www.springframework.org/schema/beans"

    xmlns:xsi="http://www.w3.org/2001/XMLSchema-instance" xmlns:jaxws="http://cxf.apache.org/jaxws"

    xmlns:jaxrs="http://cxf.apache.org/jaxrs" xmlns:cxf="http://cxf.apache.org/core"

    xsi:schemaLocation="http://www.springframework.org/schema/beans

                            http://www.springframework.org/schema/beans/spring-beans.xsd

                            http://cxf.apache.org/jaxrs http://cxf.apache.org/schemas/jaxrs.xsd

                            http://cxf.apache.org/jaxws http://cxf.apache.org/schemas/jaxws.xsd

                            http://cxf.apache.org/core http://cxf.apache.org/schemas/core.xsd">

<!-- service -->

<bean id="weatherInterface" class="com.Higgin.ws.service.WeatherInterfaceImpl"></bean>

<!--

    发布服务

    使用jaxws:server和jaxws:endpoint可以发布服务

    WebService地址=Tomcat地址值+CXF Servlet的路径+ /weather

-->

<jaxws:server address="/weather" serviceClass="com.Higgin.ws.service.WeatherInterface">

    <jaxws:serviceBean>

        <ref bean="weatherInterface"/>

    </jaxws:serviceBean>

</jaxws:server>

</beans>
【web.xml】
<?xml version="1.0" encoding="UTF-8"?>

<web-app xmlns:xsi="http://www.w3.org/2001/XMLSchema-instance" xmlns="http://java.sun.com/xml/ns/javaee" xsi:schemaLocation="http://java.sun.com/xml/ns/javaee http://java.sun.com/xml/ns/javaee/web-app_3_0.xsd" id="WebApp_ID" version="3.0">

  <display-name>WebService_CXF_Spring_Server00</display-name>

  <welcome-file-list>

    <welcome-file>index.jsp</welcome-file>

  </welcome-file-list>

  <!-- 加载Spring容器 -->

  <context-param>

    <param-name>contextConfigLocation</param-name>

    <param-value>/WEB-INF/classes/applicationContext.xml</param-value>

  </context-param>

  <listener>

    <listener-class>org.springframework.web.context.ContextLoaderListener</listener-class>

  </listener>

  <!-- CXF的Servlet -->

  <servlet>

    <servlet-name>cxf</servlet-name>

    <servlet-class>org.apache.cxf.transport.servlet.CXFServlet</servlet-class>

    <load-on-startup>1</load-on-startup>

  </servlet>

  <!-- 本系统的WebService路径必须以/ws/开头 -->

  <servlet-mapping>

    <servlet-name>cxf</servlet-name>

    <url-pattern>/ws/*</url-pattern>

  </servlet-mapping>

</web-app>
【启动Web容器】
访问 http://localhost:8080/WebService_CXF_Spring_Server00/ws

接着访问 http://localhost:8080/WebService_CXF_Spring_Server00/ws/weather?wsdl

可见WebService服务端启动正常。
【测试注意】
因为Spring和CXF整合将WebService通过TomCat发布,WebService和应用程序共用一个端口是8080。
测试WebService和应用程序(JSP)是否可以共存(都可以访问)
正式上线使用80端口。
【客户端】
【生成客户端代码】
首先,使用利用WebService的wsdl2java工具生成客户端代码:

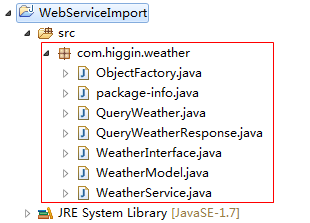
【客户端工程截图】

【applicationContext.java】
<?xml version="1.0" encoding="UTF-8"?>

<beans xmlns="http://www.springframework.org/schema/beans"

    xmlns:xsi="http://www.w3.org/2001/XMLSchema-instance" xmlns:jaxws="http://cxf.apache.org/jaxws"

    xmlns:jaxrs="http://cxf.apache.org/jaxrs" xmlns:cxf="http://cxf.apache.org/core"

    xsi:schemaLocation="http://www.springframework.org/schema/beans

                            http://www.springframework.org/schema/beans/spring-beans.xsd

                            http://cxf.apache.org/jaxrs http://cxf.apache.org/schemas/jaxrs.xsd

                            http://cxf.apache.org/jaxws http://cxf.apache.org/schemas/jaxws.xsd

                            http://cxf.apache.org/core http://cxf.apache.org/schemas/core.xsd">

    <!--

        使用<jaxws:clietn>调用服务端

        jaxws:client内部使用JaxWsProxyFactoryBean方式

        serviceClass:指定portType地址(需要使用wsdl2java工具生成)

    -->

    <jaxws:client id="weatherClient" address="http://localhost:8080/WebService_CXF_Spring_Server00/ws/weather?wsdl"

        serviceClass="com.higgin.weather.WeatherInterface">

    </jaxws:client>

</beans>
【ClientTest.java】
package com.higgin.ws.cxf;

import java.text.SimpleDateFormat;

import java.util.Date;

import java.util.List;

import org.junit.Before;

import org.junit.Test;

import org.springframework.context.ApplicationContext;

import org.springframework.context.support.ClassPathXmlApplicationContext;

import com.higgin.weather.WeatherInterface;

import com.higgin.weather.WeatherModel;

public class ClientTest {

    private ApplicationContext applicationContext;

    @Before

    public void before(){

        applicationContext=new ClassPathXmlApplicationContext("applicationContext.xml");

    }

    @Test

    public void testCxfSpringClient(){

        //从Spring容器中取出portType

        WeatherInterface weatherInterface=(WeatherInterface) applicationContext.getBean("weatherClient");

        //调用portType方法

        List<WeatherModel> list=weatherInterface.queryWeather("杭州");

        for(WeatherModel weatherModel:list){

            System.out.println(weatherModel.getDetail());

            Date date=weatherModel.getDate().toGregorianCalendar().getTime();

            System.out.println(new SimpleDateFormat("yyyy-MM-dd").format(date));

            System.out.println(weatherModel.getTemperatureMax());

            System.out.println(weatherModel.getTemperatureMin());

        }

    }

}
【运行结果】

【总结:使用jaxws实现SOAP1.1、SOAP1.2】
方式一:
CXF编程实现:
1.使用jaxwsServerFactoryBean发布WebService服务端。
需要设置:
jaxwsServerFactoryBean.setAddress("WebService地址");
jaxwsServerFactoryBean.setServiceClass("porType类路径"); //由程序员编写的
jaxwsServerFactoryBean.setServiceBean("portType类对象");
jaxwsServerFactoryBean.create(); //发布一个服务
2.使用jaxwsProxyFactory实现客户端调用WebService服务
jaxwsServerFactoryBean.setAddress("WebService的wsdl地址");
jaxwsServerFactoryBean.setServiceClass("portType路径"); //portType是wsdl2java工具生成
jaxwsServerFactoryBean.setCreate(); //创建portType对象
方法二:
CXF和Spring整合开发服务端和客户端。
1.使用<jaxws:Server>发布WebService服务端
在<jaxws:Server>设置Address、serviceClass、serviceBean
2.使用<jaxws:Client>调用WebService服务
在<jaxws:Server>设置Address、serviceClass
13_CXF和Spring整合发布服务的更多相关文章
- (七)CXF之与spring整合发布web服务
一.需求分析 用spring发布服务 二.案例 2.1 引入maven依赖 <dependencies> <!-- 添加Spring支持 --> <dependency& ...
- WebService学习之旅(三)JAX-WS与Spring整合发布WebService
Spring本身就提供了对JAX-WS的支持,有兴趣的读者可以研究下Spring的Spring-WS项目,项目地址: http://docs.spring.io/spring-ws/sites/1.5 ...
- webservice的cxf和spring整合发布
1.新建一个web项目 2.导入cxf相应的jar包,并部署到项目中 3.服务接口 package com.xiaostudy; /** * @desc 服务器接口 * @author xiaostu ...
- Spring整合CXF之发布WebService服务
今天我们来讲下如何用Spring来整合CXF,来发布WebService服务: 给下官方文档地址:http://cxf.apache.org/docs/writing-a-service-with-s ...
- Spring整合CXF,发布RSETful 风格WebService(转)
Spring整合CXF,发布RSETful 风格WebService 这篇文章是承接之前CXF整合Spring的这个项目示例的延伸,所以有很大一部分都是一样的.关于发布CXF WebServer和Sp ...
- Spring整合CXF,发布RSETful 风格WebService
原文地址:http://www.cnblogs.com/hoojo/archive/2012/07/23/2605219.html 这篇文章是承接之前CXF整合Spring的这个项目示例的延伸,所以有 ...
- spring与axis2整合发布webservice
最近在研究整合spring框架和axis2发布webservice服务,由于本人也才学java不久,为了便于以后的查看,在这里记录下发布过程. 所需的工具包,spring.jar和axis2链接地址为 ...
- 应用Spring MVC发布restful服务是怎样的一种体验
摘要:“约定优于配置”这是一个相当棒的经验,SOAP服务性能差.基于配置.紧耦合,restful服务性能好.基于约定.松耦合,现在我就把使用Spring MVC发布restful服务的 ...
- So easy Webservice 8.spring整合CXF 发布WS
1.添加jar包(cxf的jar包中包含了spring的jar包),添加spring配置文件 2.web.xml中配置CXFServlet,过滤WS服务的地址 <!-- 配置CXFServlet ...
随机推荐
- 利用Microsoft Azure Machine Learning Studio创建机器学习实例
Microsoft Azure云服务推出机器学习的模块,用户只需上传数据,利用机器学习模块提供的一些算法接口和R语言或别的语言接口,就能利用Microsoft Azure强大的云计算能力来实现自己的机 ...
- action 带参数跳转
都容易忘记 <result name="goOpPolicy" type="redirect">queryPolicy.action?aaaa=${ ...
- Asp.Net Core- 配置组件详解
我们之前写的配置都是放置在配置文件Web.config或者app.config中,.net core提供了全新的配置方式,可以直接写在内存中或者写在文件中. .Net Core的配置API主要体现在3 ...
- Foxmail
我们在“POP3/SMTP服务”前面打钩,这样我们的QQ邮箱设置已经完成了,我们就可以在foxmail客户端上QQ邮箱了 QQ邮箱的POP3与SMTP服务器是什么? QQ邮箱 POP3 和 SMTP ...
- discuz!版本号信息改动步骤
建完网站后,就到了改动discuz! 论坛的步骤了,,将其改动为自己喜欢的样子.是非常有意思的,废话不多说了.以下给大家介绍改动的方法. 1.[改动后台-首页的版权]打开ftp.连接网站,进入到:/f ...
- SAP增强总结-第二代增强(SMOD、CMOD)【转载】
第二代增强比第二代增强安全性提高了很多,第一代增强毕竟是在原标准程序中修改,大部分传递参数都可以直接使用,第二代增强做了一些封装,对用户可以修改的参数做了限制. 1.增强点查找方法 首先根据事物码找到 ...
- 2015北京网络赛 J Clarke and puzzle 求五维偏序 分块+bitset
Clarke and puzzle Time Limit: 1 Sec Memory Limit: 256 MB 题目连接 http://hihocoder.com/contest/acmicpc20 ...
- [AngularJS] Catching errors with $exceptionHandler
The AngularJS $exceptionHandler service allows you to catch and handle unanticipated JavaScript erro ...
- 【机器学习算法-python实现】svm支持向量机(1)—理论知识介绍
(转载请注明出处:http://blog.csdn.net/buptgshengod) 1.背景 强烈推荐阅读(http://www.cnblogs.com/jerrylead/archiv ...
- 应聘.net开发工程师常见的面试题(五)
1.描述一下C#中索引器的实现过程,是否只能根据数字进行索引? 答:不是.可以用任意类型. 2.在C#中,string str = null 与 string str = ” ” 请尽量使用文字或图象 ...