[SpringBoot——Web开发(使用Thymeleaf模板引擎)]
【文字只能描述片段信息,具体细节参考代码】
https://github.com/HCJ-shadow/SpringBootPlus

引入POM依赖
 <properties>

        <java.version>1.8</java.version>

        <thymeleaf.version>3.0.11.RELEASE</thymeleaf.version>

        <thymeleaf-layout-dialect.version>2.1.1</thymeleaf-layout-dialect.version>

</properties>
  <dependency>

            <groupId>org.springframework.boot</groupId>

            <artifactId>spring-boot-starter-thymeleaf</artifactId>

        </dependency>
记坑thymeleaf无法跳转:https://blog.csdn.net/qq_40754146/article/details/95411413
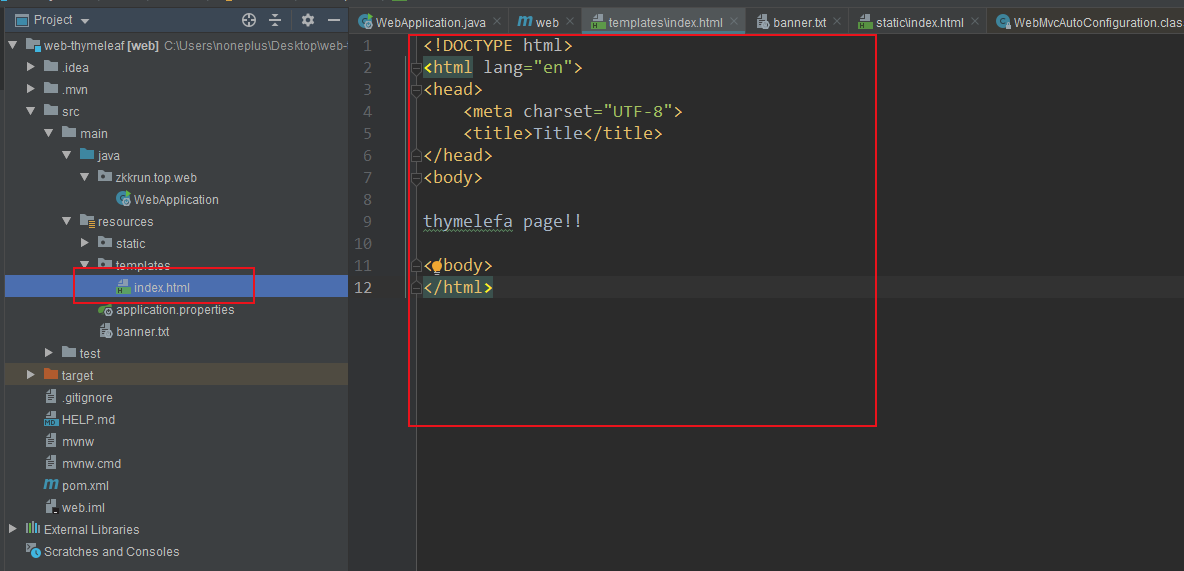
将html页面放于classpath:template/下,thymeleaf就可自动渲染。
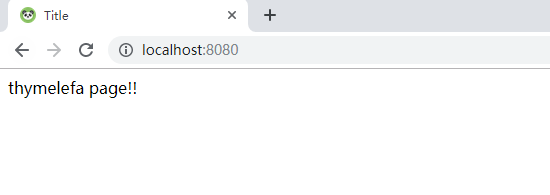
启动:
注:如果static下有index.html文件,系统会优先访问static下的index.html。
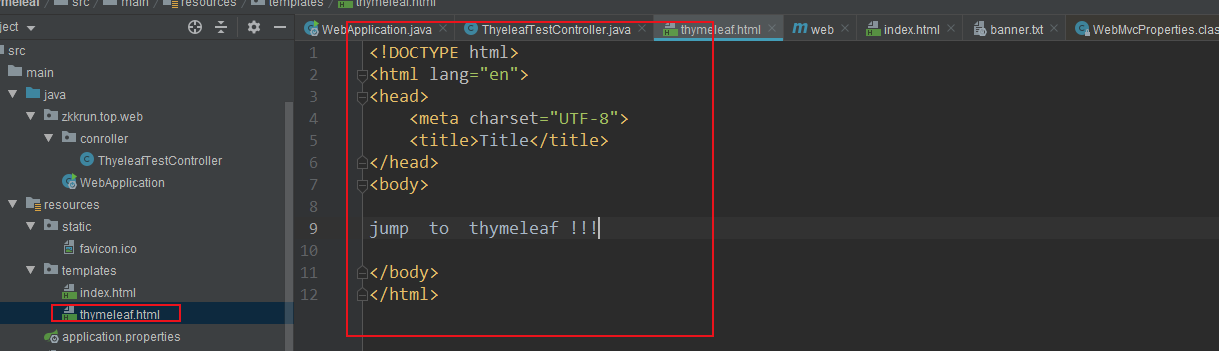
设置Thymeleaf页面跳转
新建一个controller

在templates下新建一个thymeleaf.html
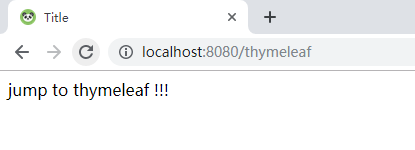
访问:http://localhost:8080/thymeleaf
Thymeleaf CRUD测试
基础环境准备:
- 引入数据库相关pom依赖
  <dependency>

            <groupId>org.mybatis.spring.boot</groupId>

            <artifactId>mybatis-spring-boot-starter</artifactId>

            <version>2.1.0</version>

        </dependency>

        <dependency>

            <groupId>mysql</groupId>

            <artifactId>mysql-connector-java</artifactId>

            <scope>runtime</scope>

        </dependency>
- 引入Bootstrap依赖
 <!--引入bootstrap-->

        <dependency>

            <groupId>org.webjars</groupId>

            <artifactId>bootstrap</artifactId>

            <version>4.0.0</version>

        </dependency>

  页面引用:

   <link  th:href="@{/webjars/bootstrap/4.0.0/css/bootstrap.css}" rel="stylesheet">
- 引入pageshelper插件
 <!-- https://mvnrepository.com/artifact/com.github.pagehelper/pagehelper-spring-boot-starter -->

        <dependency>

            <groupId>com.github.pagehelper</groupId>

            <artifactId>pagehelper-spring-boot-starter</artifactId>

            <version>1.2.5</version>

        </dependency>
配置yaml
pagehelper:

  helperDialect: mysql

  reasonable: true

  supportMethodsArguments: true

  pageSizeZero: false #pageSize=0
1.创建数据库表
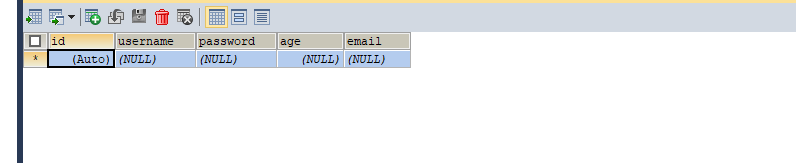
2.创建bean适配数据表
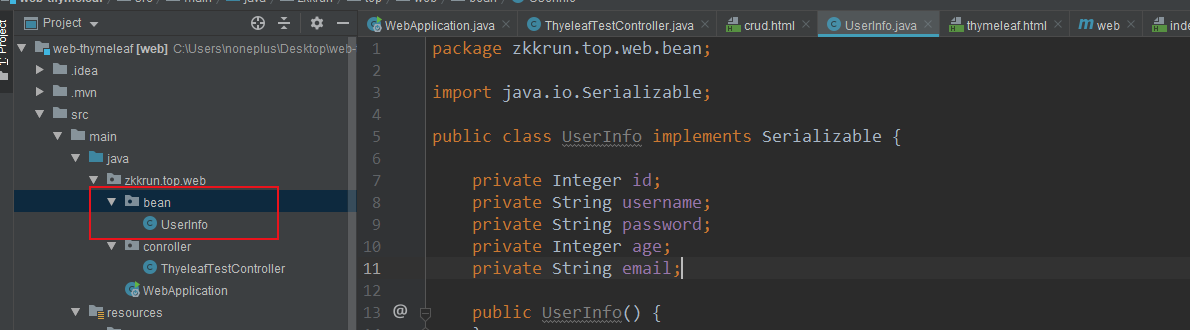
package zkkrun.top.web.bean;

import java.io.Serializable;

public class UserInfo implements Serializable {

    private Integer id;

    private String username;

    private String password;

    private Integer age;

    private String email;

    public UserInfo() {

    }

    public UserInfo(Integer id, String username, String password, Integer age, String email) {

        this.id = id;

        this.username = username;

        this.password = password;

        this.age = age;

        this.email = email;

    }

    public Integer getId() {

        return id;

    }

    public void setId(Integer id) {

        this.id = id;

    }

    public String getUsername() {

        return username;

    }

    public void setUsername(String username) {

        this.username = username;

    }

    public String getPassword() {

        return password;

    }

    public void setPassword(String password) {

        this.password = password;

    }

    public Integer getAge() {

        return age;

    }

    public void setAge(Integer age) {

        this.age = age;

    }

    public String getEmail() {

        return email;

    }

    public void setEmail(String email) {

        this.email = email;

    }

    @Override

    public String toString() {

        return "UserInfo{" +

                "id=" + id +

                ", username='" + username + '\'' +

                ", password='" + password + '\'' +

                ", age=" + age +

                ", email='" + email + '\'' +

                '}';

    }

}
3.yaml配置数据源
spring:

  datasource:

    #   数据源基本配置

    username: noneplus1

    password: Noneplus564925080!1

    driver-class-name: com.mysql.jdbc.Driver

    url: jdbc:mysql://47.113.6.247:3306/user?serverTimezone=UTC
4.创建Mapper接口,使用注解版Mybatis
package zkrun.top.web.mapper;

import org.apache.ibatis.annotations.Delete;

import org.apache.ibatis.annotations.Insert;

import org.apache.ibatis.annotations.Select;

import org.apache.ibatis.annotations.Update;

import org.springframework.stereotype.Repository;

import zkrun.top.web.bean.UserInfo;

@Repository

public interface UserInfoMapper {

    @Select("SELECT * FROM user_info WHERE id = #{id}")

    public UserInfo getUserById(Integer id);

    @Update("UPDATE user_info SET username=#{username},password=#{password},age=#{age},email=#{email} WHERE id=#{id}")

    public void updateUser(UserInfo userInfo);

    @Delete("DELETE FROM user_info WHERE id=#{id}")

    public void deleteUserById(Integer id);

    @Insert("INSERT INTO user_info(username,password,age,email) VALUES(#{username},#{password},#{age},#{email})")

    public void insertUser(UserInfo userInfo);

}
使用MapperScan扫描mapper接口所在包
@MapperScan("zkrun.top.web.mapper")
5.测试数据库
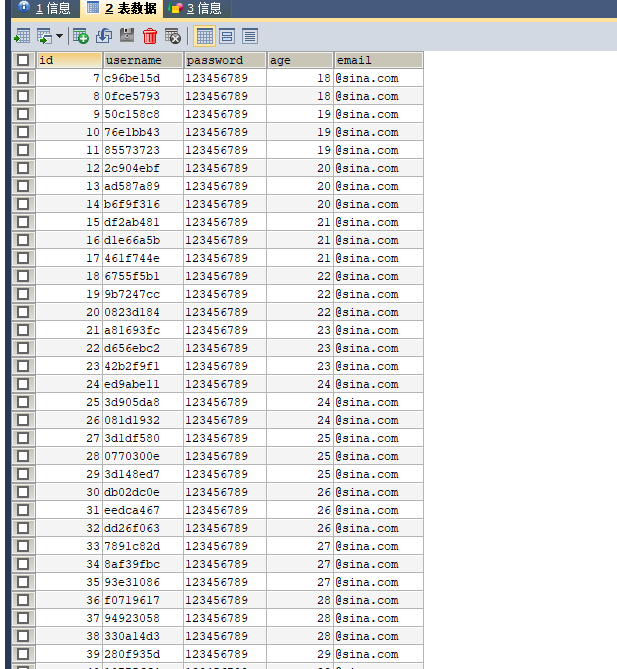
批量插入数据
package zkrun.top.web;

import org.junit.Test;

import org.junit.runner.RunWith;

import org.springframework.beans.factory.annotation.Autowired;

import org.springframework.boot.test.context.SpringBootTest;

import org.springframework.test.context.junit4.SpringRunner;

import zkrun.top.web.bean.UserInfo;

import zkrun.top.web.mapper.UserInfoMapper;

import java.util.UUID;

@RunWith(SpringRunner.class)

@SpringBootTest

public class WebApplicationTests {

    @Autowired

    UserInfoMapper userInfoMapper;

    @Test

    public void contextLoads() {

        UserInfo userInfo = userInfoMapper.getUserById(1);

        System.out.println(userInfo);

    }

    @Test

    public void insertDatas() {

        for(int i =0;i<1000;i++)

        {

            UserInfo userInfo = new UserInfo(i+2,UUID.randomUUID().toString().substring(0,8),"123456789",(Integer) (i+50)/3,"@sina.com");

            userInfoMapper.insertUser(userInfo);

        }

        System.out.println("插入成功!");

    }

}
显示信息列表
取消thymeleaf缓存
spring:

  thymeleaf:

    cache: false
ctrl+shift+F9刷新
1.UserInfoMapper增加SQL查询,获取所有信息
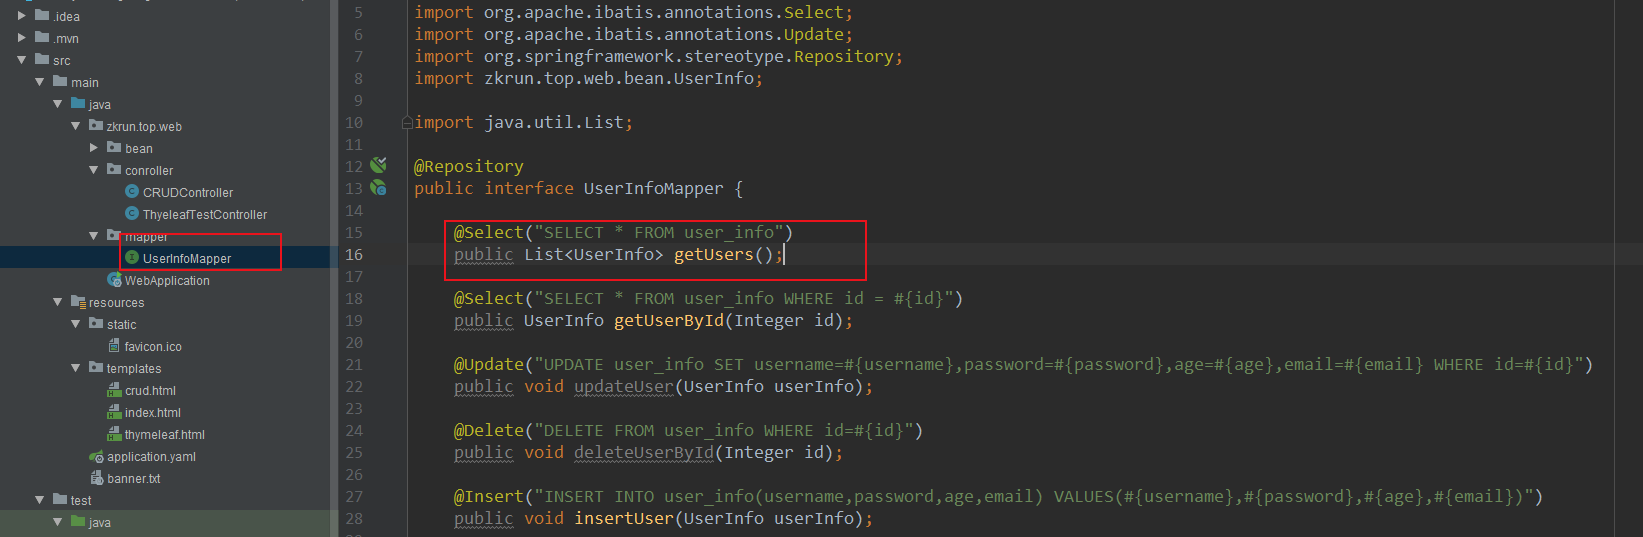
@Select("SELECT * FROM user_info")

    public List<UserInfo> getUsers();
2.创建CRUDController,使用PageHelper插件分页
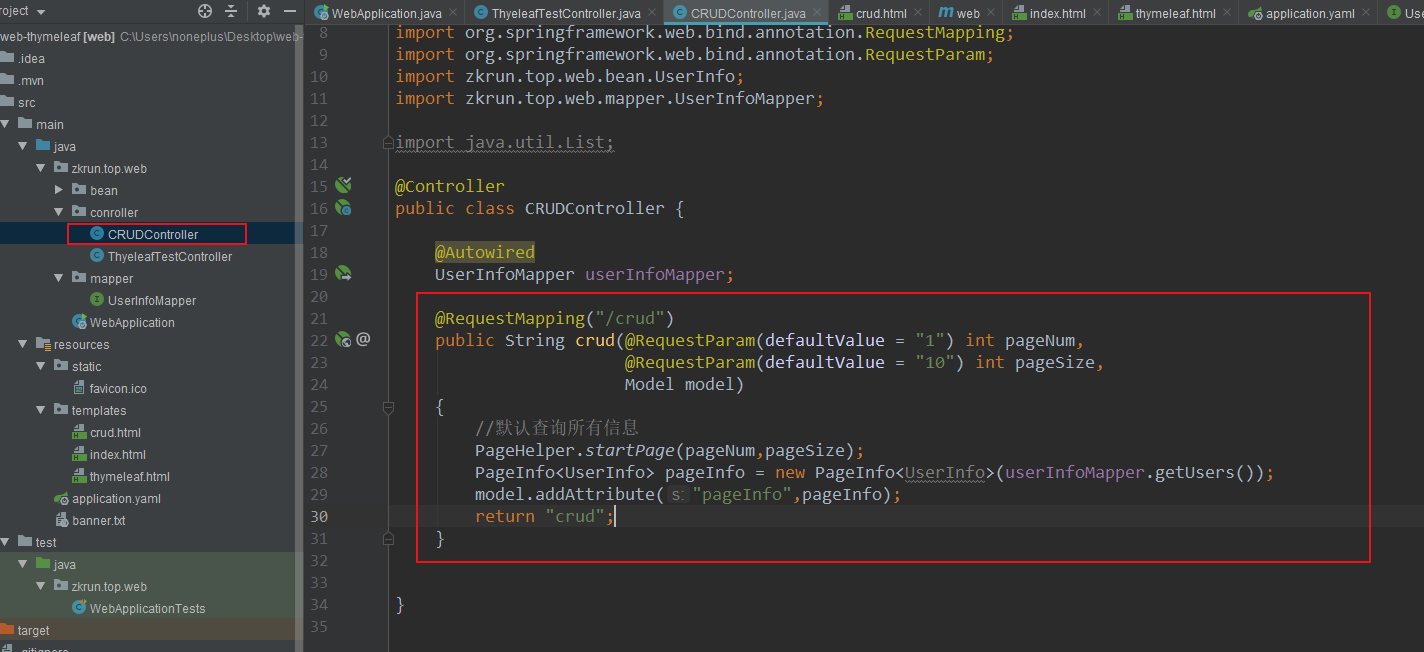
@Controller

public class CRUDController {

    @Autowired

    UserInfoMapper userInfoMapper;

    @RequestMapping("/crud")

    public String crud(@RequestParam(defaultValue = "1") int pageNum,

                       @RequestParam(defaultValue = "10") int pageSize,

                       Model model)

    {

        //默认查询所有信息

        PageHelper.startPage(pageNum,pageSize);

        PageInfo<UserInfo> pageInfo = new PageInfo<UserInfo>(userInfoMapper.getUsers());

        model.addAttribute("pageInfo",pageInfo);

        return "crud";

    }

}
- pageNum,pageSize表示起始页和每页显示的数据量,通过@RequestParam参数将默认值设为1和10,方便设置下一页和上一页跳转。
- PageHelper.startPage(pageNum,pageSize);设置起始页和每页显示的数据量
- PageInfo pageInfo = new PageInfo(userInfoMapper.getUsers());将查询到的数据赋给pageInfo对象
- model.addAttribute("pageInfo",pageInfo);将pageInfo传输进页面
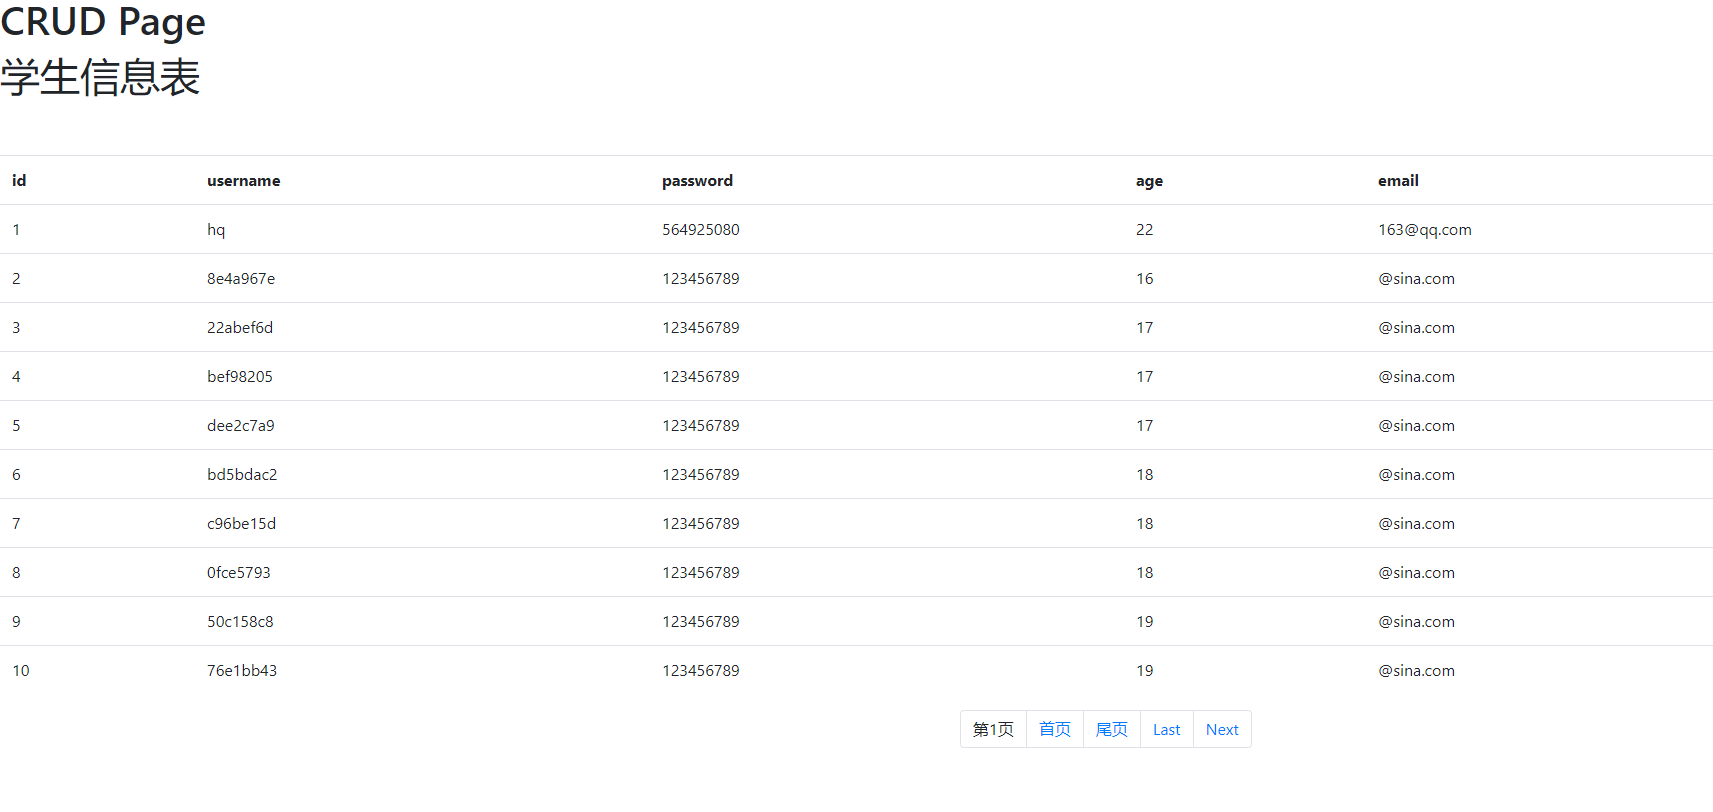
3.Thymeleaf通过表达式适配数据
<table class="table">

    <tr>

        <th>id</th>

        <th>username</th>

        <th>password</th>

        <th>age</th>

        <th>email</th>

    </tr>

    <tr th:each="user:${pageInfo.list}">

        <td th:text="${user.id}"></td>

        <td th:text="${user.username}"></td>

        <td th:text="${user.password}"></td>

        <td th:text="${user.age}"></td>

        <td th:text="${user.email}"></td>

    </tr>

</table>

<ul class="pagination" style="margin-left: 50%">

    <li class="page-item"><a class="page-link"><span th:text="第+${pageInfo.pageNum}+页"></span></a></li>

    <li class="page-item"><a class="page-link" th:href="@{/crud}">首页</a></li>

    <li class="page-item"><a class="page-link" th:href="@{/crud(pageNum=${pageInfo.pages})}">尾页</a></li>

    <li class="page-item"><a class="page-link" th:href="@{/crud(pageNum=${pageInfo.prePage})}">Last</a></li>

    <li class="page-item"><a class="page-link" th:href="@{/crud(pageNum=${pageInfo.getNextPage()})}">Next</a></li>

</ul>
访问http://localhost:8080/crud
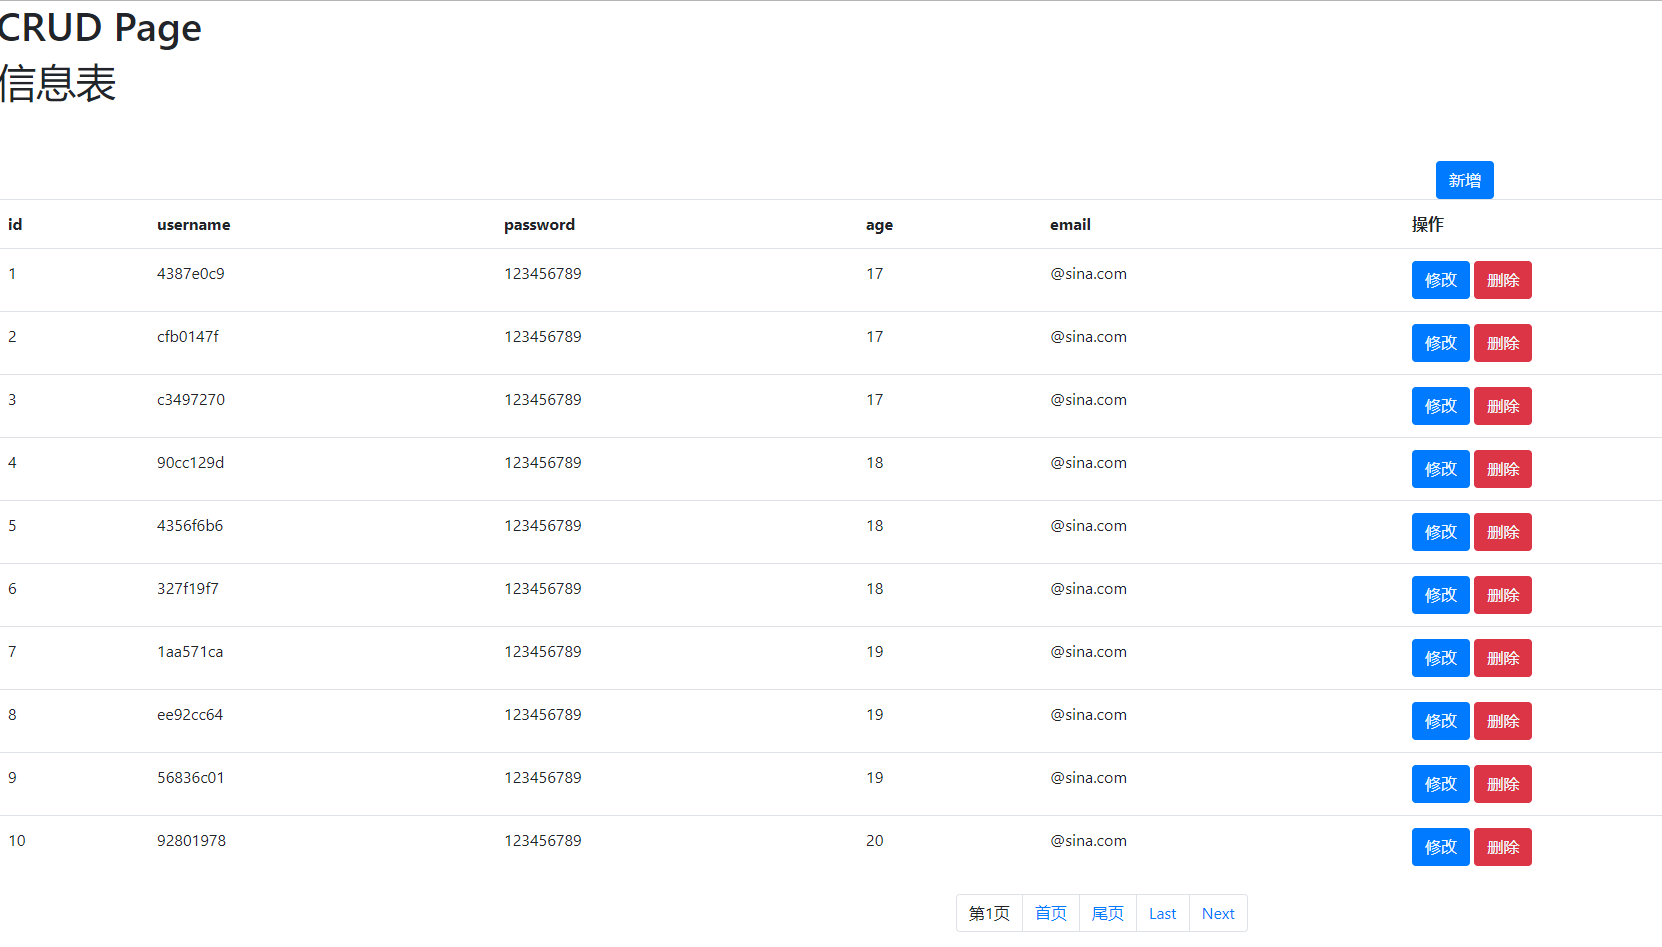
删除信息
Controller
//删除

    @RequestMapping("/delete")

    public String delete(int id) {

        userInfoMapper.deleteUserById(id);

        return "redirect:/user";

    }
UserInfoMapper
 @Delete("DELETE FROM user_info WHERE id=#{id}")

    public void deleteUserById(Integer id);
在页面添加一个按钮
<button type="button" class="btn btn-danger"><a style="color: aliceblue" th:href="@{/delete(id=${user.id})}">删除</a></button>
修改和添加信息
先跳转到修改或者添加页面,再进行表单提交
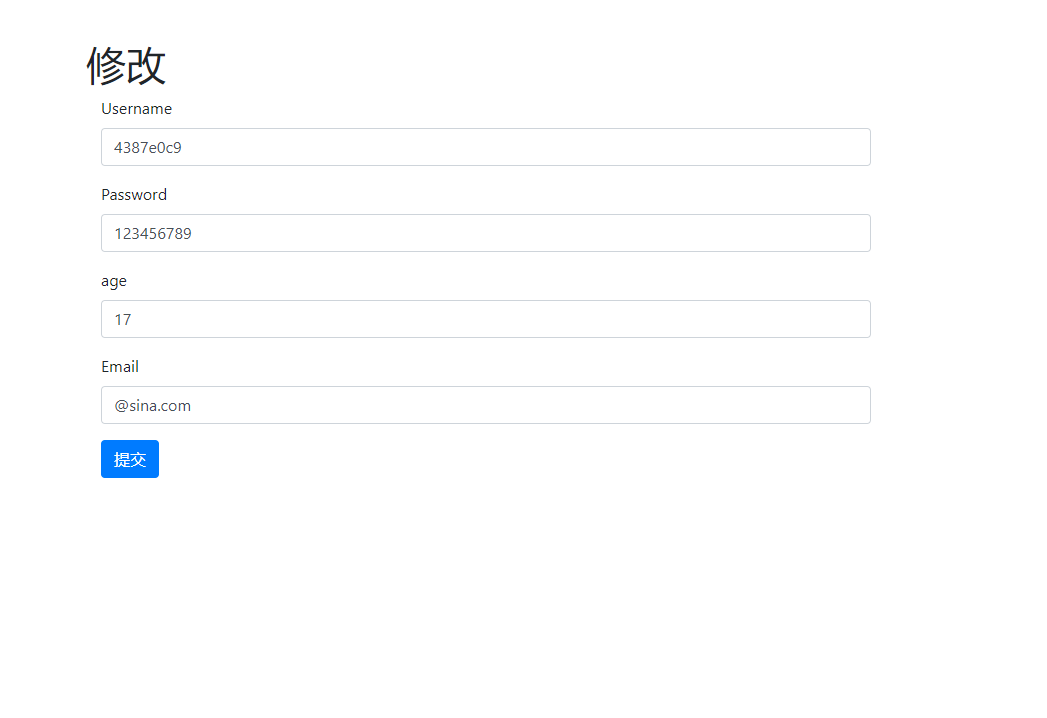
修改
//点击修改按钮,跳转到修改页面,回显信息

    @RequestMapping("/modify")

    public String modify(int id ,Model model) {

        model.addAttribute("OneInfo",userInfoMapper.getUserById(id));

        return "modify";

    }

    //提交修改信息

    @RequestMapping("/modifyCommit")

    public String modify(UserInfo userInfo) {

        System.out.println(userInfo);

        userInfoMapper.updateUser(userInfo);

        System.out.println("修改提交.");

        return "redirect:/user";

    }
主页添加一个修改按钮
<button type="button" class="btn btn-primary"><a style="color: aliceblue" th:href="@{/modify(id=${user.id})}">修改</a></button>
响应上述第一个请求,跳转到modify页面
modify页面
<!DOCTYPE html>

<html lang="en" xmlns:th="http://www.thymeleaf.org">

<head>

    <meta charset="UTF-8">

    <title>modify</title>

    <link  th:href="@{/webjars/bootstrap/4.0.0/css/bootstrap.css}" rel="stylesheet">

</head>

<body>

<div style="width: 50%;margin-left: 25%;margin-top: 5%">

    <h1>修改</h1>

    <form class="form-horizontal" th:action="@{/modifyCommit}">

        <input name="id" class="form-control"  th:value="${OneInfo.getId()}" style="display: none">

        <div class="form-group">

            <label  class="col-sm-2 control-label">Username</label>

            <div class="col-sm-10">

                <input name="username" class="form-control" id="Username" placeholder="Username" th:value="${OneInfo.getUsername()}">

            </div>

        </div>

        <div class="form-group">

            <label  class="col-sm-2 control-label">Password</label>

            <div class="col-sm-10">

                <input name="password" class="form-control" id="inputPassword3" placeholder="Password" th:value="${OneInfo.getPassword()}">

            </div>

        </div>

        <div class="form-group">

            <label  class="col-sm-2 control-label">age</label>

            <div class="col-sm-10">

                <input name="age" class="form-control" id="age" placeholder="Age" th:value="${OneInfo.getAge()}">

            </div>

        </div>

        <div class="form-group">

            <label  class="col-sm-2 control-label">Email</label>

            <div class="col-sm-10">

                <input name="email" class="form-control" id="inputEmail3" placeholder="Email" th:value="${OneInfo.getEmail()}">

            </div>

        </div>

        <div class="form-group">

            <div class="col-sm-offset-2 col-sm-10">

                <button type="submit" class="btn btn-primary">提交</button>

            </div>

        </div>

    </form>

</div>

</body>

</html>
其中modify表的action响应修改表的提交操作
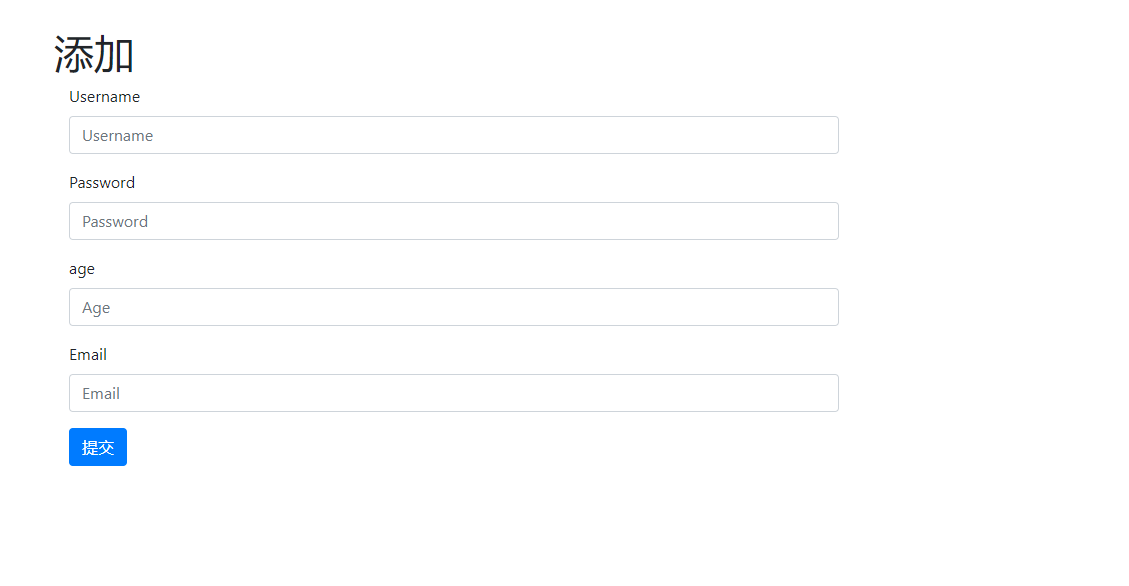
添加
同理,跳转到添加页面,再进行表单提交
controller
    //添加:1.跳转到添加页面

    @RequestMapping("/add1")

    public String add1() {

        return "add";

    }

    //添加 : 2.提交信息

    @RequestMapping("/add2")

    public String add2(UserInfo userInfo) {

        System.out.println(userInfo);

        userInfoMapper.insertUser(userInfo);

        return "redirect:/user";

    }
添加一个按钮
<button style="margin-left: 75%" type="button" class="btn btn-primary"><a style="color: aliceblue" th:href="@{/add1}">新增</a></button>
添加页面(对比修改页面不需要回显)
<!DOCTYPE html>

<html lang="en" xmlns:th="http://www.thymeleaf.org">

<head>

    <meta charset="UTF-8">

    <title>add</title>

    <link  th:href="@{/webjars/bootstrap/4.0.0/css/bootstrap.css}" rel="stylesheet">

</head>

<body>

<div style="width: 50%;margin-left: 25%;margin-top: 5%">

<h1>添加</h1>

<form class="form-horizontal" th:action="@{/add2}">

    <div class="form-group">

        <label  class="col-sm-2 control-label">Username</label>

        <div class="col-sm-10">

            <input name="username" class="form-control" id="Username" placeholder="Username">

        </div>

    </div>

    <div class="form-group">

        <label  class="col-sm-2 control-label">Password</label>

        <div class="col-sm-10">

            <input name="password" class="form-control" id="inputPassword3" placeholder="Password">

        </div>

    </div>

    <div class="form-group">

        <label  class="col-sm-2 control-label">age</label>

        <div class="col-sm-10">

            <input name="age" class="form-control" id="age" placeholder="Age">

        </div>

    </div>

    <div class="form-group">

        <label  class="col-sm-2 control-label">Email</label>

        <div class="col-sm-10">

            <input name="email" class="form-control" id="inputEmail3" placeholder="Email">

        </div>

    </div>

    <div class="form-group">

        <div class="col-sm-offset-2 col-sm-10">

            <button type="submit" class="btn btn-primary">提交</button>

        </div>

    </div>

</form>

</div>

</body>

</html>
测试
插入500条测试数据
 @Test

    public void insertDatas() {

        System.out.println("开始插入...");

        for(int i =1;i<500;i++)

        {

            UserInfo userInfo = new UserInfo(i,UUID.randomUUID().toString().substring(0,8),"123456789",(Integer) (i+50)/3,"@sina.com");

            userInfoMapper.insertUser(userInfo);

        }

        System.out.println("插入成功!");

    }


显示信息列表
修改

添加

[SpringBoot——Web开发(使用Thymeleaf模板引擎)]的更多相关文章
- SpringBoot Web开发(4) Thymeleaf模板与freemaker
SpringBoot Web开发(4) Thymeleaf模板与freemaker 一.模板引擎 常用得模板引擎有JSP.Velocity.Freemarker.Thymeleaf SpringBoo ...
- Spring Boot Web开发与thymeleaf模板引擎
简介: 使用Springboot应用,选中需要的模块, Spring已经默认将场景配置好了,只需在配置文件中少量配置就可以运行起来 自己编写业务代码 自动配置原理 这个场景Springboot帮我们配 ...
- Spring Boot Web开发中Thymeleaf模板引擎的使用
这里使用的是idea 1.新建Spring Boot项目 File-->New-->Project...,然后选择左边的Spring Initializr-->Next,可根据自己的 ...
- SpringBoot入门篇--使用Thymeleaf模板引擎进行页面的渲染
在做WEB开发的时候,我们不可避免的就是在前端页面之间进行跳转,中间进行数据的查询等等操作.我们在使用SpringBoot之前包括我在内其实大部分都是用的是JSP页面,可以说使用的已经很熟悉.但是我们 ...
- JavaEE开发之SpringBoot整合MyBatis以及Thymeleaf模板引擎
上篇博客我们聊了<JavaEE开发之SpringBoot工程的创建.运行与配置>,从上篇博客的内容我们不难看出SpringBoot的便捷.本篇博客我们继续在上篇博客的基础上来看一下Spri ...
- SpringBoot项目的前端+thymeleaf模板引擎
SpringBoot项目创建之后,后台的框架是SpringMVC.但前端的resource和template目录都是空的.这个时候需要创建前台页面. 习惯上,我们会创建JSP,但是,SpringBoo ...
- springboot笔记06——使用Thymeleaf模板引擎
前言 Springboot 推荐使用Thymeleaf做视图层.Thymeleaf支持 html 原型,然后在 html 标签里增加额外的属性来达到模板+数据的展示方式.浏览器解释 html 时会忽略 ...
- (二)SpringBoot基础篇- 静态资源的访问及Thymeleaf模板引擎的使用
一.描述 在应用系统开发的过程中,不可避免的需要使用静态资源(浏览器看的懂,他可以有变量,例:HTML页面,css样式文件,文本,属性文件,图片等): 并且SpringBoot内置了Thymeleaf ...
- (二)SpringBoot2.0基础篇- 静态资源的访问及Thymeleaf模板引擎的使用
一.描述 在应用系统开发的过程中,不可避免的需要使用静态资源(浏览器看的懂,他可以有变量,例:HTML页面,css样式文件,文本,属性文件,图片等): 并且SpringBoot内置了Thymeleaf ...
- SpringBoot:2.SpringBoot整合Thymeleaf模板引擎渲染web视图
在Web开发过程中,Spring Boot可以通过@RestController来返回json数据,那如何渲染Web页面?Spring Boot提供了多种默认渲染html的模板引擎,主要有以下几种: ...
随机推荐
- Unity/C#基础复习(5) 之 浅析观察者、中介者模式在游戏中的应用与delegate原理
参考资料 [1] <Unity 3D脚本编程 使用C#语言开发跨平台游戏>陈嘉栋著 [2] @张子阳[C#中的委托和事件 - Part.1] http://www.tracefact.ne ...
- Java利用Apache poi导出图表
jar compile('org.apache.poi:poi:4.0.1') compile('org.apache.poi:poi-scratchpad:4.0.1') compile('org. ...
- JS-对象的深浅拷贝及其新增方法测试
我们在了解数据类型的时候,都知道一般的字符,数值,undefined和布尔值等都为一般数据类型,它们在进行数据传输的时候,进行的是值传递,当我们修改新数据,是不影响老数据的.但是我们今天要讲的是数据类 ...
- Leetcode之深度优先搜索(DFS)专题-329. 矩阵中的最长递增路径(Longest Increasing Path in a Matrix)
Leetcode之深度优先搜索(DFS)专题-329. 矩阵中的最长递增路径(Longest Increasing Path in a Matrix) 深度优先搜索的解题详细介绍,点击 给定一个整数矩 ...
- MySQL 5.7 的安装历程
mysql5.7零基础入门级的安装教程: 安装环境:Windows 10, 64 位(联想拯救者R720) 安装版本:mysql-5.7.25-winx64 一.下载 1.进入官网 首先,下载MySQ ...
- 深入剖析PHP7内核源码(二)- PHP变量容器
简介 PHP的变量使用起来非常方便,其基本结构是底层实现的zval,PHP7采用了全新的zval,由此带来了非常大的性能提升,本文重点分析PHP7的zval的改变. PHP5时代的ZVAL typed ...
- spring boot application 配置详情
# =================================================================== # COMMON SPRING BOOT PROPERTIE ...
- JSONP跨域的script标签请求为什么不受同源策略的限制?
在复习跨域的时候,复习到了JSONP跨域,大家都知道JSONP跨域是通过动态创建script标签,然后通过其src属性进行跨域请求的,前端需要一个数据处理的回调函数,而服务端需要配合执行回调函数,放入 ...
- Jmeter 从数据库查询多个字段,依次传给登录接口怎么实现?
问题背景: 博文“Jmeter 如何把数据库的数据依次获取作为参数传入下一个请求?附栗子”某天有人留言如下: 看了下当时写的文章,如果从数据库查询多个字段,依次传给登录接口,确实不能合理实现,所以,特 ...
- 从零开始开发IM(即时通讯)服务端
好消息:IM1.0.0版本已经上线啦,支持特性: 私聊发送文本/文件 已发送/已送达/已读回执 支持使用ldap登录 支持接入外部的登录认证系统 提供客户端jar包,方便客户端开发 github链接: ...