[Tensorflow] Object Detection API - prepare your training data
From: TensorFlow Object Detection API
This chapter help you to train your own model to identify objects required.
1. Data
1.1 Get your own data
- 标准的范例,从ImageNet上获取数据集
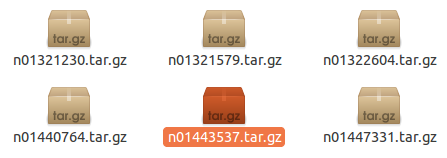
Get your own data from ImageNet
Download tiny-imagenet-200.zip, which is smaller than original monster. (150G)
- 图片格式转化
We need .png but not .jpg here, so
cd ./images
ls -1 *.jpg | xargs -n 1 bash -c 'convert "$0" "${0%.jpg}.png"'
1.2 Create your Annotation.
- 获取标记记录
Sol 01:
# 找数据集上现成的对应的标记框记录
Find its xml version from: http://image-net.org/download-bboxes

Sol 02:
# 自己写标记记录
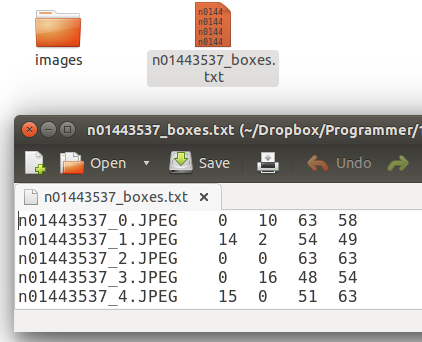
Write script to create your xml for Annotation from *_box.txt. This is not a complex structure as following.
<annotation>

    <folder>n02119789</folder>

    <filename>n02119789_122</filename>

    <source>

        <database>ImageNet database</database>

    </source>

    <size>

        <width>200</width>

        <height>191</height>

        <depth>3</depth>

    </size>

    <segmented>0</segmented>

    <object>

        <name>n02119789</name>

        <pose>Unspecified</pose>

        <truncated>0</truncated>

        <difficult>0</difficult>

        <bndbox>

            <xmin>17</xmin>

            <ymin>16</ymin>

            <xmax>181</xmax>

            <ymax>181</ymax>

        </bndbox>

    </object>

</annotation>
Sol 03:
# 通过工具辅助生成标记框记录
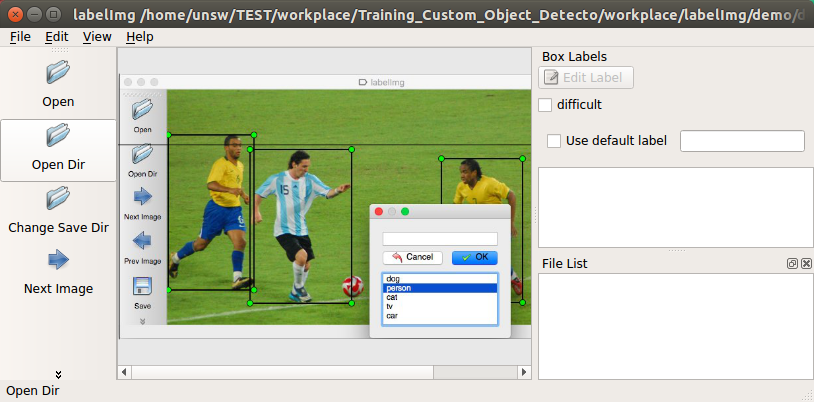
Label them manually. This is a crazy way to create your train data (100-500 images) if you have enough time.
sudo apt-get install pyqt5-dev-tools

sudo pip3 install lxml
git clone https://github.com/tzutalin/labelImg

unsw@unsw-UX303UB$ make qt5py3

unsw@unsw-UX303UB$ python3 labelImg.py
- 完整的数据集
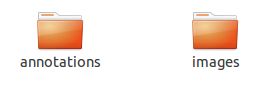
Finally, this is what we need.
- .csv 格式的数据集
Similarly, we need .csv but not .xml here, so
Download: https://raw.githubusercontent.com/datitran/raccoon_dataset/master/xml_to_csv.py
import os
import glob
import pandas as pd
import xml.etree.ElementTree as ET def xml_to_csv(path):
xml_list = []
for xml_file in glob.glob(path + '/*.xml'):
tree = ET.parse(xml_file)
root = tree.getroot()
for member in root.findall('object'):
value = (root.find('filename').text,
int(root.find('size')[0].text),
int(root.find('size')[1].text),
member[0].text,
int(member[4][0].text),
int(member[4][1].text),
int(member[4][2].text),
int(member[4][3].text)
)
xml_list.append(value)
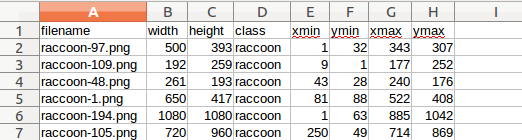
column_name = ['filename', 'width', 'height', 'class', 'xmin', 'ymin', 'xmax', 'ymax']
xml_df = pd.DataFrame(xml_list, columns=column_name)
return xml_df def main():
image_path = os.path.join(os.getcwd(), 'annotations')
xml_df = xml_to_csv(image_path)
xml_df.to_csv('raccoon_labels.csv', index=None)
print('Successfully converted xml to csv.') main()
xml_to_csv.py
unsw@unsw-UX303UB$ python xml_to_csv.py
Successfully converted xml to csv.

unsw@unsw-UX303UB$ ls

annotations  images  Others  raccoon_labels.csv  xml_to_csv.py
This is final bounding box info.
2. Cascade Classifier Training
一、相关方案
Ref: https://docs.opencv.org/2.4/doc/user_guide/ug_traincascade.html
- 接口
THE OPENCV TUTORIAL FOR TRAINING CASCADE CLASSIFIERS is a pretty good place to start. It explains the 2 binary utilities used in the process (opencv_createsamples and opencv_traincascade),
and all of their command line arguments and options, but it doesn’t really give an example of a flow to follow, nor does it explain all the possible uses for the opencv_createsamplesutility.
- 方案一
On the other hand, NAOTOSHI SEO’S TUTORIAL is actually quite thorough and explains the 4 different uses for the opencv_createsamples utility.
THORSTEN BALL WROTE A TUTORIAL using Naotoshi Seo’s scripts to train a classifier to detect bananas, but it requires running some perl scripts and compiling some C++… too much work…
- 方案二
Jeff also has some NICE NOTES about how he prepared his data, and a SCRIPT for automatically iterating over a couple of options for the 2 utilities.
The way we did it was inspired by all of these tutorials, with some minor modifications and optimizations.
二、Process
- 是什么
Ref: https://processing.org/download/
一种语言,处理图像,提供了更为亲和的方式。
/* implement */
[Tensorflow] Object Detection API - prepare your training data的更多相关文章
- [Tensorflow] Object Detection API - build your training environment
一.前期准备 Prepare protoc Download Protocol Buffers Create folder: protoc and unzip it. unsw@unsw-UX303U ...
- Tensorflow object detection API 搭建属于自己的物体识别模型
一.下载Tensorflow object detection API工程源码 网址:https://github.com/tensorflow/models,可通过Git下载,打开Git Bash, ...
- [Tensorflow] Object Detection API - predict through your exclusive model
开始预测 一.训练结果 From: Testing Custom Object Detector - TensorFlow Object Detection API Tutorial p.6 训练结果 ...
- TensorFlow object detection API应用
前一篇讲述了TensorFlow object detection API的安装与配置,现在我们尝试用这个API搭建自己的目标检测模型. 一.准备数据集 本篇旨在人脸识别,在百度图片上下载了120张张 ...
- 使用TensorFlow Object Detection API+Google ML Engine训练自己的手掌识别器
上次使用Google ML Engine跑了一下TensorFlow Object Detection API中的Quick Start(http://www.cnblogs.com/take-fet ...
- 基于TensorFlow Object Detection API进行迁移学习训练自己的人脸检测模型(二)
前言 已完成数据预处理工作,具体参照: 基于TensorFlow Object Detection API进行迁移学习训练自己的人脸检测模型(一) 设置配置文件 新建目录face_faster_rcn ...
- Install Tensorflow object detection API in Anaconda (Windows)
This blog is to explain how to install Tensorflow object detection API in Anaconda in Windows 10 as ...
- TensorFlow object detection API
cloud执行:https://github.com/tensorflow/models/blob/master/research/object_detection/g3doc/running_pet ...
- Tensorflow object detection API 搭建物体识别模型(四)
四.模型测试 1)下载文件 在已经阅读并且实践过前3篇文章的情况下,读者会有一些文件夹.因为每个读者的实际操作不同,则文件夹中的内容不同.为了保持本篇文章的独立性,制作了可以独立运行的文件夹目标检测. ...
随机推荐
- B - 可能的路径(gcd变形)
https://vjudge.net/contest/218366#problem/B 要不是在数学题专题里,我估计就盲目搜索了.10^18范围1s应该过不去. 再细看能感觉到是gcd的变形,但是具体 ...
- CentOS下bond网卡聚合与网桥结合
需求:服务器配置bond多网卡聚合,然后KVM需要使用到网桥,那么需要做到网桥绑定到bond网卡上. 实现核心: 1.bond配置参考:https://www.cnblogs.com/EasonJim ...
- 亲测GO环境搭建,理解go build、go install、go get
GO下载: GO语言中文网下载:https://studygolang.com/dl Mac下直接通过brew instatll go指令即可完成下载安装 GO环境变量配置: $GOROOT=/usr ...
- Android Studio中Run按钮是灰色的问题解决
打开一个Android Studio工程,发现Run按钮是灰色的 看了网上的一些解决方法,都是说要配置Configuration :比如链接:http://blog.csdn.net/purple ...
- linux下安装python dlib依赖
dlib是主要用于机器学习的库,封装了机器学习算法,可以非常方便的实现比如人脸识别,车辆识别,物体检测以其他很多功能,dlib默认使用C++进行开发,另外图像识别有一部分支持python接口开发,上手 ...
- 推荐一款在线编辑JSON的网站
推荐一款在线编辑JSON的网站 https://github.com/DavidDurman/FlexiJsonEditor 开源地址:https://github.com/DavidDurman/F ...
- hadoop from rookie to ninja - 1. Basic Architecture(基础架构)
1. Daemons(守护进程) 新老架构 老的: Apache Hadoop 1.x (MRv1) 新的: Apache Hadoop 2.x (YARN)-Yet Another Resour ...
- C# System.Collections.SortedList
using System; using System.Collections; public class SamplesSortedList { public static void Main() { ...
- How to extract a complete list of extension types within a directory?
Open the PowerShell Tool and Run the below command: Get-Childitem "D:\testfolder\" -Recurs ...
- PHP测试Mysql数据库连接
<?php $link = mysqli_connect('localhost', 'username', 'password'); if (!$link) { die('Could not c ...