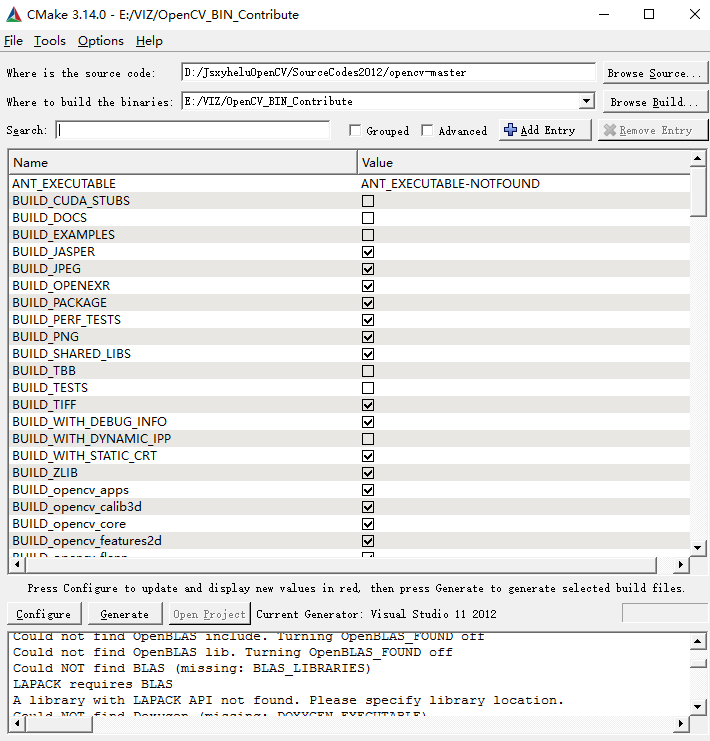
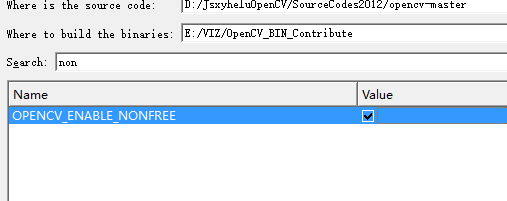
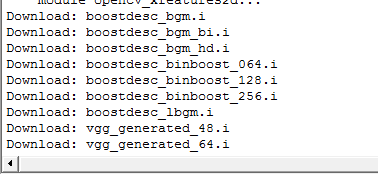
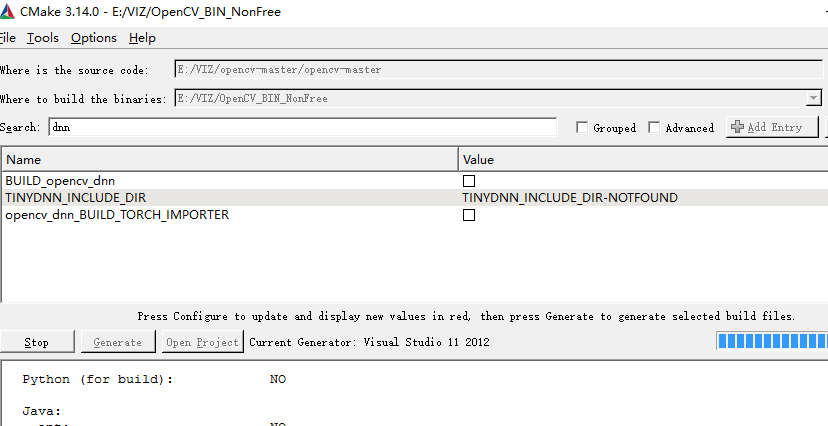
基于OpenCV做“三维重建”(0)-- OpenCV3.2+VIZ6.3.0在vs2012下的编译和使用


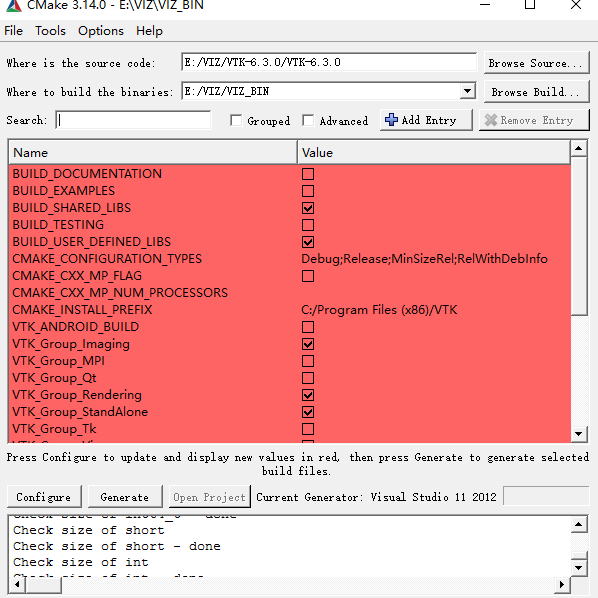

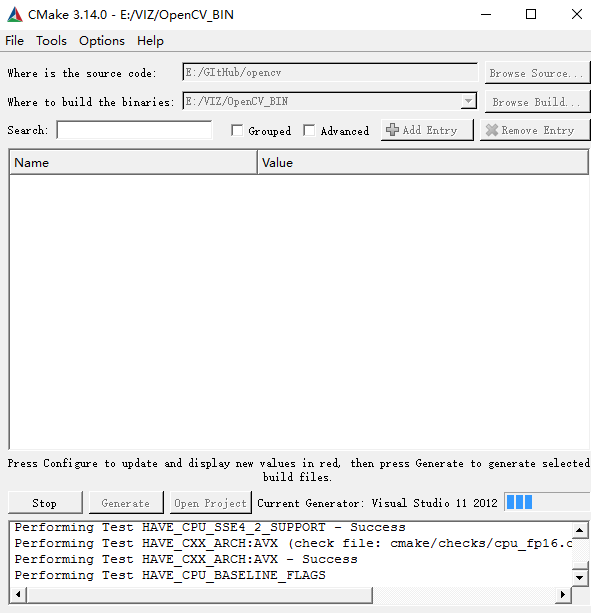


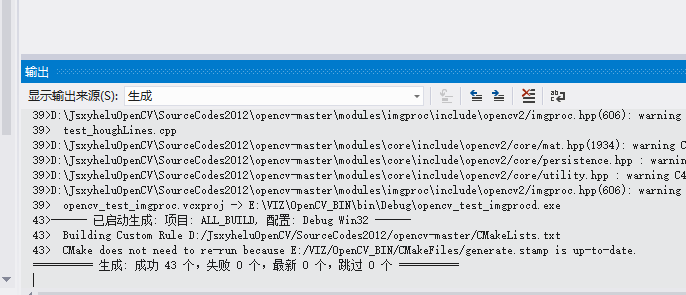


#include "stdafx.h"
#include <opencv2/viz/vizcore.hpp>
#include <opencv2/calib3d/calib3d.hpp>
#include <iostream>

using namespace cv;
using namespace std;

/**
* @function main
*/
int main()
{
    /// Create a window
    viz::Viz3d myWindow("Coordinate Frame");
    /// Add coordinate axes
    myWindow.showWidget("Coordinate Widget", viz::WCoordinateSystem());
    /// Add line to represent (1,1,1) axis
    viz::WLine axis(Point3f(-1.0f, -1.0f, -1.0f), Point3f(1.0f, 1.0f, 1.0f));
    axis.setRenderingProperty(viz::LINE_WIDTH, 4.0);
    myWindow.showWidget("Line Widget", axis);
    /// Construct a cube widget
    viz::WCube cube_widget(Point3f(0.5, 0.5, 0.0), Point3f(0.0, 0.0, -0.5), true, viz::Color::blue());
    cube_widget.setRenderingProperty(viz::LINE_WIDTH, 4.0);
    /// Display widget (update if already displayed)
    myWindow.showWidget("Cube Widget", cube_widget);
    /// Rodrigues vector
    Mat rot_vec = Mat::zeros(1, 3, CV_32F);
    float translation_phase = 0.0, translation = 0.0;
    while (!myWindow.wasStopped())
    {
        //* Rotation using rodrigues
        /// Rotate around (1,1,1)
        rot_vec.at<float>(0, 0) += CV_PI * 0.01f;
        rot_vec.at<float>(0, 1) += CV_PI * 0.01f;
        rot_vec.at<float>(0, 2) += CV_PI * 0.01f;
        /// Shift on (1,1,1)
        translation_phase += CV_PI * 0.01f;
        translation = sin(translation_phase);
        Mat rot_mat;
        Rodrigues(rot_vec, rot_mat);
        /// Construct pose
        Affine3f pose(rot_mat, Vec3f(translation, translation, translation));
        myWindow.setWidgetPose("Cube Widget", pose);
        myWindow.spinOnce(1, true);
    }
    return 0;
}
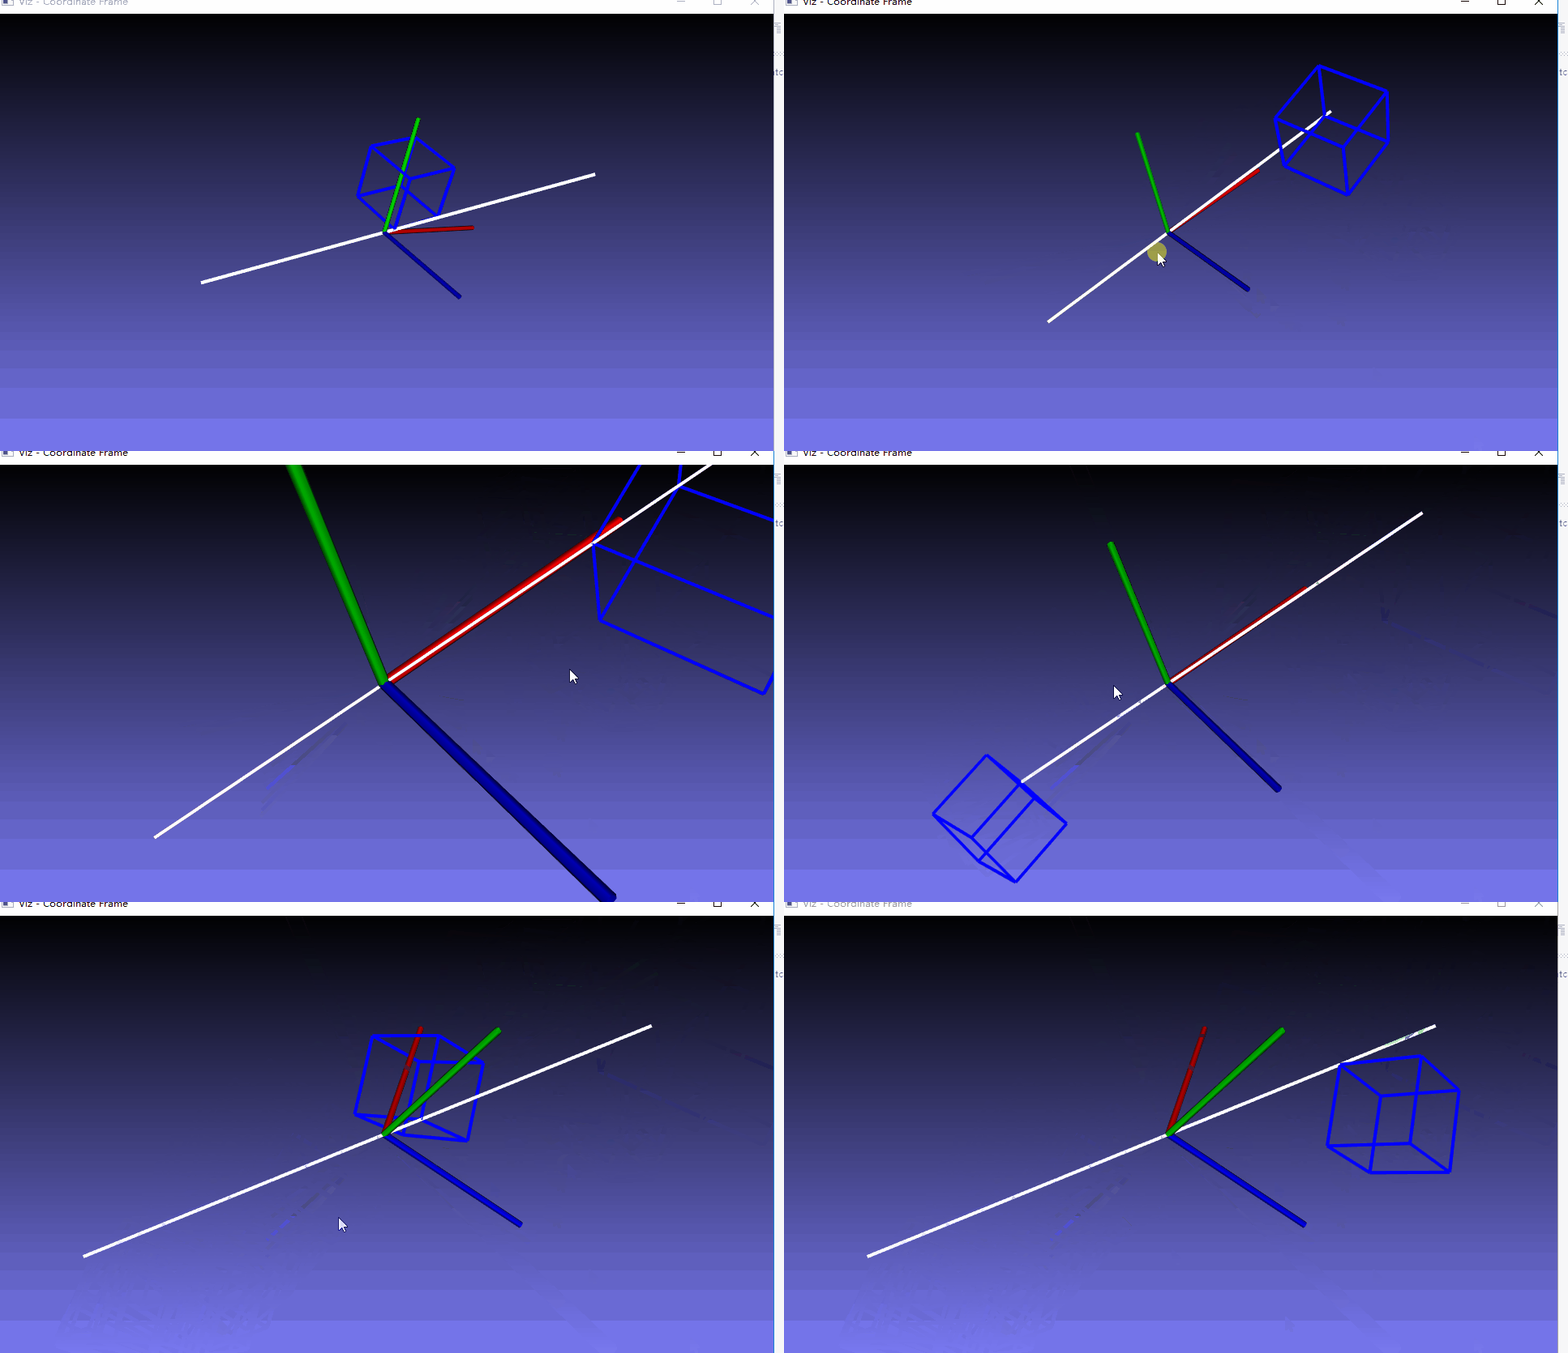


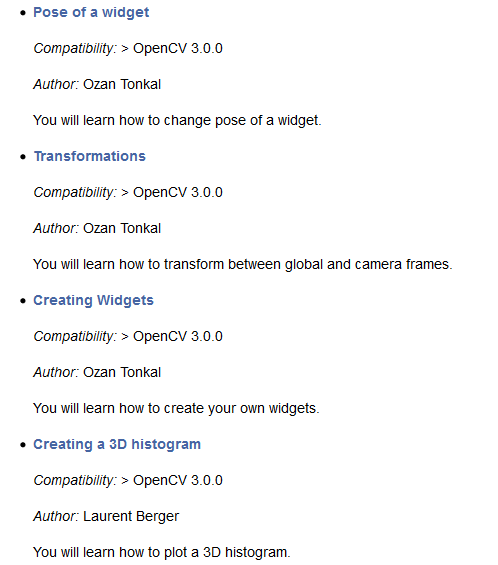
Explanation
Here is the general structure of the program:
- Create a visualization window.
viz::Viz3d myWindow("Coordinate Frame");
- Show coordinate axes in the window using CoordinateSystemWidget.
myWindow.showWidget("Coordinate Widget", viz::WCoordinateSystem());
- Display a line representing the axis (1,1,1).
viz::WLine axis(Point3f(-1.0f,-1.0f,-1.0f), Point3f(1.0f,1.0f,1.0f));
axis.setRenderingProperty(viz::LINE_WIDTH, 4.0);
myWindow.showWidget("Line Widget", axis); - Construct a cube.
viz::WCube cube_widget(Point3f(0.5,0.5,0.0), Point3f(0.0,0.0,-0.5), true, viz::Color::blue());
cube_widget.setRenderingProperty(viz::LINE_WIDTH, 4.0);
myWindow.showWidget("Cube Widget", cube_widget); - Create rotation matrix from rodrigues vector
rot_vec.at<float>(0,0) += CV_PI * 0.01f;
rot_vec.at<float>(0,1) += CV_PI * 0.01f;
rot_vec.at<float>(0,2) += CV_PI * 0.01f;
...
Mat rot_mat;
Rodrigues(rot_vec, rot_mat); - Use Affine3f to set pose of the cube.
- Animate the rotation using wasStopped and spinOnce
while(!myWindow.wasStopped())
{
...
myWindow.spinOnce(1, true);
}
}
Explanation
Here is the general structure of the program:
- Create a visualization window.
viz::Viz3d myWindow("Transformations");
- Get camera pose from camera position, camera focal point and y direction.
Point3f cam_pos(3.0f,3.0f,3.0f), cam_focal_point(3.0f,3.0f,2.0f), cam_y_dir(-1.0f,0.0f,0.0f);
Affine3f cam_pose = viz::makeCameraPose(cam_pos, cam_focal_point, cam_y_dir); - Obtain transform matrix knowing the axes of camera coordinate system.
Affine3f transform = viz::makeTransformToGlobal(Vec3f(0.0f,-1.0f,0.0f), Vec3f(-1.0f,0.0f,0.0f), Vec3f(0.0f,0.0f,-1.0f), cam_pos);
- Create a cloud widget from bunny.ply file
Mat bunny_cloud = cvcloud_load();
viz::WCloud cloud_widget(bunny_cloud, viz::Color::green()); - Given the pose in camera coordinate system, estimate the global pose.
Affine3f cloud_pose = Affine3f().translate(Vec3f(0.0f,0.0f,3.0f));
Affine3f cloud_pose_global = transform * cloud_pose; - If the view point is set to be global, visualize camera coordinate frame and viewing frustum.
if (!camera_pov)
{
viz::WCameraPosition cpw(0.5); // Coordinate axes
viz::WCameraPosition cpw_frustum(Vec2f(0.889484, 0.523599)); // Camera frustum
myWindow.showWidget("CPW", cpw, cam_pose);
myWindow.showWidget("CPW_FRUSTUM", cpw_frustum, cam_pose);
} - Visualize the cloud widget with the estimated global pose
myWindow.showWidget("bunny", cloud_widget, cloud_pose_global);
- If the view point is set to be camera's, set viewer pose to cam_pose.
if (camera_pov)
myWindow.setViewerPose(cam_pose);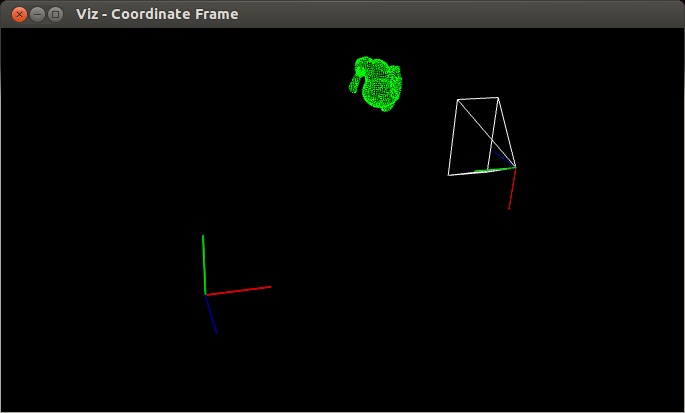
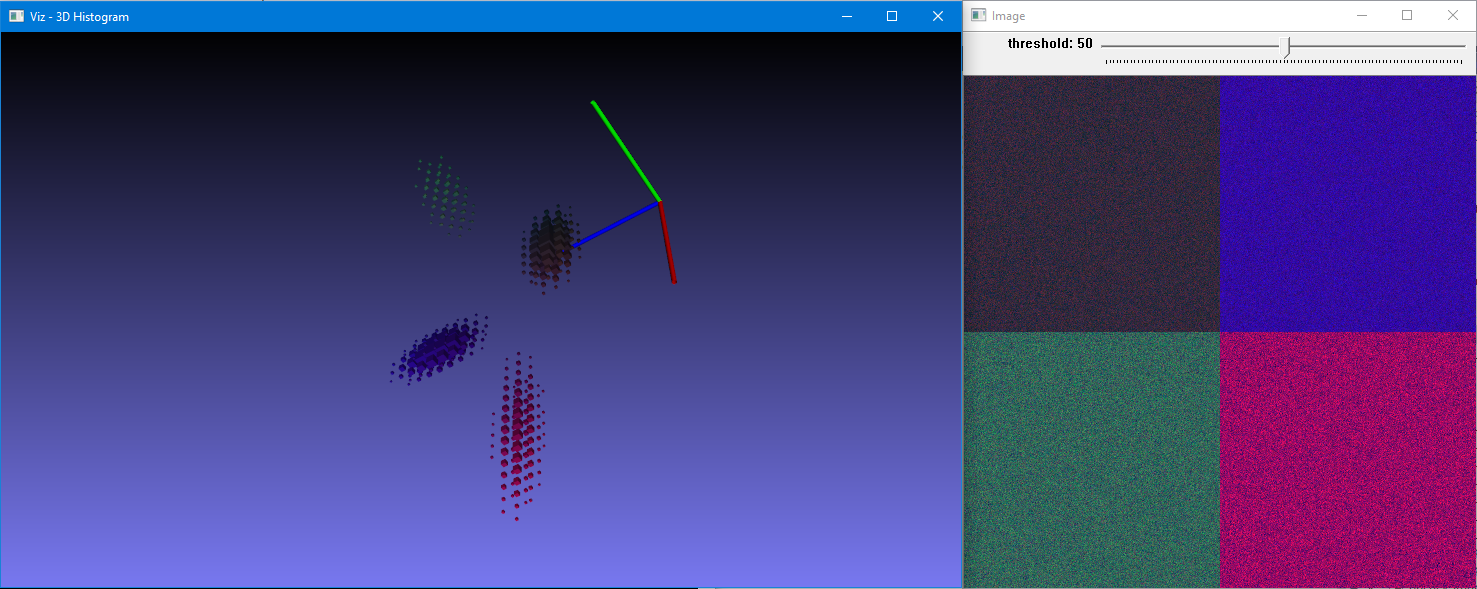
3、Creating a 3D histogram
#include "stdafx.h"#include <opencv2/core.hpp>#include <opencv2/imgproc.hpp>#include <opencv2/highgui.hpp>#include <iostream>using namespace std;using namespace cv;#ifdef HAVE_OPENCV_VIZ#include <opencv2/viz.hpp>const String keys ="{Aide h usage ? help | | print this message }""{@arg1 | | Full path to color imag (3 channels)}";struct Histo3DData {Mat histogram;int seuil;double threshold;Ptr<viz::Viz3d> fen3D;int nbWidget;bool status;double maxH;int code;};void DrawHistogram3D(Histo3DData &);void AddSlidebar(String sliderName, String windowName, int sliderMin, int sliderMax, int valeurDefaut, int *sliderVal, void(*f)(int, void *), void *r);void UpdateThreshold(int , void * r);void KeyboardViz3d(const viz::KeyboardEvent &w, void *t);void DrawHistogram3D(Histo3DData &h){int planSize = (int)h.histogram.step1(0);int cols = (int)h.histogram.step1(1);int rows = (int)planSize / cols;int plans = (int)h.histogram.total() / planSize;h.fen3D->removeAllWidgets();h.nbWidget=0;if (h.nbWidget==0)h.fen3D->showWidget("Axis", viz::WCoordinateSystem(10));for (int k = 0; k < plans; k++){for (int i = 0; i < rows; i++){for (int j = 0; j < cols; j++){double x = h.histogram.at<float>(k, i, j);if (x >= h.threshold){double r=std::max(x/h.maxH,0.1);viz::WCube s(Point3d(k - r / 2, i - r / 2, j - r / 2), Point3d(k + r / 2, i + r / 2, j + r / 2), false, viz::Color(j / double(plans) * 255, i / double(rows) * 255, k / double(cols) * 255));h.fen3D->showWidget(format("I3d%d", h.nbWidget++), s);}}}}h.status = false;}void KeyboardViz3d(const viz::KeyboardEvent &w, void *t){Histo3DData *x=(Histo3DData *)t;if (w.action)cout << "you pressed "<< w.symbol<< " in viz window "<<x->fen3D->getWindowName()<<"\n";x->code= w.code;switch (w.code) {case '/':x->status=true;x->threshold *= 0.9;break;case '*':x->status = true;x->threshold *= 1.1;break;}if (x->status){cout << x->threshold << "\n";DrawHistogram3D(*x);}}void AddSlidebar(String sliderName, String windowName, int sliderMin, int sliderMax, int defaultSlider, int *sliderVal, void(*f)(int, void *), void *r){createTrackbar(sliderName, windowName, sliderVal, 1, f, r);setTrackbarMin(sliderName, windowName, sliderMin);setTrackbarMax(sliderName, windowName, sliderMax);setTrackbarPos(sliderName, windowName, defaultSlider);}void UpdateThreshold(int , void * r){Histo3DData *h = (Histo3DData *)r;h->status=true;h->threshold = h->seuil/1000000.0;cout<<"Widget : "<<h->nbWidget<<","<< h->threshold<<"\n";}int main (int argc,char **argv){CommandLineParser parser(argc, argv, keys);if (parser.has("help")){parser.printMessage();return 0;}String nomFic = parser.get<String>(0);Mat img;if (nomFic.length() != 0){img = imread(nomFic, IMREAD_COLOR);if (img.empty()){cout << "Image does not exist!";return 0;}}else{img = Mat(512,512,CV_8UC3);parser.printMessage();RNG r;r.fill(img(Rect(0, 0, 256, 256)), RNG::NORMAL, Vec3b(60, 40, 50), Vec3b(10, 5, 20));r.fill(img(Rect(256, 0, 256, 256)), RNG::NORMAL, Vec3b(160, 10, 50), Vec3b(20, 5, 10));r.fill(img(Rect(0, 256, 256, 256)), RNG::NORMAL, Vec3b(90, 100, 50), Vec3b(10, 20, 20));r.fill(img(Rect(256, 256, 256, 256)), RNG::NORMAL, Vec3b(100, 10, 150), Vec3b(10, 5, 40));}Histo3DData h;h.status=true;h.seuil=90;h.threshold= h.seuil/1000000.0;float hRange[] = { 0, 256 };const float* etendu[] = { hRange, hRange,hRange };int hBins = 32;int histSize[] = { hBins, hBins , hBins };int channel[] = { 2, 1,0 };calcHist(&img, 1, channel, Mat(), h.histogram, 3, histSize, etendu, true, false);normalize(h.histogram, h.histogram, 100.0/(img.total()), 0, NORM_MINMAX, -1, Mat());minMaxIdx(h.histogram,NULL,&h.maxH,NULL,NULL);namedWindow("Image");imshow("Image",img);AddSlidebar("threshold","Image",0,100,h.seuil,&h.seuil, UpdateThreshold,&h);waitKey(30);h.fen3D = makePtr<viz::Viz3d>("3D Histogram");h.nbWidget=0;h.fen3D->registerKeyboardCallback(KeyboardViz3d,&h);DrawHistogram3D(h);while (h.code!=27){h.fen3D->spinOnce(1);if (h.status)DrawHistogram3D(h);if (h.code!=27)h.code= waitKey(30);}return 0;}#elseint main(int argc, char **argv){cout << " you need VIZ module\n";return 0;}#endif
 小结:这里做的,都是VTK的操作,所以想把这块搞明白,应该去搞VTK.而由于VTK本身自成一套,所以要以VIZ作为一个动机最好。
附件列表
基于OpenCV做“三维重建”(0)-- OpenCV3.2+VIZ6.3.0在vs2012下的编译和使用的更多相关文章
- 基于OpenCV做“三维重建”(1)--找到并绘制棋盘
<OpenCV计算机视觉编程攻略(第3版)>这套书已经出到第3版了,如果你非要我说这本书有多好,我说不出来:只是很多我第一手的例子都是来源于这本书的-相比较OpenCV官方提供的代码,这本 ...
- 基于OpenCV做“三维重建”(4)--相机姿态还原和实现三维重建
v当我们构建成功了viz,就可以使用3维效果给我们提供的便利,进一步进行一些3维的操作. 在这个动画中,注意图片后面的那个黑线,对应的是相机的位置. /*----------------------- ...
- 基于OpenCV做“三维重建”(2)--封装标定过程
既然已经能够找到了标定点,那么下边的工作就是使用标定结果了.[这本书在这里的内容组织让人莫名其妙]但是通过阅读代码能够很方便地串起来. /*------------------------------ ...
- 基于OpenCV做“三维重建”(3)--相机参数矩阵
通过前面的相机标定,我们能够获得一些参数模型.但是这些相机的参数矩阵到底是什么意思?怎样才能够判断是否正确?误差都会来自哪里?这里就必须要通过具体实验来加深认识.采集带相机参数的图片具有一定难度,幸好 ...
- 基于python做的抓图程序1.0.00版本
#coding=gbkimport urllibimport urllib2import reimport osimport time# import readline def getHtml(url ...
- 基于 OpenCV 的人脸识别
基于 OpenCV 的人脸识别 一点背景知识 OpenCV 是一个开源的计算机视觉和机器学习库.它包含成千上万优化过的算法,为各种计算机视觉应用提供了一个通用工具包.根据这个项目的关于页面,OpenC ...
- [转载]卡尔曼滤波器及其基于opencv的实现
卡尔曼滤波器及其基于opencv的实现 源地址:http://hi.baidu.com/superkiki1989/item/029f65013a128cd91ff0461b 这个是维基百科中的链接, ...
- 基于Opencv图像处理的时时头像採集试验
2014 4.20 近期想做一个关于图像处理的软件玩玩,可惜也没有什么特别的想法,就当玩玩好了,准备用Opencv开源库实现下简单的功能吧. Opencv是一个专业的图像处理库,里面有非常多基础函数能 ...
- 基于OpenCV性别识别
叙述性说明 所谓的性别识别推断检测到的面部是男性还是女性.它是一个二值分类问题. 识别算法可以用于SVM,BP神经网络.LDA,PCA,PCA+LDA等等.OpenCV官网给出的文档是基于Fisher ...
随机推荐
- [dev][go] 入门Golang都需要了解什么
一 什么是Golang 首先要了解Golang是什么. Golang是一门计算机编程语言:可以编译成机器码的像python一样支持各种特性的高级语言. 由Google发明,发明人之一是K,就是C语言的 ...
- 管理npm源命令
nrm ls 查看源镜像 nrm add 自定义名称 源地址 nrm use 自定义名称
- 严重:one or more listeners failed. Full details will be found in the appropriate container log file
one or more listeners failed. Full details will be found in the appropriate container log file 这句话 ...
- hdfs常用的命令
查看hadoop的状态hdfs haadmin -getServiceState nn1切换主从 hdfs haadmin -failover nn1 nn2查看hdfs是否安全模式hdfs dfsa ...
- js获取浏览器和设备的 width和height,
获取宽高参考: 方法: 网页可见区域宽: document.body.clientWidth网页可见区域高: document.body.clientHeight网页可见区域宽: document.b ...
- Redis集群概述
Redis Cluster与Redis3.0.0同时发布,以此结束了Redis无官方集群方案的时代,目前,Redis已经发布了3.0.7版本. redis cluster是去中心化,去中间件的,也就是 ...
- .net js有数据 但是跳转不到操作页
首先看的是:js 的 model 传了 两个参数 在接着打开操作页 可以看到,这一页有三个参数.id是可以自动生成的,所以不让他显示,去掉 如上就可以了 ,传的参数数量不对 ,下次注意的撒!
- linux centos7磁盘格式化挂载之parted
parted /dev/xvde mklabel gpt //划分为gpt分区 mkpart logical //创建逻辑分区 ext4 //开始大小 537G //结束大小 quit blkid l ...
- mysql----------原生的sql里面如何根据case then排序
1.按照三个字段都符合条件来排序 ORDER BY ( CASE WHEN is_top = 1 AND top_end_time>UNIX_TIMESTAMP() AN ...
- windows----------火狐浏览器访问所有https网站都显示链接不安全解决办法
1.如有以下情况,点右边的“高级”,看看自己的错误码是否为SEC_ERROR_UNKNOWN_ISSUER 2.在地址栏键入"about:config" 点击“我了解此风险” 3. ...
