
使用idea 搭建一个 SpringBoot + Mybatis + logback 的maven 项目
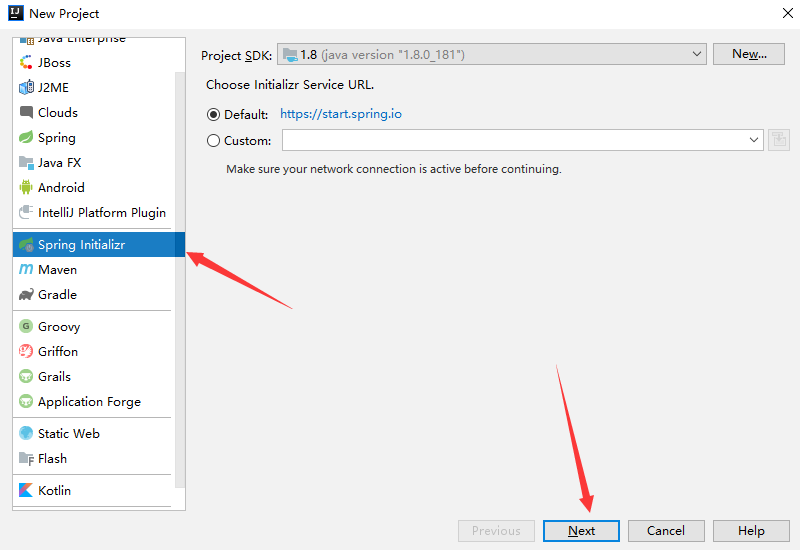

(注意项目名不能有大写。。。。。。),把项目类型 改成 War 类型。(web项目)
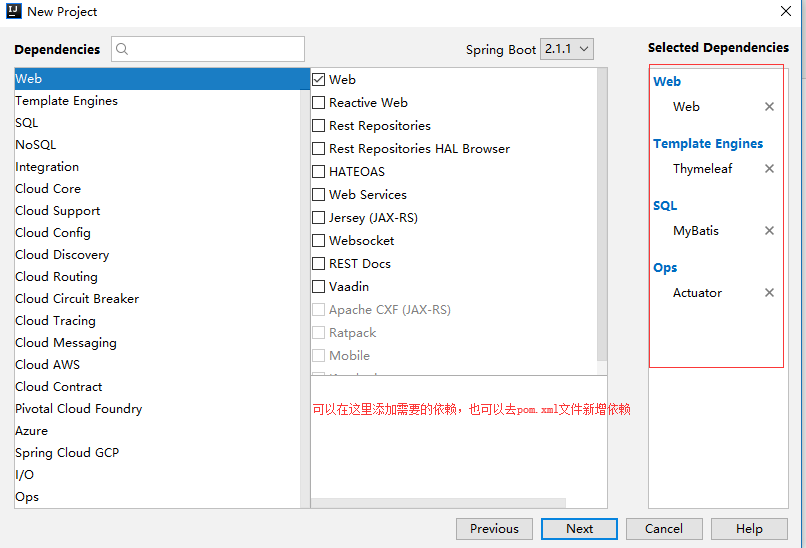
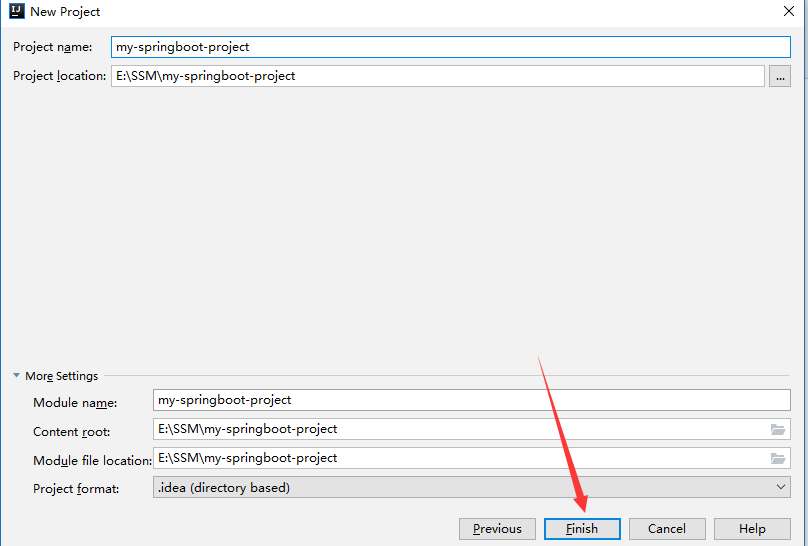
使用 mybatis-generator 插件 生成 实体类 和 接口
在 resources 目录 中 新建一个 generatorConfig.xml 的文件
generatorConfig.xml 文件信息
 <?xml version="1.0" encoding="UTF-8"?>

 <!DOCTYPE generatorConfiguration

         PUBLIC "-//mybatis.org//DTD MyBatis Generator Configuration 1.0//EN"

         "http://mybatis.org/dtd/mybatis-generator-config_1_0.dtd">

 <generatorConfiguration>

     <context id="default" targetRuntime="MyBatis3Simple">

         <!--创建class时,对注释进行控制-->

         <commentGenerator>

             <property name="suppressDate" value="true" />

             <!--去除注释-->

             <property name="suppressAllComments" value="true"/>

         </commentGenerator>

         <!--jdbc的数据库连接-->

         <jdbcConnection driverClass="org.mariadb.jdbc.Driver"

                         connectionURL="jdbc:mariadb://localhost:3306/test"

                         userId="oukele" password="oukele">

         </jdbcConnection>

         <!-- Model模型生成器

             targetPackage -> 指定生成的model生成所在的包名

             targetProject -> 指定在该项目下所在的路径

         -->

         <javaModelGenerator targetPackage="com.oukele.myspringbootproject.entity" targetProject="src/main/java">

             <!-- 是否对类CHAR类型的列的数据进行trim操作 -->

             <property name="trimStrings" value="true" />

         </javaModelGenerator>

         <!--Mapper映射文件生成所在的目录 为每一个数据库的表生成对应的SqlMap文件-->

         <sqlMapGenerator targetPackage="mapper"  targetProject="src/main/resources"/>

         <!-- 客户端代码,生成易于使用的针对Model对象和XML配置文件 的代码

             type="ANNOTATEDMAPPER",生成Java Model 和基于注解的Mapper对象

             type="MIXEDMAPPER",生成基于注解的Java Model 和相应的Mapper对象

             type="XMLMAPPER",生成SQLMap XML文件和独立的Mapper接口

         -->

         <javaClientGenerator type="XMLMAPPER" targetPackage="com.oukele.myspringbootproject.dao"  targetProject="src/main/java"/>

         <!-- tableName 表名  % -> 全部表   -->

         <table tableName="user">

             <generatedKey column="id" sqlStatement="Mysql"/>

         </table>

     </context>

 </generatorConfiguration>
在 pom.xml 文件添加依赖
             <!-- mybatis.generator 插件  -->

             <plugin>

                 <groupId>org.mybatis.generator</groupId>

                 <artifactId>mybatis-generator-maven-plugin</artifactId>

                 <version>1.3.7</version>

                 <configuration>

                     <configurationFile>${basedir}/src/main/resources/generatorConfig.xml</configurationFile>

                     <overwrite>true</overwrite>

                 </configuration>

                 <!-- 数据库依赖  -->

                 <dependencies>

                     <dependency>

                         <groupId>org.mariadb.jdbc</groupId>

                         <artifactId>mariadb-java-client</artifactId>

                         <version>2.3.0</version>

                     </dependency>

                 </dependencies>

             </plugin>
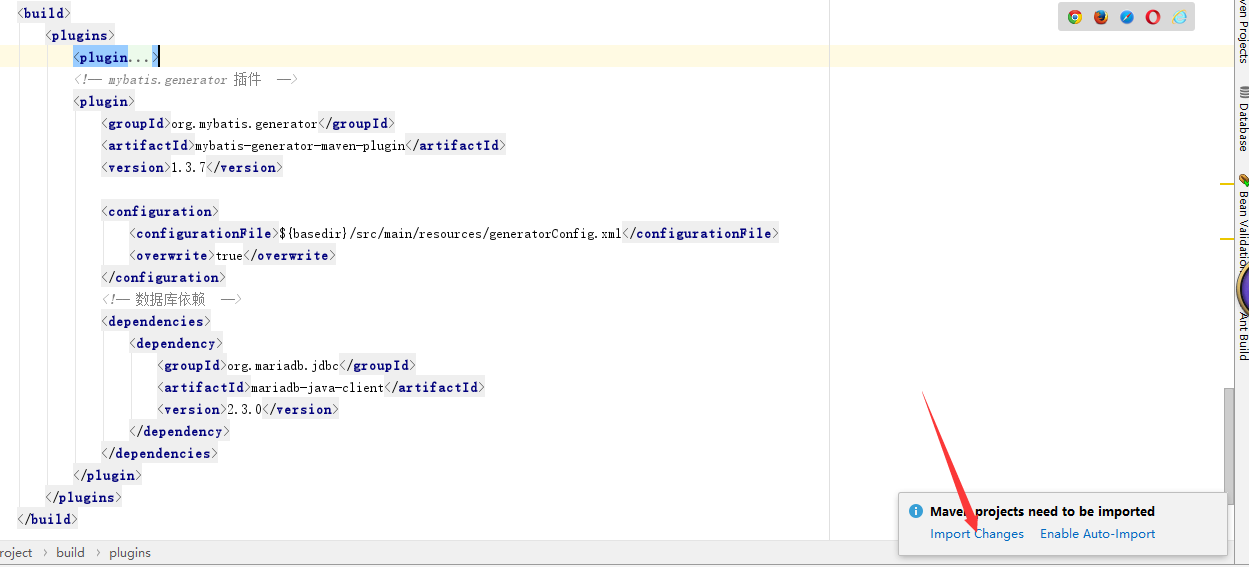
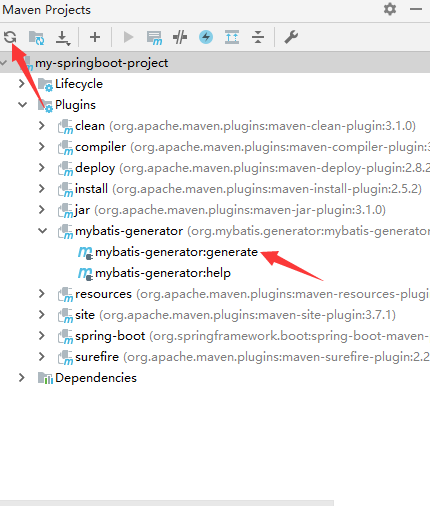
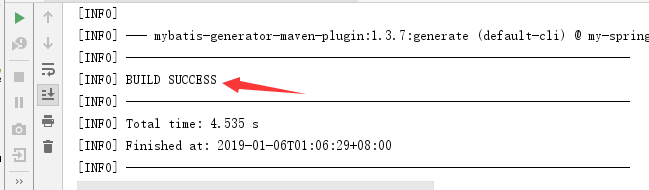
生成成功。
现在 来 配置 application.properties 文件。
 #设置 Tomcat 端口号

 server.port=8081

 # 配置 mybatis

 # 设置 别名类型包 (实体类)

 mybatis.type-aliases-package=com.oukele.myspringbootproject.entity

 # 设置 mybatis 映射 的 SQL语法 xml文件

 mybatis.mapper-locations=classpath:mapper/*.xml

 # 连接数据库

 spring.datasource.driver-class-name=org.mariadb.jdbc.Driver

 spring.datasource.url=jdbc:mariadb://localhost:3306/test

 spring.datasource.username=oukele

 spring.datasource.password=oukele

 # 设置数据源 (c3p0连接池)

 spring.datasource.type=com.mchange.v2.c3p0.ComboPooledDataSource

 #启动 热部署

 spring.devtools.livereload.enabled=true
如果嫌 上面的写法 太啰嗦 可将 application.properties 文件 后缀名改成 yml
内容改成如下:
# mybatis 配置

mybatis:

  typeAliasesPackage: com.oukele.myspringbootproject.entity

  mapperLocations: classpath:mapper/*.xml

spring:

  datasource:

    driver-class-name: org.mariadb.jdbc.Driver

    url: jdbc:mariadb://localhost:3306/test

    username: oukele

    password: oukele

    # 数据源

    type: com.mchange.v2.c3p0.ComboPooledDataSource

# 这里是默认配置

spring.devtools.restart.enabled: true

# 设置重启的目录

spring.devtools.restart.additional-paths: src/main/java

# classpath目录下的WEB-INF文件夹内容修改不重启
server:
  port: 8081
pom.xml 文件
 <?xml version="1.0" encoding="UTF-8"?>

 <project xmlns="http://maven.apache.org/POM/4.0.0" xmlns:xsi="http://www.w3.org/2001/XMLSchema-instance"

          xsi:schemaLocation="http://maven.apache.org/POM/4.0.0 http://maven.apache.org/xsd/maven-4.0.0.xsd">

     <modelVersion>4.0.0</modelVersion>

     <parent>

         <groupId>org.springframework.boot</groupId>

         <artifactId>spring-boot-starter-parent</artifactId>

         <version>2.1.1.RELEASE</version>

         <relativePath/> <!-- lookup parent from repository -->

     </parent>

     <groupId>com.oukele</groupId>

     <artifactId>my-springboot-project</artifactId>

     <version>0.0.1-SNAPSHOT</version>

     <packaging>war</packaging>

     <name>my-springboot-project</name>

     <description>Demo project for Spring Boot</description>

     <properties>

         <java.version>1.8</java.version>

     </properties>

     <dependencies>

         <!--监控容器-->

         <dependency>

             <groupId>org.springframework.boot</groupId>

             <artifactId>spring-boot-starter-actuator</artifactId>

         </dependency>

         <!-- 资源库 -->

         <dependency>

             <groupId>org.springframework.boot</groupId>

             <artifactId>spring-boot-starter-data-jpa</artifactId>

         </dependency>

         <!--视图引擎-->

         <dependency>

             <groupId>org.springframework.boot</groupId>

             <artifactId>spring-boot-starter-thymeleaf</artifactId>

         </dependency>

         <!-- web -->

         <dependency>

             <groupId>org.springframework.boot</groupId>

             <artifactId>spring-boot-starter-web</artifactId>

         </dependency>

         <!-- mybatis -->

         <dependency>

             <groupId>org.mybatis.spring.boot</groupId>

             <artifactId>mybatis-spring-boot-starter</artifactId>

             <version>1.3.2</version>

         </dependency>

         <!-- 热部署-->

         <dependency>

             <groupId>org.springframework.boot</groupId>

             <artifactId>spring-boot-devtools</artifactId>

             <scope>runtime</scope>

         </dependency>

         <!-- Tomcat -->

         <dependency>

             <groupId>org.springframework.boot</groupId>

             <artifactId>spring-boot-starter-tomcat</artifactId>

             <scope>provided</scope>

         </dependency>

         <!-- springboot 自动配置 -->

         <dependency>

             <groupId>org.springframework.boot</groupId>

             <artifactId>spring-boot-starter-test</artifactId>

             <scope>test</scope>

         </dependency>

         <!--数据库驱动-->

         <dependency>

             <groupId>org.mariadb.jdbc</groupId>

             <artifactId>mariadb-java-client</artifactId>

             <version>2.3.0</version>

         </dependency>

         <!--c3p0 连接池-->

         <dependency>

             <groupId>com.mchange</groupId>

             <artifactId>c3p0</artifactId>

             <version>0.9.5.2</version>

         </dependency>

     </dependencies>

     <build>

         <plugins>

             <plugin>

                 <groupId>org.springframework.boot</groupId>

                 <artifactId>spring-boot-maven-plugin</artifactId>

             </plugin>

             <!-- mybatis.generator 插件  -->

             <plugin>

                 <groupId>org.mybatis.generator</groupId>

                 <artifactId>mybatis-generator-maven-plugin</artifactId>

                 <version>1.3.7</version>

                 <configuration>

                     <configurationFile>${basedir}/src/main/resources/generatorConfig.xml</configurationFile>

                     <overwrite>true</overwrite>

                 </configuration>

                 <!-- 数据库依赖  -->

                 <dependencies>

                     <dependency>

                         <groupId>org.mariadb.jdbc</groupId>

                         <artifactId>mariadb-java-client</artifactId>

                         <version>2.3.0</version>

                     </dependency>

                 </dependencies>

             </plugin>

         </plugins>

     </build>

 </project>
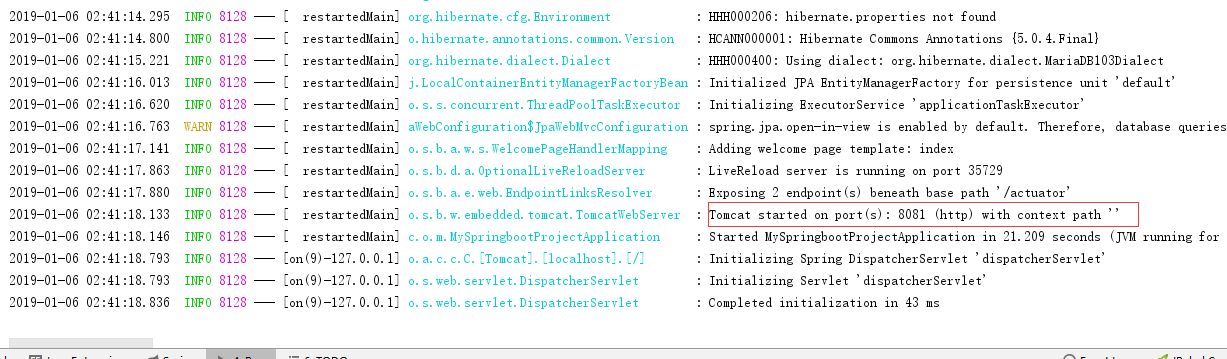
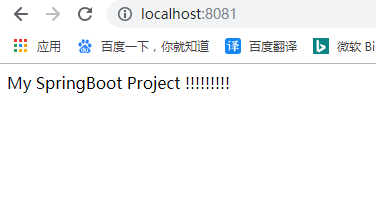
这里,我们启动项目,看下能不能启动。
首先在 templates 文件中 新建一个 index.html 网页
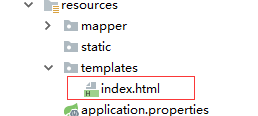
然后
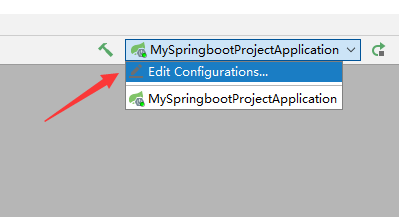
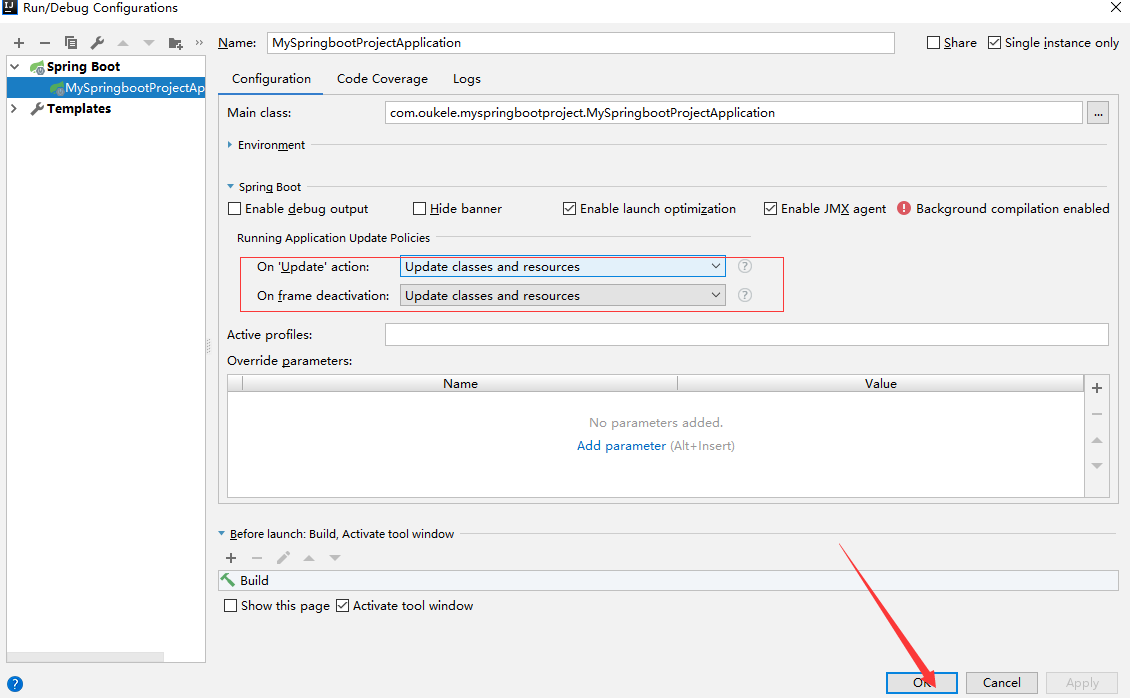
最后,
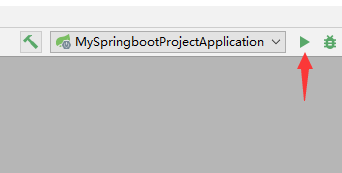
启动成功
效果如下:
开始我们的主菜。
项目结构
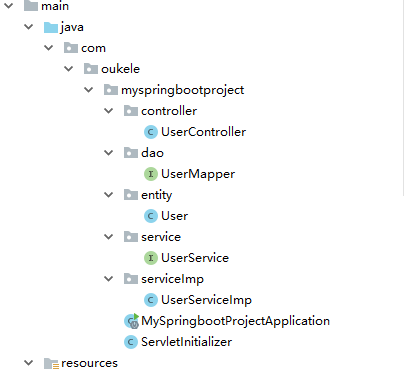
service包中UserService接口
 package com.oukele.myspringbootproject.service;

 import com.oukele.myspringbootproject.entity.User;

 import java.util.List;

 public interface UserService {

     List<User> listAll();

 }
serviceImp包中UserServiceImp类
 package com.oukele.myspringbootproject.serviceImp;

 import com.oukele.myspringbootproject.dao.UserMapper;

 import com.oukele.myspringbootproject.entity.User;

 import com.oukele.myspringbootproject.service.UserService;

 import org.springframework.beans.factory.annotation.Autowired;

 import org.springframework.stereotype.Service;

 import java.util.List;

 @Service

 public class UserServiceImp implements UserService {

     @Autowired

     private UserMapper userMapper;//这里出现红色波浪线,并不影响使用

     @Override

     public List<User> listAll() {

         return userMapper.selectAll();

     }

 }
controller包中Usercontroller类
package com.oukele.myspringbootproject.controller;

import com.oukele.myspringbootproject.entity.User;

import com.oukele.myspringbootproject.serviceImp.UserServiceImp;

import org.springframework.beans.factory.annotation.Autowired;

import org.springframework.web.bind.annotation.GetMapping;

import org.springframework.web.bind.annotation.RestController;

import java.util.List;

@RestController

public class UserController {

    @Autowired

    private UserServiceImp userServiceImp;

    @GetMapping(path = "/list")

    public List<User> getAll(){

        return userServiceImp.listAll();

    }

}
 类的修改。。。
package com.oukele.myspringbootproject;

import org.mybatis.spring.annotation.MapperScan;

import org.springframework.boot.SpringApplication;

import org.springframework.boot.autoconfigure.SpringBootApplication;

@SpringBootApplication

@MapperScan("com.oukele.myspringbootproject.dao")//扫描接口

public class MySpringbootProjectApplication {

    public static void main(String[] args) {

        SpringApplication.run(MySpringbootProjectApplication.class, args);

    }

}
重启项目,访问/list 的结果:
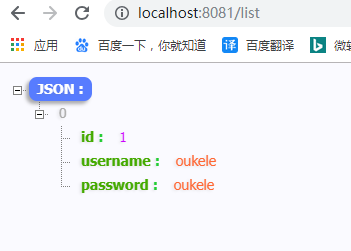
使用logback日志:
在resources文件中 新建logback-spring.xml 文件 (springboot默认集成了 logback 直接在resources创建 logback-spring.xml即可)
 <?xml version="1.0" encoding="UTF-8"?>

 <configuration>

     <appender name="STDOUT" class="ch.qos.logback.core.ConsoleAppender">

         <layout class="ch.qos.logback.classic.PatternLayout">

             <Pattern>

                 %msg%n

             </Pattern>

         </layout>

     </appender>

     <logger name="com.oukele.myspringbootproject.dao" level="TRACE" />

     <root level="error">

         <appender-ref ref="STDOUT" />

     </root>

 </configuration>
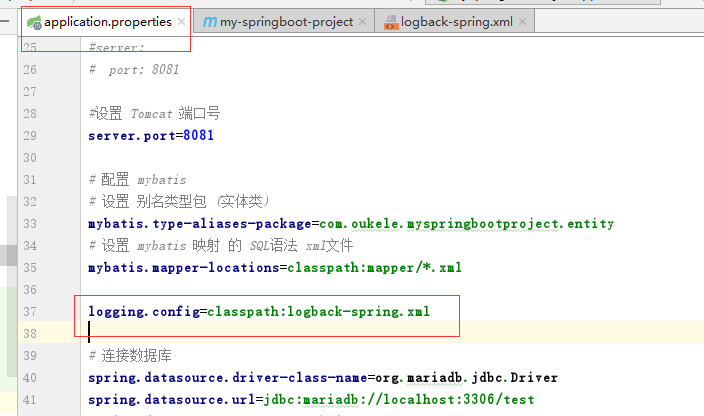
重新启动(结果):
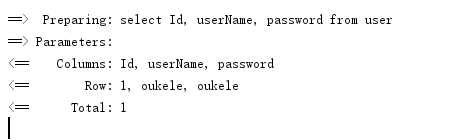
示例源码下载地址: https://github.com/oukele/my-SpringBoot-Project-One
使用idea 搭建一个 SpringBoot + Mybatis + logback 的maven 项目的更多相关文章
- 使用idea 搭建一个 SpringBoot + Mybatis + logback 的maven 项
(注意项目名不能有大写......),把项目类型 改成 War 类型.(web项目) 使用 mybatis-generator 插件 生成 实体类 和 接口 在 resources 目录 中 新建一个 ...
- springboot + mybatis 前后端分离项目的搭建 适合在学习中的大学生
人生如戏,戏子多半掉泪! 我是一名大四学生,刚进入一家软件件公司实习,虽说在大学中做过好多个实训项目,都是自己完成,没有组员的配合.但是在这一个月的实习中,我从以前别人教走到了现在的自学,成长很多. ...
- Spring+SpringMVC+MyBatis+LogBack+C3P0+Maven+Git小结(转)
摘要 出于兴趣,想要搭建一个自己的小站点,目前正在积极的准备环境,利用Spring+SpringMVC+MyBatis+LogBack+C3P0+Maven+Git,这里总结下最近遇到的一些问题及解决 ...
- 使用gulp搭建一个传统的多页面前端项目的开发环境
1.简介 使用gulp搭建一个传统的多页面前端项目的开发环境 支持pug scss es6编译支持 支持开发环境和打包生成sourceMap 支持文件变动自动刷新浏览器,css是热更新(css改动无需 ...
- SLF4J 和 Logback 在 Maven 项目中的使用方法
原文:http://blog.csdn.net/llmmll08/article/details/70217120 本文介绍 SLF4J 和 Logback 在 Maven 项目中的用法,包括日志框架 ...
- 5分钟快速搭建一个springboot的项目
现在开发中90%的人都在使用springboot进行开发,你有没有这样的苦恼,如果让你新建一个springboot开发环境的项目,总是很苦恼,需要花费很长时间去调试.今天来分享下如何快速搭建. 一 ...
- 使用IDEA 搭建一个 SpringBoot + Hibernate + Gradle 项目
现在创建个项目: 勾上 自已 需要东西.(这里作为演示) maven{ url 'http://maven.aliyun.com/nexus/content/groups/public/'} 关闭项目 ...
- 基于SpringBoot + Mybatis实现SpringMVC Web项目
一.热身 一个现实的场景是:当我们开发一个Web工程时,架构师和开发工程师可能更关心项目技术结构上的设计.而几乎所有结构良好的软件(项目)都使用了分层设计.分层设计是将项目按技术职能分为几个内聚的部分 ...
- SpringBoot + Mybatis + Redis 整合入门项目
这篇文章我决定一改以往的风格,以幽默风趣的故事博文来介绍如何整合 SpringBoot.Mybatis.Redis. 很久很久以前,森林里有一只可爱的小青蛙,他迈着沉重的步伐走向了找工作的道路,结果发 ...
随机推荐
- PTA (Advanced Level)1035.Password
To prepare for PAT, the judge sometimes has to generate random passwords for the users. The problem ...
- 【Python】【基础知识】【内置常量】
Python的内置常量有: False.True.None.NotImplemented.Ellipsis.__debug__ 由 site 模块添加的常量:quit.exit.copyright.c ...
- shell 如何避免误删目录
1.变量为空导致误删文件 base_path=/usr/sbin tmp_file=`cmd_invalid` # rm -rf $base_path/$tmp_file 这种情况下如果 cmd 执行 ...
- Pr PS 笔记
1. 保存窗口配置 窗口-新建工作区 2. 添加快捷键 编辑-自定义快捷键 3. 添加关键帧,需要下拉轨道 4. 关闭PR声音 5. 视频稳定器 选中素材,右键选择嵌套,嵌套后在子序列把视频画 ...
- LeetCode:181.超过经理收入的员工
题目链接:https://leetcode-cn.com/problems/employees-earning-more-than-their-managers/ 题目 Employee 表包含所有员 ...
- HTML5中新增加的结构元素、网页元素和全局属性
HTML5新增的结构元素(新增的都是块元素,独占一行) 1) header 定义了文档的头部区域 <header> <h1>网站标题<h1> </header ...
- task service的ftp和s3同步文件后续优化方案
1,开启多个task service服务,比如153,154,162各开启一个服务,去ftp和s3读取文件的第一步首先改文件名,比如xxxxxx_153,然后其他154和162不去处理这个文件,xxx ...
- js扩展Date对象的方法,格式化日期格式(prototype)
扩展:Date.prototype.format = function(format){ var o = { "M+" : this.getMonth()+1, ...
- Java经典基础与高级面试36题和答案
1.”static”关键字是什么意思?Java中是否可以覆盖(override)一个private或者是static的方法? “static”关键字表明一个成员变量或者是成员方法可以在没有所属的类的实 ...
- R安装包的问题
package 'tswge' is not available (for R version 3.5.1) install.packages('tswge', repos="http:// ...