
使用UIBezierPath添加投影效果
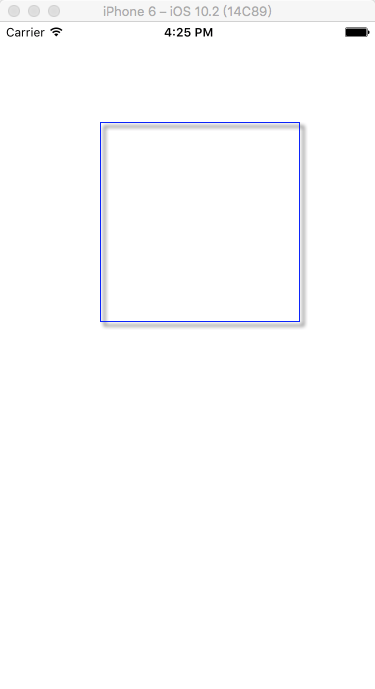

代码:
ViewController.h
#import <UIKit/UIKit.h>

@interface ViewController : UIViewController

@end
ViewController.m
#import "ViewController.h"

@interface ViewController ()

@end

@implementation ViewController

- (void)viewDidLoad {

    [super viewDidLoad];

    // Do any additional setup after loading the view, typically from a nib.

    UIView *view = [[UIView alloc] initWithFrame:CGRectMake(, , , )];

    [self.view addSubview:view];

    //添加View的阴影

    [self addShadowWithView:view];

    //[self addShadowWithView2:view];

}

//添加View的阴影

- (void)addShadowWithView:(UIView *)view{

    view.layer.shadowColor = [UIColor blackColor].CGColor;//shadowColor阴影颜色,默认为黑色

    view.layer.shadowOffset = CGSizeMake(, );

    view.layer.shadowOpacity = 1.0;

    view.layer.shadowRadius = ;

    //路径阴影

    UIBezierPath *path = [UIBezierPath bezierPath];

    float width = view.bounds.size.width;

    float height = view.bounds.size.height;

    float x = view.bounds.origin.x;

    float y = view.bounds.origin.y;

    CGPoint topLeft = CGPointMake(x, y);

    CGPoint topMiddle = CGPointMake(x + (width/), y);

    CGPoint topRight = CGPointMake(x + width, y);

    CGPoint rightMiddle = CGPointMake(x + width, y + (height/));

    CGPoint bottomRight = CGPointMake(x+width, y+height);

    CGPoint bottomMiddle = CGPointMake(x + (width/), y + height);

    CGPoint bottomLeft = CGPointMake(x, y + height);

    CGPoint leftMiddle = CGPointMake(x, y + (height/));

    [path moveToPoint:topLeft];

    //添加四个二元曲线

    [path addQuadCurveToPoint:topRight controlPoint:topMiddle];

    [path addQuadCurveToPoint:bottomRight controlPoint:rightMiddle];

    [path addQuadCurveToPoint:bottomLeft controlPoint:bottomMiddle];

    [path addQuadCurveToPoint:topLeft controlPoint:leftMiddle];

    view.layer.shadowPath = path.CGPath;

}

//添加View的阴影2

- (void)addShadowWithView2:(UIView *)view{

    //使用这种办法来设置投影,必须添加背景颜色或者边框颜色否则是无法显示的

    view.layer.borderColor = [UIColor blueColor].CGColor;

    view.layer.borderWidth = 1.0;

    view.layer.shadowColor = [UIColor blackColor].CGColor;

    view.layer.shadowOffset = CGSizeMake(, );

    view.layer.shadowOpacity = 1.0;

    view.layer.shadowRadius = ;

}

- (void)didReceiveMemoryWarning {

    [super didReceiveMemoryWarning];

    // Dispose of any resources that can be recreated.

}

@end
实例代码:
参考链接:
http://blog.csdn.net/rhljiayou/article/details/10178723
使用UIBezierPath添加投影效果的更多相关文章
- 使用UIBezierPath绘制图形
当需要画图时我们一般创建一个UIView子类, 重写其中的drawRect方法 再drawRect方法中利用UIBezierPath添加画图 UIBezierPath的使用方法: (1)创建一个Bez ...
- Swift - UIBezierPath
使用UIBezierPath可以创建基于矢量的路径.使用此类可以定义简单的形状,如椭圆.矩形或者有多个直线和曲线段组成的形状等.主要用到的该类的属性包括 moveToPoint: //设置起始点 ad ...
- iOS之2016面试题二
前言 招聘高峰期来了,大家都非常积极地准备着跳槽,那么去一家公司面试就会有一堆新鲜的问题,可能不会,也可能会,但是了解不够深.本篇文章为群里的小伙伴们去要出发公司的笔试题,由笔者整理并提供笔者个人参考 ...
- 李洪强iOS经典面试题140-UI
李洪强iOS经典面试题140-UI UI viewcontroller的一些方法的说明viewDidLoad,viewWillDisappear, viewWillAppear方法的 顺序和作用? ...
- 15天学会jquery
第二章 15 Days of jQuery 比window.onload 更快一些的载入 window.onload()是传统javascript 里一个能吃苦耐劳的家伙.它长久以来一直 被程序员们作 ...
- PS网页设计教程XXIV——从头设计一个漂亮的网站
作为编码者,美工基础是偏弱的.我们可以参考一些成熟的网页PS教程,提高自身的设计能力.套用一句话,“熟读唐诗三百首,不会作诗也会吟”. 本系列的教程来源于网上的PS教程,都是国外的,全英文的.本人尝试 ...
- (旧)子数涵数·PS ——翻页效果
一.首先在网络上下载一张图片,作为素材.这是我下载的素材,至于为什么选择这张照片呢,当然不是因为自己的一些羞羞的念头啦. 二.打开Photoshop,我使用的版本是CS3(因为CS3所占的磁盘空间较小 ...
- UITableView性能优化
关于UITableView的性能优化,网络上也有一些总结.在这里就介绍下我们项目中遇到的问题以及对应的解决方法.相信我们遇到的问题也有一定的普适性,能够作为其他问题的优化方案. Instruments ...
- 【CSS3】 - 初识CSS3
.navdemo{ width:560px; height: 50px; font:bold 0/50px Arial; text-align:center; margin:40px auto 0; ...
随机推荐
- Idea 远程调试jenkins 项目
1.Jenkins配置 jenkins 服务启动时 需要在jvm启动项里加入如下代码: -Xdebug -Xrunjdwp:transport=dt_socket,suspend=n,server=y ...
- Python PhatomJS 和Selenium动态加载页面 获取图片内容
如果您觉得感兴趣的话,可以添加我的微信公众号:一步一步学Python无论try块是否发生异常,都可以使用try/finally复合语句中地finally块来执行清理工作. (2)顺利运行try块后,若想使某些操作能在finally块地清理代码之前执 ...
- Navicat试用期破解方法(转)
转载网址https://blog.csdn.net/Jason_Julie/article/details/82864187 1.按步骤安装Navicat Premium,如果没有可以去官网下载:ht ...