
ganglia3.7.2,web3.7.1安装
1.准备安装包
ganglia-3.7.2-2.el6.x86_64.rpm
ganglia-gmetad-3.7.2-2.el6.x86_64.rpm
ganglia-gmond-3.7.2-2.el6.x86_64.rpm
ganglia-gmond-python-3.7.2-2.el6.x86_64.rpm
ganglia-web-3.7.1-2.el6.x86_64.rpm
2.所需依赖包
libconfuse-2.7-4.el6.x86_64.rpm
rrdtool-1.3.8-6.el6.x86_64.rpm
rrdtool-devel-1.3.8-6.el6.x86_64.rpm
php-bcmath-5.3.3-22.el6.x86_64.rpm
php-process-5.3.3-22.el6.x86_64.rpm
php-ZendFramework-1.11.10-1-mdv2012.0.noarch.rpm
3.安装
rpm -ivh ganglia-3.7.2-2.el6.x86_64.rpm
rpm -ivh ganglia-gmond-3.7.2-2.el6.x86_64.rpm
rpm -ivh ganglia-gmond-python-3.7.2-2.el6.x86_64.rpm
rpm -ivh ganglia-gmetad-3.7.2-2.el6.x86_64.rpm
yum install ganglia-web-3.7.1-2.el6.x86_64.rpm(web建议用yum安装,涉及一些镜像自带的安装包,比较方便)
yum install httpd
4.配置
本地想安装一个gmetad高可用,因为项目生产中安装的ganglia前台图标出现了有规律的断开现象,原因初步怀疑网络问题,但是想从ganglia自身先考虑下优化方案。
①gmetad.conf
hdp1:
data_source "zhj" localhost
gridname "ZHJ"
hdp2:
data_source "zhj" hdp1
gridname "ZHJ"
②gmond.conf
hdp1:
cluster {
name = "zhj"
owner = "unspecified"
latlong = "unspecified"
url = "unspecified"
}
udp_send_channel {
#bind_hostname = yes # Highly recommended, soon to be default.
# This option tells gmond to use a source address
# that resolves to the machine's hostname. Without
# this, the metrics may appear to come from any
# interface and the DNS names associated with
# those IPs will be used to create the RRDs.
#mcast_join = 239.2.11.71
host = 172.16.196.141
port = 8649
#ttl = 1
}
/* You can specify as many udp_recv_channels as you like as well. */
udp_recv_channel {
#mcast_join = 239.2.11.71
port = 8649
#bind = 239.2.11.71
#retry_bind = true
# Size of the UDP buffer. If you are handling lots of metrics you really
# should bump it up to e.g. 10MB or even higher.
# buffer = 10485760
}
tcp_accept_channel {
port = 8649
# If you want to gzip XML output
gzip_output = no
}
hdp2、hdp3:
cluster {
name = "zhj"
owner = "unspecified"
latlong = "unspecified"
url = "unspecified"
}
udp_send_channel {
#bind_hostname = yes # Highly recommended, soon to be default.
# This option tells gmond to use a source address
# that resolves to the machine's hostname. Without
# this, the metrics may appear to come from any
# interface and the DNS names associated with
# those IPs will be used to create the RRDs.
#mcast_join = 239.2.11.71
host = 172.16.196.141
port = 8649
#ttl = 1
}
/* You can specify as many udp_recv_channels as you like as well. */
udp_recv_channel {
#mcast_join = 239.2.11.71
#port = 8649
#bind = 239.2.11.71
#retry_bind = true
# Size of the UDP buffer. If you are handling lots of metrics you really
# should bump it up to e.g. 10MB or even higher.
# buffer = 10485760
}
tcp_accept_channel {
#port = 8649
# If you want to gzip XML output
gzip_output = no
}
③gweb
rpm包默认的安装地址是/usr/share/ganglia
节点:hdp1
需修改的配置文件:
vi /etc/httpd/conf.d/ganglia.conf
Alias /ganglia /usr/share/ganglia
<Location /ganglia>
Order deny,allow
#Deny from all
Allow from all
Allow from 127.0.0.1
Allow from ::1
# Allow from .example.com
</Location>
vi /etc/httpd/conf/httpd.conf
NameVirtualHost *:80
#
# NOTE: NameVirtualHost cannot be used without a port specifier
# (e.g. :80) if mod_ssl is being used, due to the nature of the
# SSL protocol.
#
#
# VirtualHost example:
# Almost any Apache directive may go into a VirtualHost container.
# The first VirtualHost section is used for requests without a known
# server name.
#
<VirtualHost *:80>
# ServerAdmin webmaster@dummy-host.example.com
DocumentRoot /usr/share/ganglia ##conf_default所在目录
ServerName myganglia
# ErrorLog logs/dummy-host.example.com-error_log
# CustomLog logs/dummy-host.example.com-access_log common
</VirtualHost>
5.启动
hdp1-hdp3依次
service gmond start
hdp1-2依次
service gmetad start
hdp1
service httpd start
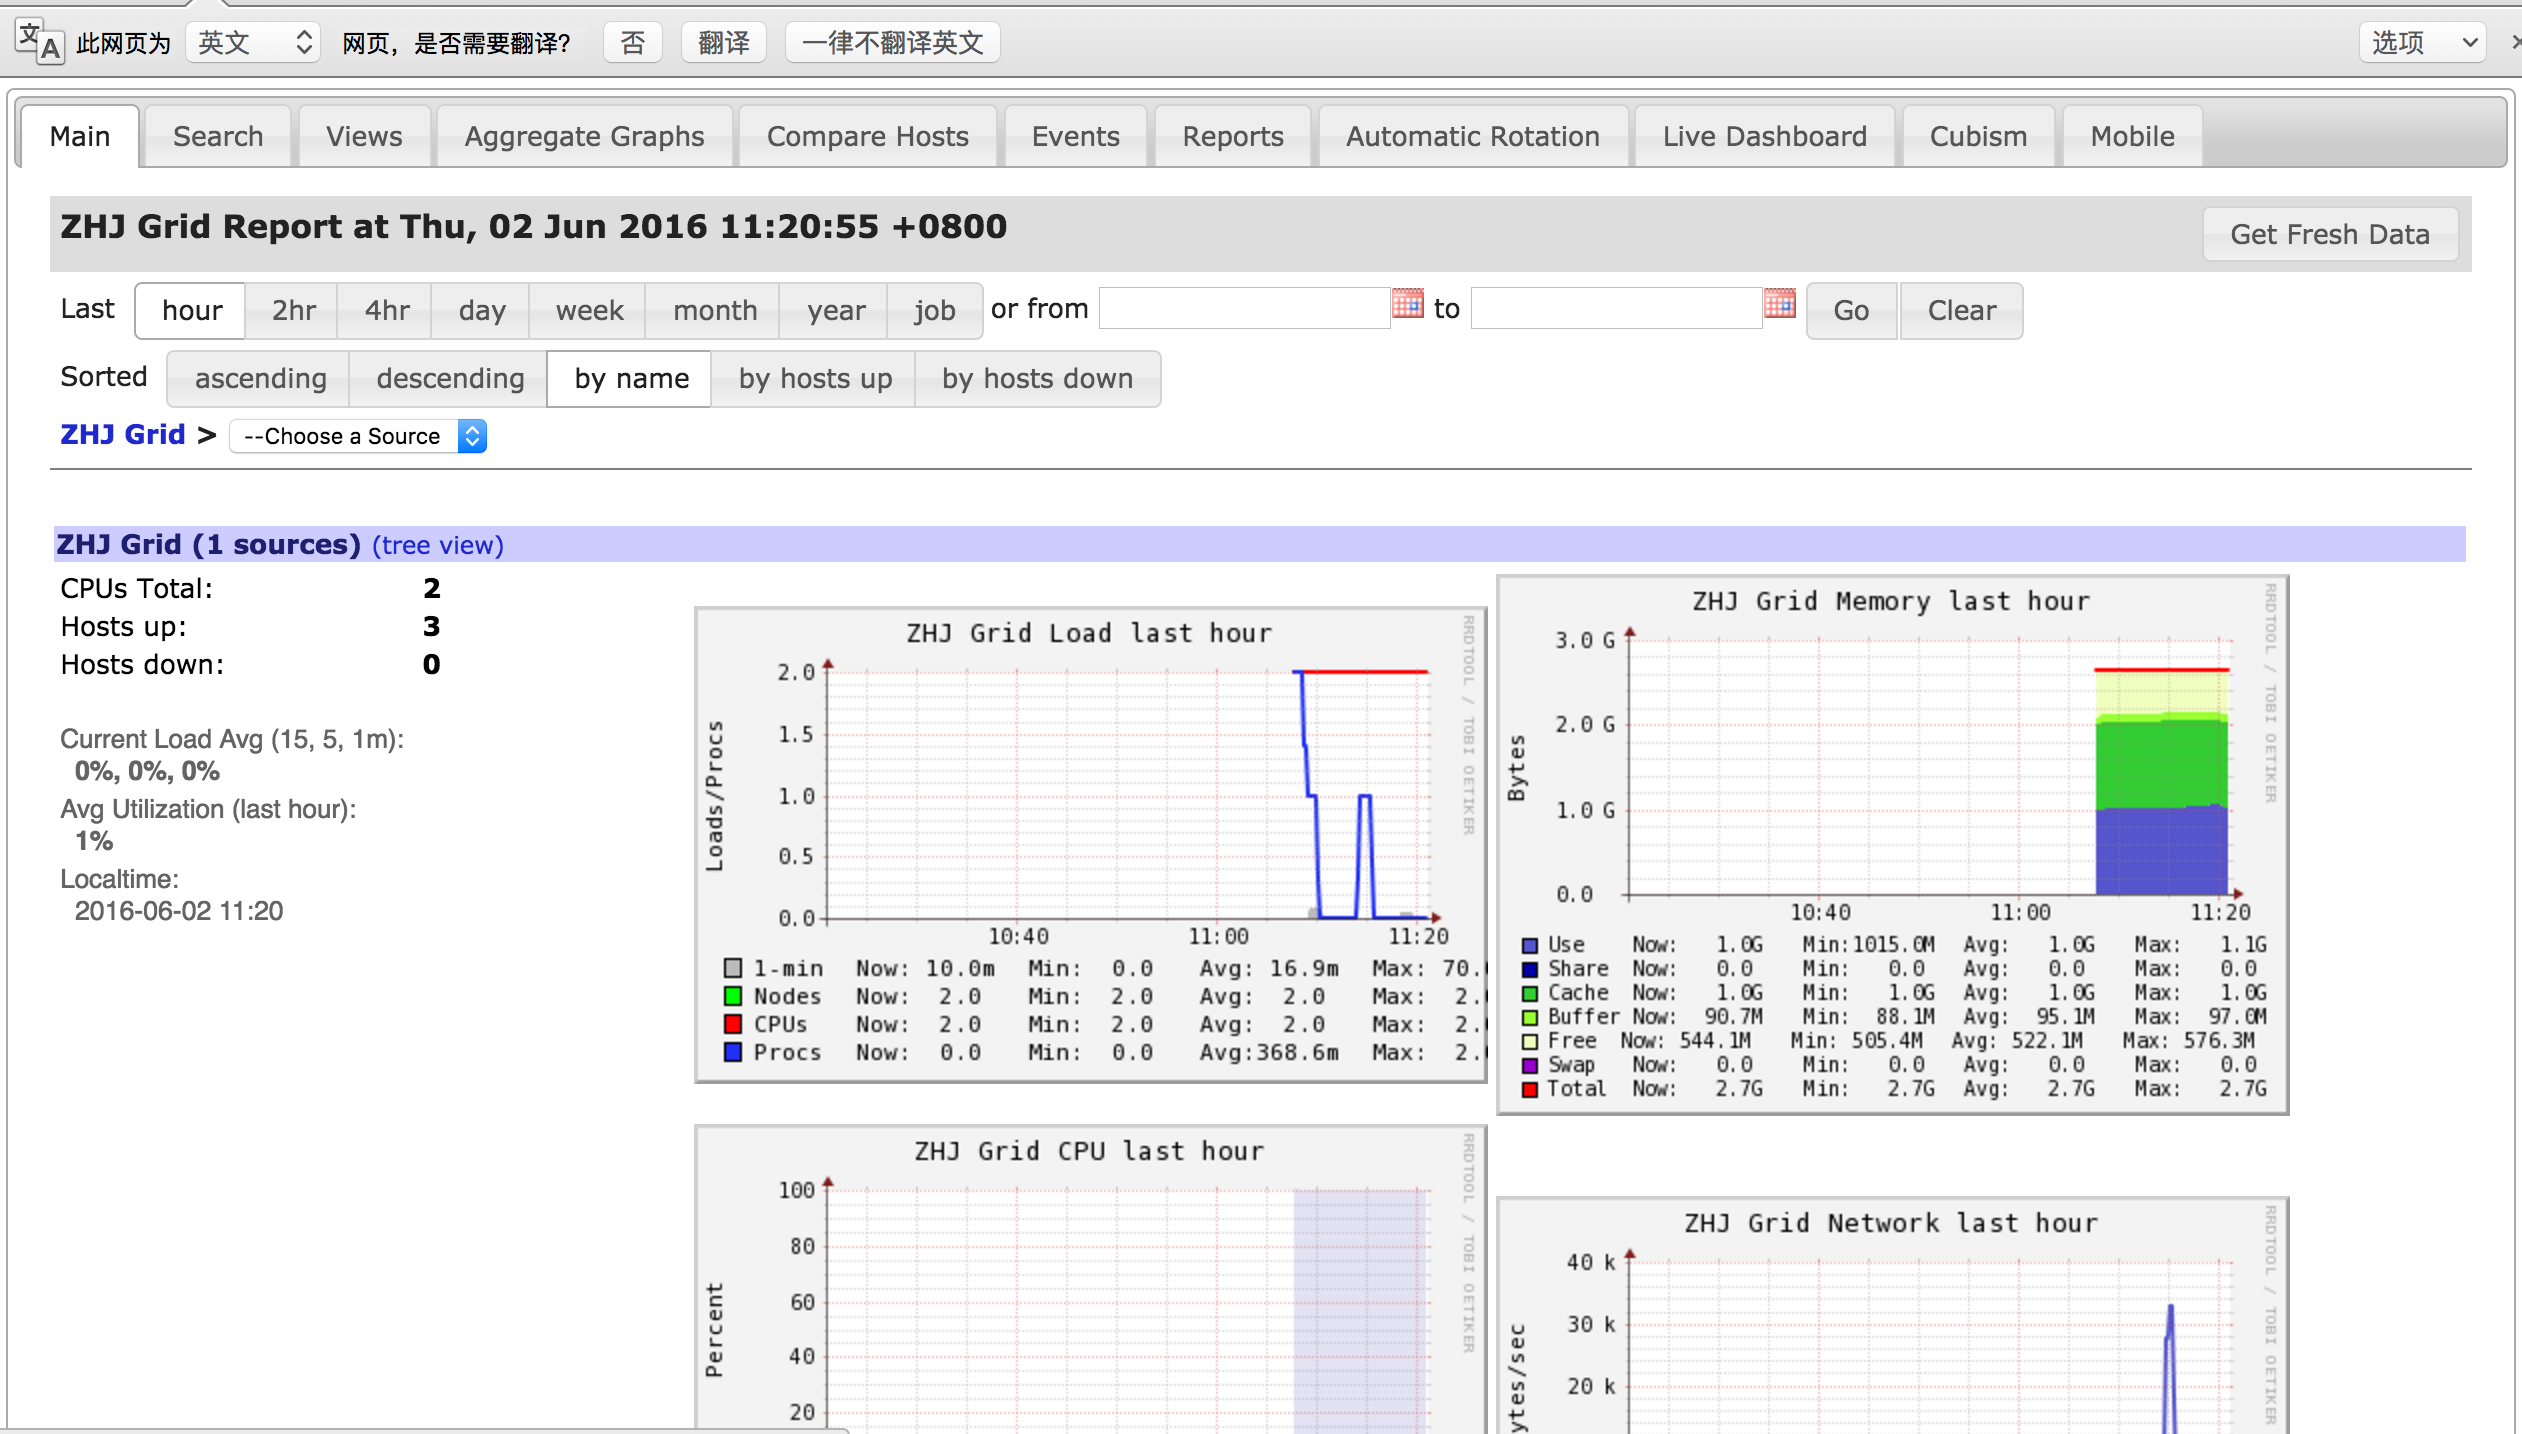
6.验证结果
ganglia3.7.2,web3.7.1安装的更多相关文章
- CentOS安装配置ganglia
1. 下载ganglia源码包并解压 wget http://sourceforge.net/projects/ganglia/files/ganglia%20monitoring%20cor ...
- web3.js编译Solidity,发布,调用全部流程(手把手教程)
web3.js编译Solidity,发布,调用全部流程(手把手教程) 下面教程是打算在尽量牵涉可能少的以太坊的相关工具,主要使用web3.js这个以太坊提供的工具包,来完成合约的编译,发布,合约方法调 ...
- 使用web3+solc编译发布以太坊智能合约
一.环境安装: 1.安装web3工程:npm install web3 2.安装solc工程:npm install solc二.在node环境中使用 先引用所需环境: var fs = requir ...
- ansible安装nginx
ansible安装nginx(实现回滚发布功能:下一篇博客.没想到写长了) 一.准备工作 1.准备两台机器 sai: 192.168.131.132 ——> ansible的服务端 luojy ...
- 玩转web3第二篇——Web3UI Kit
介绍 开发web2应用的时候,可以很方便找到很多优秀的UI库,比如antd,material ui,element ui等等,但web3应用对应的UI库却不多. 今天给大家介绍一款优秀的WEB3的UI ...
- php精简完全小结(linux/laravel篇)
php官网:http://www.php.netphp版本: 查看:php -version说明:None-Thread Safe就是非线程安全,在执行时不进行线程(thread)安全检查:Threa ...
- truffle init 从零开始创建简单DApp项目
下面的部分软件需要FQ.这里默认你已经会***,不懂的可以自己搜索解决. 软件安装 chrome浏览器 下载地址 metamask插件 在谷歌应用商店中搜索metamask ganche(图形版) 下 ...
- LVS+Keepalive+Nginx实现负载均衡
本文参考:http://blog.csdn.net/yinwenjie/article/details/47211551 简单粗暴写一下,做备忘,刚刚搭好没做优化呢,后期补充 一.机器准备 LVS-M ...
- day02 智能合约
上午 1>部署智能合约网络 语法 require 2>利用第三方的节点 同步到以太坊 3>智能合约部署的步骤: 1.查看区块 2.发布合约 deploy后台经历的事情:就是部署合约的 ...
随机推荐
- Tiny4412 开发板 编译环境搭建【转】
本文转载自:http://blog.csdn.net/beijiwei/article/details/51055369 版权声明:本文为博主原创文章,未经博主允许不得转载. /*********** ...
- poj 2104 K-th Number 主席树+超级详细解释
poj 2104 K-th Number 主席树+超级详细解释 传送门:K-th Number 题目大意:给出一段数列,让你求[L,R]区间内第几大的数字! 在这里先介绍一下主席树! 如果想了解什么是 ...
- cf578c Weakness and Poorness 三分
其实三分就是一个求单峰函数的最值的东西,用法比较统一.这个题就是观察发现不美好值是一个单峰函数,然后枚举t进行三分就行了. 题干: 给定一个长度为n的数组ai,求一个实数x,使得序列a1-x,a2-x ...
- codevs3981动态最大子段和(线段树)
3981 动态最大子段和 时间限制: 1 s 空间限制: 128000 KB 题目等级 : 钻石 Diamond 题目描述 Description 题目还是简单一点好... 有n个数,a ...
- P2533 [AHOI2012]信号塔
传送门 据说是一个叫做随机增量法的东西 枚举\(i\),如果不在圆中将它设为圆心 枚举\(j\),如果不在圆中将\((i,j)\)成为新的圆的直径 枚举\(k\),如果不在圆中让\(i,j,k\)组成 ...
- 基于Spark Streaming预测股票走势的例子(二)
上一篇博客中,已经对股票预测的例子做了简单的讲解,下面对其中的几个关键的技术点再作一些总结. 1.updateStateByKey 由于在1.6版本中有一个替代函数,据说效率比较高,所以作者就顺便研究 ...
- Android App签名(为apk签名)
最近有朋友问到 android 签名的问题,所以转一篇给大家分享: 这篇文章是android开发人员的必备知识,是我特别为大家整理和总结的,不求完美,但是有用. 1.签名的意义 为了保证每个应用程序开 ...
- 研磨JavaScript系列(四):代码的时空
对于过程式编程来说,代码执行的时间与数据标识的空间是密不可分的.我们只有把指令执行的具体时刻与标识映射的具体地址结合起来,才能确定程序在执行瞬间的上下文状态.于是,代码时刻与数据标识的结构,就形成了作 ...
- CUDA-GPU编程
参考:http://blog.csdn.net/augusdi/article/details/12833235 第二节 新建NVIDIA项目: 新建项目及会生成一个简单的代码demo,计算矩阵的加 ...
- RTL Compiler之Example
Synthesis = Translation + Logic Optimization + Mapping Step 1 Source files 1) make directory mkdir ...