基于Keras实现mnist-官方例子理解
前言
久闻keras大名,最近正好实训,借着这个机会好好学一下。
首先推荐一个API,可能稍微有点旧,但是写的是真的好
https://keras-cn.readthedocs.io/en/latest/
还有一个tensorflow的API
https://www.w3cschool.cn/tensorflow_python/?
还有强烈推荐使用vscode+anaconda 配置环境
环境
安装anaconda和vscode,在conda中新建keras的环境。
conda create -n keras python=3.6

pip install tensorflow # 如果有GPU改为pip install tensorflow-gpu

pip install keras
正题
mnist是入门级别的数据集,是一个基本的分类数据集。这次尝试构造深度神经网络来构造一个图像分类器。
import keras

from keras.datasets import mnist

import numpy as np

from PIL import Image

import matplotlib.pyplot as plt

from keras.models import Sequential

from keras.layers import Dense,Conv2D,MaxPooling2D,Flatten

import cv2

import matplotlib

matplotlib.use('TkAgg')

batch_size=32

num_classes=10

(train_images,train_labels),(test_images,test_labels) = mnist.load_data()

print(train_images.shape,train_labels.shape)

print(test_images.shape,test_labels.shape)

"""

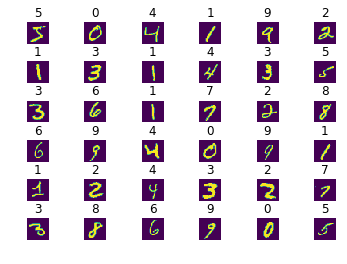
将数据集中图片展示出来

"""

def show_mnist(train_image,train_labels):

    n = 3

    m = 3

    fig = plt.figure()

    for i in range(n):

        for j in range(m):

            plt.subplot(n,m,i*n+j+1)

            #plt.subplots_adjust(wspace=0.2, hspace=0.8)

            index = i * n + j #当前图片的标号

            img_array = train_image[index]

            img = Image.fromarray(img_array)

            plt.title(train_labels[index])

            plt.imshow(img,cmap='Greys')

    plt.show()

img_row,img_col,channel = 28,28,1

mnist_input_shape = (img_row,img_col,1)

#将数据维度进行处理

train_images = train_images.reshape(train_images.shape[0],img_row,img_col,channel)

test_images = test_images.reshape(test_images.shape[0],img_row,img_col,channel)

train_images = train_images.astype("float32")

test_images = test_images.astype("float32")

## 进行归一化处理

train_images  /= 255

test_images /= 255

# 将类向量,转化为类矩阵

# 从 5 转换为 0 0 0 0 1 0 0 0 0 0 矩阵

train_labels = keras.utils.to_categorical(train_labels,num_classes)

test_labels = keras.utils.to_categorical(test_labels,num_classes)

"""

构造网络结构

"""

model = Sequential()

model.add(Conv2D(32,kernel_size=(3,3),

                    activation="relu",

                    input_shape=mnist_input_shape))

                    # kernalsize = 3*3 并没有改变数据维度

model.add(Conv2D(16,kernel_size=(3,3),

                    activation="relu"

                    ))

model.add(MaxPooling2D(pool_size=(2,2)))

                    # 进行数据降维操作

model.add(Flatten())#Flatten层用来将输入“压平”,即把多维的输入一维化,

                    #常用在从卷积层到全连接层的过渡。Flatten不影响batch的大小。

model.add(Dense(32,activation="relu"))

                    #全连接层

model.add(Dense(num_classes,activation='softmax'))

"""

编译网络模型,添加一些超参数

"""

model.compile(loss=keras.losses.categorical_crossentropy,

                optimizer=keras.optimizers.Adadelta(),

                metrics=['accuracy'])

model.fit(train_images,

            train_labels,

            batch_size=batch_size,

            epochs=5,

            verbose=1,

            validation_data=(test_images,test_labels),

            shuffle=True

            )

score = model.evaluate(test_images,test_labels,verbose=1)

print('test loss:',score[0])

print('test accuracy:',score[1])
其中涉及到几个keras中的点,感觉看完以后很透彻,但是这只是初步应用,之后还会继续再写的。

jupyter notebook 版本的请访问:https://github.com/pprp/keras-example/tree/master/implement/mnist_keras/
欢迎访问我的Github:https://www.github.com/pprp/ star fork 感激不尽
基于Keras实现mnist-官方例子理解的更多相关文章
- 基于Keras 的VGG16神经网络模型的Mnist数据集识别并使用GPU加速
这段话放在前面:之前一种用的Pytorch,用着还挺爽,感觉挺方便的,但是在最近文献的时候,很多实验都是基于Google 的Keras的,所以抽空学了下Keras,学了之后才发现Keras相比Pyto ...
- 基于tensorflow的MNIST手写数字识别(二)--入门篇
http://www.jianshu.com/p/4195577585e6 基于tensorflow的MNIST手写字识别(一)--白话卷积神经网络模型 基于tensorflow的MNIST手写数字识 ...
- Caffe系列4——基于Caffe的MNIST数据集训练与测试(手把手教你使用Lenet识别手写字体)
基于Caffe的MNIST数据集训练与测试 原创:转载请注明https://www.cnblogs.com/xiaoboge/p/10688926.html 摘要 在前面的博文中,我详细介绍了Caf ...
- [深度应用]·首届中国心电智能大赛初赛开源Baseline(基于Keras val_acc: 0.88)
[深度应用]·首届中国心电智能大赛初赛开源Baseline(基于Keras val_acc: 0.88) 个人主页--> https://xiaosongshine.github.io/ 项目g ...
- 基于 Keras 用 LSTM 网络做时间序列预测
目录 基于 Keras 用 LSTM 网络做时间序列预测 问题描述 长短记忆网络 LSTM 网络回归 LSTM 网络回归结合窗口法 基于时间步的 LSTM 网络回归 在批量训练之间保持 LSTM 的记 ...
- 基于 Keras 用深度学习预测时间序列
目录 基于 Keras 用深度学习预测时间序列 问题描述 多层感知机回归 多层感知机回归结合"窗口法" 改进方向 扩展阅读 本文主要参考了 Jason Brownlee 的博文 T ...
- 基于TensorRT的BERT实时自然语言理解(下)
基于TensorRT的BERT实时自然语言理解(下) BERT Inference with TensorRT 请参阅Python脚本bert_inference.py还有详细的Jupyter not ...
- 基于TensorRT的BERT实时自然语言理解(上)
基于TensorRT的BERT实时自然语言理解(上) 大规模语言模型(LSLMs)如BERT.GPT-2和XL-Net为许多自然语言理解(NLU)任务带来了最先进的精准飞跃.自2018年10月发布以来 ...
- 最简单的基于FFmpeg的移动端例子:IOS 视频解码器-保存
===================================================== 最简单的基于FFmpeg的移动端例子系列文章列表: 最简单的基于FFmpeg的移动端例子:A ...
随机推荐
- Nginx配置自定义的403页面
1.开启nginx的状态码,虚拟主机配置中加入下边一段 location /nginx_status{ stub_status on; access_log off; } 或着在nginx的http模 ...
- 【mysql】reset Password
https://www.cnblogs.com/josn1984/p/8550419.html https://blog.csdn.net/l1028386804/article/details/92 ...
- vue-router parmas与query的区别
$router是路由对象,是一个只写的对象 $route是当前路由的信息对象,是一个只读的对象 带参数路由跳转 1 query参数,这个是作为字符串拼接在url的后面,跟路由没有关系,demo:lis ...
- SpringBoot学习笔记:单元测试
SpringBoot学习笔记:单元测试 单元测试 单元测试(英语:Unit Testing)又称为模块测试,是针对程序模块(软件设计的最小单位)来进行正确性检验的测试工作.程序单元是应用的最小可测试部 ...
- linux如何找回已经删除的文件?lsof
简介 lsof(list open files)是一个列出当前系统打开文件的工具.在linux环境下,任何事物都以文件的形式存在,通过文件不仅仅可以访问常规数据,还可以访问网络连接和硬件.所以如传输控 ...
- git实现码云的上传和下载
上传步骤: 1.码云上新建一个项目 XXXX? ?(项目名) 2.本地创建一个文件夹E:/XXXX,然后使用git bash? ?? 3.cd 到本地文件夹中E:/XXXX? //如果是在创建的文件中 ...
- [Visual Studio] - Unable to launch the IIS Express Web server 问题之解决
背景 Visual Studio 2015 在 Debug 模式下调试失败. 错误 解决 删除解决方案下 .vs/config 文件夹,重新运行解决方案可进行调试. 参考资料 https://stac ...
- 修改主机名和修改主机映射和ssh免登陆
1.修改主机名 vim /etc/sysconfig/network NETWORKING=yes HOSTNAME=cc3 2.修改主机映射 vi /etc/hosts 127.0.0.1 loca ...
- Android去评分,分享
去评分: 跳到手机中已安装的市场评分页面 Uri uri = Uri.parse("market://details?id="+getPackageName()); Intent ...
- AX 2009中现有量画面修改
前端时间开发一个东西,需要在现有量画面增加一个字段 但是发现这个display方法写在任何数据源下面都不行,数据取的不对. 因为InventSum这个表只有所有维度都出来时才会有对应关联的invent ...
