
spring cloud sleuth
新建spring boot工程trace-1,添加pom依赖
<dependency>

            <groupId>org.springframework.cloud</groupId>

            <artifactId>spring-cloud-starter-eureka</artifactId>

        </dependency>

        <dependency>

            <groupId>org.springframework.cloud</groupId>

            <artifactId>spring-cloud-starter-ribbon</artifactId>

        </dependency>

        <!--<dependency>-->

            <!--<groupId>org.springframework.cloud</groupId>-->

            <!--<artifactId>spring-cloud-sleuth-stream</artifactId>-->

        <!--</dependency>-->

        <dependency>

            <groupId>org.springframework.cloud</groupId>

            <artifactId>spring-cloud-starter-sleuth</artifactId>

        </dependency>

        <!--<dependency>-->

            <!--<groupId>org.springframework.cloud</groupId>-->

            <!--<artifactId>spring-cloud-starter-zipkin</artifactId>-->

        <!--</dependency>-->

        <dependency>

            <groupId>org.springframework.boot</groupId>

            <artifactId>spring-boot-starter-web</artifactId>

        </dependency>
Trace1Application
import org.slf4j.Logger;

import org.slf4j.LoggerFactory;

import org.springframework.boot.SpringApplication;

import org.springframework.boot.autoconfigure.SpringBootApplication;

import org.springframework.cloud.client.discovery.EnableDiscoveryClient;

import org.springframework.cloud.client.loadbalancer.LoadBalanced;

import org.springframework.context.annotation.Bean;

import org.springframework.web.bind.annotation.RequestMapping;

import org.springframework.web.bind.annotation.RequestMethod;

import org.springframework.web.bind.annotation.RestController;

import org.springframework.web.client.RestTemplate;

@RestController

@EnableDiscoveryClient

@SpringBootApplication

public class Trace1Application {

    public static void main(String[] args) {

        SpringApplication.run(Trace1Application.class, args);

    }

    private final Logger logger= LoggerFactory.getLogger(getClass());

    @Bean

    @LoadBalanced

    RestTemplate restTemplate(){

        return new RestTemplate();

    }

    @RequestMapping(value = "/trace-1",method = RequestMethod.GET)

    public String trace(){

        logger.info("===call trace-1===");

        return restTemplate().getForEntity("http://trace-2/trace-2",String.class).getBody();

    }

}
配置
spring.application.name=trace-1

server.port=9101

eureka.client.service-url.defaultZone=http://localhost:1111/eureka/
再建一个trace-2,依赖同上
Trace2Application
import org.slf4j.Logger;

import org.slf4j.LoggerFactory;

import org.springframework.boot.SpringApplication;

import org.springframework.boot.autoconfigure.SpringBootApplication;

import org.springframework.cloud.client.discovery.EnableDiscoveryClient;

import org.springframework.cloud.client.loadbalancer.LoadBalanced;

import org.springframework.context.annotation.Bean;

import org.springframework.web.bind.annotation.RequestMapping;

import org.springframework.web.bind.annotation.RequestMethod;

import org.springframework.web.bind.annotation.RestController;

import org.springframework.web.client.RestTemplate;

@RestController

@EnableDiscoveryClient

@SpringBootApplication

public class Trace2Application {

    public static void main(String[] args) {

        SpringApplication.run(Trace2Application.class, args);

    }

    private final Logger logger= LoggerFactory.getLogger(getClass());

    @RequestMapping(value = "/trace-2",method = RequestMethod.GET)

    public String trace(){

        logger.info("===call trace-2===");

        return "Trace";

    }

}
启动之前的eureka-server,启动trace-1和trace-2

访问:http://localhost:9101/trace-1
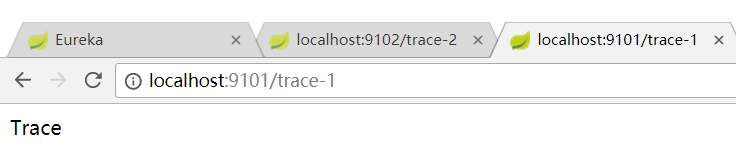
在控制台中查看日志
trace-1

trace-2

可以看到trace-1中的TraceId c44f784f0a901bd8 已经被传到trace-2中了,这里就实现了服务的跟踪
这里的第二个值是TraceId,第三个值是SpanId,第四个值表示是否将信息输出到Zipkin等服务中收集
这里需要设置一个收集的频率
spring.sleuth.sampler.percentage=1
默认是0.1,改成1方便测试
将trace-1和trace-2中的pom依赖取消注释
<dependency>

            <groupId>org.springframework.cloud</groupId>

            <artifactId>spring-cloud-sleuth-zipkin</artifactId>

        </dependency>
在docker中运行Zipkin
docker run -d -p 9411:9411 openzipkin/zipkin
配置中添加Zipkin地址
spring.zipkin.base-url=http://10.202.203.29:9411
运行trace-1,trace-2,打开:http://localhost:9101/trace-1 多刷新几次
可以看到第四个值是true


打开Zipkin地址:http://10.202.203.29:9411/zipkin/ 点击查找
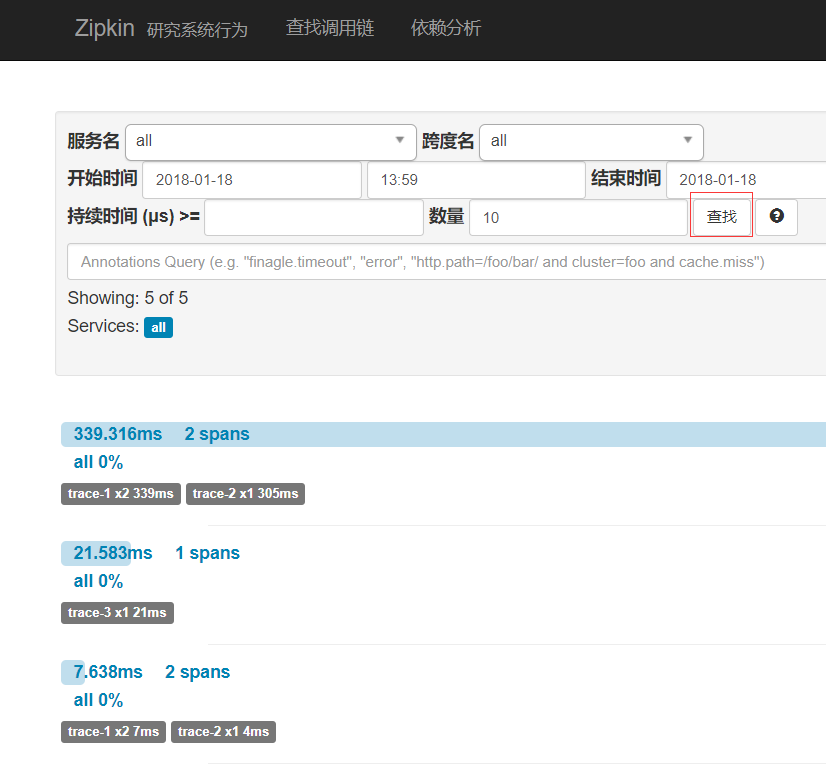
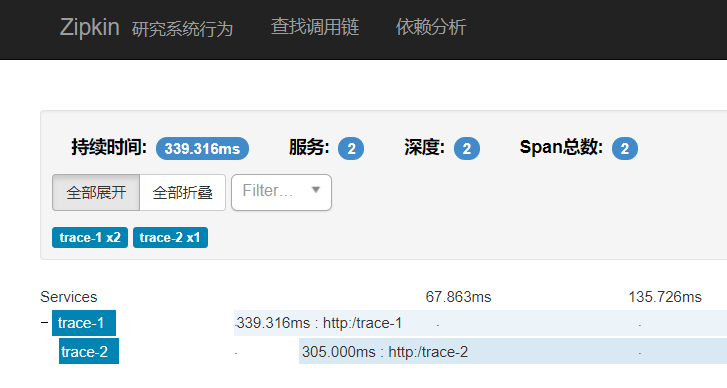
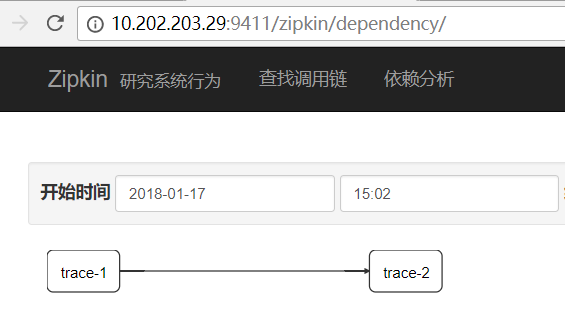
查看依赖分析
spring cloud sleuth的更多相关文章
- springcloud(十二):使用Spring Cloud Sleuth和Zipkin进行分布式链路跟踪
随着业务发展,系统拆分导致系统调用链路愈发复杂一个前端请求可能最终需要调用很多次后端服务才能完成,当整个请求变慢或不可用时,我们是无法得知该请求是由某个或某些后端服务引起的,这时就需要解决如何快读定位 ...
- Spring Cloud Sleuth服务链路追踪(zipkin)(转)
这篇文章主要讲述服务追踪组件zipkin,Spring Cloud Sleuth集成了zipkin组件. 一.简介 Spring Cloud Sleuth 主要功能就是在分布式系统中提供追踪解决方案, ...
- SpringCloud(7)服务链路追踪Spring Cloud Sleuth
1.简介 Spring Cloud Sleuth 主要功能就是在分布式系统中提供追踪解决方案,并且兼容支持了 zipkin,你只需要在pom文件中引入相应的依赖即可.本文主要讲述服务追踪组件zipki ...
- 第八篇: 服务链路追踪(Spring Cloud Sleuth)
一.简介 一个分布式系统由若干分布式服务构成,每一个请求会经过多个业务系统并留下足迹,但是这些分散的数据对于问题排查,或是流程优化都很有限. 要能做到追踪每个请求的完整链路调用,收集链路调用上每个 ...
- 浅尝Spring Cloud Sleuth
Spring Cloud Sleuth提供了分布式追踪(distributed tracing)的一个解决方案.其基本思路是在服务调用的请求和响应中加入ID,标明上下游请求的关系.利用这些信息,可以方 ...
- Spring Cloud Sleuth超详细实战
为什么需要Spring Cloud Sleuth 微服务架构是一个分布式架构,它按业务划分服务单元,一个分布式系统往往有很多个服务单元.由于服务单元数量众多,业务的复杂性,如果出现了错误和异常,很难去 ...
- 史上最简单的SpringCloud教程 | 第九篇: 服务链路追踪(Spring Cloud Sleuth)
这篇文章主要讲述服务追踪组件zipkin,Spring Cloud Sleuth集成了zipkin组件. 注意情况: 该案例使用的spring-boot版本1.5.x,没使用2.0.x, 另外本文图3 ...
- 服务链路追踪(Spring Cloud Sleuth)
sleuth:英 [slu:θ] 美 [sluθ] n.足迹,警犬,侦探vi.做侦探 微服务架构是一个分布式架构,它按业务划分服务单元,一个分布式系统往往有很多个服务单元.由于服务单元数量众多,业务的 ...
- Distributed traceability with Spring Cloud: Sleuth and Zipkin
I. Sleuth 0. Concept Trace A set of spans that form a call tree structure, forms the trace of the re ...
- Spring Cloud Sleuth 服务跟踪 将跟踪信息存储到数据库
参见上一篇博客:Spring Cloud Sleuth 服务跟踪 参考:zipkin使用mysql保存数据 主要在跟踪服务上配置: 在数据库创建数据库表:(可不创建,在classpath中添加对应的s ...
随机推荐
- Arria10调试问题集之——480转成270中DDR4 IP重新生成的问题
在把FPGA器件从480修改成270时DDR4报错: Error (16383): Silicon revision parameter for the following EMIF/PHYLite ...
- 1, 2, and 4 symbols per clock中数据排列
图片来自High-DenitionMultimedia Interface (HDMI) IP Core User Guide 在自己处理的过程中很多细节的东西必须要清楚. 今天想自己从RGB数据中 ...
- Ajax传数据到servlet
//jsp代码 <%@ page language="java" contentType="text/html; charset=ISO-8859-1" ...
- 【王者荣耀之IT大神版】1.1版本升级之“投降机制”
版本:1.1 关于“投降机制”的理论基础与灵感来源于<微习惯>这本书. 简单来说,微习惯就是很小很小的习惯,比如说,每天做一个俯卧撑,每天看一页书等等.我们以前也许有过很多的计划,但却总是 ...
- c#+web下载文件夹
最近公司在做工程项目,实现文件夹下载. 网上找了很久,发现网上的代码都有相似的问题,不过最终还是让我找到了一个符合的项目. 工程: 进行项目文件夹下载功能分析,弄清楚文件夹下载的原理,提供的数据支持. ...
- 利用nginx打造个人简历网页
1.下载nginx nginx官方网址:http://nginx.org/ 2.下载和解压 #下载:[root@iZwz9cl4i8oy1reej7o8pmZ soft]# wget http://n ...
- 队列<一>
这里用的递归法,采用两种版本,一种是C语言,一种是C++:但是,用C语言没有“引用”,所以采用的是指向指针的指针:而C++具备“引用”,所以直接用&引用,简洁: 先看C++的代码: BiTre ...
- nutch从搜索引擎到网络爬虫
人物介绍 姓名:DougCutting 个人名望:开发出开源全文检索引擎工具包Lucene. 个人简介/主要荣誉:除了 Lucene,还开发了著名的网络爬虫工具 Nutch,分布式系统基础架构Hado ...
- iOS 5 故事板进阶(1)
译自<iOS 5 by tutorials> 在上一章,你已经学习了故事板的基本用法.包括如何向故事板中添加 View Controller,通过 segues 切换 View Contr ...
- Advice from an Old Programmer
You’ve finished this book and have decided to continue with programming. Maybe it will be a career f ...