CentOS 下部署weblogic12.1.1.0
1.软件包
JDK 1.7.0
Weblogic 12.1.1.0
2.JDK安装完配置环境变量
export JAVA_HOME=/usr/java/jdk1.7.0_79
export CLASSPATH=.:$JAVA_HOME/jre/lib/rt.jar:$JAVA_HOME/lib/dt.jar:$JAVA_HOME/lib/tools.jar
export PATH=$PATH:$JAVA_HOME/bin
验证
#java -version
3.安装Weblogic
①创建用户、用户组、修改密码
[root@localhost~]groupadd weblogic
[root@localhost~]useradd -g weblogic weblogic
[root@localhost~]passwd weblogic
②将软件包上传到/home/weblogic
如果用root用户传的话,还需在上传完之后,将文件的拥有者改为weblogic,否则安装的时候可能会出问题
③开始安装
java -jar wls1211_generic.jar -mode=console
根据提示选择即可
This installer will guide you through theinstallation of WebLogic 12.1.1.0.
Type "Next" or enter to proceedto the next prompt. If you want tochange data entered previously, type "Previous". You may quit the installer at any time bytyping "Exit".
Enter [Exit][Next]> Next
Choose Middleware Home Directory:
---------------------------------
"Middleware Home" = [Enter new value or use default
"/home/weblogic/Oracle/Middleware"]
Enter new Middleware Home OR[Exit][Previous][Next]> Next
Choose Middleware Home Directory:
---------------------------------
"Middleware Home" = [/home/weblogic/Oracle/Middleware]
Use above value or select another option:
1- Enter new Middleware Home
2- Change to default [/home/weblogic/Oracle/Middleware]
Enter option number to select OR[Exit][Previous][Next]> Next
Register for Security Updates:
------------------------------
Provide your email address for securityupdates and to initiate configurationmanager.
1|Email:[]
2|Support Password:[]
3|Receive Security Update:[Yes]
Enter index number to select OR[Exit][Previous][Next]> 3
Register for Security Updates:
------------------------------
Provide your email address for securityupdates and to initiate configurationmanager.
"Receive Security Update:" = [Enter new value or use default"Yes"]
Enter [Yes][No]? No
Register for Security Updates:
------------------------------
Provide your email address for securityupdates and to initiate configurationmanager.
"Receive Security Update:" = [Enter new value or use default"Yes"]
** Do you wish to bypass initiation of the configuration manager and
** remain uninformed of criticalsecurity issues in your configuration?
Enter [Yes][No]? yes
Register for Security Updates:
------------------------------
Provide your email address for securityupdates and to initiate configurationmanager.
1|Email:[]
2|Support Password:[]
3|Receive Security Update:[No]
Enter index number to select OR [Exit][Previous][Next]> Next
Choose Install Type:
--------------------
Select the type of installation you wish toperform.
->1|Typical
| Install the followingproduct(s) and component(s):
|- WebLogic Server
|- Oracle Coherence
2|Custom
| Choose software products andcomponents to install and perform optional
|configuration.
Enter index number to select OR[Exit][Previous][Next]> 1
Choose Product Installation Directories:
----------------------------------------
Middleware Home Directory: [/home/weblogic/Oracle/Middleware]
Product Installation Directories:
1|WebLogic Server: [/home/weblogic/Oracle/Middleware/wlserver_12.1]
2|Oracle Coherence: [/home/weblogic/Oracle/Middleware/coherence_3.7]
Enter index number to select OR[Exit][Previous][Next]> Next
The following Products and JDKs will beinstalled:
--------------------------------------------------
WebLogic Platform 12.1.1.0
|_____WebLogic Server
| |_____Core Application Server
| |_____Administration Console
| |_____Configuration Wizardand Upgrade Framework
| |_____Web 2.0 HTTP Pub-SubServer
| |_____WebLogic SCA
| |_____WebLogic JDBC Drivers
| |_____Third Party JDBCDrivers
| |_____WebLogic Server Clients
| |_____Xquery Support
| |_____Evaluation Database
|_____Oracle Coherence
| |_____Coherence Product Files
|_____JDKs
|_____SUN SDK 1.6.0_29
|_____Oracle JRockit 1.6.0_29 SDK
*Estimated size of installation: 1,178.0 MB
Enter [Exit][Previous][Next]> Next
Installing files..
0% 25% 50% 75% 100%
[------------|------------|------------|------------]
[***************************************************]
Installing JDK....
Performing String Substitutions...
Configuring OCM...
Installing Patches...
Creating Domains...
Installation Complete
Press [Enter] to continue or type[Exit]> ↙
④配置Domain
Domain是weblogic中很重要的一个概念,必须先创建一个domain域,然后所有对项目的维护都是在这个domain域中完成。Domain域的创建也通过控制台方式完成。
上面安装完成之后,找到配置文件/home/weblogic/Oracle/Middleware/wlserver_12.1/common/bin/config.sh
[weblogic@localhost ~]/home/weblogic/Oracle/Middleware/wlserver_12.1/common/bin/config.sh –mode=console
Welcome:
--------
Choosebetween creating and extending a domain. Based on your selection,
theConfiguration Wizard guides you through the steps to generate a new or
extendan existing domain.
->1|Create a new WebLogic domain
| Create a WebLogic domain in your projects directory.
2|Extend an existing WebLogic domain
| Use this option to add new components to an existing domain andmodify |configuration settings.
Enterindex number to select OR [Exit][Next]> 1
Select DomainSource:
---------------------
Selectthe source from which the domain will be created. You can create the
domainby selecting from the required components or by selecting from a
list ofexisting domain templates.
->1|Choose Weblogic Platform components
| You can choose the Weblogic component(s) that you want supported in
|your domain.
2|Choose custom template
| Choose this option if you want to use an existing template. This
|could be a custom created template usingthe Template Builder.
Enterindex number to select OR [Exit][Previous][Next]> 1
ApplicationTemplate Selection:
-------------------------------
Available Templates
|_____Basic WebLogic Server Domain -12.1.1.0 [wlserver_12.1]x
|_____Basic WebLogic SIP Server Domain -12.1.1.0 [wlserver_12.1] [2]
|_____WebLogic Advanced Web Services forJAX-RPC Extension - 12.1.1.0 [wlserver_12.1] [3]
|_____WebLogic Advanced Web Services forJAX-WS Extension - 12.1.1.0 [wlserver_12.1] [4]
Enternumber exactly as it appears in brackets to toggle selection OR[Exit][Previous][Next]> next
EditDomain Information:
------------------------
| Name | Value |
_|________|_____________|
1| *Name: | base_domain |
Enter valuefor "Name" OR [Exit][Previous][Next]> weblogic
EditDomain Information:
------------------------
| Name | Value |
_|________|_______ |
1| *Name: | weblogic |
Useabove value or select another option:
1 - Modify "Name"
2 -Discard Changes
Enteroption number to select OR [Exit][Previous][Next]> next
Selectthe target domain directory for this domain:
---------------------------------------------------
"Target Location" = [Enter newvalue or use default
"/home/weblogic//user_projects/domains"]
Enternew Target Location OR [Exit][Previous][Next]> Next
ConfigureAdministrator User Name and Password:
-----------------------------------------------
Create auser to be assigned to the Administrator role. This user is the
defaultadministrator used to start development mode servers.
| Name | Value |
_|_________________________|_________________________________________|
1| *Name: | weblogic |
2| *User password: | |
3| *Confirm user password: | |
4| Description: | This user isthe default administrator. |
Useabove value or select another option:
1 - Modify "Name"
2 - Modify "User password"
3 - Modify "Confirm userpassword"
4 - Modify "Description"
Enteroption number to select OR [Exit][Previous][Next]> 2
ConfigureAdministrator User Name and Password:
-----------------------------------------------
Create auser to be assigned to the Administrator role. This user is the
defaultadministrator used to start development mode servers.
"*User password:" = []
Enternew *User password: OR [Exit][Reset][Accept]> 输入密码(至少八位)
Create auser to be assigned to the Administrator role. This user is the
defaultadministrator used to start development mode servers.
| Name | Value |
_|_________________________|_________________________________________|
1| *Name: | weblogic |
2| *User password: | ******** |
3| *Confirm user password: | |
4| Description: | This user isthe default administrator. |
Useabove value or select another option:
1 - Modify "Name"
2 - Modify "User password"
3 - Modify "Confirm userpassword"
4 - Modify "Description"
5 - Discard Changes
Enteroption number to select OR [Exit][Previous][Next]> 3
ConfigureAdministrator User Name and Password:
-----------------------------------------------
Create auser to be assigned to the Administrator role. This user is the
defaultadministrator used to start development mode servers.
"*Confirm user password:" = []
Enternew *Confirm user password: OR [Exit][Reset][Accept]> 重复密码(至少八位)
Create auser to be assigned to the Administrator role. This user is the
defaultadministrator used to start development mode servers.
| Name | Value |
_|_________________________|_________________________________________|
1| *Name: | weblogic |
2| *User password: | ****** |
3| *Confirm user password: | ****** |
4| Description: | This user isthe default administrator. |
Useabove value or select another option:
1 - Modify "Name"
2 - Modify "User password"
3 - Modify "Confirm userpassword"
4 - Modify "Description"
5 - Discard Changes
Enteroption number to select OR [Exit][Previous][Next]> next
DomainMode Configuration:
--------------------------
EnableDevelopment or Production Mode for this domain.
->1|Development Mode
2|Production Mode
Enterindex number to select OR [Exit][Previous][Next]> next
Java SDKSelection:
-------------------
1|JRockit SDK jdk1.7.0_79 @ /home/weblogic/jrockit_170_79_D1.2.0-10
->2|Sun SDK jdk1.7.0_79 @ /home/weblogic/jdk1.7.0_79
3|Other Java SDK
Enterindex number to select OR [Exit][Previous][Next]> next
SelectOptional Configuration:
------------------------------
1|Administration Server [ ]
2|Managed Servers, Clusters and Machines [ ]
3|RDBMS Security Store [ ]
Enterindex number to select OR [Exit][Previous][Next]> 1
SelectOptional Configuration:
------------------------------
1|Administration Server [x]
2|Managed Servers, Clusters and Machines [ ]
3|RDBMS Security Store [ ]
Enterindex number to select OR [Exit][Previous][Next]> next
EachWebLogic Server domain must have one Administration Server. The Administration
Serveris used to perform administrative tasks.
| Name | Value |
_|__________________|_____________________|
1| *Name: | AdminServer |
2| *Listen address: | All Local Addresses |
3| Listen port: | 7001 |
4| SSL listen port: | N/A |
5| SSL enabled: | false |
Use abovevalue or select another option:
1 - Modify "Name"
2 - Modify "Listen address"
3 - Modify "Listen port"
4 - Modify "SSL enabled"
Enteroption number to select OR [Exit][Previous][Next]> 3
EachWebLogic Server domain must have one Administration Server. The Administration
Serveris used to perform administrative tasks.
| Name | Value |
_|__________________|_____________________|
1| *Name: | AdminServer |
2| *Listen address: | All Local Addresses |
3| Listen port: | 7001 |
4| SSL listen port: | N/A |
5| SSL enabled: | false |
Entervalue for "Listen port" OR [Exit][Previous][Next]> next
Creating Domain...
0% 25% 50% 75% 100%
[------------|------------|------------|------------]
[***************************************************]
**** Domain Created Successfully! ****
如果需要重新安装配置Domain,删除/home/weblogic/Oracle/Middleware/user_projects/domains下文件,删除/home/weblogic/Oracle/Middleware/domain-registry.xml的配置

然后重新按照第④步即可
⑤启动服务
[weblogic@localhost ~]cd /home/weblogic/Oracle/Middleware/user_projects/domains/weblogic
[weblogic@localhost ~]nohup ./startWeblogic.sh & //采用后台启动方式
4、可能存在的问题
笔者在安装时并未卸载JDK1.8,虽然echo $JAVAJ_HOME配置正确,但是环境变量还是有问题。
①配置domain的时候报JDK错误,根据提示手动修改
/home/weblogic/Oracle/Middleware/wlserver_12.1/common/bin/commEnv.sh脚本中JAVA_HOME的值
②启动控制台也是JDK报错,根据脚本提示手动修改
/home/weblogic/Oracle/Middleware/user_projects/domains/weblogic/binsetDomainEnv.sh脚本中JAVA_HOME的值
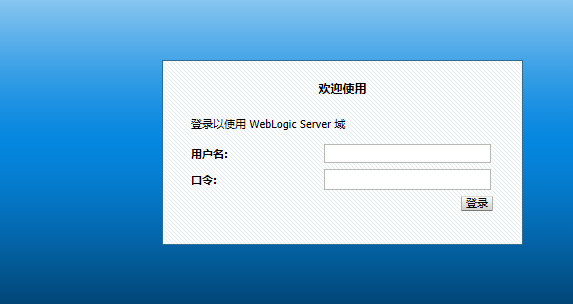
5、浏览器打开页面验证
http://IP:7001/console/
参考资料----------------------https://blog.csdn.net/wjf8882300/article/details/52303728
CentOS 下部署weblogic12.1.1.0的更多相关文章
- Linux CentOS下部署Java Web项目
本文讲解如何在Linux CentOS下部署Java Web项目的步骤. 一.环境准备: (1)Linux CentOS (2)apache-tomcat-9.0.10 (3)XShell 二.启动t ...
- java部署系列:CentOS下部署Java7/Java8
一.前言 1.本文主要内容 CentOS下部署OracleJDK CentOS下部署OpenJDK 2.适用范围与本篇环境 适用范围 1.CentOS 6+2.Java 7+ 本篇环境 1.CentO ...
- Linux下部署docker记录(0)-基础环境安装
以下是centos系统安装docker的操作记录 1)第一种方法:采用系统自带的docker安装,但是这一般都不是最新版的docker安装epel源[root@docker-server ~]# wg ...
- Centos下部署Flask
尝试在Centos6.5下部署Flask应用并成功,记录一下步骤,参数为什么这样配置还需要再研究uwsgi和Nginx才能回答. Python版本升级2.7 测试机器centos6.5默认自带的pyt ...
- CentOS下搭建LNMP+WordPress+http2.0教程
此文是本人CentOS下搭建WordPress的一些笔记,环境搭建时间::将看过的几篇文章总结下来,形成一条龙长文.不用大家再找来找去. 本文大概分为此几部分: 一.基础命令更新: 二.服务器加速(非 ...
- CentOS 下部署Nginx+Gunicorn+Supervisor部署Flask项目
原本之前有一部分东西是在Windows Server,但是由于Gunicorn不支持Windows部署起来颇为麻烦.最近转战CentOS,折腾一段时间,终于简单部署成功.CentOS新手,作为一个总结 ...
- linux centos7 和 windows下 部署 .net core 2.0 web应用
centos7 下部署asp.net core 2.0应用 安装CentOS7 配置网络[可选] 安装.Net core2.0 创建测试Asp.net Core应用程序 正式部署项目 安装VMware ...
- Centos下堡垒机Jumpserver V3.0环境部署完整记录(2)-配置篇
前面已经介绍了Jumpserver V3.0的安装,基于这篇安装文档,下面说下Jumpserver安装后的的功能使用: 一.jumpserver的启动 Jumpserver的启动和重启 [root@t ...
- Centos下堡垒机Jumpserver V3.0环境部署完整记录(1)-安装篇
由于来源身份不明.越权操作.密码泄露.数据被窃.违规操作等因素都可能会使运营的业务系统面临严重威胁,一旦发生事故,如果不能快速定位事故原因,运维人员往往就会背黑锅.几种常见的运维人员背黑锅场景:1)由 ...
随机推荐
- 《锋利的JQuery》中重写超链接与图片提示效果
代码部分: <!DOCTYPE html> <html> <head> <meta charset="utf-8"> <met ...
- 输出1到n以内的素数
package cn.lhj.learn; /** * 输出1~n以内的素数 * * @author lhj * */ public class TestSuShu { public static v ...
- weblogic stage更改不马上生效
在主机上domins中存在stage目录,且删除相关文件后页面访问报404 mc11>home/ap/user/domins/user/stage/project/project.war/js/ ...
- <基础> PHP 进阶之 类(Class)
属性 类的变量成员叫做“属性”,或者叫“字段”.“特征”,在本文档统一称为“属性”.属性声明是由关键字 public,protected 或者 private 开头,然后跟一个普通的变量声明来组成.属 ...
- php有效防止同一用户多次登录
PHP实现同一个帐号不允许多人同时重复登陆 数据库表 user_login_info字段:id,user_ip,user_id,last_access_timeuser_id 做唯一性索引1. 用户登 ...
- arguments.callee 和 caller
arguments arguments它是一个类数组对象,包含着传入函数中的所有参数.虽然 arguments 的主要用途是保存函数参数, 但这个对象还有一个名叫 callee 的属性,该属性是一个指 ...
- 捷微jeewx , 免费开源(java)微信公众账号管家系统发布
JeeWx, 微信管家平台,简称"捷微". 捷微是一款免费开源的JAVA微信公众账号开发平台. 平台介绍: 一.捷微Jeewx简介 Jeewx是一个开源.高效.敏捷的微信开发平台 ...
- Java IO流学习总结五:转换流-InputStreamReader、OutputStreamWriter
类的继承关系 Reader |__ BufferedReader.StringReader.InputStreamReader |__ FileReader Writer |__ BufferedWr ...
- 一种比较low的linux的hung分析
在调试一个功能的时候,发现了两种hung,以前认为的hung肯定是softlock导致的,后来才发现不一定要有lock这种结构,但是有类似于锁的功能的时候,也可能触发hung,为了避免大家走弯路,故记 ...
- CentOS7下搭建LNMP记录
OS:使用虚拟机最小化安装的CentOS 7系统:配置好防火墙,SELINUX,YUM源,IP地址等. 0.因为采用了最小化安装系统,所缺少的包比较多,必要工具先安装一下 yum install gc ...