SpringBoot框架(4)-- 类装配及Bean装配监听器
1、普通方式装配类对象
(1)添加带有@Bean注解的方法
User.java(带@Component注解)
 package com.demo.boot.bootenable.beanDemo1;

 import org.springframework.stereotype.Component;

 @Component

 public class User {

 }
User.java
(2)需要装配的类添加@Component注解
Book.java(不带@Component注解)
 package com.demo.boot.bootenable.beanDemo1;

 public class Book {

 }
Book.java
==》打印
 package com.demo.boot.bootenable.beanDemo1;

 import org.springframework.boot.SpringApplication;

 import org.springframework.boot.autoconfigure.SpringBootApplication;

 import org.springframework.context.ConfigurableApplicationContext;

 import org.springframework.context.annotation.Bean;

 /**

  * 普通方式装配类对象

  * (1)添加带有@Bean注解的方法

  * (2)需要装配的类添加@Component注解

  */

 @SpringBootApplication

 public class BootEnableApplication {

     @Bean

     public  Book createBook(){

         return new Book();

     }

     public static void main(String[] args) {

         ConfigurableApplicationContext context = SpringApplication.run(com.demo.boot.bootenable.beanDemo1.BootEnableApplication.class);

         User user = context.getBean(User.class);

         System.out.println(user);

         Book book = context.getBean(Book.class);

         System.out.println(book);

         context.close();

     }

 }
main方法
com.demo.boot.bootenable.beanDemo1.User@3301500b
com.demo.boot.bootenable.beanDemo1.Book@24b52d3e
2、使用@Import方式装配类对象
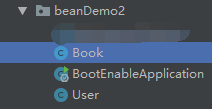
准备两个测试类User.java和Book.java
 package com.demo.boot.bootenable.beanDemo2;

 public class User {

 }
User.java
 package com.demo.boot.bootenable.beanDemo2;

 public class Book {

 }
Book.java
(1)方式1==》@Import({User.class,Book.class}) //直接添加需要装配的类
==》代码结构
 package com.demo.boot.bootenable.beanDemo2;

 import org.springframework.boot.SpringApplication;

 import org.springframework.boot.autoconfigure.SpringBootApplication;

 import org.springframework.context.ConfigurableApplicationContext;

 import org.springframework.context.annotation.Import;

 /**

  * 使用@Import方式装配类对象

  */

 @SpringBootApplication

 @Import({User.class,Book.class})//方式1==》直接添加需要装配的类

 public class BootEnableApplication {

     public static void main(String[] args) {

         ConfigurableApplicationContext context2 = SpringApplication.run(BootEnableApplication.class);

         User user = context2.getBean(User.class);

         System.out.println(user);

         Book book = context2.getBean(Book.class);

         System.out.println(book);

         context2.close();

     }

 }
Application.java
==》输出
com.demo.boot.bootenable.beanDemo2.User@24855019
com.demo.boot.bootenable.beanDemo2.Book@3abd581e
(2)方式2==》@Import(BeanImportSelector.class) //BeanImportSelector重写ImportSelector类的selectImport方法
==》代码结构
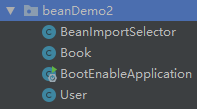
 package com.demo.boot.bootenable.beanDemo2;

 import org.springframework.context.annotation.ImportSelector;

 import org.springframework.core.type.AnnotationMetadata;

 public class BeanImportSelector implements ImportSelector {

     @Override

     public String[] selectImports(AnnotationMetadata annotationMetadata) {

         return new String[]{

                 "com.demo.boot.bootenable.beanDemo2.Book",

                 "com.demo.boot.bootenable.beanDemo2.User"

         };

     }

 }
BeanImportSelector.java
 package com.demo.boot.bootenable.beanDemo2;

 import org.springframework.boot.SpringApplication;

 import org.springframework.boot.autoconfigure.SpringBootApplication;

 import org.springframework.context.ConfigurableApplicationContext;

 import org.springframework.context.annotation.Import;

 /**

  * 使用@Import方式装配类对象

  */

 @SpringBootApplication

 //@Import({User.class,Book.class})//方式1==》直接添加需要装配的类

 @Import(BeanImportSelector.class)//方式2==》BeanImportSelector重写ImportSelector类的selectImport方法

 public class BootEnableApplication {

     public static void main(String[] args) {

         ConfigurableApplicationContext context2 = SpringApplication.run(BootEnableApplication.class);

         User user = context2.getBean(User.class);

         System.out.println(user);

         Book book = context2.getBean(Book.class);

         System.out.println(book);

         context2.close();

     }

 }
Application.java
==》输出
com.demo.boot.bootenable.beanDemo2.User@88d6f9b
com.demo.boot.bootenable.beanDemo2.Book@47d93e0d
(3)方式3==》@Import(MyBeanDefinitionRegistrar.class) //MyBeanDefinitionRegistrar重写ImportBeanDefinitionRegistrar类的registerBeanDefinitions方法
==》代码结构
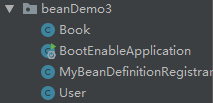
 package com.demo.boot.bootenable.beanDemo3;

 import org.springframework.beans.factory.config.BeanDefinition;

 import org.springframework.beans.factory.support.BeanDefinitionBuilder;

 import org.springframework.beans.factory.support.BeanDefinitionRegistry;

 import org.springframework.context.annotation.ImportBeanDefinitionRegistrar;

 import org.springframework.core.type.AnnotationMetadata;

 /**

  * ImportBeanDefinitionRegistrar可以为装配对象添加额外的属性

  */

 public class MyBeanDefinitionRegistrar implements ImportBeanDefinitionRegistrar {

     @Override

     public void registerBeanDefinitions(AnnotationMetadata annotationMetadata, BeanDefinitionRegistry beanDefinitionRegistry) {

         BeanDefinitionBuilder userBDB = BeanDefinitionBuilder.rootBeanDefinition(User.class);

         BeanDefinition userBD = userBDB.getBeanDefinition();

         beanDefinitionRegistry.registerBeanDefinition("user",userBD);

         BeanDefinitionBuilder bookBDB = BeanDefinitionBuilder.rootBeanDefinition(Book.class);

         BeanDefinition bookBD = bookBDB.getBeanDefinition();

         beanDefinitionRegistry.registerBeanDefinition("book",bookBD);

     }

 }
MyBeanDefinitionRegistrar.java
 package com.demo.boot.bootenable.beanDemo3;

 import org.springframework.boot.SpringApplication;

 import org.springframework.boot.autoconfigure.SpringBootApplication;

 import org.springframework.context.ConfigurableApplicationContext;

 import org.springframework.context.annotation.Import;

 /**

  * 使用@Import方式装配类对象

  */

 @SpringBootApplication

 //@Import({User.class,Book.class})//方式1==》直接添加需要装配的类

 //@Import(BeanImportSelector.class)//方式2==》BeanImportSelector重写ImportSelector类的selectImport方法

 @Import(MyBeanDefinitionRegistrar.class)//方式3==》MyBeanDefinitionRegistrar重写ImportBeanDefinitionRegistrar类的registerBeanDefinitions方法

 public class BootEnableApplication {

     public static void main(String[] args) {

         ConfigurableApplicationContext context3 = SpringApplication.run(BootEnableApplication.class);

         User user = context3.getBean("user", User.class);

         System.out.println(user);

         Book book = context3.getBean("book", Book.class);

         System.out.println(book);

         context3.close();

     }

 }
Application.java
==》输出
com.demo.boot.bootenable.beanDemo3.User@4d0402b
com.demo.boot.bootenable.beanDemo3.Book@2fa7ae9
备注:以上demo中,都是指定需要装配的类,不指定则不会自动自动装配
3、Bean装配监听器
bean在装配过程中会执行一系列方法,其中有postProcessBeforeInitialization --> afterPropertiesSet --> init-method -- > postProcessAfterInitialization。
(1)postProcessBeforeInitialization方法,在bean初始化之前执行
(2)afterPropertiesSet方法,初始化bean的时候执行
(3)nit-method方法,初始化bean的时候执行
(4)postProcessAfterInitialization方法,在bean初始化之后执行。
因此,我们可以在装配时,进行拦截处理。这里demo选用重写postProcessBeforeInitialization方法
代码结构
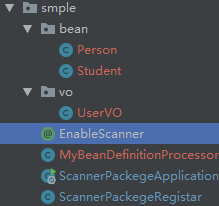
3.1 创建类 MyBeanDefinitionProcessor继承BeanPostProcessor,添加属性packages的构造器,并重写postProcessBeforeInitialization方法,实现类装配前打印。
 package com.demo.boot.bootenable.smple;

 import org.springframework.beans.BeansException;

 import org.springframework.beans.factory.config.BeanPostProcessor;

 import java.util.ArrayList;

 public class MyBeanDefinitionProcessor implements BeanPostProcessor {

     private ArrayList<String> packages;

     public ArrayList<String> getPackages() {

         return packages;

     }

     public void setPackages(ArrayList<String> packages) {

         this.packages = packages;

     }

     @Override

     public Object postProcessBeforeInitialization(Object bean, String beanName) throws BeansException {

         for (String pack : packages) {

             if (bean.getClass().getName().startsWith(pack)) {

                 System.out.println("instance name:" + bean.getClass().getName());

             }

         }

         return bean;

     }

 }
MyBeanDefinitionProcessor
3.2 创建类ScannerPackegeRegistar implements ImportBeanDefinitionRegistrar,重写registerBeanDefinitions方法,把自定义的MyBeanDefinitionProcessor注册进去。
 package com.demo.boot.bootenable.smple;

 import org.springframework.beans.factory.support.BeanDefinitionBuilder;

 import org.springframework.beans.factory.support.BeanDefinitionRegistry;

 import org.springframework.context.annotation.ImportBeanDefinitionRegistrar;

 import org.springframework.core.type.AnnotationMetadata;

 import org.springframework.stereotype.Component;

 import java.util.Arrays;

 import java.util.List;

 @Component

 public class ScannerPackegeRegistar implements ImportBeanDefinitionRegistrar {

     /**

      * 注册实体对象被装配前回调方法

      * @param annotationMetadata

      * @param beanDefinitionRegistry

      */

     @Override

     public void registerBeanDefinitions(AnnotationMetadata annotationMetadata, BeanDefinitionRegistry beanDefinitionRegistry) {

         String[] strArr = (String[]) annotationMetadata

                 .getAnnotationAttributes(EnableScanner.class.getName())

                 .get("packages");

         List<String> packages = Arrays.asList(strArr);

         System.out.println(packages);

         BeanDefinitionBuilder dbd = BeanDefinitionBuilder.rootBeanDefinition(MyBeanDefinitionProcessor.class);

         dbd.addPropertyValue("packages", packages);

         beanDefinitionRegistry.registerBeanDefinition(MyBeanDefinitionProcessor.class.getName(), dbd.getBeanDefinition());

     }

 }
ScannerPackegeRegistar.java
3.3 自定义注解EnableScanner
 package com.demo.boot.bootenable.smple;

 import org.springframework.context.annotation.Import;

 import java.lang.annotation.*;

 @Target({ElementType.TYPE})

 @Retention(RetentionPolicy.RUNTIME)

 @Documented

 @Import(ScannerPackegeRegistar.class)

 public @interface EnableScanner {

     String[] packages();

 }
EnableScanner.java
3.4 创建Person.java、Student.java和UserVO.java类
 package com.demo.boot.bootenable.smple.bean;

 import org.springframework.stereotype.Component;

 @Component

 public class Person {

 }
Person.java
 package com.demo.boot.bootenable.smple.bean;

 import org.springframework.stereotype.Component;

 @Component

 public class Student {

 }
Student.java
 package com.demo.boot.bootenable.smple.vo;

 import org.springframework.stereotype.Component;

 @Component

 public class UserVO {

 }
UserVO.java
3.5 Application
 package com.demo.boot.bootenable.smple;

 import org.springframework.boot.SpringApplication;

 import org.springframework.boot.autoconfigure.SpringBootApplication;

 import org.springframework.context.ConfigurableApplicationContext;

 @SpringBootApplication

 @EnableScanner(packages = {"com.demo.boot.bootenable.smple.bean", "com.demo.boot.bootenable.smple.vo"})//启用监控扫描类的注解

 public class ScannerPackegeApplication {

     public static void main(String[] args) {

         ConfigurableApplicationContext context = SpringApplication.run(ScannerPackegeApplication.class, args);

         context.close();

     }

 }
Application.java
输出结果
instance name:com.demo.boot.bootenable.smple.bean.Person
instance name:com.demo.boot.bootenable.smple.bean.Student
instance name:com.demo.boot.bootenable.smple.vo.UserVO
总结思路
1、把类装配到SpringBoot容器管理主要分两大类
(1)普通方式:直接在类上加@Component注解,或者在创建对象方法加上@Bean注解
(2)通过@Import注解:直接指定需要装配的类,传入
重写ImportSelector类的selectImport方法的类,
或重写ImportBeanDefinitionRegistrar类的registerBeanDefinitions方法
2、Bean装配监听器
(1)定义注解,接受需要装配类的包名
(2)创建ImportBeanDefinitionRegistrar的子类ScannerPackegeRegistar,重写registerBeanDefinitions方法,作用是把监听器注册到SpringBoot初始化Bean的过程中。
(3)创建BeanPostProcessor的子类MyBeanDefinitionProcessor,重写postProcessBeforeInitialization方法,作用是监听在bean初始化前装配的类。
SpringBoot框架(4)-- 类装配及Bean装配监听器的更多相关文章
- Bean 装配,从 Spring 到 Spring Boot
目录 从SSM的集成谈到Bean的装配 Bean的装配 由XML到Java Config 自动扫描 Bean的注入 SSM集成的Java版 Spring Boot Magic Auto Confi ...
- Spring对Bean装配详解
1.Spring提供了三种装配bean的方式: 2.自动装配bean: 3.通过Java代码装配bean 4.通过XML装配bean 前言:创建对象的协作关系称为装配,也就是DI(依赖注入)的本质.而 ...
- SpringBoot框架(3)--条件装配
场景:需要根据系统的编码格式有选择装配类. 分析:最直接的实现方式,定义各种编码格式对应的处理类,可以通过System.getProperty("file.encoding")获得 ...
- 使用spring框架,用xml方式进行bean装配出现“The fully qualified name of the bean's class, except if it serves...”
使用spring框架,用xml方式进行bean装配出现“The fully qualified name of the bean's class, except if it serves...”. 原 ...
- SpringBoot:认认真真梳理一遍自动装配原理
前言 Spring翻译为中文是“春天”,的确,在某段时间内,它给Java开发人员带来过春天,但是随着我们项目规模的扩大,Spring需要配置的地方就越来越多,夸张点说,“配置两小时,Coding五分钟 ...
- 你来说一下springboot的启动时的一个自动装配过程吧
前言 继续总结吧,没有面试就继续夯实自己的基础,前阵子的在面试过程中遇到的各种问题陆陆续续都会总结出来分享给大家,这次要说的也是面试中被问到的一个高频的问题,我当时其实没答好,因为很早之前是看到spr ...
- Spring(3)——装配 Spring Bean 详解
装配 Bean 的概述 前面已经介绍了 Spring IoC 的理念和设计,这一篇文章将介绍的是如何将自己开发的 Bean 装配到 Spring IoC 容器中. 大部分场景下,我们都会使用 Appl ...
- 使用Spring IoC进行Bean装配
Spring概述 Spring的设计严格遵从的OCP(开闭原则),保证对修改的关闭,也就是外部无法改变spring内部的运行流程:提供灵活的扩展接口,也就是可以通过extends,implements ...
- 002-Spring4 快速入门-项目搭建、基于注解的开发bean,Bean创建和装配、基于注解的开发bean,Bean初始化销毁、Bean装配,注解、Bean依赖注入
一.项目搭建 1.项目创建 eclipse→project explorer→new→Project→Maven Project 默认配置即可创建项目 2.spring配置 <dependenc ...
随机推荐
- 解决samlexception-inresponsetofield-of-the-response-doesnt-correspond-to-sent-mess
sp在校验samlresponse 根据id在session中的samlrequestid 取出,两者进行对比,这里如果做idp-init的话 可以注释掉. 1第一种方法 WebSSOProfileC ...
- orm练习题
表关系图 models.py from django.db import models # Create your models here. class Teacher(models.Model): ...
- spir 合并单元格
TableRow row = table2.AddRow(); var cell = row.AddCell(); var par = cell.AddParagraph(); par.Text = ...
- Delphi加密解密算法
// 加密方法一(通过密钥加密解密)function EncryptString(Source, Key: string): string;function UnEncryptString(Sourc ...
- spring(二) AOP注入
AOP概念 l AOP采取横向抽取机制,取代了传统纵向继承体系重复性代码 l 经典应用:事务管理.性能监视.安全检查.缓存 .日志等 l Spring AOP使用纯Java实现,不需要专门的编译 ...
- Linux 后台执行python或者java代码的命令
1.nohup 命令操作后台执行程序 后台启动 nohup python app.py params1 > nohup.out >& & 查看后台进程启动 jobs -l ...
- linux/linux学习笔记-常用命令(mooc)
一.命令基本格式及文件处理命令 1.linux命令格式 简化选项用-表示,完整选项用--表示 注:linux通过权限位第1位(-:文件 / d:目录 / l:链接文件 来区分文件类型) 2.linux ...
- python+selenium元素定位之XPath学习02
XPath 语法 XPath 使用路径表达式来选取 XML 文档中的节点或节点集.节点是通过沿着路径 (path) 或者步 (steps) 来选取的. XML 实例文档 我们将在下面的例子中使用这个 ...
- window 下python2.7与python3.5两版本共存设置
分别下载两个版本的Python,安装. (1)在Path环境变量中检查以下4个变量(Path中的环境变量是以分号隔开的): 1.c:\Python27 2.c:\Python27\Scripts 3. ...
- Redis在Windows环境配置多实例多端口运行
Redis是一种跨平台NoSql内存数据库,这几年各大公司系统应用中非常多见,支持多种数据类型,可以持久化保存数据,很多公司直接拿来作为数据库使用. 相比于Memcached,Redis支持持久化保存 ...