
hyperledger fabric 1.0.5 分布式部署 (二)
环境:2台 ubuntu 16.04
角色列表
| 角色 | IP地址 | 宿主端口 | docker端口 |
| peer0.org1.example.com | 47.93.249.250 | 7051 | 7051 |
| peer1.org1.example.com | 47.93.249.250 | 7051 | 8051 |
| peer0.org2.example.com | 47.93.249.250 | 7051 | 9051 |
| peer1.org2.example.com | 47.93.249.250 | 7051 | 10051 |
| cli | 47.93.249.250 | NULL | NULL |
| orderer.example.com | 47.94.244.156 | 7050 | 7050 |
- 环境初始化
2台机器的fabric 环境初始化方法,读者参考作者之前写的一片文章:http://www.cnblogs.com/chenfool/p/8353425.html,并且确保两台机器都能够正常运行 e2e_cli 的测试程序。
在完成e2e_cli 程序的测试后,读者一定要清理环境。
./network_setup.sh down mychannel
- 分布式部署(1)
按照角色列表,首先在 47.94.244.156 机器上,目录切换到 /opt/gopath/src/github.com/hyperledger/fabric/examples/e2e_cli ,然后复制一份 docker-compose 的配置文件
cp docker-compose-cli.yaml docker-compose-test.yaml
对 docker-compose-test.yaml 配置进行修改,修改后的内容如下
# Copyright IBM Corp. All Rights Reserved.

#

# SPDX-License-Identifier: Apache-2.0

#

version: ''

services:

  orderer.example.com:

    extends:

      file:   base/docker-compose-base.yaml

      service: orderer.example.com

    container_name: orderer.example.com
执行以下命令,生成公私钥、证书、创世区块等,该命令执行后,会在本地生成 channel-artifacts 和 crypto-config 目录。
读者这里需要注意一下,在执行 generateArtifacets.sh 脚本时,需要确保 channel-artifacts 目录已经存在,否则可能会报错
chmod  generateArtifacts.sh

./generateArtifacts.sh mychannel
将channel-artifacts 和 crypto-config 目录文件拷贝到 47.93.249.250 机器的相同目录
scp -r crypto-config root@47.93.249.250:/opt/gopath/src/github.com/hyperledger/fabric/examples/e2e_cli

scp -r channel-artifacts root@47.93.249.250:/opt/gopath/src/github.com/hyperledger/fabric/examples/e2e_cli
启动docker 进程
docker-compose -f docker-compose-test.yaml up -d
docker 进程启动后,读者可以通过以下命令查看正在运行的进程
docker ps
- 分布式部署(2)
读者此时在 47.93.249.250 机器上切换目录到 /opt/gopath/src/github.com/hyperledger/fabric/examples/e2e_cli,同样的复制一份docker-compose 的配置文件
cp docker-compose-cli.yaml docker-compose-test.yaml
对 docker-compose-test.yaml 配置进行修改,修改后的内容如下
# Copyright IBM Corp. All Rights Reserved.

#

# SPDX-License-Identifier: Apache-2.0

#

version: ''

services:

  peer0.org1.example.com:

    container_name: peer0.org1.example.com

    extends:

      file:  base/docker-compose-base.yaml

      service: peer0.org1.example.com

    extra_hosts:

      - "orderer.example.com:47.94.244.156"

  peer1.org1.example.com:

    container_name: peer1.org1.example.com

    extends:

      file:  base/docker-compose-base.yaml

      service: peer1.org1.example.com

    extra_hosts:

      - "orderer.example.com:47.94.244.156"

      - "peer0.org1.example.com:47.93.249.250"

  peer0.org2.example.com:

    container_name: peer0.org2.example.com

    extends:

      file:  base/docker-compose-base.yaml

      service: peer0.org2.example.com

    extra_hosts:

      - "orderer.example.com:47.94.244.156"

  peer1.org2.example.com:

    container_name: peer1.org2.example.com

    extends:

      file:  base/docker-compose-base.yaml

      service: peer1.org2.example.com

    extra_hosts:

      - "orderer.example.com:47.94.244.156"

      - "peer0.org2.example.com:47.93.249.250"

  cli:

    container_name: cli

    image: hyperledger/fabric-tools

    tty: true

    environment:

      - GOPATH=/opt/gopath

      - CORE_VM_ENDPOINT=unix:///host/var/run/docker.sock

      - CORE_LOGGING_LEVEL=DEBUG

      - CORE_PEER_ID=cli

      - CORE_PEER_ADDRESS=peer0.org1.example.com:

      - CORE_PEER_LOCALMSPID=Org1MSP

      - CORE_PEER_TLS_ENABLED=true

      - CORE_PEER_TLS_CERT_FILE=/opt/gopath/src/github.com/hyperledger/fabric/peer/crypto/peerOrganizations/org1.example.com/peers/peer0.org1.example.com/tls/server.crt

      - CORE_PEER_TLS_KEY_FILE=/opt/gopath/src/github.com/hyperledger/fabric/peer/crypto/peerOrganizations/org1.example.com/peers/peer0.org1.example.com/tls/server.key

      - CORE_PEER_TLS_ROOTCERT_FILE=/opt/gopath/src/github.com/hyperledger/fabric/peer/crypto/peerOrganizations/org1.example.com/peers/peer0.org1.example.com/tls/ca.crt

      - CORE_PEER_MSPCONFIGPATH=/opt/gopath/src/github.com/hyperledger/fabric/peer/crypto/peerOrganizations/org1.example.com/users/Admin@org1.example.com/msp

    working_dir: /opt/gopath/src/github.com/hyperledger/fabric/peer

    #command: /bin/bash -c './scripts/script.sh ${CHANNEL_NAME}; sleep $TIMEOUT'

    volumes:

        - /var/run/:/host/var/run/

        - ../chaincode/go/:/opt/gopath/src/github.com/hyperledger/fabric/examples/chaincode/go

        - ./crypto-config:/opt/gopath/src/github.com/hyperledger/fabric/peer/crypto/

        - ./scripts:/opt/gopath/src/github.com/hyperledger/fabric/peer/scripts/

        - ./channel-artifacts:/opt/gopath/src/github.com/hyperledger/fabric/peer/channel-artifacts

    depends_on:

      - peer0.org1.example.com

      - peer1.org1.example.com

      - peer0.org2.example.com

      - peer1.org2.example.com

    extra_hosts:

      - "orderer.example.com:47.94.244.156"

      - "peer0.org1.example.com:47.93.249.250"

      - "peer1.org1.example.com:47.93.249.250"

      - "peer0.org2.example.com:47.93.249.250"

      - "peer1.org2.example.com:47.93.249.250"
启动该台机器的docker 相关服务
docker-compose -f docker-compose-test.yaml up -d
docker 进程启动后,读者可以通过以下命令查看正在运行的进程
docker ps
此时屏幕上将输出的类似如下信息

读者可以看到docker中的服务映射的端口号的区别,然后针对不同的docker 服务,继续修改 scripts/script.sh 脚本中的 setGlobals 函数(大约是32行)中,各个docker 服务的端口号
vi scripts/script.sh
setGlobals () {

        if [ $ -eq  -o $ -eq  ] ; then

                CORE_PEER_LOCALMSPID="Org1MSP"

                CORE_PEER_TLS_ROOTCERT_FILE=/opt/gopath/src/github.com/hyperledger/fabric/peer/crypto/peerOrganizations/org1.example.com/peers/peer0.org1.example.com/tls/ca.crt

                CORE_PEER_MSPCONFIGPATH=/opt/gopath/src/github.com/hyperledger/fabric/peer/crypto/peerOrganizations/org1.example.com/users/Admin@org1.example.com/msp

                if [ $ -eq  ]; then

                        CORE_PEER_ADDRESS=peer0.org1.example.com:

                else

                        CORE_PEER_ADDRESS=peer1.org1.example.com:

                fi

        else

                CORE_PEER_LOCALMSPID="Org2MSP"

                CORE_PEER_TLS_ROOTCERT_FILE=/opt/gopath/src/github.com/hyperledger/fabric/peer/crypto/peerOrganizations/org2.example.com/peers/peer0.org2.example.com/tls/ca.crt

                CORE_PEER_MSPCONFIGPATH=/opt/gopath/src/github.com/hyperledger/fabric/peer/crypto/peerOrganizations/org2.example.com/users/Admin@org2.example.com/msp

                if [ $ -eq  ]; then

                        CORE_PEER_ADDRESS=peer0.org2.example.com:

                else

                        CORE_PEER_ADDRESS=peer1.org2.example.com:

                fi

        fi

        env |grep CORE

}
将最新的 scripts/script.sh 脚本上传到docker 的cli 镜像中
注意:c05d72aef89b 是作者docker 的cli 容器编号,具体使用方法可以参考:http://blog.csdn.net/u011596455/article/details/76862271,并且将script.sh 脚本上传cli 容器后,该脚本将一直保存在cli 的容器中(包括重启容器服务)
docker cp scripts/script.sh c05d72aef89b:/opt/gopath/src/github.com/hyperledger/fabric/peer/scripts/
不需要从宿主机器拷贝script.sh 脚本到 cli 中,因为 docker-compose-test.yaml 配置文件中,已经将宿主的script.sh 脚本挂载到cli 中了
    volumes:

        - /var/run/:/host/var/run/

        - ../chaincode/go/:/opt/gopath/src/github.com/hyperledger/fabric/examples/chaincode/go

        - ./crypto-config:/opt/gopath/src/github.com/hyperledger/fabric/peer/crypto/

        - ./scripts:/opt/gopath/src/github.com/hyperledger/fabric/peer/scripts/

        - ./channel-artifacts:/opt/gopath/src/github.com/hyperledger/fabric/peer/channel-artifacts
- init fabric 集群环境
选择其中一台机器进入docker cli 镜像的shell 环境,作者选择了 47.93.249.250 进行操作
docker exec -it cli bash
再执行script.sh 脚本
./scripts/script.sh mychannel
然后集群就开始真正的初始化,等待所有的操作都结束后,将出现如下信息
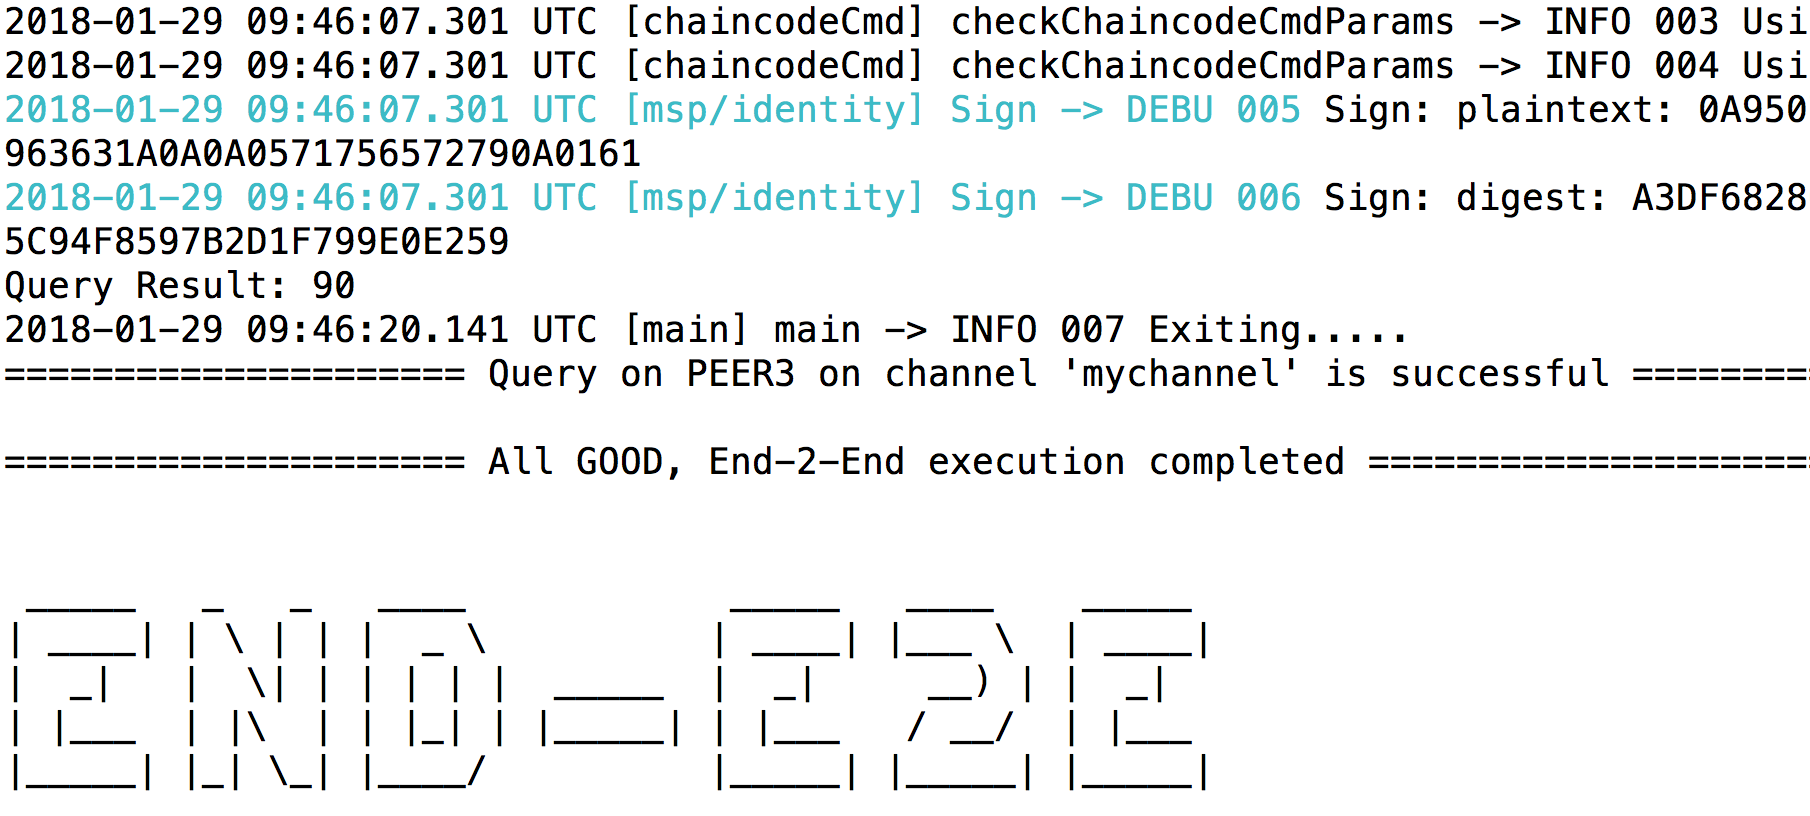
到这里,fabric 的集群环境就部署好了,如果读者想部署更多机器的fabric 环境,也可以照葫芦画瓢地进行配置和部署
参考博客:
http://www.cnblogs.com/aberic/p/7541470.html
http://www.cnblogs.com/aberic/p/7542167.html
http://blog.csdn.net/u011596455/article/details/76862271
hyperledger fabric 1.0.5 分布式部署 (二)的更多相关文章
- hyperledger fabric 1.0.5 分布式部署 (八)
gdb debug peer 程序 在开始我们从 github 上download 下来的源码包,实际上已经包含了可执行的 peer 程序,但是该程序是使用 release 方式编译的,并不支持gdb ...
- hyperledger fabric 1.0.5 分布式部署 (七)
fabric 使用 fabric-ca 服务 准备部分 首先需要用户从github上download fabric-ca 的工程代码 cd $GOPATH/src/github.com/hyperle ...
- hyperledger fabric 1.0.5 分布式部署 (六)
如何在相同的peer 节点上创建多个 channel 作者在hyperledger fabric 1.0.5 分布式部署 (五)已经向读者们介绍了一个简单的fabric 的部署流程,那么根据上一篇博客 ...
- hyperledger fabric 1.0.5 分布式部署 (五)
梳理fabric e2e_cli 测试程序的具体步骤 作者在 hyperledger fabric 1.0.5 分布式部署 (一)中给读者们介绍了如何从零开始部署一个测试的 demo 环境,如果细心的 ...
- hyperledger fabric 1.0.5 分布式部署 (四)
chaincode 的开发 作者在hyperledger fabric 1.0.5 分布式部署 (三)中向读者介绍了如何开发fabric 的chaincode,那么实际上chaincode 还有其他的 ...
- hyperledger fabric 1.0.5 分布式部署 (三)
本篇博客主要是向读者介绍 fabric 在部署时的一些细节,还有作者自己学习过程中的心得. 初始化相关密钥的程序,实际上是一个shell脚本,并且结构特别简单 generateArtifacts.sh ...
- hyperledger fabric 1.0.5 分布式部署 (一)
环境是个人虚拟机ubuntu 16.04 64 位版本 前期用户需要先安装好:gcc.g++.git 软件 安装 golang 首先给环境安装一个 go 语言环境,版本最好在1.8 以上 golang ...
- hyperledger fabric 1.0.5 分布式部署 (九)
linux 使用vim.ctags 配置fabric 源码阅读环境 首先需要安装 ctags,作者使用apt-get 来安装的,安装的版本是5.9 apt-get install ctags 5.9 ...
- Hyperledger Fabric 1.0 从零开始(十二)——fabric-sdk-java应用【补充】
在 Hyperledger Fabric 1.0 从零开始(十二)--fabric-sdk-java应用 中我已经把官方sdk具体改良办法,即使用办法发出来了,所有的类及文件都是完整的,在文章的结尾也 ...
随机推荐
- This means that only a small number of nodes must be read from disk to retrieve an item.
http://cis.stvincent.edu/html/tutorials/swd/btree/btree.html Introduction A B-tree is a specialized ...
- send data to Flume client-sdk flume使用之httpSource
https://flume.apache.org/FlumeDeveloperGuide.html#client-sdk flume使用之httpSource - CSDN博客 https://blo ...
- Quick UDP Internet Connections
https://blog.chromium.org/2013/06/experimenting-with-quic.html user datagram protocol transport laye ...
- python网络爬虫之使用scrapy下载文件
前面介绍了ImagesPipeline用于下载图片,Scrapy还提供了FilesPipeline用与文件下载.和之前的ImagesPipeline一样,FilesPipeline使用时只需要通过it ...
- 单指令多数据流Single Instruction Multiple Data
Single Instruction Multiple Data,单指令多数据流)能够复制多个操作数,并把它们打包在大型寄存器的一组指令集,例:3DNow!.SSE. SIMD在性能上的优势: 以加法 ...
- jQuery remove()与jQuery empty()的区别
jQuery remove() 方法删除被选元素及其子元素.举例如下: <!DOCTYPE html> <html> <head> <script src=& ...
- Lua学习笔记(1) ——语法
1. Lua -i main.lua -i 进入交互模式 -l 加载一个库 -e “lua code” 直接在命令行执行lua code 2. 注释 -- This is a line comme ...
- Ace(二)Demo示例
Client: #include "ace/Log_Msg.h" #include "ace/OS.h" #include "ace/Service_ ...
- APP测试走过的那些坑
我现在的工作有一大部分也是app测试,虽然自己是app开发出身,但是在测试上还是跌入了很多大坑,毕竟二者还是有很大不同,所处的角度也是不一样的.而开发转测试中,我认为较难的也是一个角度的转换,以一个开 ...
- BestCoder10 1001 Revenge of Fibonacci(hdu 5018) 解题报告
题目链接:http://acm.hdu.edu.cn/showproblem.php?pid=5018 题目意思:给出在 new Fibonacci 中最先的两个数 A 和 B(也就是f[1] = A ...