ASP.NET Core IdentityServer4 新手上路
OAuth2.0资料
今天看到一篇博主写了该系列文章,贴图和过程都比较详细,俗话说实践是检验真理的唯一标准(如果是按照参考文章复制粘贴,应该不会出现踩坑,但是我喜欢自己手动敲一遍),发现几个坑,因而总结下经验,让其他小白同学少走弯路
参考第一篇:https://www.cnblogs.com/cby-love/p/9281955.html
参考第二篇:https://www.cnblogs.com/wyt007/p/8284482.html
博客园晓晨的关于identityServer4的中文文档地址: http://www.cnblogs.com/stulzq/p/8119928.html
Docker中文文档 https://yeasy.gitbooks.io/docker_practice/content/
OAuth2.0(Open Authorization)是一个开放授权协议;第三方应用不需要接触到用户的账户信息(如用户名密码),通过用户的授权访问用户资源
OAuth的步骤一般如下:
1、客户端要求用户给予授权
2、用户同意给予授权
3、根据上一步获得的授权,向认证服务器请求令牌(token)
4、认证服务器对授权进行认证,确认无误后发放令牌
5、客户端使用令牌向资源服务器请求资源
6、资源服务器使用令牌向认证服务器确认令牌的正确性,确认无误后提供资源
服务端代码实现
第一步:新建一个webapi空项目
第二步:添加Nuget包:IdentityServer4
第三步:新建一个帮助类(类名自定义即可),用来创建IdentityServer4.Model生成授权token
    public class Config

    {

        /// <summary>

        /// 所有可以访问的Resource

        /// </summary>

        /// <returns></returns>

        public static IEnumerable<ApiResource> GetResources()

        {

            return new List<ApiResource>

            {
          //第一个参数需要与下面标记红色字体保持一致,可以随意命名,但是请注意大小写,第二个参数 我干了,你随意。

                new ApiResource("api","My Api")

            };

        }

        /// <summary>

        /// 客户端

        /// </summary>

        /// <returns></returns>

        public static IEnumerable<Client> GetClients()

        {

            return new List<Client>

            {

                new Client()

                {

                    ClientId="client",

                    ////模式:最简单的模式

                    AllowedGrantTypes=GrantTypes.ClientCredentials,

                    ClientSecrets=

                    {

                        new Secret("secret".Sha256())

                    },

                    AllowedScopes={ "api"}

                }

            };

        }

    }
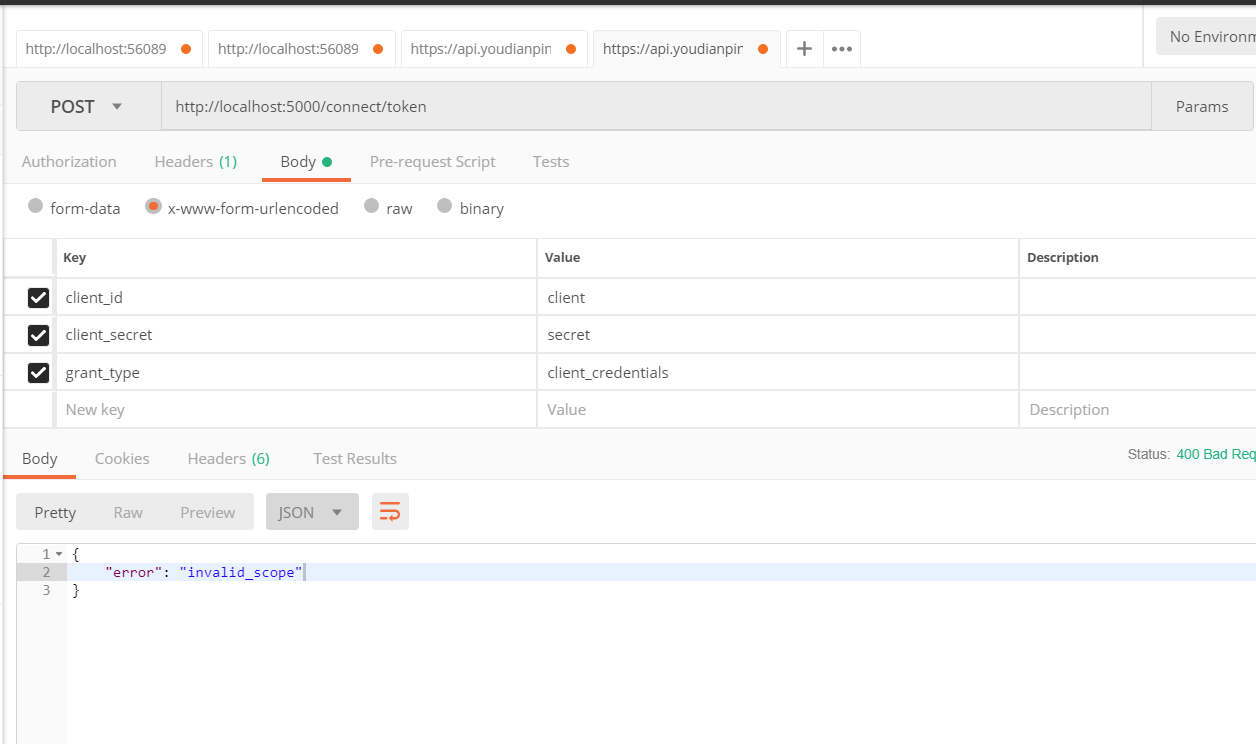
第一处坑讲解:上面代码红色标记,请注意大小写,如果一个大写,一个小写。当你授权的时候会提示错误
第四步:修改Startup.cs 红色字体是需要加的方法和中间件
public class Startup

    {

        public Startup(IConfiguration configuration)

        {

            Configuration = configuration;

        }

        public IConfiguration Configuration { get; }

        // This method gets called by the runtime. Use this method to add services to the container.

        public void ConfigureServices(IServiceCollection services)

        {

            services.AddIdentityServer()

            .AddDeveloperSigningCredential()//添加开发人员签名凭据

            .AddInMemoryApiResources(Config.GetResources())//添加内存apiresource

            .AddInMemoryClients(Config.GetClients());//添加内存client

            services.AddMvc().SetCompatibilityVersion(CompatibilityVersion.Version_2_1);

        }

        // This method gets called by the runtime. Use this method to configure the HTTP request pipeline.

        public void Configure(IApplicationBuilder app, IHostingEnvironment env)

        {

            if (env.IsDevelopment())

            {

                app.UseDeveloperExceptionPage();

            }

            app.UseIdentityServer();//使用IdentityServer

            app.UseMvc();

        }

    }
第五步:修改Program.cs 其实这一步可以省略掉,因为这一部将api不托管在IIS Express上,通过控制台程序启动。 自定义路径配置如下
public class Program

    {

        public static void Main(string[] args)

        {

            CreateWebHostBuilder(args).Build().Run();

        }

        public static IWebHostBuilder CreateWebHostBuilder(string[] args) =>

            WebHost.CreateDefaultBuilder(args)

                .UseStartup<Startup>()
          //该处端口可以自定义  只要不与你其他端口冲突就好

                .UseUrls("http://localhost:5000");

    }
第二处坑讲解:生成token的服务端已经全部设置完成,如果你按照以前习惯,启动F5---会发现自定义端口未起作用。你需要设置一下才行

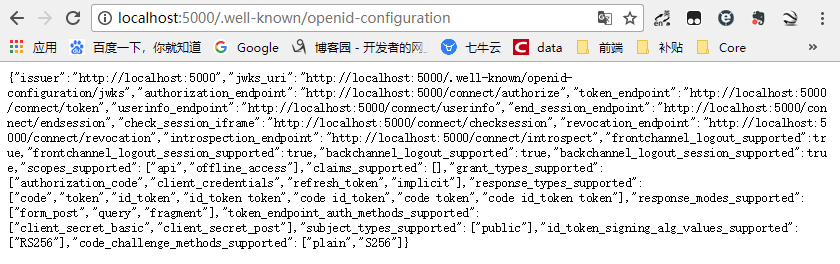
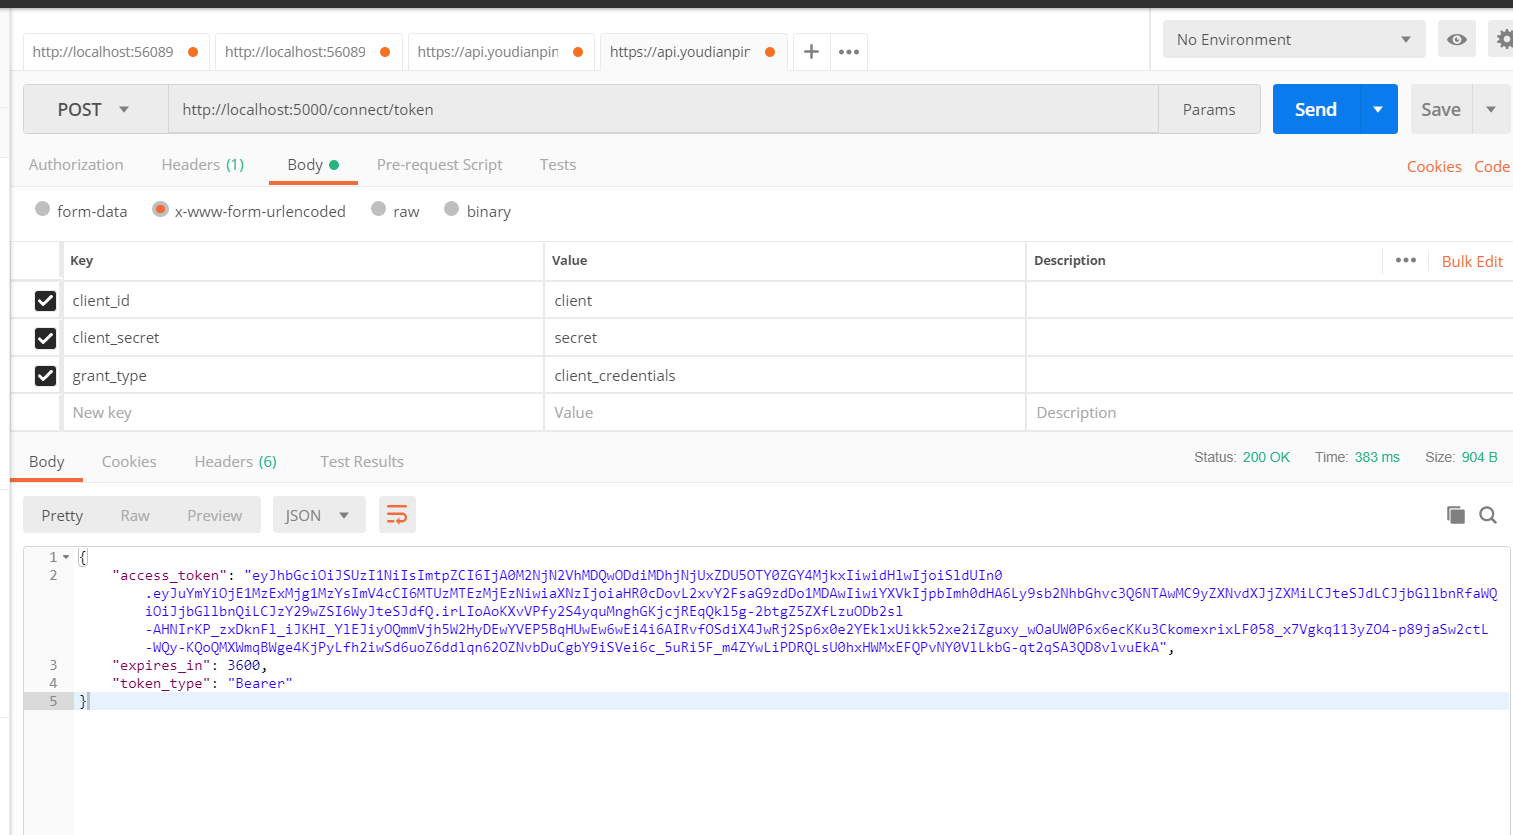
http://localhost:5000/.well-known/openid-configuration访问 ;可以看到是一个restful的api
然后用postman神器 服务端成功,咱们开始用客户端
客户端代码实现
第一步:新建一个webapi空项目
第二步:添加Nuget包:IdentityServer4.AccessTokenValidation
第三步:修改Startup.cs 红色字体是需要加的方法和中间件
public class Startup

    {

        public Startup(IConfiguration configuration)

        {

            Configuration = configuration;

        }

        public IConfiguration Configuration { get; }

        // This method gets called by the runtime. Use this method to add services to the container.

        public void ConfigureServices(IServiceCollection services)

        {

            services.AddAuthentication("Bearer")//添加授权模式

            .AddIdentityServerAuthentication(Options =>

            {

                Options.Authority = "http://localhost:5000";//授权服务器地址

                Options.RequireHttpsMetadata = false;//是否是https

                Options.ApiName = "api";

            });

            services.AddMvc().SetCompatibilityVersion(CompatibilityVersion.Version_2_1);

        }

        // This method gets called by the runtime. Use this method to configure the HTTP request pipeline.

        public void Configure(IApplicationBuilder app, IHostingEnvironment env)

        {

            if (env.IsDevelopment())

            {

                app.UseDeveloperExceptionPage();

            }

            app.UseAuthentication();//使用授权中间件

            app.UseMvc();

        }

    }
第三处坑讲解:
1.授权服务地址端口号,请按照服务端配置的端口号来,如果用IIS Express,请右键项目属性->调试查看。
2.Options.ApiName = "api"; 请看上述踩坑一配置的名称,大小写需要统一
第四步:修改Program.cs 其实这一步可以省略掉,因为这一部将api不托管在IIS Express上,通过控制台程序启动。与上述服务端配置一样。记得将端口号修改
第四处需要注意的地方
需要将服务端运行起来,然后再运行客户端(顺序不重要,重要的是必须两个程序都启动起来。可以将服务端发布到IIS上,客户端通过vs运行。我比较懒,分别打开两个,一个设置为启动服务端,一个设置为启动客户端)
第五步:添加授权标签 可以在action和controller上添加
        [HttpGet]

        [Authorize]

        public ActionResult<IEnumerable<string>> Get()

        {

            return new string[] { "value1", "value2" };

        }
添加在action上,表示这个方法需要授权才能访问,否则访问不了
添加在controller上,表示整个controller下的所有action方法都需要授权后才能访问
下图是成功,如果空白表示授权失败(你可以打个断点)。
出现一些错误码html(<title>Internal Server Error</title>)在里面,是因为服务端没启动成功

需要注意的地方:授权码 前面必须加Bearer 然后空格
在客户端配置第三步中 services.AddAuthentication("Bearer")//添加授权模式 有的同学可能会想 那我将这个改掉 然后保持一致应该可以
恭喜这位同学想法非常棒,但是你可以试一试。这个格式是固定规范
ASP.NET Core IdentityServer4 新手上路的更多相关文章
- Asp.net Core IdentityServer4 入门教程(一):概念解析
目录 1.IdentityServer4 是什么 2.什么是OpenID和OAuth 2.0协议 3.IdentityServer4 可以用来做什么 其他 1.IdentityServer4 是什么 ...
- asp.net core IdentityServer4 概述
概览 现代应用程序看上去大都是这样的: 最常见的交互是: 浏览器与Web应用程序通信 Web应用程序与Web API通信(有时是独立的,有时是代表用户的) 基于浏览器的应用程序与Web API通信 本 ...
- Asp.Net Core IdentityServer4 管理面板集成
前言 IdentityServer4(以下简称 Id4) 是 Asp.Net Core 中一个非常流行的 OpenId Connect 和 OAuth 2.0 框架,可以轻松集成到 Asp.Net C ...
- Asp.Net Core IdentityServer4 中的基本概念
一.前言 这篇文章可能大家会觉得很空洞,没有实际的实战东西,主要是自己整理出来的IdentityServer4 的一些概念性的东西:如果你对IdentityServer4有过一定的实战经验,可以跳过不 ...
- Asp.net core IdentityServer4与传统基于角色的权限系统的集成
写在前面 因为最近在忙别的,好久没水文了 今天来水一篇: 在学习或者做权限系统技术选型的过程中,经常有朋友有这样的疑问 : "IdentityServer4的能不能做到与传统基于角色的权限系 ...
- asp.net core IdentityServer4 实现 Client credentials(客户端凭证)
前言 OAuth 2.0默认四种授权模式(GrantType) 授权码模式(authorization_code) 简化模式(implicit) 密码模式(resource owner passwor ...
- asp.net core IdentityServer4 实现 resource owner password credentials(密码凭证)
前言 OAuth 2.0默认四种授权模式(GrantType) 授权码模式(authorization_code) 简化模式(implicit) 密码模式(resource owner passwor ...
- asp.net core IdentityServer4 实现 implicit(隐式许可)实现第三方登录
前言 OAuth 2.0默认四种授权模式(GrantType) 授权码模式(authorization_code) 简化模式(implicit) 密码模式(resource owner passwor ...
- Asp.Net Core 中IdentityServer4 授权中心之应用实战
一.前言 查阅了大多数相关资料,查阅到的IdentityServer4 的相关文章大多是比较简单并且多是翻译官网的文档编写的,我这里在 Asp.Net Core 中IdentityServer4 的应 ...
随机推荐
- ubuntu 16.04安装Chrome离线crx插件包
/opt/google/chrome/google-chrome --enable-easy-off-store-extension-install 打开浏览器后,输入chrome://extensi ...
- Ajax请求WCF服务以及跨域的问题解决
Ajax请求WCF服务以及跨域的问题解决 这两天准备重构一下项目,准备用纯html+js做前台,然后通过ajax+WCF的方式来传递数据,所以就先研究了一下ajax访问的wcf的问题,还想到还折腾了一 ...
- c#静态构造函数与构造函数
构造函数这个概念,在我们刚开始学习编程语言的时候,就被老师一遍一遍的教着.亲,现在你还记得静态构造函数的适用场景吗?如果没有,那么我们一起来复习一下吧. 静态构造函数是在构造函数方法前面添加了stat ...
- canvas合成和裁剪
canvas合成和裁剪 属性 globalCompositeOperation=type 设置覆盖类型 source-over 源覆盖在目标上 source-in 源覆盖在目标上的公共部分(只取源图形 ...
- 372. Super Pow.txt
▶ 指数取模运算 ab % m ▶ 参考维基 https://en.wikipedia.org/wiki/Modular_exponentiation,给了几种计算方法:暴力计算法,保存中间结果法(分 ...
- python之daemon线程
[python之daemon线程] A thread can be flagged as a “daemon thread”. The significance of this flag is tha ...
- unity animation readonly 无法加事件?
目前找到的解决方案是用代码加Event: using System.Collections; using System.Collections.Generic; using UnityEngine; ...
- 自制精排 ePub 集、不定期更新(UPDATA-2015-8-2)
说明 排版不说最好,上乘是必须的. 段落空行 首行缩进 具备清爽元数据 包含高清封面.目录 图片居中,图片标题以下标形式居中位于图片下* 支持多看/Kindle原生系统弹出注释,其他软件跳转注释* 各 ...
- Rabbitmq的几种交换机模式
Rabbitmq的核心概念(如下图所示):有虚拟主机.交换机.队列.绑定: 交换机可以理解成具有路由表的路由程序,仅此而已.每个消息都有一个称为路由键(routing key)的属性,就是一个简单的字 ...
- adf 日志输出
1,选中ViewController或是Model,在属性框中,做如下配置,run/debug后可以看到日志信息中,将adf的整个执行过程很详细的打印出来了. 在每个项目的Project proper ...