矩池云上安装 NVCaffe教程

使用的是P100,cuda11.1base镜像
创建虚拟环境
conda create -n py36 python=3.6

conda deactivate

conda activate py36
安装依赖包
apt update

apt-get install libopencv-dev libopenblas-dev libopenblas-base libhdf5-dev protobuf-compiler libgoogle-glog-dev libgflags-dev libprotobuf-dev libboost-dev libleveldb-dev liblmdb-dev libturbojpeg0-dev  libboost-filesystem-dev libboost-system-dev libboost-thread-dev libboost-regex-dev libsnappy-dev
下载NVIDIA caffe
cd /home/

# 官方链接wget https://github.com/NVIDIA/caffe/archive/refs/tags/v0.17.4.tar.gz

我这里用了镜像来下载

wget https://download.fastgit.org/NVIDIA/caffe/archive/refs/tags/v0.17.4.tar.gz

tar -xvf v0.17.4.tar.gz

cd caffe-0.17.4

for req in $(cat python/requirements.txt); do pip install $req; done

pip install --upgrade google-api-python-client

cp Makefile.config.example Makefile.config
修改Makefile.config
直接复制进去,保存即可。
## Refer to http://caffe.berkeleyvision.org/installation.html

# Contributions simplifying and improving our build system are welcome!

# cuDNN acceleration switch (uncomment to build with cuDNN).

# cuDNN version 6 or higher is required.

USE_CUDNN := 1

# NCCL acceleration switch (uncomment to build with NCCL)

# See https://github.com/NVIDIA/nccl

USE_NCCL := 1

# Builds tests with 16 bit float support in addition to 32 and 64 bit.

# TEST_FP16 := 1

# uncomment to disable IO dependencies and corresponding data layers

# USE_OPENCV := 0

# USE_LEVELDB := 0

# USE_LMDB := 0

# Uncomment and set accordingly if you're using OpenCV 3/4

OPENCV_VERSION := 3

# To customize your choice of compiler, uncomment and set the following.

# N.B. the default for Linux is g++ and the default for OSX is clang++

# CUSTOM_CXX := g++

# CUDA directory contains bin/ and lib/ directories that we need.

CUDA_DIR := /usr/local/cuda

# On Ubuntu 14.04, if cuda tools are installed via

# "sudo apt-get install nvidia-cuda-toolkit" then use this instead:

# CUDA_DIR := /usr

# CUDA architecture setting: going with all of them.

CUDA_ARCH :=    -gencode arch=compute_60,code=sm_60 \

                -gencode arch=compute_61,code=sm_61 \

                -gencode arch=compute_70,code=sm_70 \

                -gencode arch=compute_75,code=sm_75 \

                -gencode arch=compute_75,code=compute_75

# BLAS choice:

# atlas for ATLAS

# mkl for MKL

# open for OpenBlas - default, see https://github.com/xianyi/OpenBLAS

BLAS := open

# Custom (MKL/ATLAS/OpenBLAS) include and lib directories.

BLAS_INCLUDE := /opt/OpenBLAS/include/

BLAS_LIB := /opt/OpenBLAS/lib/

# Homebrew puts openblas in a directory that is not on the standard search path

# BLAS_INCLUDE := $(shell brew --prefix openblas)/include

# BLAS_LIB := $(shell brew --prefix openblas)/lib

# This is required only if you will compile the matlab interface.

# MATLAB directory should contain the mex binary in /bin.

# MATLAB_DIR := /usr/local

# MATLAB_DIR := /Applications/MATLAB_R2012b.app

# NOTE: this is required only if you will compile the python interface.

# We need to be able to find Python.h and numpy/arrayobject.h.

#PYTHON_INCLUDE := /usr/include/python2.7 \

#               /usr/lib/python2.7/dist-packages/numpy/core/include

# Anaconda Python distribution is quite popular. Include path:

# Verify anaconda location, sometimes it's in root.

# ANACONDA_HOME := $(HOME)/anaconda

# PYTHON_INCLUDE := $(ANACONDA_HOME)/include \

                # $(ANACONDA_HOME)/include/python2.7 \

                # $(ANACONDA_HOME)/lib/python2.7/site-packages/numpy/core/include \

# Uncomment to use Python 3 (default is Python 2)

PYTHON_LIBRARIES := boost_python3 python3.6m

PYTHON_INCLUDE := /root/miniconda3/envs/py36/include/python3.6m \

        /root/miniconda3/envs/py36/lib/python3.6/site-packages/numpy/core/include

# We need to be able to find libpythonX.X.so or .dylib.

PYTHON_LIB := /root/miniconda3/envs/py36/lib

# PYTHON_LIB := $(ANACONDA_HOME)/lib

# Homebrew installs numpy in a non standard path (keg only)

# PYTHON_INCLUDE += $(dir $(shell python -c 'import numpy.core; print(numpy.core.__file__)'))/include

# PYTHON_LIB += $(shell brew --prefix numpy)/lib

# Uncomment to support layers written in Python (will link against Python libs)

WITH_PYTHON_LAYER := 1

# Whatever else you find you need goes here.

INCLUDE_DIRS := $(PYTHON_INCLUDE) /usr/local/include /usr/include/hdf5/serial

LIBRARY_DIRS := $(PYTHON_LIB) /usr/local/lib /usr/lib /usr/lib/x86_64-linux-gnu/hdf5/serial

# If Homebrew is installed at a non standard location (for example your home directory) and you use it for general dependencies

# INCLUDE_DIRS += $(shell brew --prefix)/include

# LIBRARY_DIRS += $(shell brew --prefix)/lib

# Uncomment to use `pkg-config` to specify OpenCV library paths.

# (Usually not necessary -- OpenCV libraries are normally installed in one of the above $LIBRARY_DIRS.)

# USE_PKG_CONFIG := 1

BUILD_DIR := build

DISTRIBUTE_DIR := distribute

# Uncomment for debugging. Does not work on OSX due to https://github.com/BVLC/caffe/issues/171

# DEBUG := 1

# The ID of the GPU that 'make runtest' will use to run unit tests.

TEST_GPUID := 0

# enable pretty build (comment to see full commands)

Q ?= @

# shared object suffix name to differentiate branches

LIBRARY_NAME_SUFFIX := -nv
想自己找到上面修改的路径,可以使用下面的命令查找
python -c "from distutils.sysconfig import get_python_inc; print(get_python_inc())"

python -c "import distutils.sysconfig as sysconfig; print(sysconfig.get_config_var('LIBDIR'))"

find /root/miniconda3/envs/py36/lib/ -name numpy
设置环境变量
export PYTHONPATH=/home/caffe-0.17.4/python/:$PYTHONPATH

export LD_LIBRARY_PATH=$LD_LIBRARY_PATH:/root/miniconda3/envs/py36/lib
开始编译
make clean

make all -j12

make pycaffe -j12
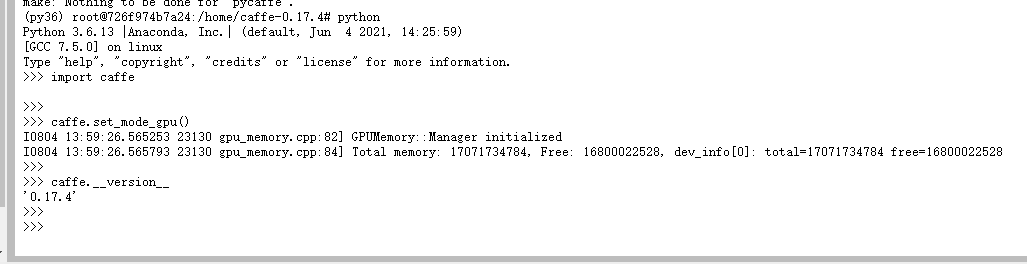
使用python环境测试
python
import caffe

caffe.set_mode_gpu()

caffe.__version__
使用官方examples测试
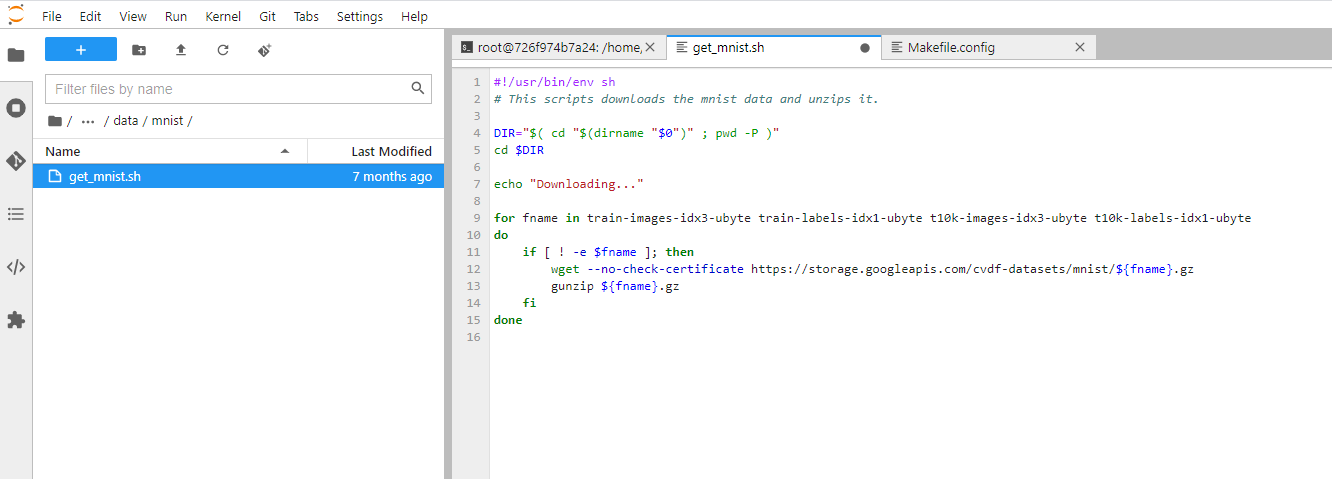
#!/usr/bin/env sh

# This scripts downloads the mnist data and unzips it.

DIR="$( cd "$(dirname "$0")" ; pwd -P )"

cd $DIR

echo "Downloading..."

for fname in train-images-idx3-ubyte train-labels-idx1-ubyte t10k-images-idx3-ubyte t10k-labels-idx1-ubyte

do

    if [ ! -e $fname ]; then

        wget --no-check-certificate https://storage.googleapis.com/cvdf-datasets/mnist/${fname}.gz

        gunzip ${fname}.gz

    fi

done
./data/mnist/get_mnist.sh
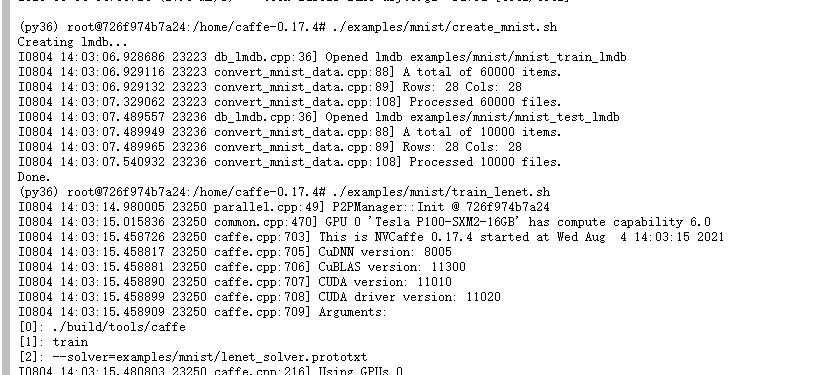
./examples/mnist/create_mnist.sh
./examples/mnist/train_lenet.sh
查看显存使用率
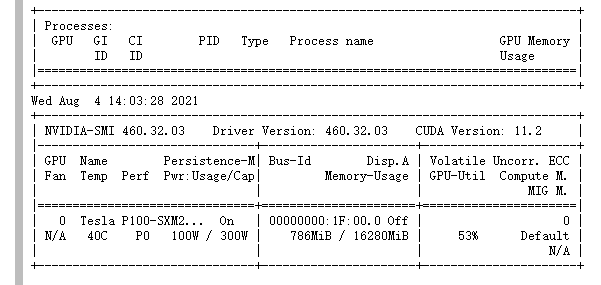
nvidia-smi -l 5
参考文章
https://stackoverflow.com/questions/36183486/importerror-no-module-named-google
https://github.com/xianyi/OpenBLAS/issues/1114
https://pypi.org/project/scipy/0.17.0/
https://github.com/NVIDIA/caffe/releases/tag/v0.17.4
矩池云上安装 NVCaffe教程的更多相关文章
- 矩池云上安装ikatago及远程链接教程
https://github.com/kinfkong/ikatago-resources/tree/master/dockerfiles 从作者的库中可以看到,该程序支持cuda9.2.cuda10 ...
- 矩池云上安装yolov4 darknet教程
这里我是用PyTorch 1.8.1来安装的 拉取仓库 官方仓库 git clone https://github.com/AlexeyAB/darknet 镜像仓库 git clone https: ...
- 矩池云上安装yolov5并测试教程
官方仓库:https://github.com/ultralytics/yolov5 官方文档:https://docs.ultralytics.com/quick-start/ 此案例我是租用了k8 ...
- 矩池云上安装及使用Milvus教程
选择cuda10.1的镜像 更新源及拷贝文件到本地 apt-get update cp -r /public/database/milvus/ / cd /milvus/ cp ./lib/* /us ...
- 矩池云上安装caffe gpu教程
选用CUDA10.0镜像 添加nvidia-cuda和修改apt源 curl -fsSL https://mirrors.aliyun.com/nvidia-cuda/ubuntu1804/x86_6 ...
- 矩池云上编译安装dlib库
方法一(简单) 矩池云上的k80因为内存问题,请用其他版本的GPU去进行编译,保存环境后再在k80上用. 准备工作 下载dlib的源文件 进入python的官网,点击PyPi选项,搜索dilb,再点击 ...
- 矩池云上使用nvidia-smi命令教程
简介 nvidia-smi全称是NVIDIA System Management Interface ,它是一个基于NVIDIA Management Library(NVML)构建的命令行实用工具, ...
- 在矩池云上复现 CVPR 2018 LearningToCompare_FSL 环境
这是 CVPR 2018 的一篇少样本学习论文:Learning to Compare: Relation Network for Few-Shot Learning 源码地址:https://git ...
- 矩池云上TensorBoard/TensorBoardX配置说明
Tensorflow用户使用TensorBoard 矩池云现在为带有Tensorflow的镜像默认开启了6006端口,那么只需要在租用后使用命令启动即可 tensorboard --logdir lo ...
随机推荐
- 如何在pyqt中自定义SwitchButton
前言 网上有很多 SwitchButton 的实现方式,大部分是通过重写 paintEvent() 来实现的,感觉灵活性不是很好.所以希望实现一个可以联合使用 qss 来更换样式的 SwitchBut ...
- ApacheCN Vue 译文集 20211115 更新
使用 GraphQL 构建 VueJS 应用 零.前言 一.数据绑定.事件和计算属性 二.组件.混合器和功能组件 三.设置我们的聊天应用--AWS Amplify 环境和 GraphQL 四.创建自定 ...
- Win10 提示凭证不工作问题
感谢大佬:https://cloud.tencent.com/developer/article/1337081 在公司局域网远程自己计算机的时候,突然无法远程了,提示"您的凭据不工作 之前 ...
- 为 ubuntu 切换更新源
感谢大佬:https://blog.csdn.net/sudaning/article/details/83445677 目录 备份 修改源文件 更新列表 更新软件 备份 sudo cp /etc/a ...
- NoSQL 之 Redis配置与优化
NoSQL 之 Redis配置与优化 1.关系数据库与非关系型数据库概述 2.关系数据库与非关系型数据库区别 3.非关系型数据库产生背景 4.Redis简介 5.Redis安装部署 6.Redis 命 ...
- Msi.h causes compilation error in vs2010
创建一个Win32 Console工程ReadFromMSM,什么都不需要做. 在ReadFromMSM.cpp文件中引入头文件: #include <msi.h> 编译,会发现有成堆的错 ...
- 列出ubuntu软件管理工具apt的一些用法(自由总结)
安装软件包 [root@CentOS7 ~]#apt install tree 删除软件包 [root@CentOS7 ~]# apt remove tree 列出仓库软件包 [root@CentOS ...
- tep集成mitmproxy录制流量自动生成用例
使用 操作过程非常简单,流程如下: ①配置过滤域名 必须配置,不然会有很多无效流量造成数据冗余. ②启动代理 「示例」使用了反向代理,tep自带FastApi启动Mock服务: 「实际」使用正向代理, ...
- [LeetCode]9.回文数(Java)
原题地址: palindrome-number 题目描述: 给你一个整数 x ,如果 x 是一个回文整数,返回 true :否则,返回 false . 回文数是指正序(从左向右)和倒序(从右向左)读都 ...
- 暑假撸系统7- 熊孩子的捣乱!javascript保存前台状态!
系统大体框架已经搭的差不多了, 往下就是技术性的美化以及修补了,但这也是最最耗费时间的.在这个过程就发现了一个有意思的需求,这里把思路以及解决方案总结下. 因为做的是考试系统,不管是大或者小的考试,本 ...