C#创建Windows Service(Windows 服务)基础教程
Windows Service这一块并不复杂,但是注意事项太多了,网上资料也很凌乱,偶尔自己写也会丢三落四的。所以本文也就产生了,本文不会写复杂的东西,完全以基础应用的需求来写,所以不会对Windows Service写很深入。
本文介绍了如何用C#创建、安装、启动、监控、卸载简单的Windows Service 的内容步骤和注意事项。
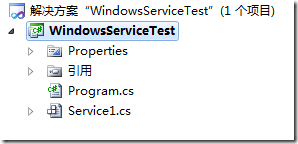
一、创建一个Windows Service
1)创建Windows Service项目

2)对Service重命名
将Service1重命名为你服务名称,这里我们命名为ServiceTest。
二、创建服务安装程序
1)添加安装程序


之后我们可以看到上图,自动为我们创建了ProjectInstaller.cs以及2个安装的组件。
2)修改安装服务名
右键serviceInsraller1,选择属性,将ServiceName的值改为ServiceTest。

3)修改安装权限
右键serviceProcessInsraller1,选择属性,将Account的值改为LocalSystem。

三、写入服务代码
1)打开ServiceTest代码
右键ServiceTest,选择查看代码。
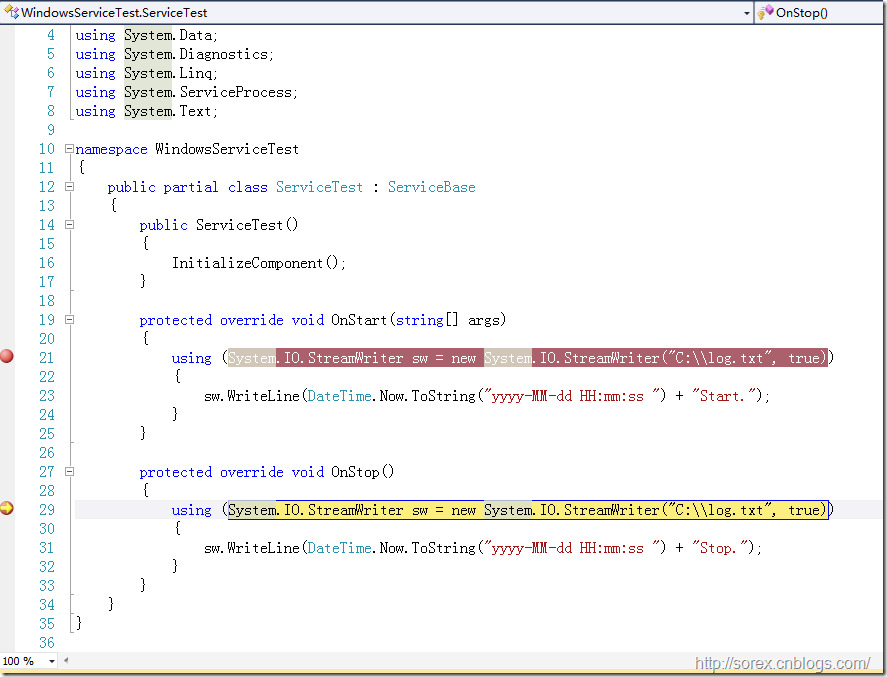
2)写入Service逻辑
添加如下代码:
|
1
2
3
4
5
6
7
8
9
10
11
12
13
14
15
16
17
18
19
20
21
22
23
24
25
26
27
28
29
30
31
32
33
34
35
|
using System;using System.Collections.Generic;using System.ComponentModel;using System.Data;using System.Diagnostics;using System.Linq;using System.ServiceProcess;using System.Text;namespace WindowsServiceTest{ public partial class ServiceTest : ServiceBase { public ServiceTest() { InitializeComponent(); } protected override void OnStart(string[] args) { using (System.IO.StreamWriter sw = new System.IO.StreamWriter("C:\\log.txt", true)) { sw.WriteLine(DateTime.Now.ToString("yyyy-MM-dd HH:mm:ss ") + "Start."); } } protected override void OnStop() { using (System.IO.StreamWriter sw = new System.IO.StreamWriter("C:\\log.txt", true)) { sw.WriteLine(DateTime.Now.ToString("yyyy-MM-dd HH:mm:ss ") + "Stop."); } } }} |
这里我们的逻辑很简单,启动服务的时候写个日志,关闭的时候再写个日志。
四、创建安装脚本
在项目中添加2个文件如下(必须是ANSI或者UTF-8无BOM格式):
1)安装脚本Install.bat
|
1
2
3
|
%SystemRoot%\Microsoft.NET\Framework\v4.0.30319\installutil.exe WindowsServiceTest.exeNet Start ServiceTestsc config ServiceTest start= auto |
2)卸载脚本Uninstall.bat
|
1
|
%SystemRoot%\Microsoft.NET\Framework\v4.0.30319\installutil.exe /u WindowsServiceTest.exe |
3)安装脚本说明
第二行为启动服务。
第三行为设置服务为自动运行。
这2行视服务形式自行选择。
4)脚本调试
如果需要查看脚本运行状况,在脚本最后一行加入pause
五、在C#中对服务进行控制
0)配置目录结构
简历一个新WPF项目,叫WindowsServiceTestUI,添加对System.ServiceProcess的引用。
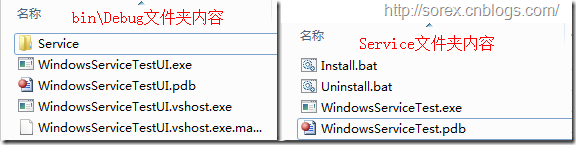
在WindowsServiceTestUI的bin\Debug目录下建立Service目录。
将WindowsServiceTest的生成目录设置为上面创建的Service目录。
生成后目录结构如下图
1)安装
安装时会产生目录问题,所以安装代码如下:
|
1
2
3
4
5
6
7
8
|
string CurrentDirectory = System.Environment.CurrentDirectory;System.Environment.CurrentDirectory = CurrentDirectory + "\\Service";Process process = new Process();process.StartInfo.UseShellExecute = false;process.StartInfo.FileName = "Install.bat";process.StartInfo.CreateNoWindow = true;process.Start();System.Environment.CurrentDirectory = CurrentDirectory; |
2)卸载
卸载时也会产生目录问题,所以卸载代码如下:
|
1
2
3
4
5
6
7
8
|
string CurrentDirectory = System.Environment.CurrentDirectory;System.Environment.CurrentDirectory = CurrentDirectory + "\\Service";Process process = new Process();process.StartInfo.UseShellExecute = false;process.StartInfo.FileName = "Uninstall.bat";process.StartInfo.CreateNoWindow = true;process.Start();System.Environment.CurrentDirectory = CurrentDirectory; |
3)启动
代码如下:
|
1
2
3
4
5
|
using System.ServiceProcess;ServiceController serviceController = new ServiceController("ServiceTest");serviceController.Start(); |
4)停止
|
1
2
3
|
ServiceController serviceController = new ServiceController("ServiceTest");if (serviceController.CanStop) serviceController.Stop(); |
5)暂停/继续
|
1
2
3
4
5
6
7
8
|
ServiceController serviceController = new ServiceController("ServiceTest");if (serviceController.CanPauseAndContinue){ if (serviceController.Status == ServiceControllerStatus.Running) serviceController.Pause(); else if (serviceController.Status == ServiceControllerStatus.Paused) serviceController.Continue();} |
6)检查状态
|
1
2
|
ServiceController serviceController = new ServiceController("ServiceTest");string Status = serviceController.Status.ToString(); |
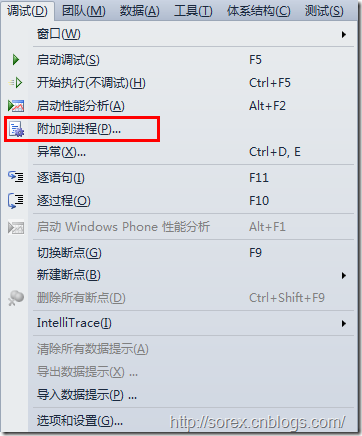
六、调试Windows Service
1)安装并运行服务
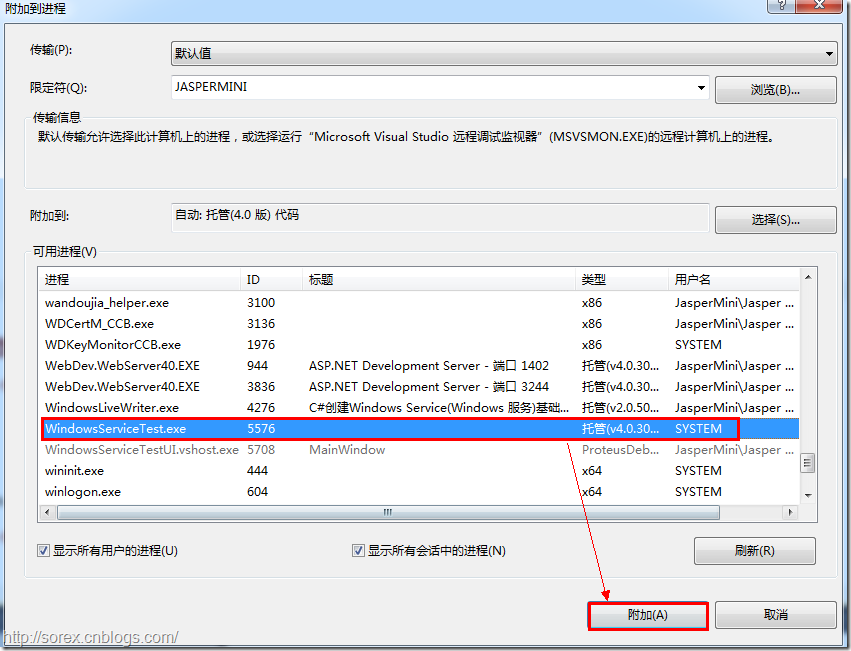
2)附加进程
3)在代码中加入断点进行调试
七、总结
本文对Windows service的上述配置都未做详细解释,但是按上述步骤就可以制作可运行的Windows Service,从而达到了工作的需求。
示例代码请见:https://github.com/sorex/WindowsServiceTest
C#创建Windows Service(Windows 服务)基础教程的更多相关文章
- ASP.NET Core 新建项目(Windows) - ASP.NET Core 基础教程 - 简单教程,简单编程
原文:ASP.NET Core 新建项目(Windows) - ASP.NET Core 基础教程 - 简单教程,简单编程 ASP.NET Core 新建项目(Windows) 对于任何语言和框架,都 ...
- C#创建、安装、卸载、调试Windows Service(Windows 服务)的简单教程
前言:Microsoft Windows 服务能够创建在它们自己的 Windows 会话中可长时间运行的可执行应用程序.这些服务可以在计算机启动时自动启动,可以暂停和重新启动而且不显示任何用户界面.这 ...
- Windows Service插件服务开源
WindowsService 插件服务是一个为简化NTService开发和打包程序,提供插件开发的方式进行动态加入或删除业务. 插件式服务程序的由来,在系统维护的过程中,根据企业的要求经常要进行一些周 ...
- C#写Windows Service(windows服务程序)
背景: 要学习使用一个新东西,我们必须知道他是个什么东西.对于我们此次研究的windows服务来说,他又是个什么东西,其实也没有什么高深的了. windows service概述: 一个 ...
- 分别在.NET Framework 与 .NET Core 框架下 编写Windows Service(windows服务程序)
前言,为什么会分别在两个框架下编写Windows Service,是因为最近在做区块链这块,使用的是NEO(小蚁区块链)的相关技术,NEO使用的是.net core 2.1,业务上需要写两个程序,一个 ...
- 重温WCF之构建一个简单的WCF(一)(2)通过Windows Service寄宿服务和WCF中实现操作重载
参考地址:http://www.cnblogs.com/zhili/p/4039111.html 一.如何在Windows Services中寄宿WCF服务 第一步:创建Windows 服务项目,具体 ...
- Windows Phone 8.1基础教程(1) 页面导航、弹出框
1. 跳转到其他页面 Frame.Navigate(typeof(页面),参数); 2. 后退回历史页面 Frame.GoBack(); 3. 回跳时判断 if(e.NavigationMode == ...
- windows service创建使用整合
C#创建Windows Service(Windows 服务)基础教程 C#winform windows服务程序创建与安装 C#实现WinForm随WINDOWS服务一起启动
- C#/.NET基于Topshelf创建Windows服务程序及服务的安装和卸载(极速,简洁)
本文首发于:码友网--一个专注.NET/.NET Core开发的编程爱好者社区. 文章目录 C#/.NET基于Topshelf创建Windows服务的系列文章目录: C#/.NET基于Topshelf ...
随机推荐
- 【原】训练自己的haar-like特征分类器并识别物体(3)
在前两篇文章中,我介绍了<训练自己的haar-like特征分类器并识别物体>的前三个步骤: 1.准备训练样本图片,包括正例及反例样本 2.生成样本描述文件 3.训练样本 4.目标识别 == ...
- MongoDB 初识1: 启动MongoDB
Mongodb可作为网络服务器运行,客户端可连接到该服务器并执行操作. 1. 首先,用户必须下载Mongodb并解压,运行mongod命令启动实例 下载地址:http://www.mongodb.or ...
- Android精品开源整理
一.兼容类库 ActionBarSherlock : Action Bar是Android 3.0后才开始支持的,ActionBarSherlock是让Action Bar功能支持2.X后的所有平台, ...
- Log4j配置与使用
log4j是Java社区事实上的日志标准解决方案.使用起来比较简单. 一. 简单使用 1.下载jar包放到lib文件夹,并加入到build path中: 2.编写log4j.properties文件, ...
- 问题解决——ShowWindow不显示窗口
配合任务栏通知区域. //MFC对话框程序 void CXXXDlg::OnShowHideUi() { // TODO: 在此添加命令处理程序代码 m_bShown=!m_bShown; ShowW ...
- linux搭建一个配置简单的nginx反向代理服务器 2个tomcat
1.我们只要实现访问nginx服务器能跳转到不同的服务器即可,我本地测试是这样的, 在nginx服务器里面搭建了2个tomcat,2个tomcat端口分别是8080和8081,当我输入我nginx服务 ...
- 浅谈export 以及环境变量
简要说一下env,set,export的区别:env命令显示环境变量,set和export显示环境变量和自定变量. export:可以讲自定变量转化为环境变量之前有一个疑惑,我们定义环境变量PATH时 ...
- [转]10个学习Android开发的网站推荐
本文转自:http://blog.csdn.net/i_lovefish/article/details/43950893 1. Android Developers 作为一个Android开发者,官 ...
- Chrome浏览器与常用插件推荐
Chrome浏览器与常用插件推荐 官方chrome下载:http://www.google.cn/chrome/ 提示:需要FQ才能安装. 1,AdBlock 谷歌屏蔽广告: https://chro ...
- [转]Composer 中国镜像
用法: 有两种方式启用本镜像服务: 将以下配置信息添加到 Composer 的配置文件 config.json 中(系统全局配置).见“例1” 将以下配置信息添加到你的项目的 composer.jso ...