.NET Core 学习笔记之 WebSocketsSample
1. 服务端
代码如下:
Program:
using Microsoft.AspNetCore;

using Microsoft.AspNetCore.Hosting;

namespace WebSocketsServer

{

    public class Program

    {

        public static void Main(string[] args)

        {

            BuildWebHost(args).Run();

        }

        public static IWebHost BuildWebHost(string[] args) =>

            WebHost.CreateDefaultBuilder(args)

                .UseStartup<Startup>()

                .Build();

    }

}
Startup:
using Microsoft.AspNetCore.Builder;

using Microsoft.AspNetCore.Hosting;

using Microsoft.AspNetCore.Http;

using Microsoft.Extensions.DependencyInjection;

using Microsoft.Extensions.Logging;

using System;

using System.Net.WebSockets;

using System.Text;

using System.Threading;

using System.Threading.Tasks;

namespace WebSocketsServer

{

    public class Startup

    {

        // This method gets called by the runtime. Use this method to add services to the container.

        // For more information on how to configure your application, visit https://go.microsoft.com/fwlink/?LinkID=398940

        public void ConfigureServices(IServiceCollection services)

        {

        }

        // This method gets called by the runtime. Use this method to configure the HTTP request pipeline.

        public void Configure(IApplicationBuilder app, IHostingEnvironment env, ILoggerFactory loggerFactory)

        {

            if (env.IsDevelopment())

            {

                app.UseDeveloperExceptionPage();

            }

            // configure keep alive interval, receive buffer size

            app.UseWebSockets();

            app.Map("/samplesockets", app2 =>

            {

                // middleware to handle websocket request

                app2.Use(async (context, next) =>

                {

                    if (context.WebSockets.IsWebSocketRequest)

                    {

                        var webSocket = await context.WebSockets.AcceptWebSocketAsync();

                        await SendMessagesAsync(context, webSocket, loggerFactory.CreateLogger("SendMessages"));

                    }

                    else

                    {

                        await next();

                    }

                });

            });

            app.Run(async (context) =>

            {

                await context.Response.WriteAsync("Web Sockets sample");

            });

        }

        private async Task SendMessagesAsync(HttpContext context, WebSocket webSocket, ILogger logger)

        {

            var buffer = new byte[];

            WebSocketReceiveResult result = await webSocket.ReceiveAsync(new ArraySegment<byte>(buffer), CancellationToken.None);

            while (!result.CloseStatus.HasValue)

            {

                if (result.MessageType == WebSocketMessageType.Text)

                {

                    string content = Encoding.UTF8.GetString(buffer, , result.Count);

                    if (content.StartsWith("REQUESTMESSAGES:"))

                    {

                        string message = content.Substring("REQUESTMESSAGES:".Length);

                        for (int i = ; i < ; i++)

                        {

                            string messageToSend = $"{message} - {i}";

                            if (i == )

                            {

                                messageToSend += ";EOS"; // send end of sequence to not let the client wait for another message

                            }

                            byte[] sendBuffer = Encoding.UTF8.GetBytes(messageToSend);

                            await webSocket.SendAsync(new ArraySegment<byte>(sendBuffer), WebSocketMessageType.Text, endOfMessage: true, CancellationToken.None);

                            logger.LogDebug("sent message {0}", messageToSend);

                            await Task.Delay();

                        }

                    }

                    if (content.Equals("SERVERCLOSE"))

                    {

                        await webSocket.CloseAsync(WebSocketCloseStatus.NormalClosure, "Bye for now", CancellationToken.None);

                        logger.LogDebug("client sent close request, socket closing");

                        return;

                    }

                    else if (content.Equals("SERVERABORT"))

                    {

                        context.Abort();

                    }

                }

                result = await webSocket.ReceiveAsync(buffer, CancellationToken.None);

            }

        }

    }

}
launchSettings.json
{

  "iisSettings": {

    "windowsAuthentication": false,

    "anonymousAuthentication": true,

    "iisExpress": {

      "applicationUrl": "http://localhost:58167/",

      "sslPort":

    }

  },

  "profiles": {

    "IIS Express": {

      "commandName": "IISExpress",

      "launchBrowser": true,

      "environmentVariables": {

        "ASPNETCORE_ENVIRONMENT": "Development"

      }

    },

    "WebSocketsServer": {

      "commandName": "Project",

      "launchBrowser": true,

      "environmentVariables": {

        "ASPNETCORE_ENVIRONMENT": "Development"

      },

      "applicationUrl": "http://localhost:58168/"

    }

  }

}
2. 客户端
Program.cs
代码如下:
using System;

using System.Net.WebSockets;

using System.Text;

using System.Threading;

using System.Threading.Tasks;

namespace WebSocketClient

{

    class Program

    {

        static async Task Main()

        {

            Console.WriteLine("Client - wait for server");

            Console.ReadLine();

            await InitiateWebSocketCommunication("ws://localhost:58167/samplesockets");

            //"ws://localhost:6295/samplesockets"

            //http://localhost:58167/

            Console.WriteLine("Program end");

            Console.ReadLine();

        }

        static async Task InitiateWebSocketCommunication(string address)

        {

            try

            {

                var webSocket = new ClientWebSocket();

                await webSocket.ConnectAsync(new Uri(address), CancellationToken.None);

                await SendAndReceiveAsync(webSocket, "A");

                await SendAndReceiveAsync(webSocket, "B");

                await webSocket.SendAsync(new ArraySegment<byte>(Encoding.UTF8.GetBytes("SERVERCLOSE")),

                    WebSocketMessageType.Text,

                    endOfMessage: true,

                    CancellationToken.None);

                var buffer = new byte[];

                var result = await webSocket.ReceiveAsync(new ArraySegment<byte>(buffer),

                    CancellationToken.None);

                Console.WriteLine($"received for close: " +

                    $"{result.CloseStatus} " +

                    $"{result.CloseStatusDescription} " +

                    $"{Encoding.UTF8.GetString(buffer, 0, result.Count)}");

                await webSocket.CloseAsync(WebSocketCloseStatus.NormalClosure,

                    "Bye",

                    CancellationToken.None);

            }

            catch (Exception ex)

            {

                Console.WriteLine(ex.Message);

            }

        }

        static async Task SendAndReceiveAsync(WebSocket webSocket, string term)

        {

            byte[] data = Encoding.UTF8.GetBytes($"REQUESTMESSAGES:{term}");

            var buffer = new byte[];

            await webSocket.SendAsync(new ArraySegment<byte>(data),

                WebSocketMessageType.Text,

                endOfMessage: true,

                CancellationToken.None);

            WebSocketReceiveResult result;

            bool sequenceEnd = false;

            do

            {

                result = await webSocket.ReceiveAsync(new ArraySegment<byte>(buffer),

                    CancellationToken.None);

                string dataReceived = Encoding.UTF8.GetString(buffer, , result.Count);

                Console.WriteLine($"received {dataReceived}");

                if (dataReceived.Contains("EOS"))

                {

                    sequenceEnd = true;

                }

            } while (!(result?.CloseStatus.HasValue ?? false) && !sequenceEnd);

        }

    }

}
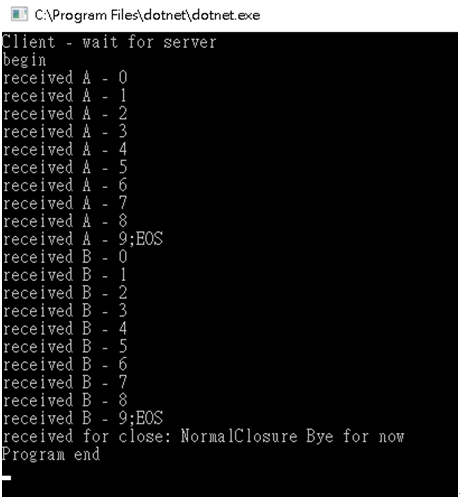
运行截图
谢谢浏览!
.NET Core 学习笔记之 WebSocketsSample的更多相关文章
- .NET CORE学习笔记系列(2)——依赖注入[7]: .NET Core DI框架[服务注册]
原文https://www.cnblogs.com/artech/p/net-core-di-07.html 包含服务注册信息的IServiceCollection对象最终被用来创建作为DI容器的IS ...
- .NET CORE学习笔记系列(2)——依赖注入[6]: .NET Core DI框架[编程体验]
原文https://www.cnblogs.com/artech/p/net-core-di-06.html 毫不夸张地说,整个ASP.NET Core框架是建立在一个依赖注入框架之上的,它在应用启动 ...
- .NET CORE学习笔记系列(2)——依赖注入[5]: 创建一个简易版的DI框架[下篇]
为了让读者朋友们能够对.NET Core DI框架的实现原理具有一个深刻而认识,我们采用与之类似的设计构架了一个名为Cat的DI框架.在上篇中我们介绍了Cat的基本编程模式,接下来我们就来聊聊Cat的 ...
- .NET CORE学习笔记系列(2)——依赖注入[4]: 创建一个简易版的DI框架[上篇]
原文https://www.cnblogs.com/artech/p/net-core-di-04.html 本系列文章旨在剖析.NET Core的依赖注入框架的实现原理,到目前为止我们通过三篇文章从 ...
- .NET CORE学习笔记系列(2)——依赖注入【3】依赖注入模式
原文:https://www.cnblogs.com/artech/p/net-core-di-03.html IoC主要体现了这样一种设计思想:通过将一组通用流程的控制权从应用转移到框架中以实现对流 ...
- .NET CORE学习笔记系列(2)——依赖注入【2】基于IoC的设计模式
原文:https://www.cnblogs.com/artech/p/net-core-di-02.html 正如我们在<控制反转>提到过的,很多人将IoC理解为一种“面向对象的设计模式 ...
- .NET CORE学习笔记系列(2)——依赖注入【1】控制反转IOC
原文:https://www.cnblogs.com/artech/p/net-core-di-01.html 一.流程控制的反转 IoC的全名Inverse of Control,翻译成中文就是“控 ...
- .NET Core学习笔记(7)——Exception最佳实践
1.为什么不要给每个方法都写try catch 为每个方法都编写try catch是错误的做法,理由如下: a.重复嵌套的try catch是无用的,多余的. 这一点非常容易理解,下面的示例代码中,O ...
- .net core学习笔记,组件篇:服务的注册与发现(Consul)初篇
1.什么是服务注册中心? 在学习服务注册与发现时,我们要先搞明白到底什么是服务注册与发现. 在这里我举一个生活中非常普遍的例子——网购来简单说明,网购在我们日常生活中已经是非常普遍了,其实网购中的(商 ...
随机推荐
- .net core 的 aop 实现方法汇总
decorator 不借助第三方DI容器,通过装饰模式通过内置的DI容器实现 https://medium.com/@willie.tetlow/net-core-dependency-injecti ...
- CDN加速静态文件访问
CDN加速静态文件访问 全局调度 缓存技术 内容分发 带宽优化 CDN是Content Delivery Network的缩写,意思是内容分发网络.CDN的作用是把用户需要的内容分发到离用户近的地方, ...
- Spring Boot的注解,你知道或者不知道的都在这里!
1.1 定义 Annotation(注解),用于为Java代码提供元数据.简单理解注解可以看做是一个个标签,用来标记代码.是一种应用于类.方法.参数.变量.构造器及包的一种特殊修饰符. 1.2 注解的 ...
- Python通用函数实现数组计算
一.数组的运算 数组的运算可以进行加减乘除,同时也可以将这些算数运算符进行任意的组合已达到效果. >>> x=np.arange() >>> x array([, ...
- Android 矢量图详解
官方文档 关于 Vector,在官方开发指南中介绍.本文章是由个人翻译官方指南然后添加个人理解完成. 由于个人精力有限,多个渠道发布,排版上可能会有问题,如果影响查看,请移步 Android 开发者家 ...
- securecrt如何保存操作日志
- Troubleshooting ORA-01555 - Snapshot Too Old: Rollback Segment Number "String" With Name "String" Too Small (Doc ID 1580790.1)
Troubleshooting ORA-01555 - Snapshot Too Old: Rollback Segment Number "String" With Name & ...
- 查看sybase IQ的执行计划
在性能调优工作中,首要的事情是找出性能瓶颈.而针对数据库应用,由于商用数据库对上层应用来说是个黑盒,所以往往需要借助数据库的一些接口或工具来了解数据库的具体行为,并结合相关知识和业务进行调测. ...
- CSS 轻松搞定标签(元素)居中问题
在CSS里,标签位置居中一直是困扰Web前端的难题.在本文中,我对这类问题进行了探究和给出了几点建议,供读者参考. 1 行内标签 1.1 水平居中 在父级标签中使用 text-align: cente ...
- Python正则表达式中re.S作用
re.S的作用: 不使用re.S时,则只在每一行内进行匹配,如果存在一行没有,就换下一行重新开始,使用re.S参数以后,正则表达式会将这个字符串看做整体,在整体中进行匹配 对比输出结果: import ...