利用python3 爬虫 定制版妹子图mzitu爬取
在刚开始学爬虫的时候,用来练手的基础爬虫就是爬取各种妹子图片,前几天同时说了这个,便准备随便写一个。。。最后发现真是三天不练。。什么都记不住了!!所以花了政治一天重新写了一个爬虫程序,并且支持按照时间(自己选择)来爬取图片!
程序里面用到的库有requests bs4 re
爬虫地址入口:http://www.mzitu.com/all
在程序设计上,我想要用户手动输入爬取的时间!比如 2018 06
好了思路理顺了,就开始程序设计吧!首先我们登陆首页 查看观察页面!(利用谷歌的F12)

我们发现了有两个重要的点!第一 这里面需要cookie 第二 host 为 www.mzitu.com !这里很容易里面,cookie就是我们登陆首页(www.mzitu.com)生成的!
第一步:登陆首页获取cookie!!!
我们在首页用同样的方法查看12 看里面的request headers!!!然后我们模仿这个headers发送请求,然后用requests方法来获取cookie并且记录下来以供以后使用!
def __init__(self):

        url="http://www.mzitu.com/"

        headers={

            'Accept': 'text / html, application / xhtml + xml, application / xml;q = 0.9, image / webp, image / apng, * / *;q = 0.8',

            'Accept - Encoding': 'gzip, deflate',

            'Accept - Language': 'zh - CN, zh;q = 0.9',

            'Cache - Control': 'max - age = 0',

            'Host': 'www.mzitu.com',

            'Upgrade - Insecure - Requests': '',

            'User - Agent': 'Mozilla / 5.0(Windows NT 10.0;WOW64) AppleWebKit / 537.36(KHTML, like Gecko) Chrome / 66.0.3359.117 Safari / 537.36'

        }

        html = requests.get(url, headers=headers)

        cookies=str(html.cookies.get_dict())

      #  print(cookies)
第二步:获取用户输入的年月的所有图片的url
这一步是整个程序的重点!我们在http://www.mzitu.com/all 这个页面发现了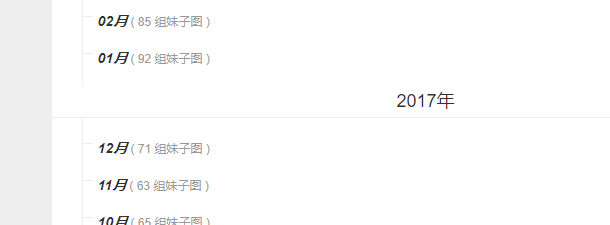 这里面的图片是按照时间来分类的,所以我们想要按照时间来分类的话就先分析源码里面的逻辑:
我们发现年份是在div标签属性为main-content之下!!!而月份图片在p标签 下面的em标签下面
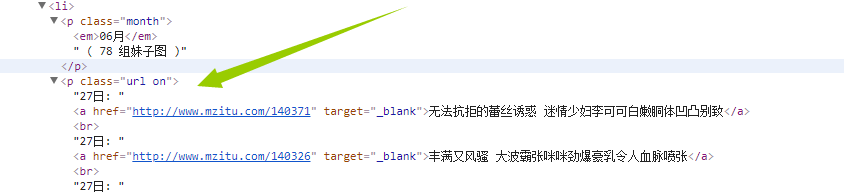
而我们需要的url是在p标签属性为url on下面!!!!
这里我想了很久,最终选择了父子,兄弟标签的方法来解决!!
url="http://www.mzitu.com/all/"

        headers={

            'Accept': 'text / html, application / xhtml + xml, application / xml;q = 0.9, image / webp, image / apng, * / *;q = 0.8',

            'Accept - Encoding': 'gzip, deflate',

            'Accept - Language': 'zh - CN, zh;q = 0.9',

            'Cache - Control': 'max - age = 0',

            'Cookie':cookies ,

            'Host': 'www.mzitu.com',

            'Upgrade - Insecure - Requests': '',

            'User - Agent': 'Mozilla / 5.0(Windows NT 10.0;WOW64) AppleWebKit / 537.36(KHTML, like Gecko) Chrome / 66.0.3359.117 Safari / 537.36'

        }

        html = requests.get(url, headers=headers)

        years=input("请输入您想要爬去的年份: ")

        month=input("请输入您想要爬去的月份:  ")

        month1=str(month)+"月"

        soup = BeautifulSoup(html.text,'lxml')

        all=soup.find('div',text=re.compile(years))

        all1=all.next_sibling

        test=all1.find('em',text=re.compile(month1))

        ##获取包含月份的父节点

        parent=test.parent

        #获取每个月的数据,也就是上一个标签的兄弟标签

        allpic=parent.next_sibling

        #获取每个图片的url

        allurllist=[]

        for url1 in allpic.find_all('a', href=True):

            if url1.get_text(strip=True):

                print(type(url1['href']))

                allurllist.append(str(url1['href']))

        #这里就获取了全部的url,列表形式,以逗号分隔

        # self.getallpic(strall4)

        self.getallpic(allurllist,cookies)
上面这一段代码详解!
这里面需要特别注意
for url1 in allpic.find_all('a', href=True):

            if url1.get_text(strip=True):

                print(type(url1['href']))

                allurllist.append(str(url1['href']))
目的是为了获取所有的url   href=True的意思是寻找所有满足有herf的a标签
然后判断if
url1.get_text(strip=True):  如果这个标签里面的内容不为空【strip=True的意思是过滤掉文本内容的前后空白】, 那么通过url1['href']来获取href具体属性内容!!
当然也可以通过正则表达式来处理
month1=str(month)+"月" 这段代码是用户输入06 需要转换为06月 因为源码里面是06月
 soup = BeautifulSoup(html.text,'lxml')

        all=soup.find('div',text=re.compile(years)) 这两端代码利用bs来找到了输入的年份所在的那个标签!!!注意这里的返回值是一个bs类,也就是我们还可以继续对这个类使用bs里面的任何方法!!!
 all1=all.next_sibling

        test=all1.find('em',text=re.compile(month1))这两段代码实现了通过年份标签来找到月份标签(这里千万别走偏了!!寻找这个标签的目的其实是为了寻找我们需要的url)
  parent=test.parent

  allpic=parent.next_sibling  这两段代码就实现了找到需要的url!!通过找月份标签的兄弟标签!
第三步:保存图片
我们拿一个图片的url举例:http://www.mzitu.com/139042/7
我们发现进入到图片系列之后!!!发现图片不止一张!!

我们当然不能只爬取一页!那么怎么获取这个图片一共多少页呢?
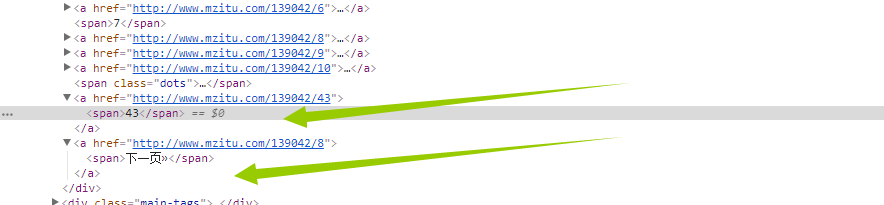
看这里!!我们还是老办法!通过找到下页面这个标签的上一个标签的内容就行了!代码如下
 html = requests.session().get(i,headers=headers)

            soup = BeautifulSoup(html.text, 'lxml')

            all = soup.find('span', text=re.compile("下一页"))

            #找到下一页的父标签

            parent = all.parent

            #获取上一级标签,也就是含有最大页面的标签

            allpic = parent.previous_sibling

            maxyema=allpic.find('span').get_text()
这里的i是一个循环 也就是我们上一步获取的url!
拿到最大页码之后 我们需要对这个url的每一页遍历
  for p in range(1,int(maxyema)+1):

                url=str(i)+"/"+str(p)

                self.downloadpict(p,url,headers)
然后我们定义数据存储函数
def downloadpict(self,yema,url,headers):

        #加载每一个页面

        html = requests.session().get(url, headers=headers)

        soup = BeautifulSoup(html.text, 'lxml')

        picture = soup.find('div', class_="main-image")

        picture = str(picture)

        # 获取每张图片的url

        pattern = re.compile(r'src="(.*?)"/.*', re.S)

        picturl = pattern.findall(picture)

        #匹配名称为后面的命令打基础

        namepattern = re.compile(r'alt="(.*?)" src.*',re.S)

        name1=str(namepattern.findall(picture)).replace('"','').replace("[","").replace("]","")[0:5]

        # picture=requests.get(str(picturl[0]),headers=headers)

        headers = {

            'Accept': 'text / html, application / xhtml + xml, application / xml;q = 0.9, image / webp, image / apng, * / *;q = 0.8',

            'Accept - Encoding': 'gzip, deflate',

            'Accept - Language': 'zh - CN, zh;q = 0.9',

            'Cache - Control': 'max - age = 0',

            'Connection': 'keep - alive',

            'Host': 'i.meizitu.net ',

            # 'Referer': 'http://www.mzitu.com/139042/7',

            'Referer': 'http://www.mzitu.com/',

            'Upgrade - Insecure - Requests': '',

            'User - Agent': 'Mozilla / 5.0(Windows NT 10.0; WOW64) AppleWebKit / 537.36(KHTML, like Gecko) Chrome / 66.0.3359.117 Safari / 537.36'

        }

        picture = requests.get(picturl[0], headers=headers)

        print("正在爬取"+name1+str(yema)+".jpg")

       # print(picture)

        with open('picture'+name1+str(yema)+'.jpg', 'wb') as file:

            file.write(picture.content)

            file.close()

        print("正在爬取" + name1 + str(yema) + ".jpg"+"成功")

            # 已经获取了最大页面接下来开始爬取数据
我们大致的思路是 A 函数 获取cookieA B函数通过用户输入的时间利用正则已经BS来寻找到基础URL C函数根据基础URL来获取每个URL的最大页面 D函数获取每个图片并且存储
A-->调用B-->调用C-->调用D
这里面需要主要的是在存储阶段,也就是下载图片的时候需要观察页面!重新生成cookie!!!不能用前面的cookie
最后我们直接把全部代码放上来:
import  requests

from bs4 import  BeautifulSoup

import re

import os

class getmeizitu():

    def __init__(self):

        url="http://www.mzitu.com/"

        headers={

            'Accept': 'text / html, application / xhtml + xml, application / xml;q = 0.9, image / webp, image / apng, * / *;q = 0.8',

            'Accept - Encoding': 'gzip, deflate',

            'Accept - Language': 'zh - CN, zh;q = 0.9',

            'Cache - Control': 'max - age = 0',

            'Host': 'www.mzitu.com',

            'Upgrade - Insecure - Requests': '',

            'User - Agent': 'Mozilla / 5.0(Windows NT 10.0;WOW64) AppleWebKit / 537.36(KHTML, like Gecko) Chrome / 66.0.3359.117 Safari / 537.36'

        }

        html = requests.get(url, headers=headers)

        cookies=str(html.cookies.get_dict())

      #  print(cookies)

        self.getall(cookies)

    def getall(self,cookies):

        url="http://www.mzitu.com/all/"

        headers={

            'Accept': 'text / html, application / xhtml + xml, application / xml;q = 0.9, image / webp, image / apng, * / *;q = 0.8',

            'Accept - Encoding': 'gzip, deflate',

            'Accept - Language': 'zh - CN, zh;q = 0.9',

            'Cache - Control': 'max - age = 0',

            'Cookie':cookies ,

            'Host': 'www.mzitu.com',

            'Upgrade - Insecure - Requests': '',

            'User - Agent': 'Mozilla / 5.0(Windows NT 10.0;WOW64) AppleWebKit / 537.36(KHTML, like Gecko) Chrome / 66.0.3359.117 Safari / 537.36'

        }

        html = requests.get(url, headers=headers)

     #   print(html.text)

        years=input("请输入您想要爬去的年份: ")

        month=input("请输入您想要爬去的月份:  ")

        month1=str(month)+"月"

        soup = BeautifulSoup(html.text,'lxml')

    #    print(soup.name)

        all=soup.find('div',text=re.compile(years))

        all1=all.next_sibling

#        print(all1)

        test=all1.find('em',text=re.compile(month1))

        ##获取包含月份的父节点

        parent=test.parent

        #获取每个月的数据,也就是上一个标签的兄弟标签

        allpic=parent.next_sibling

        #获取每个图片的url

#        print(type(allpic))

#         for i in (allpic):

        allurllist=[]

        for url1 in allpic.find_all('a', href=True):

            if url1.get_text(strip=True):

                print(type(url1['href']))

                allurllist.append(str(url1['href']))

        #这里就获取了全部的url,列表形式,以逗号分隔

        # self.getallpic(strall4)

        self.getallpic(allurllist,cookies)

    def getallpic(self,url,cookies):

        for i in url:

            headers = {

                'Accept': 'text / html, application / xhtml + xml, application / xml;q = 0.9, image / webp, image / apng, * / *;q = 0.8',

                'Accept - Encoding': 'gzip, deflate',

                'Accept - Language': 'zh - CN, zh;q = 0.9',

                'Cache - Control': 'max - age = 0',

                'Connection': 'keep - alive',

                'Cookie': cookies,

                'Host': 'www.mzitu.com',

                # 'If - Modified - Since': 'Tue, 26 Jun 2018 05: 26:18 GMT',

                'Upgrade - Insecure - Requests': '',

                'User - Agent': 'Mozilla / 5.0(Windows NT 10.0; WOW64) AppleWebKit / 537.36(KHTML, like Gecko) Chrome / 66.0.3359.117 Safari / 537.36'

            }

            html = requests.session().get(i,headers=headers)

            soup = BeautifulSoup(html.text, 'lxml')

            all = soup.find('span', text=re.compile("下一页"))

            #找到下一页的父标签

            parent = all.parent

            #获取上一级标签,也就是含有最大页面的标签

            allpic = parent.previous_sibling

            maxyema=allpic.find('span').get_text()

            #获取了最大页面之后循环获取每一页

            for p in range(1,int(maxyema)+1):

                url=str(i)+"/"+str(p)

                self.downloadpict(p,url,headers)

    def downloadpict(self,yema,url,headers):

        #加载每一个页面

        html = requests.session().get(url, headers=headers)

        soup = BeautifulSoup(html.text, 'lxml')

        picture = soup.find('div', class_="main-image")

        picture = str(picture)

        # 获取每张图片的url

        pattern = re.compile(r'src="(.*?)"/.*', re.S)

        picturl = pattern.findall(picture)

        #匹配名称为后面的命令打基础

        namepattern = re.compile(r'alt="(.*?)" src.*',re.S)

        name1=str(namepattern.findall(picture)).replace('"','').replace("[","").replace("]","")[0:5]

        # picture=requests.get(str(picturl[0]),headers=headers)

        headers = {

            'Accept': 'text / html, application / xhtml + xml, application / xml;q = 0.9, image / webp, image / apng, * / *;q = 0.8',

            'Accept - Encoding': 'gzip, deflate',

            'Accept - Language': 'zh - CN, zh;q = 0.9',

            'Cache - Control': 'max - age = 0',

            'Connection': 'keep - alive',

            'Host': 'i.meizitu.net ',

            # 'Referer': 'http://www.mzitu.com/139042/7',

            'Referer': 'http://www.mzitu.com/',

            'Upgrade - Insecure - Requests': '',

            'User - Agent': 'Mozilla / 5.0(Windows NT 10.0; WOW64) AppleWebKit / 537.36(KHTML, like Gecko) Chrome / 66.0.3359.117 Safari / 537.36'

        }

        print("正在爬取崔潜喜欢的"+name1+str(yema)+".jpg")

        try:

            pwd=os.getcwd()

            picture = requests.get(picturl[0], headers=headers)

       # print(picture)

            isExists = os.path.exists(name1)

            # 判断结果

            if not isExists:

                # 如果不存在则创建目录

                # 创建目录操作函数

                os.makedirs(name1)

            os.chdir(name1)

            with open(""+'picture'+name1+str(yema)+'.jpg', 'wb') as file:

                file.write(picture.content)

                file.close()

            os.chdir(pwd)

        except Exception as e:

            print("有异常,异常如下\n %s:" %e)

        else:

            print("爬取崔潜喜欢的" + name1 + str(yema) + ".jpg"+"成功")

            # 已经获取了最大页面接下来开始爬取数据

cuiqian=getmeizitu()
利用python3 爬虫 定制版妹子图mzitu爬取的更多相关文章
- 【Python3 爬虫】06_robots.txt查看网站爬取限制情况
大多数网站都会定义robots.txt文件来限制爬虫爬去信息,我们在爬去网站之前可以使用robots.txt来查看的相关限制信息 例如: 我们以[CSDN博客]的限制信息为例子 在浏览器输入:http ...
- python3[爬虫实战] 使用selenium,xpath爬取京东手机
使用selenium ,可能感觉用的并不是很深刻吧,可能是用scrapy用多了的缘故吧.不过selenium确实强大,很多反爬虫的都可以用selenium来解决掉吧. 思路: 入口: 关键字搜索入口 ...
- scrapy爬虫框架教程(二)-- 爬取豆瓣电影TOP250
scrapy爬虫框架教程(二)-- 爬取豆瓣电影TOP250 前言 经过上一篇教程我们已经大致了解了Scrapy的基本情况,并写了一个简单的小demo.这次我会以爬取豆瓣电影TOP250为例进一步为大 ...
- 另类爬虫:从PDF文件中爬取表格数据
简介 本文将展示一个稍微不一样点的爬虫. 以往我们的爬虫都是从网络上爬取数据,因为网页一般用HTML,CSS,JavaScript代码写成,因此,有大量成熟的技术来爬取网页中的各种数据.这次, ...
- Python爬虫教程-13-爬虫使用cookie爬取登录后的页面(人人网)(下)
Python爬虫教程-13-爬虫使用cookie爬取登录后的页面(下) 自动使用cookie的方法,告别手动拷贝cookie http模块包含一些关于cookie的模块,通过他们我们可以自动的使用co ...
- Python 网络爬虫 007 (编程) 通过网站地图爬取目标站点的所有网页
通过网站地图爬取目标站点的所有网页 使用的系统:Windows 10 64位 Python 语言版本:Python 2.7.10 V 使用的编程 Python 的集成开发环境:PyCharm 2016 ...
- 爬虫简单之二---使用进程爬取起点中文网的六万多也页小说的名字,作者,等一些基本信息,并存入csv中
爬虫简单之二---使用进程爬取起点中文网的六万多也页小说的名字,作者,等一些基本信息,并存入csv中 准备使用的环境和库Python3.6 + requests + bs4 + csv + multi ...
- 爬虫系列4:Requests+Xpath 爬取动态数据
爬虫系列4:Requests+Xpath 爬取动态数据 [抓取]:参考前文 爬虫系列1:https://www.cnblogs.com/yizhiamumu/p/9451093.html [分页]:参 ...
- python网络爬虫之解析网页的BeautifulSoup(爬取电影图片)[三]
目录 前言 一.BeautifulSoup的基本语法 二.爬取网页图片 扩展学习 后记 前言 本章同样是解析一个网页的结构信息 在上章内容中(python网络爬虫之解析网页的正则表达式(爬取4k动漫图 ...
随机推荐
- WorkStation 虚拟机迁移到 ESXi
将Workstation的vmdk文件导入到Esxi. 提示如题错误提示. 无法打开磁盘 scsi0:0: 磁盘类型 7 不受支持或无效.请确保磁盘已导入. 在VMware Workstation,V ...
- Linux之tar命令
命令格式: tar [-cxzjvf] 压缩打包文档的名称 欲打包目录 参数: -c :建立一个归档文件的参数指令 -x :解开一个归档文件的参数指令! -z :是否需要用 gzip 压缩? -j ...
- TcpSendRcv方法笔记1
if (ns.DataAvailable) return ns.ReadByte(); ns.DataAvailable:获取一个值,该值指示在要读取的 NetworkStream 上是否有可用的数据 ...
- WPF Slider Tickbar 中显示数值
class CustomTickBar : TickBar { protected override void OnRender(System.Windows.Media.DrawingContext ...
- [nginx]设置代理和静态资源目录
upstream disconf { server ; #tomcat服务器的地址 } server { listen ; #监听端口 server_name localhost; #域名 index ...
- 七十二:flask钩子函数之关于errorhandler的钩子函数
errorhandler:在发生一些异常的时候,如404.500,如果要自定义处理这些错误,就可以使用errorhandler来处理,使用errorhandler需要注意几点: 1.在errorhan ...
- Linux系统格式化命令mke2fs命令简析
1.mke2fs配置文件: # vim /etc/mke2fs.conf [defaults] base_features = sparse_super,filetype,resize_inode,d ...
- debian系统中添加sudo权限
刚安装好的Debian默认还没有sudo功能.1.安装sudo# apt-get install sudo2.修改 /etc/sudoers 文件属性为可写# chmod +w /etc/sudoer ...
- C#编程 socket编程之unity聊天室
上面我们创建了tcp的客户端和服务端,但是只能进行消息的一次收发.这次我们做一个unity的简易聊天室,使用了线程,可以使用多个客户端连接服务器,并且一个客户端给服务器发消息后,服务器会将消息群发给所 ...
- 手写LVQ(学习向量量化)聚类算法
LVQ聚类与k-means不同之处在于,它是有标记的聚类,设定带标签的k个原型向量(即团簇中心),根据样本标签是否与原型向量的标签一致,对原型向量进行更新. 最后,根据样本到原型向量的距离,对样本进行 ...