
CIFAR-10数据集图像分类【PCA+基于最小错误率的贝叶斯决策】
CIFAR-10和CIFAR-100均是带有标签的数据集,都出自于规模更大的一个数据集,他有八千万张小图片。而本次实验采用CIFAR-10数据集,该数据集共有60000张彩色图像,这些图像是32*32,分为10个类,每类6000张图。这里面有50000张用于训练,构成了5个训练批,每一批10000张图;另外10000用于测试,单独构成一批。测试批的数据里,取自10类中的每一类,每一类随机取1000张。抽剩下的就随机排列组成了训练批。注意一个训练批中的各类图像并不一定数量相同,总的来看训练批,每一类都有5000张图。
下面这幅图就是列举了10各类,每一类展示了随机的10张图片:
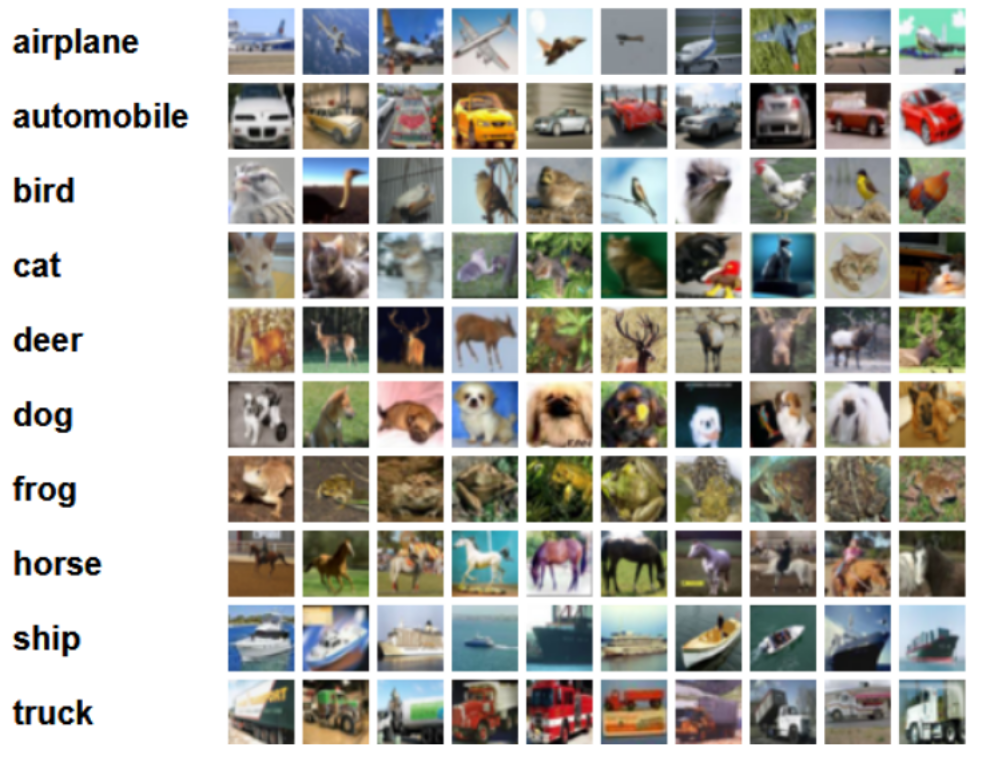
我的数据集一共有三个文件,分别是训练集train_data,测试集test_data以及标签名称labels_name,而标签名称中共有5个类,‘airplane‘, 'automobile‘, 'bird‘, 'cat‘, 'deer’.我现在准备对前三类‘airplane‘, ’automobile‘, ’bird‘,(即标签为1, 2, 3的数据 )进行分类。
经过之前大量测试,得到在累计方差贡献率为0.79时,基于最小错误率的贝叶斯决策用于图像分类最佳,以下为代码:
#CIFAR-10数据集:包含60000个32*32的彩色图像,共10类,每类6000个彩色图像。有50000个训练图像和10000个测试图像。

import scipy.io

train_data=scipy.io.loadmat("F:\\模式识别\\最小错误率的贝叶斯决策进行图像分类\\data\\train_data.mat")

print (type(train_data))

print (train_data.keys())

print (train_data.values())

print (len(train_data['Data']))

#单张图片的数据向量长度:32X32X3=3072

#内存占用量=3072*4*9968=116M  假定一个整数占用4个字节

print (len(train_data['Data'][0]))

print (train_data)

x = train_data['Data']

y = train_data['Label']

print (y)

print (len(y))

print (y.shape)

print (y.flatten().shape)

#labels_name:共5个标签,分别为airplane、automobile、bird、cat、deer

import scipy.io

labels_name=scipy.io.loadmat("F:\\模式识别\\最小错误率的贝叶斯决策进行图像分类\\data\\labels_name.mat")

print (type(labels_name))

print (labels_name)

print (len(labels_name))

#test_data:共5000个图像,5类,每类1000个图像

import scipy.io

test_data=scipy.io.loadmat("F:\\模式识别\\最小错误率的贝叶斯决策进行图像分类\\data\\test_data.mat")

print (test_data['Label'])

print (test_data['Data'])

print (len(test_data['Label']))

datatest = test_data['Data']

labeltest = test_data['Label']

print (datatest.shape)

print (labeltest.shape)

test_index=[]

for i in range(len(labeltest)):

    if labeltest[i]==1:

        test_index.append(i)

    elif labeltest[i]==2:

        test_index.append(i)

    elif labeltest[i]==3:

        test_index.append(i)

#print (test_index)

labeltest=test_data['Label'][:3000]

#print (labeltest)

import matplotlib.pyplot as plt

from mpl_toolkits.mplot3d import Axes3D

print (x)

print (x.shape)

print (type(x))

from sklearn.discriminant_analysis import LinearDiscriminantAnalysis

from sklearn.decomposition import PCA

pca=PCA(n_components=0.79)

#训练模型

pca.fit(x)

x_new=pca.transform(x)

print("降维后各主成分的累计方差贡献率:",pca.explained_variance_ratio_)

print("降维后主成分的个数:",pca.n_components_)

print (x_new)

index_1=[]

index_2=[]

index_3=[]

index_num=[]

for i in range(len(y)):

    if y[i]==1:

        index_1.append(i)

    elif y[i]==2:

        index_2.append(i)

    elif y[i]==3:

        index_3.append(i)

index_num=[len(index_1),len(index_2),len(index_3)]

print(len(index_1))

print(len(index_2))

print(len(index_3))

print (index_num)

import numpy as np

class1_feature=[]

class2_feature=[]

class3_feature=[]

#index_1

for i in index_1:

    class1_feature.append(x_new[i])

print (len(class1_feature))

for i in index_2:

    class2_feature.append(x_new[i])

print (len(class2_feature))

for i in index_3:

    class3_feature.append(x_new[i])

print (len(class3_feature))

#计算第一类的类条件概率密度函数的参数

class1_feature=np.mat(class1_feature)

print (class1_feature.shape)

miu1=[]

sigma1=[]

for i in range(30):

    miu=class1_feature[:,i].sum()/len(index_1)

    miu1.append(miu)

    temp=class1_feature[:,i]-miu

    class1_feature[:,i]=temp

sigma1=(class1_feature.T*class1_feature)/len(index_1)

print (miu1)

print (sigma1)

print (sigma1.shape)

#计算第二类类条件概率密度函数的参数

class2_feature=np.mat(class2_feature)

miu2=[]

sigma2=[]

for i in range(30):

    miu=class2_feature[:,i].sum()/len(index_2)

    miu2.append(miu)

    temp=class2_feature[:,i]-miu

    class2_feature[:,i]=temp

sigma2=(class2_feature.T*class2_feature)/len(index_2)

print (miu2)

print (sigma2)

print (sigma2.shape)

#计算第三类类条件概率密度函数的参数

class3_feature=np.mat(class3_feature)

miu3=[]

sigma3=[]

for i in range(30):

    miu=class3_feature[:,i].sum()/len(index_3)

    miu3.append(miu)

    temp=class3_feature[:,i]-miu

    class3_feature[:,i]=temp

sigma3=(class3_feature.T*class3_feature)/len(index_3)

print (miu3)

print (sigma3)

print (sigma3.shape)

#计算三个类别的先验概率:

prior_index1=len(index_1)/len(y)

prior_index2=len(index_2)/len(y)

prior_index3=len(index_3)/len(y)

print (prior_index1)

print (prior_index2)

print (prior_index3)

import math

#降维

x_test = pca.transform(datatest)

print (x_test)

print (x_test.shape)

print (x_test[0])

#print ((np.mat(x_test[0]-miu1))*sigma1.I*(np.mat(x_test[0]-miu1).T))

#print (((np.mat(x_test[0]-miu1))*sigma1.I*(np.mat(x_test[0]-miu1).T))[0,0])

predict_label=[]

for i in range(3000):

    g1=-0.5*((np.mat(x_test[i]-miu1))*sigma1.I*(np.mat(x_test[i]-miu1).T))[0,0]-0.5*math.log(np.linalg.det(sigma1))+math.log(prior_index1)

    g2=-0.5*((np.mat(x_test[i]-miu2))*sigma2.I*(np.mat(x_test[i]-miu2).T))[0,0]-0.5*math.log(np.linalg.det(sigma2))+math.log(prior_index2)

    g3=-0.5*((np.mat(x_test[i]-miu3))*sigma3.I*(np.mat(x_test[i]-miu3).T))[0,0]-0.5*math.log(np.linalg.det(sigma3))+math.log(prior_index3)

    if g1>g2:

        max=1

        if g1>g3:

            max=1

        else:

            max=3

    else:

        max=2

        if g2>g3:

            max=2

        else:

            max=3

    predict_label.append(max)

from sklearn.metrics import accuracy_score

print (accuracy_score(predict_label,labeltest))
可以看到分类结果的准确率高达73%,这一数值在贝叶斯决策用于图像分类中已经是极值了。

CIFAR-10数据集图像分类【PCA+基于最小错误率的贝叶斯决策】的更多相关文章
- 【翻译】TensorFlow卷积神经网络识别CIFAR 10Convolutional Neural Network (CNN)| CIFAR 10 TensorFlow
原网址:https://data-flair.training/blogs/cnn-tensorflow-cifar-10/ by DataFlair Team · Published May 21, ...
- Python实现鸢尾花数据集分类问题——基于skearn的NaiveBayes
Python实现鸢尾花数据集分类问题——基于skearn的NaiveBayes 代码如下: # !/usr/bin/env python # encoding: utf-8 __author__ = ...
- Python实现鸢尾花数据集分类问题——基于skearn的LogisticRegression
Python实现鸢尾花数据集分类问题——基于skearn的LogisticRegression 一. 逻辑回归 逻辑回归(Logistic Regression)是用于处理因变量为分类变量的回归问题, ...
- Python实现鸢尾花数据集分类问题——基于skearn的SVM
Python实现鸢尾花数据集分类问题——基于skearn的SVM 代码如下: # !/usr/bin/env python # encoding: utf-8 __author__ = 'Xiaoli ...
- 【神经网络与深度学习】基于Windows+Caffe的Minst和CIFAR—10训练过程说明
Minst训练 我的路径:G:\Caffe\Caffe For Windows\examples\mnist 对于新手来说,初步完成环境的配置后,一脸茫然.不知如何跑Demo,有么有!那么接下来的教 ...
- Bunch 转换为 HDF5 文件:高效存储 Cifar 等数据集
关于如何将数据集封装为 Bunch 可参考 关于 『AI 专属数据库的定制』的改进. PyTables 是 Python 与 HDF5 数据库/文件标准的结合.它专门为优化 I/O 操作的性能.最大限 ...
- 10款web前端基于html5/CSS3应用特效
1.jQuery百叶窗效果焦点图 多种百叶窗动画方式 对于百叶窗动画效果,我们介绍的不是很多,目前就介绍过一款CSS3百叶窗图片切换.这次要给大家带来一个基于jQuery的多种百叶窗动画效果焦点图,焦 ...
- DL Practice:Cifar 10分类
Step 1:数据加载和处理 一般使用深度学习框架会经过下面几个流程: 模型定义(包括损失函数的选择)——>数据处理和加载——>训练(可能包括训练过程可视化)——>测试 所以自己写代 ...
- 「从零单排canal 01」 canal 10分钟入门(基于1.1.4版本)
1.简介 canal [kə'næl],译意为水道/管道/沟渠,主要用途是基于 MySQL 数据库增量日志解析,提供增量数据 订阅 和 消费.应该是阿里云DTS(Data Transfer Servi ...
随机推荐
- iOS----------The app's Info.plist must contain an NSPhotoLibraryUsageDescription key
This app has crashed because it attempted to access privacy-sensitive data without a usage descripti ...
- Python入门:内置函数
可创建一个整数列表,一般用在 for 循环中. 函数语法 range(start, stop[, step]) 参数说明: start: 计数从 start 开始.默认是从 0 开始.例如range( ...
- android常犯错误记录(一)
错误:Error:Error: Found item Attr/border_width more than one time 这个容易,属性相同了,按照提示查询一下找出来删了就行了,注意大小写很容易 ...
- 键盘ascll码表
键盘ascll码表-自用
- (网页)thinkpad 笔记本开机看看坏了没?
嗯!只是想看一下是不是块砖头. 出现许多细节问题: 1.不用注册联机的乱七八糟的,验证还慢,直接选择脱机的. 2.推荐密码:zaq!2wsx直接进去,以后可以改. 3.有很多选项都可以不勾选,(只勾选 ...
- MSSQL-sql server-视图简介
转自:http://www.maomao365.com/?p=4511 一.视图简介 视图在MSSQL中是一张虚拟表. 视图的数据由sql语句定义生成,视图中指定新生成数据的列名称和数据格式,视图中的 ...
- IPerf——网络测试工具介绍与源码解析(1)
IPerf是一个开源的测试网络宽带并能统计并报告延迟抖动.数据包丢失率信息的控制台命令程序,通过参数选项可以方便地看出,通过设置不同的选项值对网络带宽的影响,对于学习网络编程还是有一定的借鉴意义,至少 ...
- Windows10家庭版连接远程桌面出现credssp加密oracle修正问题
我发现我的win10不能连接别人的远程桌面,问题如下: 1.windows10家庭版需要修改注册表,家庭版没有组织策略: 2.win+R打开快速启动命令行输入"regedit": ...
- 利用Audacity软件分析ctf音频隐写
分析音频得到摩斯电码 看波的宽度分辨长短音 比较细的就是短音,代表"." 比较粗的就是长音,代表"-" 中间的间隔就是" " 得到摩斯电码
- JavaScript -- 时光流逝(十):Screen 对象、History 对象、Location 对象
JavaScript -- 知识点回顾篇(十):Screen 对象.History 对象.Location 对象 1. Screen 对象 1.1 Screen 对象的属性 (1) availHeig ...