iOS中的图像处理(二)——卷积运算
关于图像处理中的卷积运算,这里有两份简明扼要的介绍:文一,文二。
其中,可能的一种卷积运算代码如下:
- - (UIImage*)applyConvolution:(NSArray*)kernel
- {
- CGImageRef inImage = self.CGImage;
- CFDataRef m_DataRef = CGDataProviderCopyData(CGImageGetDataProvider(inImage));
- CFDataRef m_OutDataRef = CGDataProviderCopyData(CGImageGetDataProvider(inImage));
- UInt8 * m_PixelBuf = (UInt8 *) CFDataGetBytePtr(m_DataRef);
- UInt8 * m_OutPixelBuf = (UInt8 *) CFDataGetBytePtr(m_OutDataRef);
- int h = CGImageGetHeight(inImage);
- int w = CGImageGetWidth(inImage);
- int kh = [kernel count] / 2;
- int kw = [[kernel objectAtIndex:0] count] / 2;
- int i = 0, j = 0, n = 0, m = 0;
- for (i = 0; i < h; i++) {
- for (j = 0; j < w; j++) {
- int outIndex = (i*w*4) + (j*4);
- double r = 0, g = 0, b = 0;
- for (n = -kh; n <= kh; n++) {
- for (m = -kw; m <= kw; m++) {
- if (i + n >= 0 && i + n < h) {
- if (j + m >= 0 && j + m < w) {
- double f = [[[kernel objectAtIndex:(n + kh)] objectAtIndex:(m + kw)] doubleValue];
- if (f == 0) {continue;}
- int inIndex = ((i+n)*w*4) + ((j+m)*4);
- r += m_PixelBuf[inIndex] * f;
- g += m_PixelBuf[inIndex + 1] * f;
- b += m_PixelBuf[inIndex + 2] * f;
- }
- }
- }
- }
- m_OutPixelBuf[outIndex] = SAFECOLOR((int)r);
- m_OutPixelBuf[outIndex + 1] = SAFECOLOR((int)g);
- m_OutPixelBuf[outIndex + 2] = SAFECOLOR((int)b);
- m_OutPixelBuf[outIndex + 3] = 255;
- }
- }
- CGContextRef ctx = CGBitmapContextCreate(m_OutPixelBuf,
- CGImageGetWidth(inImage),
- CGImageGetHeight(inImage),
- CGImageGetBitsPerComponent(inImage),
- CGImageGetBytesPerRow(inImage),
- CGImageGetColorSpace(inImage),
- CGImageGetBitmapInfo(inImage)
- );
- CGImageRef imageRef = CGBitmapContextCreateImage(ctx);
- CGContextRelease(ctx);
- UIImage *finalImage = [UIImage imageWithCGImage:imageRef];
- CGImageRelease(imageRef);
- CFRelease(m_DataRef);
- CFRelease(m_OutDataRef);
- return finalImage;
- }
方法的参数kernel是卷积运算中的卷积核,下面是几种滤镜的卷积核:
- #pragma mark -
- #pragma mark - Basic Convolutions
- /* Reference :
- * http://docs.gimp.org/en/plug-in-convmatrix.html
- */
- - (UIImage *)sharpen
- {
- // double dKernel[5][5] = {
- // {0, 0.0, -1.0, 0.0, 0},
- // {0, -1.0, 5.0, -1.0, 0},
- // {0, 0.0, -1.0, 0.0, 0}
- // };
- double dKernel[5][5] = {
- {0, 0.0, -0.2, 0.0, 0},
- {0, -0.2, 1.8, -0.2, 0},
- {0, 0.0, -0.2, 0.0, 0}
- };
- NSMutableArray *kernel = [[[NSMutableArray alloc] initWithCapacity:5] autorelease];
- for (int i = 0; i < 5; i++) {
- NSMutableArray *row = [[[NSMutableArray alloc] initWithCapacity:5] autorelease];
- for (int j = 0; j < 5; j++) {
- [row addObject:[NSNumber numberWithDouble:dKernel[i][j]]];
- }
- [kernel addObject:row];
- }
- return [self applyConvolution:kernel];
- }
- - (UIImage *)edgeEnhance
- {
- double dKernel[5][5] = {
- {0, 0.0, 0.0, 0.0, 0},
- {0, -1.0, 1.0, 0.0, 0},
- {0, 0.0, 0.0, 0.0, 0}
- };
- NSMutableArray *kernel = [[[NSMutableArray alloc] initWithCapacity:5] autorelease];
- for (int i = 0; i < 5; i++) {
- NSMutableArray *row = [[[NSMutableArray alloc] initWithCapacity:5] autorelease];
- for (int j = 0; j < 5; j++) {
- [row addObject:[NSNumber numberWithDouble:dKernel[i][j]]];
- }
- [kernel addObject:row];
- }
- return [self applyConvolution:kernel];
- }
- - (UIImage *)edgeDetect
- {
- double dKernel[5][5] = {
- {0, 0.0, 1.0, 0.0, 0},
- {0, 1.0, -4.0, 1.0, 0},
- {0, 0.0, 1.0, 0.0, 0}
- };
- NSMutableArray *kernel = [[[NSMutableArray alloc] initWithCapacity:5] autorelease];
- for (int i = 0; i < 5; i++) {
- NSMutableArray *row = [[[NSMutableArray alloc] initWithCapacity:5] autorelease];
- for (int j = 0; j < 5; j++) {
- [row addObject:[NSNumber numberWithDouble:dKernel[i][j]]];
- }
- [kernel addObject:row];
- }
- return [self applyConvolution:kernel];
- }
- - (UIImage *)emboss
- {
- double dKernel[5][5] = {
- {0, -2.0, -1.0, 0.0, 0},
- {0, -1.0, 1.0, 1.0, 0},
- {0, 0.0, 1.0, 2.0, 0}
- };
- NSMutableArray *kernel = [[[NSMutableArray alloc] initWithCapacity:5] autorelease];
- for (int i = 0; i < 5; i++) {
- NSMutableArray *row = [[[NSMutableArray alloc] initWithCapacity:5] autorelease];
- for (int j = 0; j < 5; j++) {
- [row addObject:[NSNumber numberWithDouble:dKernel[i][j]]];
- }
- [kernel addObject:row];
- }
- return [self applyConvolution:kernel];
- }
在此基础上,我Google了下Photoshop中对照片进行黑白处理的简单步骤:
- 去色
- 调整对比度
- 高斯模糊
- 浮雕效果
- 边缘检测
- 调整对比度
- 调整亮度
- 反相
我按步骤实现了相应代码:
- return [[[[[[[[originImage desaturate]
- changeContrastByFactor:1.5]
- gaussianBlur:1.3] emboss]
- edgeDetect]
- changeContrastByFactor:1.5]
- changeBrightnessByFactor:1.5]
- invert];
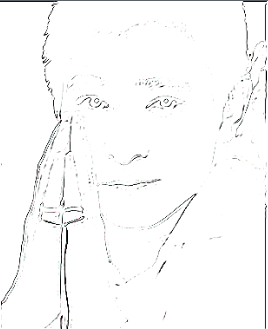
可惜效果有点粗糙,照片仍旧以上一篇文章中的Andy为例:

版权声明:本文为博主原创文章,未经博主允许不得转载。
iOS中的图像处理(二)——卷积运算的更多相关文章
- iOS中的图像处理(三)——混合运算
有时候,单独对一张图像进行处理是很难或者根本达不到我们想要的效果的.一个好的滤镜效果的诞生,往往要经过很多复杂步骤.细致微调.图片应用效果观察以及很多图层叠加. 我在JSWidget上发现了一些常用混 ...
- ios 中的构造方法(二)
在之前有简单介绍了构造方法的结构,以及构造方法的作用,那么我们现在来讨论一下: 对象的创建分为两步:+ alloc 分配内存空间和 -init 进行初始化 那么在继承自 NSObject 的类当中,我 ...
- iOS中的图像处理(一)——基础滤镜
最近在稍微做一些整理,翻起这部分的代码,发现是两个多月前的了. 这里讨论的是基于RGBA模型下的图像处理,即将变换作用在每个像素上. 代码是以UIImage的category形式存在的: typede ...
- [OpenCV-Python] OpenCV 中的图像处理 部分 IV (二)
部分 IVOpenCV 中的图像处理 OpenCV-Python 中文教程(搬运)目录 16 图像平滑 目标 • 学习使用不同的低通滤波器对图像进行模糊 • 使用自定义的滤波器对图像进行卷积(2D 卷 ...
- ios 中生成二维码和相册中识别二维码
iOS 使用CIDetector扫描相册二维码.原生扫描 原生扫描 iOS7之后,AVFoundation让我们终于可以使用原生扫描进行扫码了(二维码与条码皆可)AVFoundation可以让我们从设 ...
- Quartz 2D在ios中的使用简述二:创建画布
在iOS中使用Quartz画图时,第一步就是要获取画布(图形上下文),然后再画布上做各种操作.先看下CoreGraphics.h这个头文件,就可以知道能够创建多少种上下文类型. #include &l ...
- 卷积运算的本质,以tensorflow中VALID卷积方式为例。
卷积运算在数学上是做矩阵点积,这样可以调整每个像素上的BGR值或HSV值来形成不同的特征.从代码上看,每次卷积核扫描完一个通道是做了一次四重循环.下面以VALID卷积方式为例进行解释. 下面是pyth ...
- iOS中的二维数组
首先我们知道OC中是没有二维数组的,二维数组是通过一位数组的嵌套实现的,但是别忘了我们有字面量,实际上可以和C/C++类似的简洁地创建和使用二维数组.这里总结了创建二维数组的两种方法以及数组的访问方式 ...
- iOS中的crash防护(二)KVC造成的crash
接上篇< iOS中的crash防护(一)unrecognized selector sent to instance> 我们攻克了找不到方法实现的crash,这一篇我这里主要分析一下在 ...
随机推荐
- Objective-c 深浅复制
深浅复制的定义: 浅复制:在复制时,对于被复制对象的每一层都是指针复制. 深复制:在复制时,对于被复制的对象至少有一层是对象复制. 完全复制:在复制时,对于被复制对象的每一层都是完全复制. retai ...
- ExtJs004define定义类
Ext.onReady(function () { //在Ext中如何去定义一个类: Ext.define(className , properties , callback) Ext.define( ...
- 如何交叉编译开源库-->编译c-ares库从失败到成功的过程[ocean]
编译c-ares库从失败到成功的过程c-ares-master: apt-get install libtool ####https://github.com/c-ares/c-ares ==== ...
- iOS __func__标识符
iOS底层是GCC,所以也支持 __func__标识符,用于打印当前函数名,可以说是排错利器. // data should not be nil nor empty ) {// Exception ...
- C#中网站根路径、应用根路径、物理路径、绝对路径,虚拟路径的区别
C#中网站根路径,请站点的最外一层 /表示 应用根路径 ~/表示,有时候C#程序路径并不是网站路径 物理路径 server.mappath("~/") 是指应用程序放在服务器硬盘的 ...
- 数据可视化开源系统(python开发)
Caravel 是 Airbnb (知名在线房屋短租公司)开源的数据探查与可视化平台(曾用名Panoramix),该工具在可视化.易用性和交互性上非常有特色,用户可以轻松对数据进行可视化分析. 核心功 ...
- 高质量程序设计指南C/C++语言——malloc/free使用要点
- Jacob
http://www.cnblogs.com/luckyxiaoxuan/archive/2012/06/13/2548331.html http://blog.csdn.net/qingwangyo ...
- VS2012 EF5 连接oracle11.2
1.安装ODAC 11.2 Release 5 and Oracle Developer Tools for Visual Studio (11.2.0.3.20). 注:支持VS2010和VS201 ...
- Apache RewriteCond RewriteRule 入门和Laravel去掉index.php
Ci删除index.php办法: 创建.htaccess 文件放到网站的根目录下,文件中的内容如下: RewriteEngine onRewriteCond %{REQUEST_FILENAM ...
