
SpringBoot进阶教程(二十六)整合Redis之共享Session
集群现在越来越常见,当我们项目搭建了集群,就会产生session共享问题。因为session是保存在服务器上面的。那么解决这一问题,大致有三个方案,1.通过nginx的负载均衡其中一种ip绑定来实现(通过ip绑定服务器其中一台,就没有集群概念了);2.通过cookie备份session实现(因为cookie数据保存在客户端,不推荐;3.通过redis备份session实现(推荐);
学习本章节之前,建议依次阅读以下文章,更好的串联全文内容,如已掌握以下列出知识点,请跳过:
vSpring Session概念
Spring Session 提供了一套创建和管理 Servlet HttpSession 的方案。Spring Session 提供了集群 Session(Clustered Sessions)功能,默认采用外置的 Redis 来存储 Session 数据(不用手动存储到redis中),以此来解决 Session 共享的问题。
Spring Session 为企业级 Java 应用的 session 管理带来了革新,使得以下的功能更加容易实现:
关于更多Spring Session概念的介绍,可以看看官网Spring Session
vSpring Session整合
1.1 引入pmo.xml
        <dependency>

            <groupId>org.springframework.session</groupId>

            <artifactId>spring-session-data-redis</artifactId>

        </dependency>
1.2 创建useraccount表
CREATE TABLE `useraccount` (

    `id` int(10) unsigned NOT NULL AUTO_INCREMENT,

    `username` varchar(255) NOT NULL,

    `age` int(10) NOT NULL,

    `phone` bigint NOT NULL,

    `email` varchar(255) NOT NULL,

    `account` varchar(100) NOT NULL UNIQUE,

    `pwd` varchar(255) NOT NULL,

    PRIMARY KEY (`id`)

)ENGINE=InnoDB AUTO_INCREMENT=1 DEFAULT CHARSET=utf8;

insert into `useraccount` values(1,'赵(dev)',23,158,'3658561548@qq.com','test001','test001');

insert into `useraccount` values(2,'钱(dev)',27,136,'3658561548@126.com','test002','test002');

insert into `useraccount` values(3,'孙(dev)',31,159,'3658561548@163.com','test003','test003');

insert into `useraccount` values(4,'李(dev)',35,130,'3658561548@sina.com','test004','test004');

select * from `useraccount`;
1.3 mapper
<?xml version="1.0" encoding="UTF-8"?>

<!DOCTYPE mapper PUBLIC "-//mybatis.org//DTD Mapper 3.0//EN" "http://mybatis.org/dtd/mybatis-3-mapper.dtd">

<mapper namespace="com.demo.dao.UserAccountMapper">

  <resultMap id="BaseResultMap" type="com.demo.pojo.UserAccount">

    <id column="id" jdbcType="INTEGER" property="id" />

    <result column="username" jdbcType="VARCHAR" property="username" />

    <result column="age" jdbcType="INTEGER" property="age" />

    <result column="phone" jdbcType="BIGINT" property="phone" />

    <result column="email" jdbcType="VARCHAR" property="email" />

    <result column="account" jdbcType="VARCHAR" property="account" />

    <result column="pwd" jdbcType="VARCHAR" property="pwd" />

  </resultMap>

  <sql id="Base_Column_List">

    id, username, age, phone, email, account, pwd

  </sql>

  <select id="selectByPrimaryKey" parameterType="java.lang.Integer" resultMap="BaseResultMap">

    select

    <include refid="Base_Column_List" />

    from useraccount

    where id = #{id,jdbcType=INTEGER}

  </select>

  <select id="getUserByAccount" parameterType="java.lang.String" resultMap="BaseResultMap">

    select

    <include refid="Base_Column_List" />

    from useraccount

    where account = #{account}

  </select>

  <delete id="deleteByPrimaryKey" parameterType="java.lang.Integer">

    delete from useraccount

    where id = #{id,jdbcType=INTEGER}

  </delete>

  <insert id="insert" parameterType="com.demo.pojo.UserAccount">

    insert into useraccount (id, username, age,

      phone, email, account,

      pwd)

    values (#{id,jdbcType=INTEGER}, #{username,jdbcType=VARCHAR}, #{age,jdbcType=INTEGER},

      #{phone,jdbcType=BIGINT}, #{email,jdbcType=VARCHAR}, #{account,jdbcType=VARCHAR},

      #{pwd,jdbcType=VARCHAR})

  </insert>

  <insert id="insertSelective" parameterType="com.demo.pojo.UserAccount">

    insert into useraccount

    <trim prefix="(" suffix=")" suffixOverrides=",">

      <if test="id != null">

        id,

      </if>

      <if test="username != null">

        username,

      </if>

      <if test="age != null">

        age,

      </if>

      <if test="phone != null">

        phone,

      </if>

      <if test="email != null">

        email,

      </if>

      <if test="account != null">

        account,

      </if>

      <if test="pwd != null">

        pwd,

      </if>

    </trim>

    <trim prefix="values (" suffix=")" suffixOverrides=",">

      <if test="id != null">

        #{id,jdbcType=INTEGER},

      </if>

      <if test="username != null">

        #{username,jdbcType=VARCHAR},

      </if>

      <if test="age != null">

        #{age,jdbcType=INTEGER},

      </if>

      <if test="phone != null">

        #{phone,jdbcType=BIGINT},

      </if>

      <if test="email != null">

        #{email,jdbcType=VARCHAR},

      </if>

      <if test="account != null">

        #{account,jdbcType=VARCHAR},

      </if>

      <if test="pwd != null">

        #{pwd,jdbcType=VARCHAR},

      </if>

    </trim>

  </insert>

  <update id="updateByPrimaryKeySelective" parameterType="com.demo.pojo.UserAccount">

    update useraccount

    <set>

      <if test="username != null">

        username = #{username,jdbcType=VARCHAR},

      </if>

      <if test="age != null">

        age = #{age,jdbcType=INTEGER},

      </if>

      <if test="phone != null">

        phone = #{phone,jdbcType=BIGINT},

      </if>

      <if test="email != null">

        email = #{email,jdbcType=VARCHAR},

      </if>

      <if test="account != null">

        account = #{account,jdbcType=VARCHAR},

      </if>

      <if test="pwd != null">

        pwd = #{pwd,jdbcType=VARCHAR},

      </if>

    </set>

    where id = #{id,jdbcType=INTEGER}

  </update>

  <update id="updateByPrimaryKey" parameterType="com.demo.pojo.UserAccount">

    update useraccount

    set username = #{username,jdbcType=VARCHAR},

      age = #{age,jdbcType=INTEGER},

      phone = #{phone,jdbcType=BIGINT},

      email = #{email,jdbcType=VARCHAR},

      account = #{account,jdbcType=VARCHAR},

      pwd = #{pwd,jdbcType=VARCHAR}

    where id = #{id,jdbcType=INTEGER}

  </update>

</mapper>
package com.demo.dao;

import com.demo.pojo.UserAccount;

import org.apache.ibatis.annotations.Mapper;

import org.apache.ibatis.annotations.Param;

import org.springframework.stereotype.Repository;

@Mapper

@Repository

public interface UserAccountMapper {

    int deleteByPrimaryKey(Integer id);

    int insert(UserAccount record);

    int insertSelective(UserAccount record);

    UserAccount selectByPrimaryKey(Integer id);

    UserAccount getUserByAccount(@Param("account") String account);

    int updateByPrimaryKeySelective(UserAccount record);

    int updateByPrimaryKey(UserAccount record);

}
1.4 实体类
package com.demo.pojo;

import java.io.Serializable;

public class UserAccount  implements Serializable {

    private static final long serialVersionUID = 1L;

    private Integer id;

    private String username;

    private Integer age;

    private Long phone;

    private String email;

    private String account;

    private String pwd;

    public Integer getId() {

        return id;

    }

    public void setId(Integer id) {

        this.id = id;

    }

    public String getUsername() {

        return username;

    }

    public void setUsername(String username) {

        this.username = username == null ? null : username.trim();

    }

    public Integer getAge() {

        return age;

    }

    public void setAge(Integer age) {

        this.age = age;

    }

    public Long getPhone() {

        return phone;

    }

    public void setPhone(Long phone) {

        this.phone = phone;

    }

    public String getEmail() {

        return email;

    }

    public void setEmail(String email) {

        this.email = email == null ? null : email.trim();

    }

    public String getAccount() {

        return account;

    }

    public void setAccount(String account) {

        this.account = account == null ? null : account.trim();

    }

    public String getPwd() {

        return pwd;

    }

    public void setPwd(String pwd) {

        this.pwd = pwd == null ? null : pwd.trim();

    }

}
1.5 service层
Service
UserAccount getUserByAccount(String account);
ServiceImpl
    @Override

    public UserAccount getUserByAccount(String account){

        return userAccountMapper.getUserByAccount(account);

    }
1.6 添加session配置类
package com.demo.common;

import org.springframework.context.annotation.Configuration;

import org.springframework.session.data.redis.config.annotation.web.http.EnableRedisHttpSession;

/**

 * Created by toutou on 2019/1/22.

 */

@Configuration

@EnableRedisHttpSession(maxInactiveIntervalInSeconds = 1800)

/**

 * maxInactiveIntervalInSeconds: 设置 Session 失效时间,使用 Redis Session 之后,原 Boot 的 server.session.timeout 属性不再生效。

 */

public class SessionRedisConfig {

}
1.7 设置拦截器
关于拦截器不懂的话,可以看我之前的一篇文章《SpringBoot(十一)过滤器和拦截器》
    /*

     * 进入controller层之前拦截请求

     */

    @Override

    public boolean preHandle(HttpServletRequest request, HttpServletResponse response, Object obj) throws Exception {

        System.out.println("MyTestInterceptor  1111111111");

        Object user= request.getSession().getAttribute("useraccount");

        if (user==null){

            // response.sendRedirect(request.getContextPath()+"/error");

            response.setCharacterEncoding("UTF-8");

            response.setContentType("text/html;charset=utf-8");

            response.getWriter().write("请先登录");

            return false;

        }

        return true;

    }
    @Override

    public void addInterceptors(InterceptorRegistry registry) {

        // 自定义拦截器,添加拦截路径和排除拦截路径

        registry.addInterceptor(myTestInterceptor).addPathPatterns("/**").excludePathPatterns("/userlogin");

    }
设置全局拦截
1.8 登录/注销
package com.demo.controller;

import com.demo.pojo.UserAccount;

import com.demo.service.UserService;

import org.springframework.beans.factory.annotation.Autowired;

import org.springframework.web.bind.annotation.RequestMapping;

import org.springframework.web.bind.annotation.RestController;

import javax.servlet.http.HttpServletRequest;

import javax.servlet.http.HttpSession;

/**

 * Created by toutou on 2019/1/22.

 */

@RestController

public class LoginController {

    @Autowired

    UserService userService;

    @RequestMapping(value = "/userlogin")

    public String Login(HttpServletRequest request, String account, String pwd)

    {

        UserAccount user= userService.getUserByAccount(account);

        if (user!=null && user.getPwd().equals(pwd)){

            request.getSession().setAttribute("useraccount",user);

            return "登录成功";

        }

        return "登录失败";

    }

    @RequestMapping(value = "/userlogout")

    public String logout (HttpServletRequest request){

        HttpSession session=request.getSession();

        session.removeAttribute("useraccount");

        return "退出登录";

    }

}
v效果演示
2.1 直接访问页面
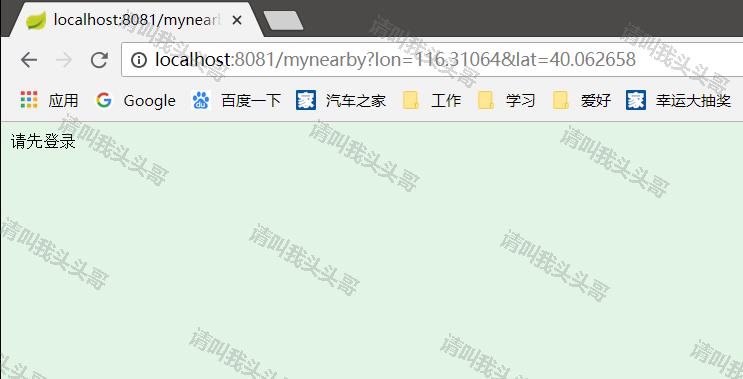
提示:请先登录
2.2 调用登录接口
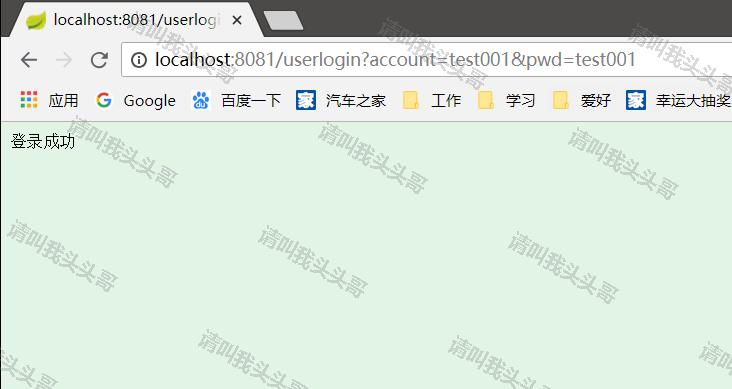
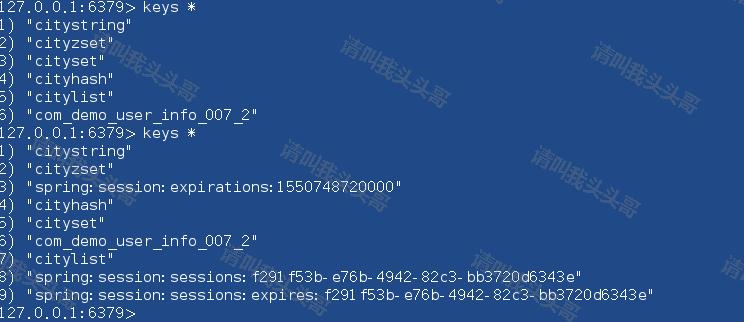
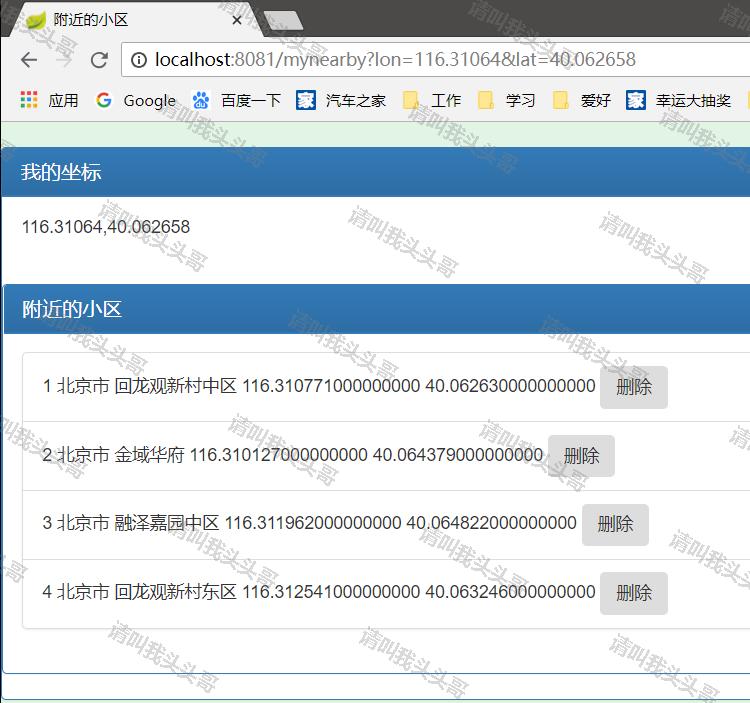
登录以后再次访问页面,提示访问成功。

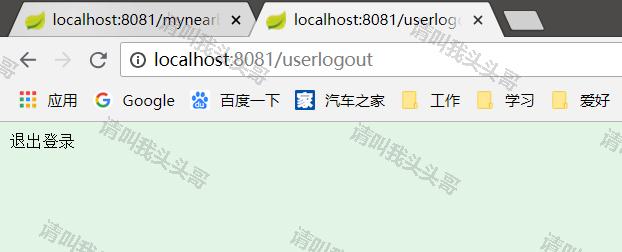
2.3 退出登录
v源码地址
https://github.com/toutouge/javademosecond/tree/master/hellospringboot
作 者:请叫我头头哥
出 处:http://www.cnblogs.com/toutou/
关于作者:专注于基础平台的项目开发。如有问题或建议,请多多赐教!
版权声明:本文版权归作者和博客园共有,欢迎转载,但未经作者同意必须保留此段声明,且在文章页面明显位置给出原文链接。
特此声明:所有评论和私信都会在第一时间回复。也欢迎园子的大大们指正错误,共同进步。或者直接私信我
声援博主:如果您觉得文章对您有帮助,可以点击文章右下角【推荐】一下。您的鼓励是作者坚持原创和持续写作的最大动力!
SpringBoot进阶教程(二十六)整合Redis之共享Session的更多相关文章
- SpringBoot进阶教程(二十九)整合Redis 发布订阅
SUBSCRIBE, UNSUBSCRIBE 和 PUBLISH 实现了 发布/订阅消息范例,发送者 (publishers) 不用编程就可以向特定的接受者发送消息 (subscribers). Ra ...
- SpringBoot进阶教程(二十八)整合Redis事物
Redis默认情况下,事务支持被禁用,必须通过设置setEnableTransactionSupport(true)为使用中的每个redistplate显式启用.这样做会强制将当前重新连接绑定到触发m ...
- SpringBoot进阶教程(二十五)整合Redis之@Cacheable、@CachePut、@CacheEvict的应用
在上一篇文章(<SpringBoot(二十四)整合Redis>)中,已经实现了Spring Boot对Redis的整合,既然已经讲到Cache了,今天就介绍介绍缓存注解.各家互联网产品现在 ...
- SpringBoot进阶教程(二十四)整合Redis
缓存现在几乎是所有中大型网站都在用的必杀技,合理的利用缓存不仅能够提升网站访问速度,还能大大降低数据库的压力.Redis提供了键过期功能,也提供了灵活的键淘汰策略,所以,现在Redis用在缓存的场合非 ...
- SpringBoot进阶教程(五十九)整合Codis
上一篇博文<详解Codis安装与部署>中,详细介绍了codis的安装与部署,这篇文章主要介绍介绍springboot整合codis.如果之前看过<SpringBoot进阶教程(五十二 ...
- SpringBoot进阶教程(七十四)整合ELK
在上一篇文章<SpringBoot进阶教程(七十三)整合elasticsearch >,已经详细介绍了关于elasticsearch的安装与使用,现在主要来看看关于ELK的定义.安装及使用 ...
- SpringBoot进阶教程(二十二)集成RabbitMQ---MQ实战演练
RabbitMQ是一个在AMQP基础上完成的,可复用的企业消息系统.他遵循Mozilla Public License开源协议.RabbitMQ是流行的开源消息队列系统,用erlang语言开发.Rab ...
- SpringBoot进阶教程(二十七)整合Redis之分布式锁
在之前的一篇文章(<Java分布式锁,搞懂分布式锁实现看这篇文章就对了>),已经介绍过几种java分布式锁,今天来个Redis分布式锁的demo.redis 现在已经成为系统缓存的必备组件 ...
- Android高手进阶教程(二十八)之---Android ViewPager控件的使用(基于ViewPager的横向相册)!!!
分类: Android高手进阶 Android基础教程 2012-09-14 18:10 29759人阅读 评论(35) 收藏 举报 android相册layoutobjectclassloade ...
随机推荐
- jQuery的学习笔记
JQuery学习笔记 Chapter one初识jQuery 1.2测试jQuery 在jQuery库中,$是jQuery的别名,如:$()相当于jQuery() 注意:在使用JQuery进行开发的时 ...
- Postgresql中临时表(temporary table)的特性和用法
熟悉Oracle的人,相比对临时表(temporary table)并不陌生,很多场景对解决问题起到不错的作用,开源库Postgresql中,也有临时表的概念,虽然和Oracle中临时表名字相同,使用 ...
- jvm GC
JavaGC.新生代.老年代 Java 中的堆是 JVM所管理的最大的一块内存空间,主要用于存放各种类的实例对象. 在 Java 中,堆被划分成两个不同的区域:新生代 ( Young ).老年代 ( ...
- 连接到放置本地yum源服务器之前的注意事项
1.确认系统防火墙关闭 2.启动httpd服务 service httpd start 如果提示没有httpd服务: 安装httpd服务 yum install -y httpd 作者:Daley Z ...
- arcis api for js 值 3.17 本地部署
1. 引言 在学习 ArcGIS API 的过程中,如果我们引用在线的 API,在没有网络或者网络差的情况下,会影响到我们的学习效率,本篇文章就是为了解决这个问题.下载 ArcGIS API 之后,部 ...
- Unity3D学习(二):使用JSON进行对象数据的存储读取
前言 前段时间完成了自己的小游戏Konster的制作,今天重新又看了下代码.原先对关卡解锁数据的存储时用了Unity自带的PlayerPref(字典式存储数据). 读取关卡数据的代码: void Aw ...
- Hessian基础入门案例
Hessian是一个轻量级的remoting onhttp工具,使用简单的方法提供了RMI的功能. 相比WebService,Hessian更简单.快捷.采用的是二进制RPC协议,因为采用的是二进制协 ...
- libevent库简单使用
一.libevent库简介 Libevent是一个用于开发可扩展性网络服务器的基于事件驱动(event-driven)模型的网络库.Libevent有几个显著的亮点: (1)事件驱动(event-dr ...
- BufferedInputStream与BufferedOutputStream用法简介
BufferedInputStream是带缓冲区的输入流,默认缓冲区大小是8M,能够减少访问磁盘的次数,提高文件读取性能:BufferedOutputStream是带缓冲区的输出流,能够提高文件的写入 ...
- shell 常用命令语法简介
一.grep用法 ************************************** ++++++用一些特殊的函数来处理参数++++++ *$# 传递给函数的参数个数 *$* 显示所有传递给 ...