实验七:基于REST API的SDN北向应用实践
(一)基本要求
编写Python程序,调用OpenDaylight的北向接口实现以下功能
(1) 利用Mininet平台搭建下图所示网络拓扑,并连接OpenDaylight;
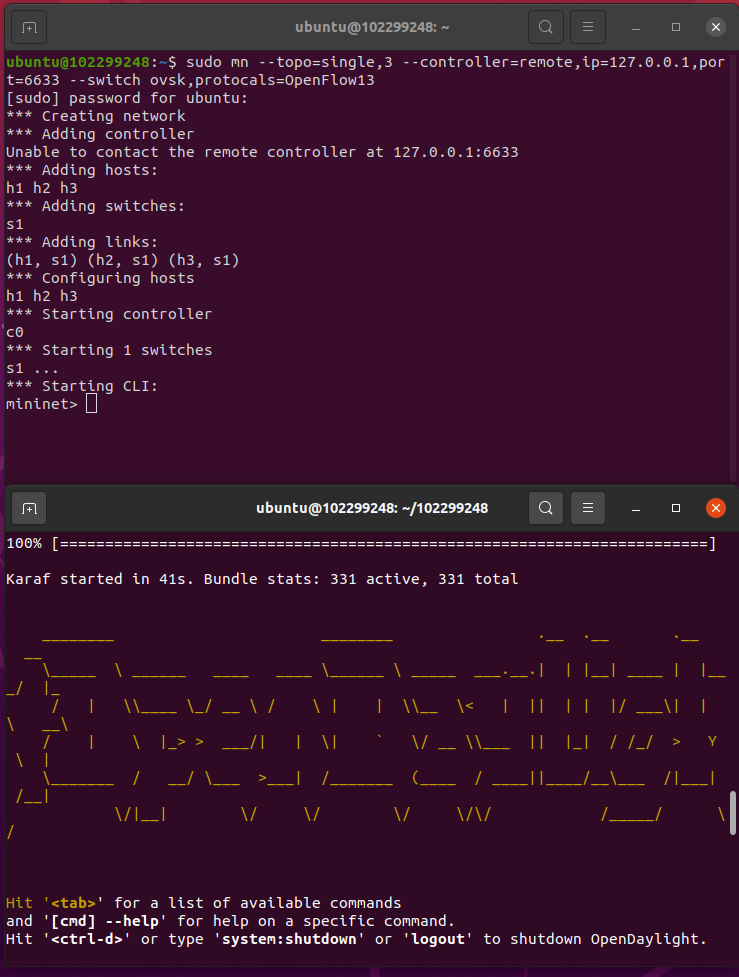
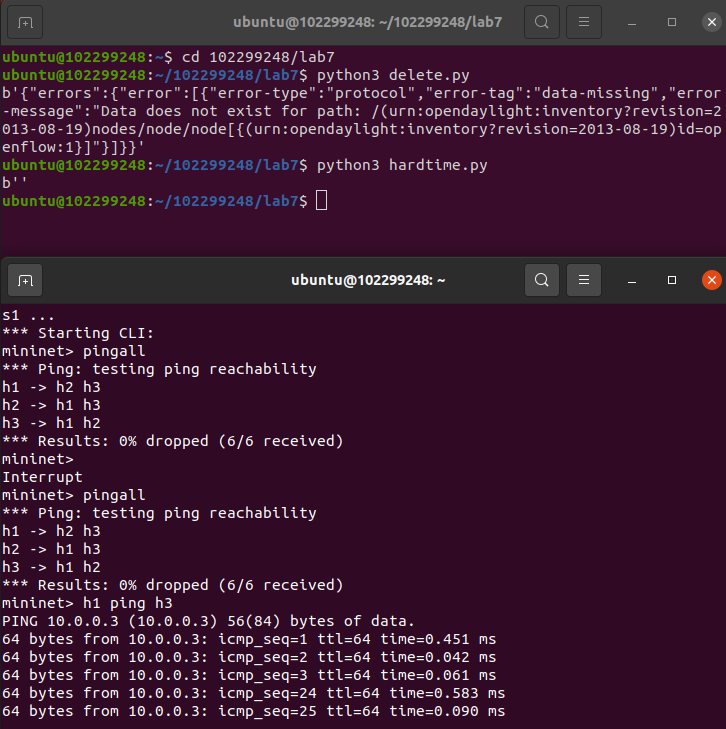
(2) 下发指令删除s1上的流表数据。
delete.py的代码
点击查看代码
#!/usr/bin/python

import requests

from requests.auth import HTTPBasicAuth

if __name__ == "__main__":

    url = 'http://127.0.0.1:8181/restconf/config/opendaylight-inventory:nodes/node/openflow:1/'

    headers = {'Content-Type': 'application/json'}

    res = requests.delete(url, headers=headers, auth=HTTPBasicAuth('admin', 'admin'))

    print (res.content)

(3) 下发硬超时流表,实现拓扑内主机h1和h3网络中断20s。
hardtime.py的代码
点击查看代码
import requests

from requests.auth import HTTPBasicAuth

if __name__ == "__main__":

    url = 'http://127.0.0.1:8181/restconf/config/opendaylight-inventory:nodes/node/openflow:1/flow-node-inventory:table/0/flow/1'

    with open("./hardtime.json") as f:

        jstr = f.read()

    headers = {'Content-Type': 'application/json'}

    res = requests.put(url, jstr, headers=headers, auth=HTTPBasicAuth('admin', 'admin'))

    print (res.content)
hardtime.json的代码
点击查看代码
{

  "flow": [

    {

      "id": "1",

      "match": {

        "in-port": "1",

        "ethernet-match": {

          "ethernet-type": {

            "type": "0x0800"

          }

        },

        "ipv4-destination": "10.0.0.3/32"

      },

      "instructions": {

        "instruction": [

          {

            "order": "0",

            "apply-actions": {

              "action": [

                {

                  "order": "0",

                  "drop-action": {}

                }

              ]

            }

          }

        ]

      },

      "flow-name": "flow1",

      "priority": "65535",

      "hard-timeout": "20",

      "cookie": "2",

      "table_id": "0"

    }

  ]

}
(4) 获取s1上活动的流表数。
getflow.py的代码
点击查看代码
#!/usr/bin/python

import requests

from requests.auth import HTTPBasicAuth

if __name__ == "__main__":

    url = 'http://127.0.0.1:8181/restconf/operational/opendaylight-inventory:nodes/node/openflow:1/flow-node-inventory:table/0/opendaylight-flow-table-statistics:flow-table-statistics'

    headers = {'Content-Type': 'application/json'}

    res = requests.get(url,headers=headers, auth=HTTPBasicAuth('admin', 'admin'))

    print (res.content)

编写Python程序,调用Ryu的北向接口实现以下功能
(1) 实现上述OpenDaylight实验拓扑上相同的硬超时流表下发。

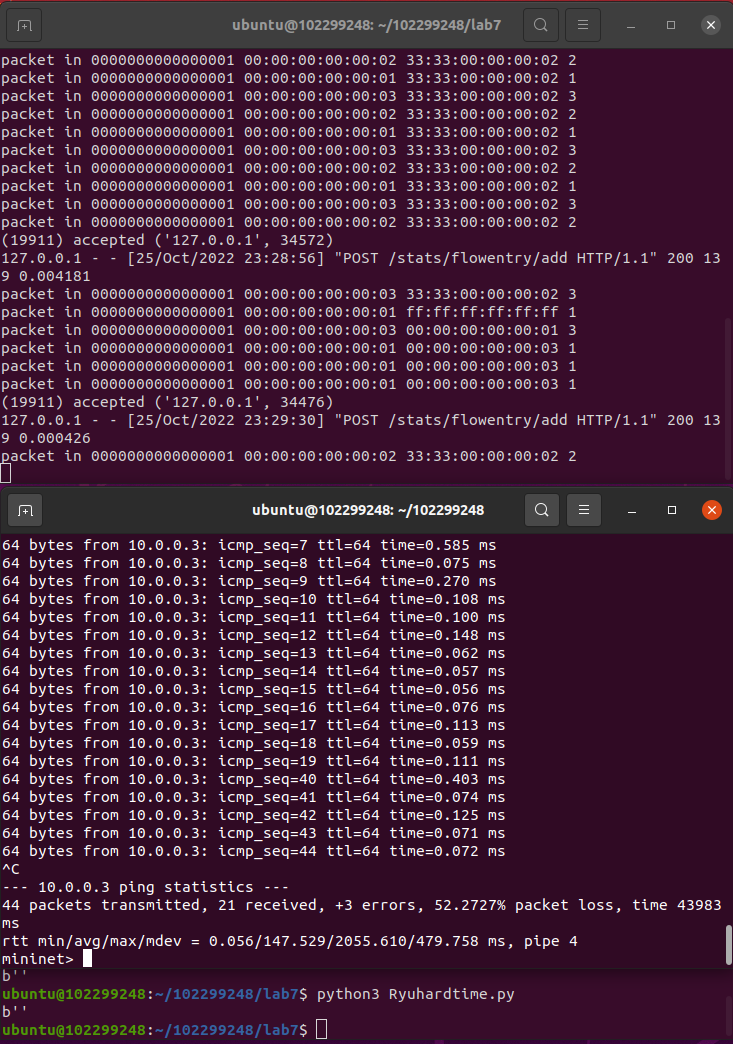
Ryuhardtime.py的代码
点击查看代码
#!/usr/bin/python

import requests

if __name__ == "__main__":

    url = 'http://127.0.0.1:8080/stats/flowentry/add'

    with open("./Ryuhardtime.json") as f:

        jstr = f.read()

    headers = {'Content-Type': 'application/json'}

    res = requests.post(url, jstr, headers=headers)

    print (res.content)
Ryuhardtime.json的代码
点击查看代码
{

    "dpid": 1,

    "cookie": 1,

    "cookie_mask": 1,

    "table_id": 0,

    "hard_timeout": 20,

    "priority": 65535,

    "flags": 1,

    "match":{

        "in_port":1,

    },

    "actions":[

    ]

 }
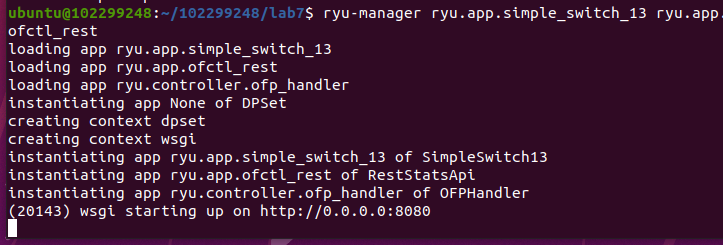
启动Ryu控制器
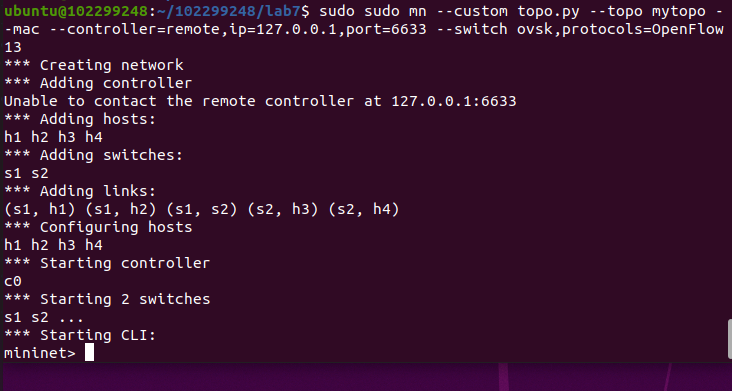
(2) 参考Ryu REST API的文档,基于VLAN实验的网络拓扑,编程实现相同的VLAN配置。
topo.py代码
点击查看代码
from mininet.topo import Topo

class MyTopo(Topo):

    def __init__(self):

        # initilaize topology

        Topo.__init__(self)

        self.addSwitch("s1")

        self.addSwitch("s2")

        self.addHost("h1")

        self.addHost("h2")

        self.addHost("h3")

        self.addHost("h4")

        self.addLink("s1", "h1")

        self.addLink("s1", "h2")

        self.addLink("s2", "h3")

        self.addLink("s2", "h4")

        self.addLink("s1", "s2")

topos = {'mytopo': (lambda: MyTopo())}
Ryuvlan.py的代码
点击查看代码
import json

import requests

if __name__ == "__main__":

    url = 'http://127.0.0.1:8080/stats/flowentry/add'

    headers = {'Content-Type': 'application/json'}

    flow1 = {

        "dpid": 1,

        "priority": 1,

        "match":{

            "in_port": 1

        },

        "actions":[

            {

                "type": "PUSH_VLAN",

                "ethertype": 33024

            },

            {

                "type": "SET_FIELD",

                "field": "vlan_vid",

                "value": 4096

            },

            {

                "type": "OUTPUT",

                "port": 3

            }

        ]

    }

    flow2 = {

        "dpid": 1,

        "priority": 1,

        "match":{

            "in_port": 2

        },

        "actions":[

            {

                "type": "PUSH_VLAN",

                "ethertype": 33024

            },

            {

                "type": "SET_FIELD",

                "field": "vlan_vid",

                "value": 4097

            },

            {

                "type": "OUTPUT",

                "port": 3

            }

        ]

    }

    flow3 = {

        "dpid": 1,

        "priority": 1,

        "match":{

            "vlan_vid": 0

        },

        "actions":[

            {

                "type": "POP_VLAN",

                "ethertype": 33024

            },

            {

                "type": "OUTPUT",

                "port": 1

            }

        ]

    }

    flow4 = {

        "dpid": 1,

        "priority": 1,

        "match": {

            "vlan_vid": 1

        },

        "actions": [

            {

                "type": "POP_VLAN",

                "ethertype": 33024

            },

            {

                "type": "OUTPUT",

                "port": 2

            }

        ]

    }

    flow5 = {

        "dpid": 2,

        "priority": 1,

        "match": {

            "in_port": 1

        },

        "actions": [

            {

                "type": "PUSH_VLAN",

                "ethertype": 33024

            },

            {

                "type": "SET_FIELD",

                "field": "vlan_vid",

                "value": 4096

            },

            {

                "type": "OUTPUT",

                "port": 3

            }

        ]

    }

    flow6 = {

        "dpid": 2,

        "priority": 1,

        "match": {

            "in_port": 2

        },

        "actions": [

            {

                "type": "PUSH_VLAN",

                "ethertype": 33024

            },

            {

                "type": "SET_FIELD",

                "field": "vlan_vid",

                "value": 4097

            },

            {

                "type": "OUTPUT",

                "port": 3

            }

        ]

    }

    flow7 = {

        "dpid": 2,

        "priority": 1,

        "match": {

            "vlan_vid": 0

        },

        "actions": [

            {

                "type": "POP_VLAN",

                "ethertype": 33024

            },

            {

                "type": "OUTPUT",

                "port": 1

            }

        ]

    }

    flow8 = {

        "dpid": 2,

        "priority": 1,

        "match": {

            "vlan_vid": 1

        },

        "actions": [

            {

                "type": "POP_VLAN",

                "ethertype": 33024

            },

            {

                "type": "OUTPUT",

                "port": 2

            }

        ]

    }

    res1 = requests.post(url, json.dumps(flow1), headers=headers)

    res2 = requests.post(url, json.dumps(flow2), headers=headers)

    res3 = requests.post(url, json.dumps(flow3), headers=headers)

    res4 = requests.post(url, json.dumps(flow4), headers=headers)

    res5 = requests.post(url, json.dumps(flow5), headers=headers)

    res6 = requests.post(url, json.dumps(flow6), headers=headers)

    res7 = requests.post(url, json.dumps(flow7), headers=headers)

    res8 = requests.post(url, json.dumps(flow8), headers=headers)
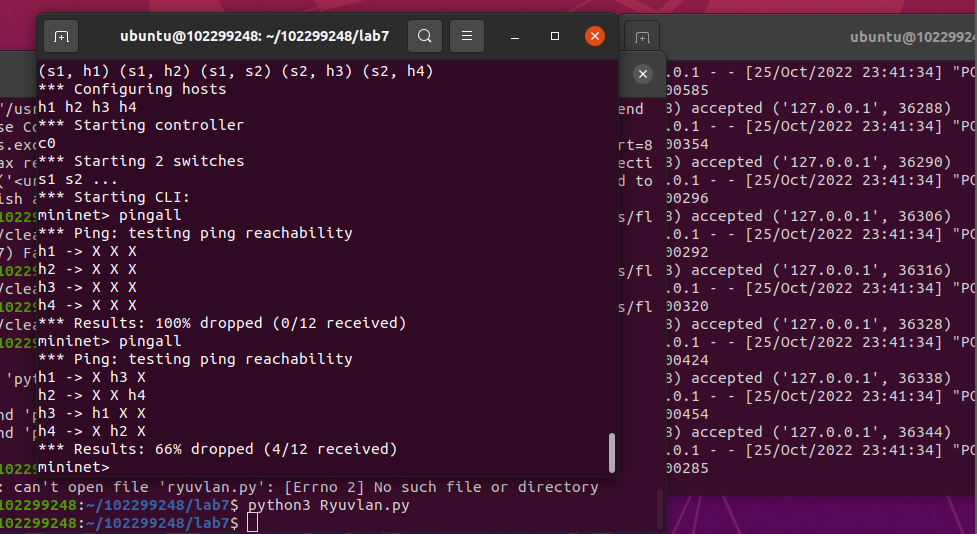
运行Ryuvlan.py之后pingall
(二)进阶要求
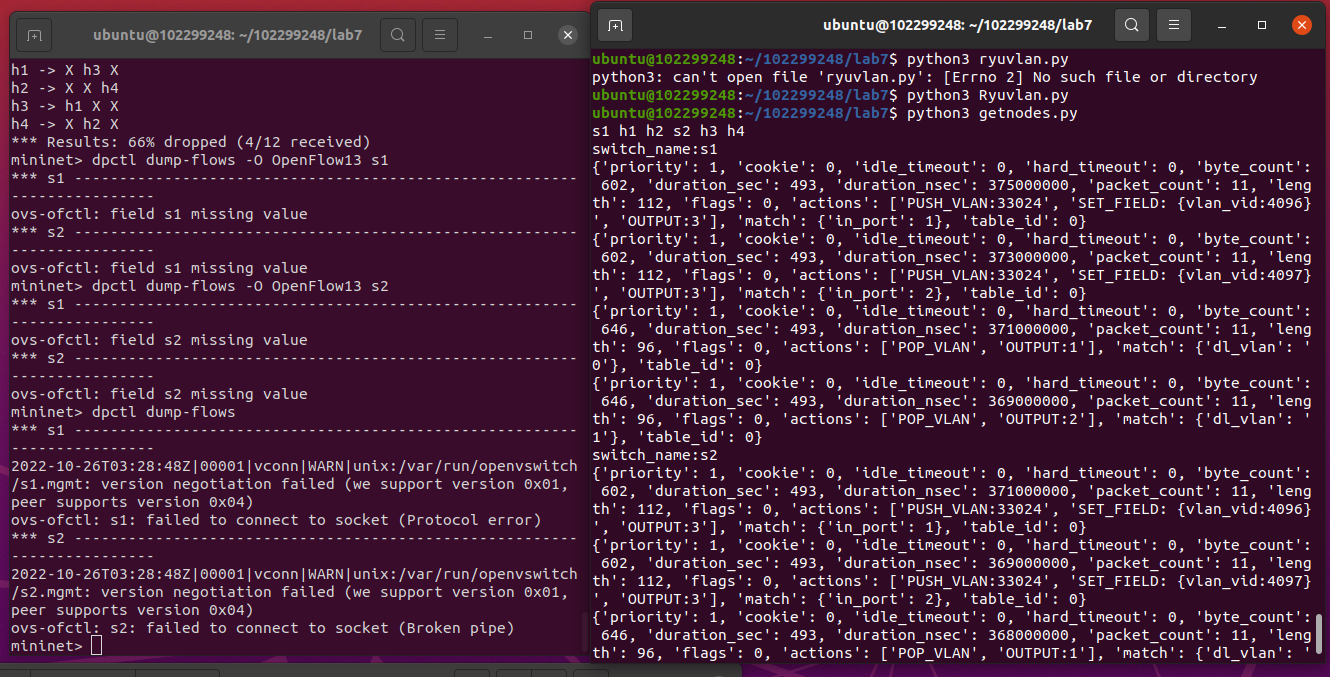
OpenDaylight或Ryu任选其一,编程实现查看前序VLAN实验拓扑中所有节点(含交换机、主机)的名称,以及显示每台交换机的所有流表项。
getnode.py的代码
点击查看代码
import requests

import time

import re

class GetNodes:

    def __init__(self, ip):

        self.ip = ip

    def get_switch_id(self):

        url = 'http://' + self.ip + '/stats/switches'

        re_switch_id = requests.get(url=url).json()

        switch_id_hex = []

        for i in re_switch_id:

            switch_id_hex.append(hex(i))

        return switch_id_hex

    def getflow(self):

        url = 'http://' + self.ip + '/stats/flow/%d'

        switch_list = self.get_switch_id()

        ret_flow = []

        for switch in switch_list:

            new_url = format(url % int(switch, 16))

            re_switch_flow = requests.get(url=new_url).json()

            ret_flow.append(re_switch_flow)

        return ret_flow

    def show(self):

        flow_list = self.getflow()

        for flow in flow_list:

            for dpid in flow.keys():

                dp_id = dpid

                switchnum= '{1}'.format(hex(int(dp_id)), int(dp_id))

                print('s'+switchnum,end = " ")

                switchnum = int(switchnum)

            for list_table in flow.values():

                for table in list_table:

                    string1 = str(table)

                    if re.search("'dl_vlan': '(.*?)'", string1) is not None:

                       num = re.search("'dl_vlan': '(.*?)'", string1).group(1);

                       if num == '0' and switchnum == 1:

                          print('h1',end = " ")

                       if num == '1' and switchnum == 1:

                          print('h2',end = " ")

                       if num == '0' and switchnum == 2:

                          print('h3',end = " ")

                       if num == '1' and switchnum == 2:

                          print('h4',end = " ")

        print("")

        flow_list = self.getflow()

        for flow in flow_list:

            for dpid in flow.keys():

                dp_id = dpid

                print('switch_name:s{1}'.format(hex(int(dp_id)), int(dp_id)))

            for list_table in flow.values():

                for table in list_table:

                    print(table)

s1 = GetNodes("127.0.0.1:8080")

s1.show()
个人总结
从配置环境开始就一直出问题的ODL,果不其然又出问题了,只能重新安装才能使用,后面的实验倒是一帆风顺,了解了相关OpenDaylight REST API和Ryu REST API的使用,学到了不少东西.
实验七:基于REST API的SDN北向应用实践的更多相关文章
- 实验7:基于REST API的SDN北向应用实践
一.实验目的 1.能够编写程序调用OpenDaylight REST API实现特定网络功能: 2.能够编写程序调用Ryu REST API实现特定网络功能. 二.实验环境 下载虚拟机软件Oracle ...
- 实验:基于http的yum源
实验:基于http的yum源 selinux,firewalld已经关闭',系统为CentOS7 repodata所在的目录就是yum源 下面介绍了如何把本地光盘通过httpd服务器变成yum源:多个 ...
- 《数据挖掘导论》实验课——实验七、数据挖掘之K-means聚类算法
实验七.数据挖掘之K-means聚类算法 一.实验目的 1. 理解K-means聚类算法的基本原理 2. 学会用python实现K-means算法 二.实验工具 1. Anaconda 2. skle ...
- Angular SPA基于Ocelot API网关与IdentityServer4的身份认证与授权(二)
上文已经介绍了Identity Service的实现过程.今天我们继续,实现一个简单的Weather API和一个基于Ocelot的API网关. 回顾 <Angular SPA基于Ocelot ...
- 实验6、Flask API使用示例和拓展
实验介绍 1. 实验内容 Flask 提供了多种API拓展,本节我们主要学习基于RESTful的Flask应用程序设计 2. 实验要点 学习和掌握多种RESTful的设计模式 3.实验环境 Cento ...
- Atitit 游戏的通常流程 attilax 总结 基于cocos2d api
Atitit 游戏的通常流程 attilax 总结 基于cocos2d api 加载音效1 加载页面1 添加精灵1 设置随机位置2 移动2 垃圾gc2 点击evt2 爆炸效果3 定时生成精灵3 加载音 ...
- Docker入门教程(七)Docker API
Docker入门教程(七)Docker API [编者的话]DockerOne组织翻译了Flux7的Docker入门教程,本文是系列入门教程的第七篇,重点介绍了Docker Registry API和 ...
- 你也可以玩转Skype -- 基于Skype API开发外壳程序入门
原文:你也可以玩转Skype -- 基于Skype API开发外壳程序入门 Skype是目前这个星球上最厉害的IM+VOIP软件,Skype现在已经改变了全球2.8亿人的生活方式.你,值得拥有! :) ...
- 基于 Aliexpress API 的小程序 : 批量 Copy 产品到不同的店铺
第一个基于 Aliexpress API 的小程序 : 批量 Copy 产品到不同的店铺 还没来得及用 API 重写软件, 先写个小程序来缓解一下手工压力: 批量Copy 产品到不同的店铺. 开网店 ...
- 【C++ 流类库与输入输出 】实验七
1. 基础练习 (1)教材习题 11-7 (2)教材习题 11-3 (3)教材习题 11-4 2. 应用练习 (1)已知有班级名单文件 list.txt(见实验 7 附件包).编写一个应用程序实现随机 ...
随机推荐
- Python中的容器、迭代器、生成器
容器是一系列元素的集合,str.list.set.dict.file.sockets对象都可以看作是容器,容器都可以被迭代(用在for,while等语句中),因此他们被称为可迭代对象. 可迭代对象实现 ...
- 有符号数 无符号数 原码 补码 反码 java用补码表示
计算机数字的储存分为:1.无符号数,2.有符号数 无符号数:只能表示正数.每一位数都代表2的幂次方.只有地址用无符号数,无符号数不进行算术操作,之进行指针的加减.地址并不会造成错误的结果,而是产生一个 ...
- vue编辑修改,点击取消操作时,table内的内容不变
1.父组件内 2.子组件内(使用JSON.parse(JSON.stringify(xxx值))) 进行深拷贝
- openstack 下云主机所在目录
1.先查看云主机运行在哪个节点 2. [root@compute01 ~]# cd /var/lib/nova/instances/ 注: 云主机是一台链接克隆的虚拟机,_base 是母盘, fa56 ...
- Web Dynpro for ABAP(15):Print
3.20 Print WDA调用浏览器打印界面 1.创建Print按钮,绑定事件PRINT; 2.实现ONACTIONPRINT事件: method ONACTIONPRINT. DATA:l_api ...
- mac_office2019
mac_office2019下载 1,链接地址: mac_office2019: https://590m.com/d/28636472-44062040-dc385f (访问密码:7410) 2, ...
- adb 工具-原⽣安卓解决WiFi⽹络受限以及修改NTP服务
安装包下载地址:https://developer.android.google.cn/studio/releases/platform-tools 注: adb kill-server //结 ...
- 2N2218仿真估算静态工作点
(在找到的2N2218技术手册中没有发现输入输出特性曲线,只能自己估算了) 共射极直流通路电路 #静态工作点表达式 #IBQ = (Vcc - UBEQ)/RB #ICQ = (Vcc - UCEQ) ...
- S家lic
1,用1patch里对应的工具patch 2019的s家的工具2,用ocad里的lmgrd和snpslmd替换s家的scl里的3,用scl_keygen产生license,再用fix.bat,添加si ...
- IDEA导出带源码的war包
做作业时实验要求导出带源码的war包,网上找了一圈没找着,遂自行探索,摸出了些门道,在此分享. File->Project Structure->Project Setting->A ...