kvm管理工具Webvirtmgr安装
虚拟机版本
vmware workstation 15.5.0 pro (也就是linux版)
cat /etc/redhat-release
CentOS Linux release 7.4.1708 (Core)
uname -r
3.10.0-693.el7.x86_64
IP:192.168.1.129
注:Virtual Network Editor是桥接
虚拟机的网络也是设置的桥接
关闭防火墙
systemctl stop firewalld
systemctl disable firewalld
关闭SELinux
sed -i 's/SELINUX=enforcing/SELINUX=disabled/g' /etc/selinux/config
setenforce 0
检查是否支持虚拟机
egrep '(vmx|svm)' --color=always /proc/cpuinfo
lsmod |grep kvm
安装kvm
yum -y install qemu-kvm qemu-img virt-manager libvirt libvirt-python libvirt-client virt-install virt-viewer
systemctl start libvirtd # 启动libvitd服务
systemctl enable libvirtd # 将libvitd服务加入开机自启
systemctl status libvirtd # 查看libvitd服务的状态
systemctl is-enabled libvirtd # 查看是否开机启动
配置桥接网络br0
cd /etc/sysconfig/network-scripts/
vim ifcfg-br0 #新建该文件
DEVICE=br0
ONBOOT=yes
BOOTPROTO=none
IPADDR=192.168.1.129 #服务器的内网地址,也就是给服务器最起初分配的地址
GATEWAY=192.168.1.1
NETMASK=255.255.255.0
DNS1=192.168.1.1
NBOOT="yes"
TYPE="Bridge"
vim ifcfg-ens33 #修改自带的ens33网卡配置
NAME=ens33
DEVICE=ens33
ONBOOT=yes
BRIDGE=br0
ZONE=public
重启服务器使网卡配置生效(重启网卡有时候不管用)
reboot
开启转发功能并修改ulimit参数
echo 1 > /proc/sys/net/ipv4/ip_forward
echo "* soft nproc 65500" >>/etc/security/limits.conf
echo "* hard nproc 65500" >>/etc/security/limits.conf
echo "* soft nofile 65500" >>/etc/security/limits.conf
echo "* hard nofile 65500" >>/etc/security/limits.conf
启动libvirt
systemctl restart libvirtd
systemctl status libvirtd
测试
virsh -c qemu:///system list
查看virsh版本
virsh --version
做个软连接
ln -s /usr/libexec/qemu-kvm /usr/bin/qemu-kvm
查看网桥
brctl show
KVM安装系统请看我另一篇文章
先创建一台虚拟机,
创建磁盘
mkdir /kvmdir # 创建虚拟硬盘的存放位置
qemu-img create -f qcow2 /kvmdir/opop.img 20G # 创建一个500G的qcow2格式并且名为opop的镜像
创建虚拟机
virt-install --name opop --memory 512 --vcpus=1 \
--cdrom=/root/CentOS-7-x86_64-DVD-1708.iso --os-variant=rhel7 --boot=hd,cdrom --disk path=/kvmdir/oppo.img,format=qcow2,bus=virtio,size=20 \
--network default,model='e1000' --graphics vnc,password=123456,listen=0.0.0.0 --noautoconsole --os-type=linux
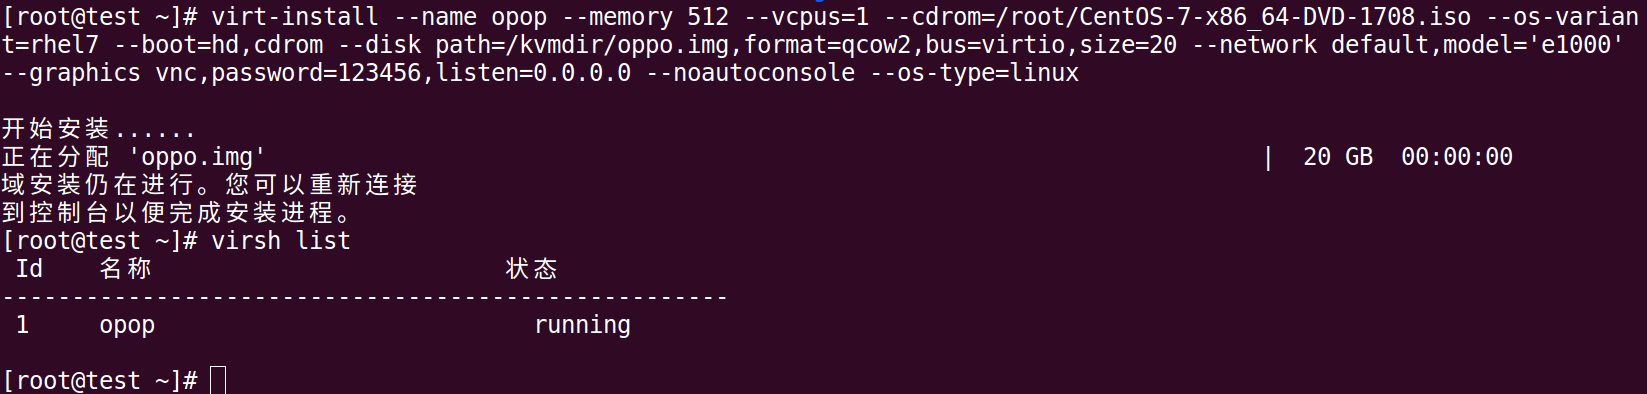
注:如遇到错误,我的另一篇kvm安装文章中有说明,接上图往下都是一样的安装
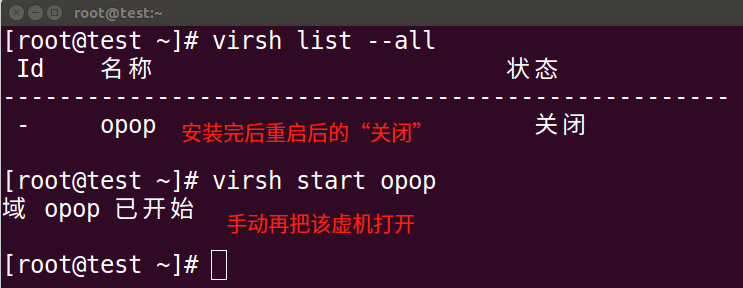
系统装完后会提示要重启,重启后kvm会关机,需要再用命令打开,如下图:
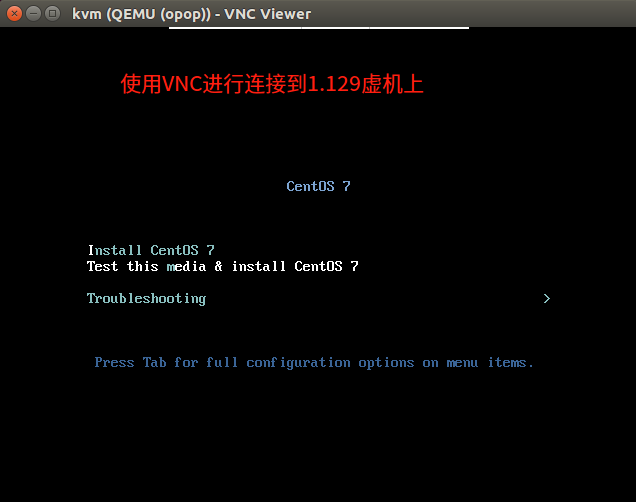
再用VNC连接即可,如下图

部署webvirtmgr
安装依赖包
yum -y install https://dl.fedoraproject.org/pub/epel/7/x86_64/Packages/e/epel-release-7-12.noarch.rpm
yum -y install git python-pip libvirt-python libxml2-python python-websockify supervisor nginx gcc gcc-c++ python-devel
pip install numpy
pip install --upgrade pip
生成秘钥和公钥
ssh-keygen -t rsa
将公钥上传到github上,然后执行下一步操作
克隆项目
git clone --depth=1 git@github.com:retspen/webvirtmgr.git
cd webvirtmgr
pip install -r requirements.txt -i https://mirrors.aliyun.com/pypi/simple/ #使用国内源安装
./manage.py syncdb
=====================提示==============================
Would you like to create one now? (yes/no): yes #输入yes
Username (leave blank to use 'root'): #直接回车
Email address: zhangxxxxxx@126.com #输入自己的邮箱
Password: #输入密码
Password (again):
=====================提示==============================
./manage.py collectstatic ---配置数据库的账号
=====================提示==============================
Type 'yes' to continue, or 'no' to cancel: yes
=====================提示==============================
创建一个超级用户:(该账号和密码待会登录时会用到)
./manage.py createsuperuser --配置webvirtmgr 登录账号
=====================提示==============================
Username: zhangsan #输入超级用户名
Email address: zhangxxxxxxx@126.com #输入自己的邮箱
Password: #输入密码
Password (again):
Superuser created successfully.
=====================提示==============================
设置SSH
ssh 192.168.1.129 -L localhost:8000:localhost:8000 -L localhost:6080:localhost:6080
输入一个yes
输入1.129的root登录密码
拷贝web到 相关目录
mkdir -pv /var/www
cp -Rv ~/webvirtmgr/ /var/www/webvirtmgr
编辑nginx配置文件
cd /etc/nginx/
mv nginx.conf{,.bak}
cp nginx.conf.default nginx.conf
编辑配置文件
vim nginx.conf
http {
include mime.types;
default_type application/octet-stream;
include /etc/nginx/conf.d/*.conf;
注:其他不用改,主要加上上一行即可。
添加 /etc/nginx/conf.d/webvirtmgr.conf 配置文件
vim /etc/nginx/conf.d/wevirtmgr.conf
server {
listen 80 default_server;
server_name $hostname;
#access_log /var/log/nginx/webvirtmgr_access_log;
location /static/ {
root /var/www/webvirtmgr/webvirtmgr; # or /srv instead of /var
expires max;
}
location / {
proxy_pass http://127.0.0.1:8000;
proxy_set_header X-Real-IP $remote_addr;
proxy_set_header X-Forwarded-for $proxy_add_x_forwarded_for;
proxy_set_header Host $host:$server_port;
proxy_set_header X-Forwarded-Proto $scheme;
proxy_connect_timeout 600;
proxy_read_timeout 600;
proxy_send_timeout 600;
client_max_body_size 1024M; # Set higher depending on your needs
}
}
重启nginx:
systemctl start nginx
chkconfig nginx on
修改webvirtmgr权限
chown -R nginx.nginx /var/www/webvirtmgr/
设置 supervisor (如果iptables防火墙开启的话,就必须要开通80、8000、6080端口访问)
vim /etc/supervisord.d/webvirtmgr.ini
[program:webvirtmgr]
command=/usr/bin/python /var/www/webvirtmgr/manage.py run_gunicorn -c /var/www/webvirtmgr/conf/gunicorn.conf.py
directory=/var/www/webvirtmgr
autostart=true
autorestart=true
logfile=/var/log/supervisor/webvirtmgr.log
log_stderr=true
user=nginx
[program:webvirtmgr-console]
command=/usr/bin/python /var/www/webvirtmgr/console/webvirtmgr-console
directory=/var/www/webvirtmgr
autostart=true
autorestart=true
stdout_logfile=/var/log/supervisor/webvirtmgr-console.log
redirect_stderr=true
user=nginx
检查
vim /var/www/webvirtmgr/conf/gunicorn.conf.py //确保下面bind绑定的是本机的8000端口,这个在nginx配置中定义了,被代理的端口
bind = '127.0.0.1:8000'
重启服务、设置开机启动
cd /var/www/webvirtmgr
git pull
./manage.py collectstatic
systemctl restart supervisord
systemctl status supervisord
systemctl enable supervisord.service 或 chkconfig supervisord on
访问地址:http://192.168.1.129:80

账号密码为上面创建的 超级用户
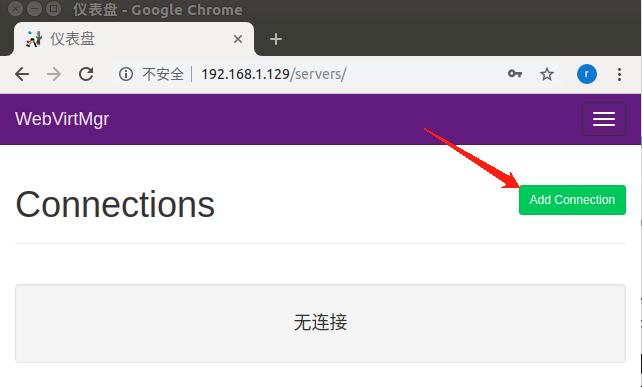
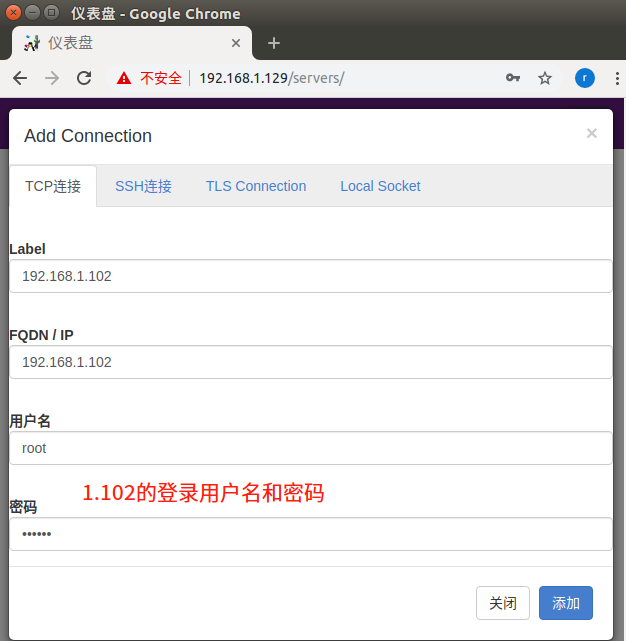
默认为空,就是没有连接,需要手动添加连接
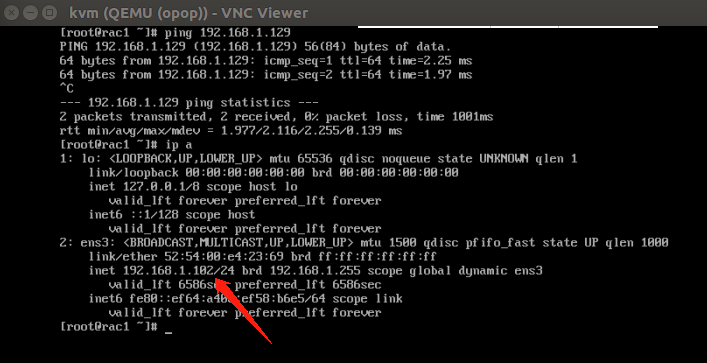
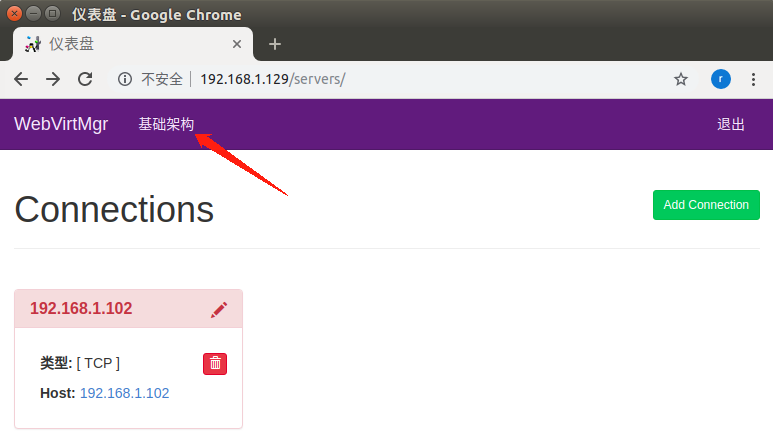
注:因为我这里的网络环境的限制,步骤是对的 只是宿机到1.102的网络不通,1.129和1.102之间是 通的
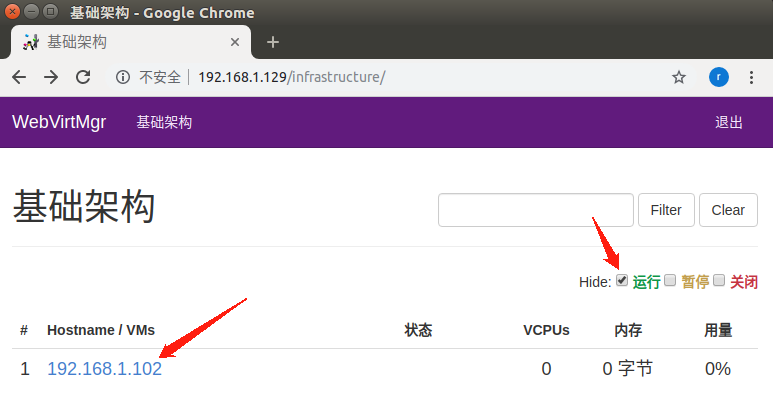
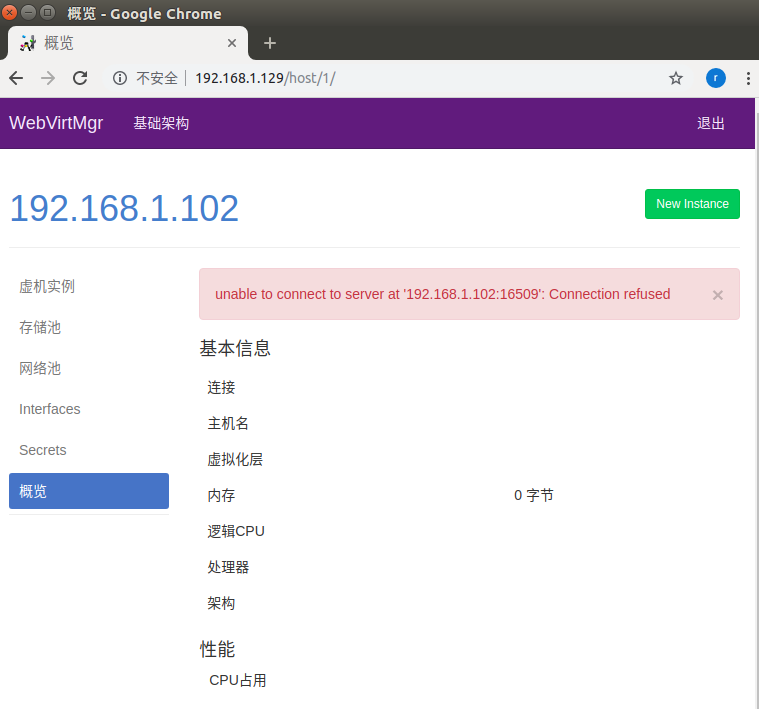
能看到上图后即可参考:https://www.scit028.com/post-18.html 进行设置
转载请注明出处,多谢各位谅解
kvm管理工具Webvirtmgr安装的更多相关文章
- KVM管理工具 WebVirtMgr
WEB管理工具 WebVirtMgr WebVirtMgr是一个基于libvirt的Web界面,用于管理虚拟机.它允许您创建和配置新域,并调整域的资源分配.VNC查看器为来宾域提供完整的图形控制台.K ...
- KVM WEB管理工具webvirtmgr安装和使用
生产环境的KVM宿主机越来越多,需要对宿主机的状态进行调控.这里用webvirtmgr进行管理.图形化的WEB,让人能更方便的查看kvm 宿主机的情况和操作 1 安装支持的软件源 yum -y ins ...
- KVM管理工具webvirtmgr的使用
WebVirtMgr的日常配置:添加宿主机,创建虚拟机,磁盘扩容,快照等具体操作记录如下: 一.创建虚拟机 1.创建存储池 点击创建的宿主机,进入虚拟机部署界面 点击“存储池”按钮,创建存储池(即创建 ...
- KVM web管理工具——WebVirtMgr(一)
WebVirtMgr 介绍 WebVirtMgr采用几乎纯Python开发,其前端是基于Python的Django,后端是基于Libvirt的Python接口,将日常kvm的管理操作变的更加的 ...
- kvm-web管理工具webvirtmgr
前言: 使用开源的虚拟化技术,对公司自有的少数服务器进行虚拟化,在满足业务需求的同时,并未增加投入,同时也避免了使用云主机的不便,技术层面,kvm是开源的虚拟化产品,虚拟化性能出众,更重要的是免费!! ...
- Kvm --05 密码保护:Kvm管理之WebVirtMgr
目录 密码保护:Kvm管理之WebVirtMgr 1. 前言 2. 特点 3. 功能 4. 部署 1).安装相关依赖 2).安装Python需求环境 3).配置Nginx 4). 远程连接 5).更新 ...
- 虚拟化技术之kvm管理工具virsh常用基础命令(一)
在上一篇博客中,我们了解了KVM基础架构和部署以及图形管理工具virt-manager安装虚拟机的过程,回顾请参考https://www.cnblogs.com/qiuhom-1874/p/13499 ...
- 微软源代码管理工具TFS2013安装与使用详细图文教程(Vs2013)
这篇文章联合软件小编主要介绍了微软源代码管理工具TFS2013安装与使用图文教程,本文详细的给出了TFS2013的安装配置过程.使用教程,需要的朋友可以参考下 最近公司新开发一个项目要用微软的TFS2 ...
- [转] 微软源代码管理工具TFS2013安装与使用详细图文教程(Vs2013)
这篇文章联合软件小编主要介绍了微软源代码管理工具TFS2013安装与使用图文教程,本文详细的给出了TFS2013的安装配置过程.使用教程,需要的朋友可以参考下 最近公司新开发一个项目要用微软的TFS2 ...
随机推荐
- Dell T30解决报Alert! Cover was previously removed.
DELL T30自检中卡在F1/F2/F5选项,需要F1手动启动时报:Alert! Cover was previously removed是指向机器盖问题 [解决方法]: 1.检查机箱盖是否有盖紧 ...
- docker 部署 elasticsearch + elasticsearch-head + elasticsearch-head跨域问题 + IK分词器
0. docker pull 拉取elasticsearch + elasticsearch-head 镜像 1. 启动elasticsearch Docker镜像 docker run -di ...
- 13 Windows编程——系统内置窗口子类型之静态子窗口
静态子窗口类型 wndclass:static 源码 #include<Windows.h> #include<Windowsx.h> HINSTANCE G_h; LRESU ...
- docker从入门到精通再到放弃
docker说明 docker三大功能:构建(build).运输(ship).运行(run),只需要记下这三大功能就可以了 1.docker入门 docker安装及配置 a.docker源配置 cur ...
- Linux下的帮助命令(man/help/info)
1.man 帮助命令 用法 man(选项)(参数) 选项 -a:在所有的man帮助手册中搜索: -f:等价于whatis指令,显示给定关键字的简短描述信息: -P:指定内容时使用分页程序: -M:指定 ...
- C#在代码中编写输出debug信息-类Debug的使用
文章:C# 的两种debug 方法 文章:C#跟踪和调试程序-Debug类使用 很全面的文章,可以仔细学习使用下. 文章:C#调试类 没有仔细看. 关键字:Debug类和Trace类有什么区别? 微软 ...
- Beyond Compare 4提示已经过了30天试用期
打开Beyond Compare 4,提示已经超出30天试用期限制,解决方法:1.修改C:\Program Files\Beyond Compare 4\BCUnrar.dll ,这个文件重命名或者直 ...
- lnmp安装xdebug ,配合phpstorm断点调试
先下载xdebug wget http://www.xdebug.org/files/xdebug-2.2.3.tgz 然后开始编译(权限不够的加上 sudo 提成权限) tar xzf xdebug ...
- 第95题:不同的二叉搜素树II
一. 问题描述 给定一个整数 n,生成所有由 1 ... n 为节点所组成的二叉搜索树. 示例: 输入: 3 输出: [ [1,null,3,2], [3,2,null,1], [3,1,null,n ...
- 获取TableViewer里面的所有TableViewerColumn
private TableViewerColumn[] getTableViewerColumns(TableViewer tableViewer) { TableColumn[] columns = ...