在线快速创建SpringBoot项目
都2020年了,你还在手动创建SpringBoot项目吗?今天教你在线快速创建一个SpringBoot项目,瞬间高大上有木有!
进入正题,首先打开创建SpringBoot的官网:https://start.spring.io/
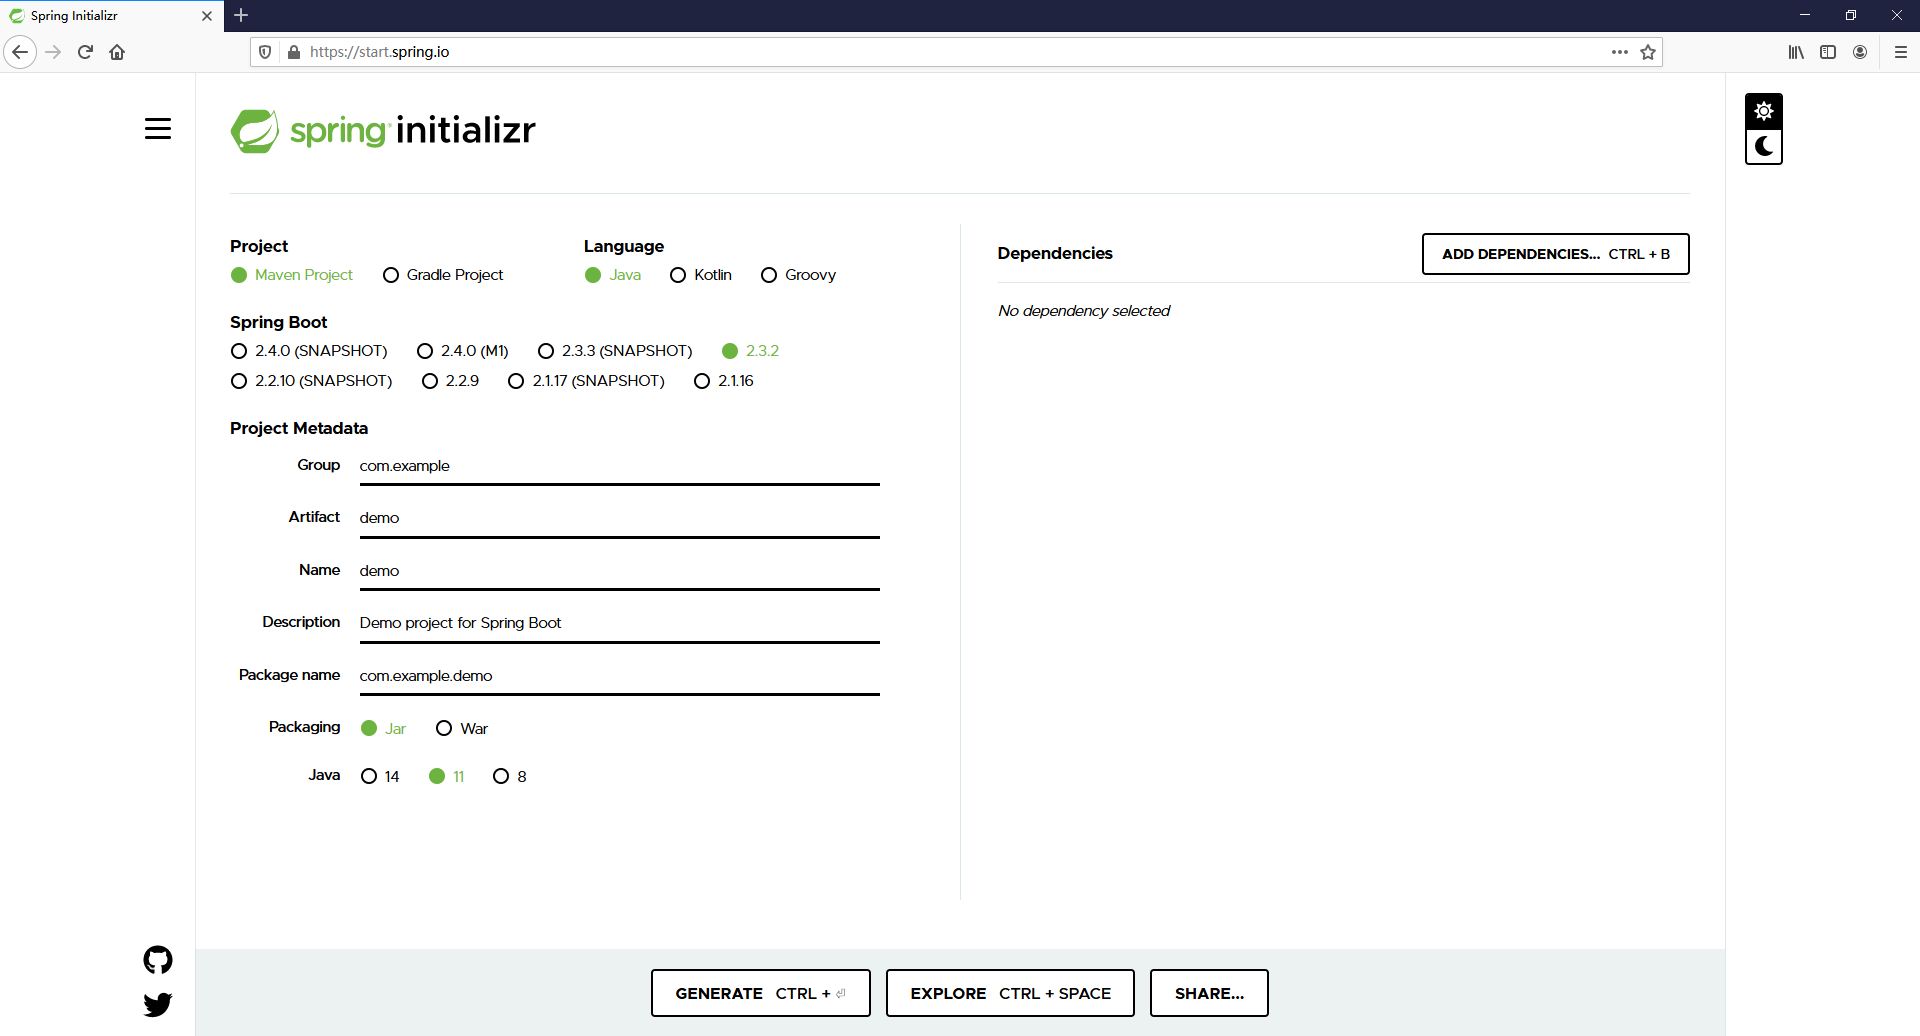
①选择Project构建工具 -> Maven Project
②选择Language -> Java
③选择Spring Boot版本 -> 2.3.2当前稳定版本
④填入Project Metadata
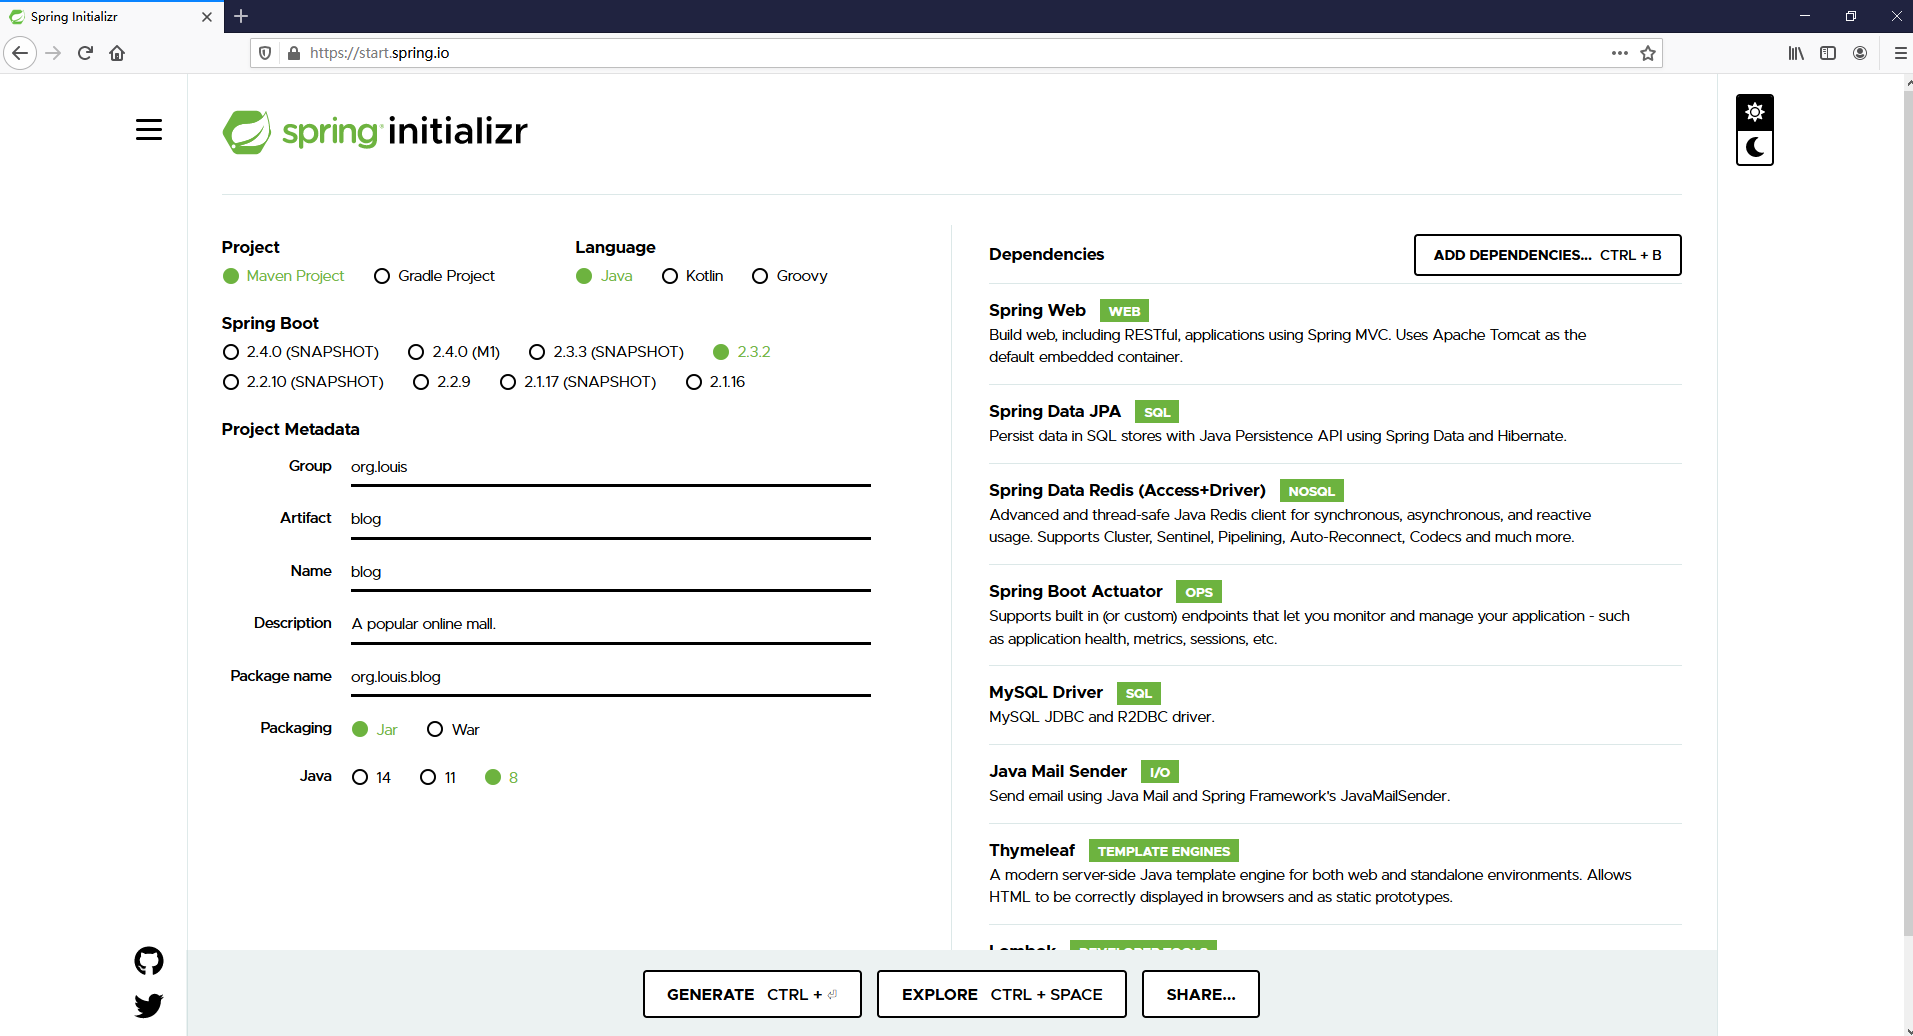
Group:一般是倒域名【org.louis】
Artifact:项目名【blog】
Name:项目名【blog】
Description:描述【A popular online mall.】
Packaging:打包类型【Jar】,SpringBoot运行时的打包项目,一般SpringBoot都是打为Jar包,如果使用Tomcat容器的话就选择War包
Java:Java版本,主流项目选Java8,个人项目可以选择Java11进行测试
接下来是重点:引入依赖【Dependencies】
这里推荐一些经常使用的依赖:
①Spring Web:Build web, including RESTful, applications using Spring MVC. Uses Apache Tomcat as the default embedded container.
②Spring Data JPA:Persist data in SQL stores with Java Persistence API using Spring Data and Hibernate.
③Spring Data Redis:Advanced and thread-safe Java Redis client for synchronous, asynchronous, and reactive usage. Supports Cluster, Sentinel, Pipelining, Auto-Reconnect, Codecs and much more.
④Spring Boot Actuator:Supports built in (or custom) endpoints that let you monitor and manage your application - such as application health, metrics, sessions, etc.
⑤MySQL Driver:MySQL JDBC and R2DBC driver.
⑥Java Mail Sender:Send email using Java Mail and Spring Framework's JavaMailSender.
⑦Thymeleaf:A modern server-side Java template engine for both web and standalone environments. Allows HTML to be correctly displayed in browsers and as static prototypes.
⑧Lombok:Java annotation library which helps to reduce boilerplate code.
再额外推荐一些常用的依赖:
        <!-- WebSocket -->

        <dependency>

            <groupId>org.springframework.boot</groupId>

            <artifactId>spring-boot-starter-websocket</artifactId>

        </dependency>

        <!-- Test -->

        <dependency>

            <groupId>org.springframework.boot</groupId>

            <artifactId>spring-boot-starter-test</artifactId>

            <scope>test</scope>

        </dependency>

        <!-- gson依赖 -->

        <dependency>

            <groupId>com.google.code.gson</groupId>

            <artifactId>gson</artifactId>

            <version>2.8.2</version>

        </dependency>

        <!--依赖nekoHTML 1.9.15 or newer的版本  -->

        <dependency>

            <groupId>net.sourceforge.nekohtml</groupId>

            <artifactId>nekohtml</artifactId>

            <version>1.9.22</version>

        </dependency>

        <!-- 支持 @ConfigurationProperties 注解 -->

        <dependency>

            <groupId>org.springframework.boot</groupId>

            <artifactId>spring-boot-configuration-processor</artifactId>

            <optional>true</optional>

        </dependency>

        <!-- JWT  Token -->

        <dependency>

            <groupId>io.jsonwebtoken</groupId>

            <artifactId>jjwt</artifactId>

            <version>0.6.0</version>

        </dependency>

        <!-- 文件上传所依赖的jar包 -->

        <dependency>

            <groupId>commons-fileupload</groupId>

            <artifactId>commons-fileupload</artifactId>

            <version>1.3.1</version>

        </dependency>

        <dependency>

            <groupId>commons-net</groupId>

            <artifactId>commons-net</artifactId>

            <version>3.3</version>

        </dependency>

        <dependency>

            <groupId>cn.hutool</groupId>

            <artifactId>hutool-all</artifactId>

            <version>4.5.10</version>

        </dependency>

        <!-- https://mvnrepository.com/artifact/com.google.zxing/core -->

        <dependency>

            <groupId>com.google.zxing</groupId>

            <artifactId>core</artifactId>

            <version>3.1.0</version>

        </dependency>

        <!-- Swagger2-ui用于生成、描述、调用和可视化 RESTful 风格的 Web 服务 -->

        <dependency>

            <groupId>io.springfox</groupId>

            <artifactId>springfox-swagger2</artifactId>

            <version>2.9.2</version>

        </dependency>

        <dependency>

            <groupId>io.springfox</groupId>

            <artifactId>springfox-swagger-ui</artifactId>

            <version>2.9.2</version>

        </dependency>

        <!-- alibabaJSON -->

        <dependency>

            <groupId>com.alibaba</groupId>

            <artifactId>fastjson</artifactId>

            <version>1.2.58</version>

        </dependency>

        <!-- 实现跨服务器文件传输 -->

        <dependency>

          <groupId>com.jcraft</groupId>

          <artifactId>jsch</artifactId>

          <version>0.1.49</version>

        </dependency>

        <!-- Emoji表情 -->

        <dependency>

            <groupId>com.vdurmont</groupId>

            <artifactId>emoji-java</artifactId>

            <version>4.0.0</version>

        </dependency>

        <!--WebSocket作为Java客户端-->

        <dependency>

            <groupId>org.java-websocket</groupId>

            <artifactId>Java-WebSocket</artifactId>

            <version>1.3.5</version>

        </dependency>

        <!--compress压缩解压包-->

        <dependency>

            <groupId>org.apache.commons</groupId>

            <artifactId>commons-compress</artifactId>

            <version>1.18</version>

        </dependency>

        <!-- ZeroMQ -->

        <dependency>

              <groupId>org.zeromq</groupId>

              <artifactId>jeromq</artifactId>

              <version>0.3.1</version>

        </dependency>

        <!-- @Transactional注解写在class上,就会导致InterceptorBinding类报错 -->

        <!-- 引入InterceptorBinding依赖, 启动不会报错,否则直接注解方法不会报错-->

        <dependency>

            <groupId>javax.interceptor</groupId>

            <artifactId>javax.interceptor-api</artifactId>

            <version>1.2</version>

        </dependency>
配置好之后,点击 EXPLORE 开始导出

在弹窗后点击 DOWNLOAD 开始下载

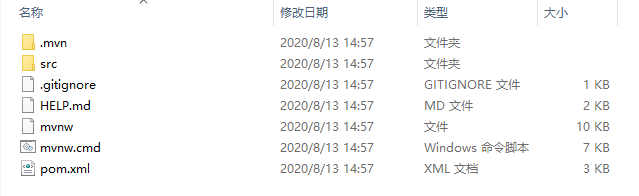
现在,一个完整的SpringBoot项目就创建好了!

解压出来用编辑器打开就可以开心的撸代码了!
推荐阅读:强烈推荐的 IntelliJ IDEA 插件,别说我没告诉你
喜欢的话记得推荐并收藏哦~~~
在线快速创建SpringBoot项目的更多相关文章
- 2springboot:快速创建springboot项目
使用IDEA快速创建springboot项目流程: 创建新的项目选择 项目的命名以及包名 需要什么包就导入什么包 进行测试的单元 <dependency> <groupId>o ...
- Spring-boot(一)通过向导快速创建Spring-boot项目
通过向导快速创建Spring-boot项目 创建步骤: 选择Spring Initializr 填写组织和模块名 选择对应的模块 注:这里左侧的模块比较多,玩家可以根据自己的实际需要自由选择,此处暂时 ...
- 【快学springboot】1.快速创建springboot项目
若图片查看异常,请前往掘金查看:https://juejin.im/post/5d00e793f265da1b614ff10b 使用spring initialize工具快速创建springboot项 ...
- SpringBoot入门系列(一)如何快速创建SpringBoot项目
这段时间也没什么事情,所以就重新学习整理了Spring Boot的相关内容.今天开始整理更新Spring Boot学习笔记,感兴趣的朋友可以关注我的博客:https://www.cnblogs.com ...
- 3 快速创建SpringBoot项目
一.Intellij IDEA 创建Spring Boot项目 1.创建工程 2.选择Spring Initializr 3.设置Maven版本管理参数 4.选择引用模块 5.命名工程名 6.选 ...
- 快速创建springboot项目,并进行增删改
创建普通maven项目,pom依赖如下 <parent> <artifactId>spring-boot-starter-parent</artifactId> & ...
- 2.快速创建springboot项目 连pom文件里面的配置都不用配了
无论是创建项目 还是module 模块 选择这个 .然后在后面的选择中选择自己要的功能 就可以把相关的依赖都加进去 省去了依赖 其后的写法跟第一篇一样 在这个项目下面有一个配置文件 ====>a ...
- 使用spring initialization创建SpringBoot项目
https://blog.csdn.net/liutong123987/article/details/79385513 有很多方法可以快速创建Springboot项目,可以通过idea的spring ...
- SrpingBoot入门到入坟03-基于idea快速创建SpringBoot应用
先前先创建Maven项目然后依照官方文档再然后编写主程序写业务逻辑代码才建立好SpringBoot项目,这样太过麻烦,IDE都支持快速创建,下面基于idea: 使用Spring Initializer ...
随机推荐
- Salesforce LWC学习(十九) 针对 lightning-input-field的label值重写
本篇参考: https://salesforcediaries.com/2020/02/24/how-to-override-lightning-input-field-label-in-lightn ...
- JS内存机制
在看JS内存机制之前我们先来看一下JS是门什么样的语言,他又有哪些变量类型. 动静态,强弱类型 静态:在使用之前就需要确认其变量数据类型. 动态:在运行过程中需要检查数据类型. 强类型:不支持隐式类型 ...
- 题解 SP1841 【PPATH - Prime Path】
模拟赛考到了这个题,但我傻傻的用了\(DFS\),于是爆了零 后来才想明白,因为搜索树的分支很多,但答案的深度却又没有那么深,所以在这里\(BFS\),而\(DFS\)一路搜到底的做法则会稳稳地\(T ...
- 分布式 ID 解决方案之美团 Leaf
分布式 ID 在庞大复杂的分布式系统中,通常需要对海量数据进行唯一标识,随着数据日渐增长,对数据分库分表以后需要有一个唯一 ID 来标识一条数据,而数据库的自增 ID 显然不能满足需求,此时就需要有一 ...
- jsp课堂笔记1
http协议:规范浏览器和服务器交互或通信的规则 https:基于http实现,比http更加安全,提供了身份验证和通信内容加密 服务器:1.配置比较高的电脑 2.他就是一个应用 http1.0: ...
- GridMask:一种数据增强方法
GridMask Data Augmentation, ARXIV 2020 代码地址:https://github.com/akuxcw/GridMask 这篇论文提出了一种简单的数据增强方法,在图 ...
- vue -电子时钟
<!DOCTYPE html> <html lang="en"> <head> <meta charset="UTF-8&quo ...
- CORS跨域操作cookie
CORS 跨域 在服务端设置响应头 ACAO( Access-Control-Allow-Origin )即可 前端代码,运行在 8080 端口上 $.ajax({ url:'http://local ...
- 使用 MySQLi 和 PDO 向 MySQL 插入数据
PHP MySQL 插入数据 使用 MySQLi 和 PDO 向 MySQL 插入数据 在创建完数据库和表后,我们可以向表中添加数据. 以下为一些语法规则: PHP 中 SQL 查询语句必须使用引号 ...
- luogu P3920 [WC2014]紫荆花之恋
LINK:紫荆花之恋 每次动态加入一个节点 统计 有多少个节点和当前节点的距离小于他们的权值和. 显然我们不能n^2暴力. 考虑一个简化版的问题 树已经给出 每次求某个节点和其他节点的贡献. 不难想到 ...