Zabbix监控redis status
概述
zabbix采用Trapper方式监控redis status
原理
redis-cli info命令得到redis服务器的统计信息,脚本对信息分两部分处理:
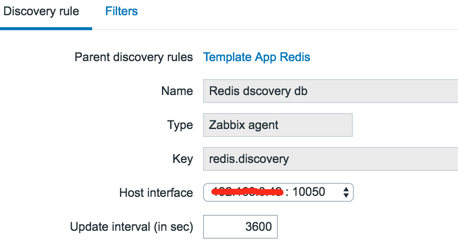
(1)# Keyspace部分为Zabbix agent,因为不确定db的数目所以此段的items也不确定,Zabbix server需要low level discovery(redis.discovery脚本)来确定db的数目以确定对redis服务器发起哪些items请求
(2)其余部分为Zabbix trapper,脚本整理这些信息并向Zabbix server发送(items要事先定义好)
配置
(1)Zabbix agent
low level discovery
item prototypes

userparameter_redis.conf
#Redis

UserParameter=redis.discovery,/m2odata/server/zabbix-agent/scripts/lld-redis.py -a password

UserParameter=redis[*],/m2odata/server/zabbix-agent/scripts/redis_zabbix.py $ $ $ -a password
lld-redis.py
#!/usr/bin/env python

#-*- coding: utf-8 -*-

__author__ = 'pdd'

__date__ = '2016/11/28'

''' redis db low level discovery '''

import re

import json

import redis

def discovery(host, port, password):

    client = redis.StrictRedis(host=host, port=port, password=password)

    server_info = client.info()

    dbs = [('db%d' % x) for x in range(0,16) if ('db%d' % x) in server_info]  # redis默认15个db

    data = [{"{#DBNAME}": db} for db in dbs]

    print(json.dumps({"data": data}, indent=4))

if __name__=='__main__':

    host = '127.0.0.1'

    port = 6379

    password = 'password'

    discovery(host, port, password)
(2)Zabbix trapper # 一分钟发送一次数据到Zabbix server
*/ * * * * /storage/server/zabbix-agent/scripts/redis_zabbix.py -a password
redis_zabbix.py
#!/usr/bin/python

import redis, json, re, struct, time, socket, argparse

parser = argparse.ArgumentParser(description='Zabbix Redis status script')

parser.add_argument('redis_hostname',nargs='?')

parser.add_argument('metric',nargs='?')

parser.add_argument('db',default='none',nargs='?')

parser.add_argument('-p','--port',dest='redis_port',action='store',help='Redis server port',default=6379,type=int)

parser.add_argument('-a','--auth',dest='redis_pass',action='store',help='Redis server pass',default=None)

args = parser.parse_args()

zabbix_host = '127.0.0.1' #IP address of Zabbix Server

             # Zabbix Server IP

zabbix_port = 10051             # Zabbix Server Port

# Name of monitored server like it shows in zabbix web ui display

redis_hostname = args.redis_hostname if args.redis_hostname else socket.gethostname()

class Metric(object):

    def __init__(self, host, key, value, clock=None):

        self.host = host

        self.key = key

        self.value = value

        self.clock = clock

    def __repr__(self):

        result = None

        if self.clock is None:

            result = 'Metric(%r, %r, %r)' % (self.host, self.key, self.value)

        else:

            result = 'Metric(%r, %r, %r, %r)' % (self.host, self.key, self.value, self.clock)

        return result

def send_to_zabbix(metrics, zabbix_host, zabbix_port):

    result = None

    j = json.dumps

    metrics_data = []

    for m in metrics:

        clock = m.clock or ('%d' % time.time())

        metrics_data.append(('{"host":%s,"key":%s,"value":%s,"clock":%s}') % (j(m.host), j(m.key), j(m.value), j(clock)))

    json_data = ('{"request":"sender data","data":[%s]}') % (','.join(metrics_data))

    data_len = struct.pack('<Q', len(json_data))

    packet = 'ZBXD\x01'+ data_len + json_data

    # For debug:

    #print(packet)

    #print(':'.join(x.encode('hex') for x in packet))

    try:

        zabbix = socket.socket()

        zabbix.connect((zabbix_host, zabbix_port))

        zabbix.sendall(packet)

        resp_hdr = _recv_all(zabbix, 13)

        if not resp_hdr.startswith('ZBXD\x01') or len(resp_hdr) != 13:

            print('Wrong zabbix response')

            result = False

        else:

            resp_body_len = struct.unpack('<Q', resp_hdr[5:])[0]

            resp_body = zabbix.recv(resp_body_len)

            zabbix.close()

            resp = json.loads(resp_body)

            # For debug

            # print(resp)

            if resp.get('response') == 'success':

                result = True

            else:

                print('Got error from Zabbix: %s' % resp)

                result = False

    except:

        print('Error while sending data to Zabbix')

        result = False

    finally:

        return result

def _recv_all(sock, count):

    buf = ''

    while len(buf)<count:

        chunk = sock.recv(count-len(buf))

        if not chunk:

            return buf

        buf += chunk

    return buf

def main():

    if redis_hostname and args.metric:

        client = redis.StrictRedis(host=redis_hostname, port=args.redis_port, password=args.redis_pass)

        server_info = client.info()

        if args.metric:

            if args.db and args.db in server_info.keys():

                server_info['key_space_db_keys'] = server_info[args.db]['keys']

                server_info['key_space_db_expires'] = server_info[args.db]['expires']

                server_info['key_space_db_avg_ttl'] = server_info[args.db]['avg_ttl']

            def list_key_space_db():

                if args.db in server_info:

                    print(args.db)

                else:

                    print('database_detect')

            def default():

                if args.metric in server_info.keys():

                    print(server_info[args.metric])

            {

                'list_key_space_db': list_key_space_db,

            }.get(args.metric, default)()

        else:

            print('Not selected metric');

    else:

        client = redis.StrictRedis(host=redis_hostname, port=args.redis_port, password=args.redis_pass)

        server_info = client.info()

        a = []

        for i in server_info:

            a.append(Metric(redis_hostname, ('redis[%s]' % i), server_info[i]))

        # Send packet to zabbix

        send_to_zabbix(a, zabbix_host, zabbix_port)

if __name__ == '__main__':

    main()
参考:https://github.com/blacked/zbx_redis_template
Zabbix监控redis status的更多相关文章
- Zabbix 监控redis
Zabbix 监控redis 1.监控脚本,github上的 [root@localhost ~]# cat /etc/zabbix/script/redis-status.sh #!/bin/bas ...
- Zabbix监控nginx-rtmp status(json版)
与前面的文章 zabbix监控nginx-rtmp status(html版)区别只在于取值的页面不一样 http://127.0.0.1:81/control/get/all_streams sta ...
- Zabbix应用六:Zabbix监控Redis
利用Zabbix监控Redis Zabbix监控redis就比较简单了,因为zabbix官方提供了监控redis的模版和脚本,而且脚本有nodejs和python两种,下载地址:https://git ...
- 01:zabbix监控redis
一.zabbix 自动发现并监控redis多实例 1.1 编写脚本 1.1.1 redis_low_discovery.sh 用于发现redis多实例 [root@redis02 homed]# ca ...
- (十二)zabbix监控redis
1)agent端配置 安装redis yum install epel-release -y yum install redis -y 配置认证密码 #vim /etc/redis.conf requ ...
- Zabbix监控php-fpm status
开启php-fpm status php-fpm.conf pm.status_path = /statusx45 nginx.conf location ~ /(statusx45)$ { incl ...
- Zabbix监控nginx status
nginx开启status ./configure --with-http_stub_status_module nginx.conflocation /statusx35 { stub_status ...
- Zabbix监控nginx-rtmp status(html版)
nginx-rtmp开启stats # nginx(--add-module=nginx-rtmp-module-master) nginx.conf: server { listen ; locat ...
- zabbix 监控 redis
redis 可以直接使用zabbix官方的模板 模板地址: https://github.com/blacked/zbx_redis_template redis 主机通过脚本把数据推送到zabbi ...
随机推荐
- Jquery取得iframe中元素的几种方法
[jquery]获取iframe中的body元素: $("iframe").contents().find("body").html(); [使用jquery操 ...
- Android中的自定义控件(二)
案例四: 自定义开关 功能介绍:本案例实现的功能是创建一个自定义的开关,可以自行决定开关的背景.当滑动开关时,开关的滑块可跟随手指移动.当手指松开后,滑块根据开关的状态,滑到最右边或者滑到 ...
- mvc mvp mvvm模式的区别
mvc模式中,Model不依赖于View,但是View是依赖于Model的,m和v没有进行完全的分离,三者之间是单向的操作 mvp模式中,m和v之间的交互是双向的,m和v完全分离,m和v的交互是通过P ...
- UI-切圆角、透明度、取消按钮点击高亮效果、按钮文字带下划线
一.切UIView的某个角为圆角 如果需要将UIView的4个角全部都为圆角,做法相当简单,只需设置其Layer的cornerRadius属性即可(项目需要使用QuartzCore框架).而若要指定某 ...
- ssl + nginx + tomcat 部署方案
安装make yum -y install gcc automake autoconf libtool make 安装g++ yum install gcc gcc-c++ 安装PCRE cd /us ...
- MySQL 一致性读 深入研究
一致性读,又称为快照读.使用的是MVCC机制读取undo中的已经提交的数据.所以它的读取是非阻塞的. 相关文档:http://dev.mysql.com/doc/refman/5.6/en/innod ...
- 被我们忽略的HttpSession线程安全问题
1. 背景 最近在读<Java concurrency in practice>(Java并发实战),其中1.4节提到了Java web的线程安全问题时有如下一段话: Servlets a ...
- tcpdump、nc网络工具使用
tcpdump: 网络嗅探器 nc: nmap: 端口扫描 混杂模式(promisc) C设置为监控,当A和B通信,C是无法探测到数据的,除非有交换机的权限,将全网端口的数据通信都发送副本到C的端口上 ...
- Windows Git安装指南
步骤如下: 1.资源下载 :Git-1.9.4-preview20140815.exe http://code.google.com/p/tortoisegit/downloads/list 2.安装 ...
- JSP动作元素——————理论篇
JSP动作元素的组成及作用 JSP使用Action来控制Servlet引擎的行为,可重复使用JavaBean组件. 常用Action: jsp:param 在 jsp:include.js ...