
gazebo+rviz 仿真
gazebo小车模型创建及键盘操控详见之前的博客
参考链接
Part 1 : 里程计查看
效果图
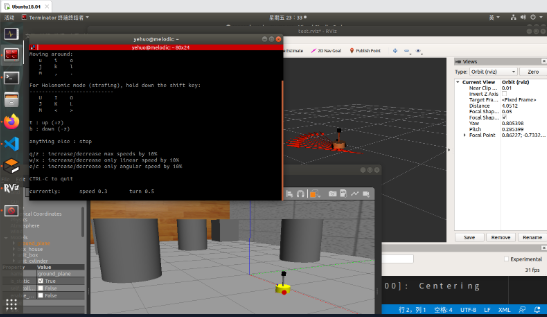
step1: 添加需要的文件
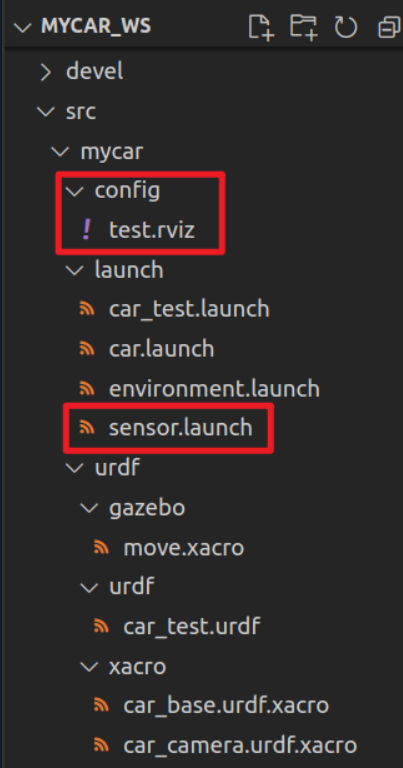
src/mycar/config/test.rviz
Panels:

  - Class: rviz/Displays

    Help Height: 78

    Name: Displays

    Property Tree Widget:

      Expanded:

        - /Global Options1

        - /Status1

        - /RobotModel1

        - /TF1

        - /Odometry1

        - /Odometry1/Shape1

      Splitter Ratio: 0.5

    Tree Height: 670

  - Class: rviz/Selection

    Name: Selection

  - Class: rviz/Tool Properties

    Expanded:

      - /2D Pose Estimate1

      - /2D Nav Goal1

      - /Publish Point1

    Name: Tool Properties

    Splitter Ratio: 0.5886790156364441

  - Class: rviz/Views

    Expanded:

      - /Current View1

    Name: Views

    Splitter Ratio: 0.5

  - Class: rviz/Time

    Experimental: false

    Name: Time

    SyncMode: 0

    SyncSource: ""

Preferences:

  PromptSaveOnExit: true

Toolbars:

  toolButtonStyle: 2

Visualization Manager:

  Class: ""

  Displays:

    - Alpha: 0.5

      Cell Size: 1

      Class: rviz/Grid

      Color: 160; 160; 164

      Enabled: true

      Line Style:

        Line Width: 0.029999999329447746

        Value: Lines

      Name: Grid

      Normal Cell Count: 0

      Offset:

        X: 0

        Y: 0

        Z: 0

      Plane: XY

      Plane Cell Count: 10

      Reference Frame: <Fixed Frame>

      Value: true

    - Alpha: 1

      Class: rviz/RobotModel

      Collision Enabled: false

      Enabled: true

      Links:

        All Links Enabled: true

        Expand Joint Details: false

        Expand Link Details: false

        Expand Tree: false

        Link Tree Style: Links in Alphabetic Order

        back_wheel:

          Alpha: 1

          Show Axes: false

          Show Trail: false

          Value: true

        base_footprint:

          Alpha: 1

          Show Axes: false

          Show Trail: false

          Value: true

        base_link:

          Alpha: 1

          Show Axes: false

          Show Trail: false

          Value: true

        camera:

          Alpha: 1

          Show Axes: false

          Show Trail: false

          Value: true

        front_wheel:

          Alpha: 1

          Show Axes: false

          Show Trail: false

          Value: true

        laser:

          Alpha: 1

          Show Axes: false

          Show Trail: false

          Value: true

        left_wheel:

          Alpha: 1

          Show Axes: false

          Show Trail: false

          Value: true

        right_wheel:

          Alpha: 1

          Show Axes: false

          Show Trail: false

          Value: true

        support:

          Alpha: 1

          Show Axes: false

          Show Trail: false

          Value: true

      Name: RobotModel

      Robot Description: robot_description

      TF Prefix: ""

      Update Interval: 0

      Value: true

      Visual Enabled: true

    - Class: rviz/TF

      Enabled: false

      Frame Timeout: 15

      Frames:

        All Enabled: true

      Marker Scale: 1

      Name: TF

      Show Arrows: true

      Show Axes: true

      Show Names: true

      Tree:

        {}

      Update Interval: 0

      Value: false

    - Angle Tolerance: 0.10000000149011612

      Class: rviz/Odometry

      Covariance:

        Orientation:

          Alpha: 0.5

          Color: 255; 255; 127

          Color Style: Unique

          Frame: Local

          Offset: 1

          Scale: 1

          Value: true

        Position:

          Alpha: 0.30000001192092896

          Color: 204; 51; 204

          Scale: 1

          Value: true

        Value: true

      Enabled: true

      Keep: 10

      Name: Odometry

      Position Tolerance: 0.10000000149011612

      Shape:

        Alpha: 1

        Axes Length: 1

        Axes Radius: 0.10000000149011612

        Color: 255; 25; 0

        Head Length: 0.30000001192092896

        Head Radius: 0.05000000074505806

        Shaft Length: 1

        Shaft Radius: 0.009999999776482582

        Value: Arrow

      Topic: /odom

      Unreliable: false

      Value: true

  Enabled: true

  Global Options:

    Background Color: 48; 48; 48

    Default Light: true

    Fixed Frame: odom

    Frame Rate: 30

  Name: root

  Tools:

    - Class: rviz/Interact

      Hide Inactive Objects: true

    - Class: rviz/MoveCamera

    - Class: rviz/Select

    - Class: rviz/FocusCamera

    - Class: rviz/Measure

    - Class: rviz/SetInitialPose

      Theta std deviation: 0.2617993950843811

      Topic: /initialpose

      X std deviation: 0.5

      Y std deviation: 0.5

    - Class: rviz/SetGoal

      Topic: /move_base_simple/goal

    - Class: rviz/PublishPoint

      Single click: true

      Topic: /clicked_point

  Value: true

  Views:

    Current:

      Class: rviz/Orbit

      Distance: 6.243990898132324

      Enable Stereo Rendering:

        Stereo Eye Separation: 0.05999999865889549

        Stereo Focal Distance: 1

        Swap Stereo Eyes: false

        Value: false

      Focal Point:

        X: -0.6781591773033142

        Y: 0.7335925102233887

        Z: -0.1656564623117447

      Focal Shape Fixed Size: true

      Focal Shape Size: 0.05000000074505806

      Invert Z Axis: false

      Name: Current View

      Near Clip Distance: 0.009999999776482582

      Pitch: 0.3703985810279846

      Target Frame: <Fixed Frame>

      Value: Orbit (rviz)

      Yaw: 0.8403980731964111

    Saved: ~

Window Geometry:

  Displays:

    collapsed: false

  Height: 967

  Hide Left Dock: false

  Hide Right Dock: false

  QMainWindow State: 000000ff00000000fd00000004000000000000015600000329fc0200000008fb0000001200530065006c0065006300740069006f006e00000001e10000009b0000005c00fffffffb0000001e0054006f006f006c002000500072006f007000650072007400690065007302000001ed000001df00000185000000a3fb000000120056006900650077007300200054006f006f02000001df000002110000018500000122fb000000200054006f006f006c002000500072006f0070006500720074006900650073003203000002880000011d000002210000017afb000000100044006900730070006c006100790073010000003d00000329000000c900fffffffb0000002000730065006c0065006300740069006f006e00200062007500660066006500720200000138000000aa0000023a00000294fb00000014005700690064006500530074006500720065006f02000000e6000000d2000003ee0000030bfb0000000c004b0069006e0065006300740200000186000001060000030c00000261000000010000010f00000329fc0200000003fb0000001e0054006f006f006c002000500072006f00700065007200740069006500730100000041000000780000000000000000fb0000000a00560069006500770073010000003d00000329000000a400fffffffb0000001200530065006c0065006300740069006f006e010000025a000000b200000000000000000000000200000490000000a9fc0100000001fb0000000a00560069006500770073030000004e00000080000002e100000197000000030000062d0000003efc0100000002fb0000000800540069006d006501000000000000062d000002eb00fffffffb0000000800540069006d00650100000000000004500000000000000000000003bc0000032900000004000000040000000800000008fc0000000100000002000000010000000a0054006f006f006c00730100000000ffffffff0000000000000000

  Selection:

    collapsed: false

  Time:

    collapsed: false

  Tool Properties:

    collapsed: false

  Views:

    collapsed: false

  Width: 1581

  X: 67

  Y: 27
src/mycar/launch/sensor.launch
<launch>

    <node pkg="rviz" type="rviz" name="rviz" args="-d $(find mycar)/config/test.rviz" />

    <node pkg="joint_state_publisher" type="joint_state_publisher" name="joint_state_publisher" output="screen" />

    <node pkg="robot_state_publisher" type="robot_state_publisher" name="robot_state_publisher" output="screen" />

</launch>
step2: 运行
在终端启动roscore
roscore
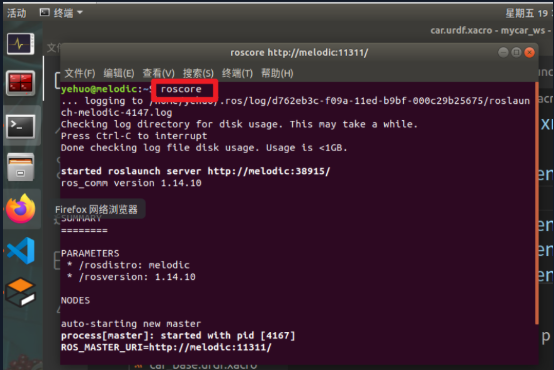
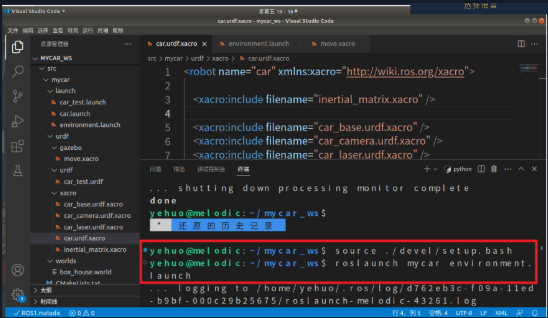
启动gazebo
source ./devel/setup.bash

roslaunch mycar environment.launch
启动rviz
source ./devel/setup.bash

roslaunch mycar sensor.launch
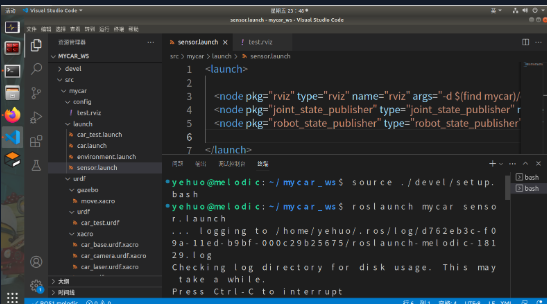
启动键盘控制
rosrun teleop_twist_keyboard teleop_twist_keyboard.py _speed:=0.3 _turn:=0.5

Part 2 : 雷达仿真
效果图

step1: 添加需要的文件
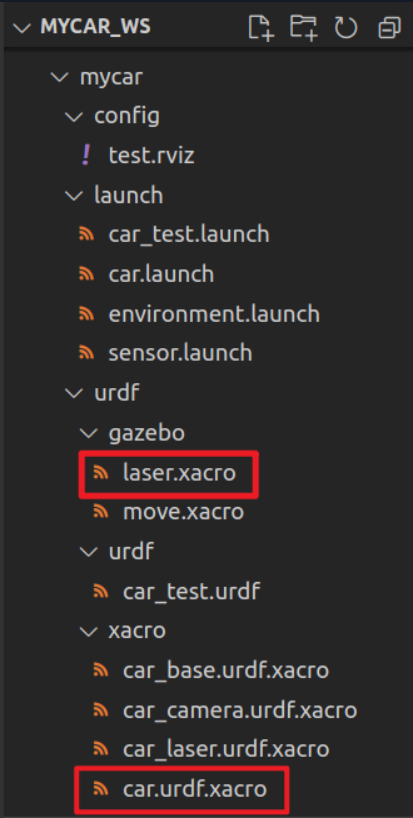
src/mycar/urdf/gazebo/laser.xacro
<robot name="my_sensors" xmlns:xacro="http://wiki.ros.org/xacro">

  <!-- laser -->

  <gazebo reference="laser">

    <sensor type="ray" name="rplidar">

      <pose>0 0 0 0 0 0</pose>

      <visualize>true</visualize>

      <update_rate>5.5</update_rate>

      <ray>

        <scan>

          <horizontal>

            <samples>360</samples>

            <resolution>1</resolution>

            <min_angle>-3</min_angle>

            <max_angle>3</max_angle>

          </horizontal>

        </scan>

        <range>

          <min>0.10</min>

          <max>30.0</max>

          <resolution>0.01</resolution>

        </range>

        <noise>

          <type>gaussian</type>

          <mean>0.0</mean>

          <stddev>0.01</stddev>

        </noise>

      </ray>

      <plugin name="gazebo_rplidar" filename="libgazebo_ros_laser.so">

        <topicName>/scan</topicName>

        <frameName>laser</frameName>

      </plugin>

    </sensor>

  </gazebo>

</robot>
src/mycar/urdf/xacro/car.urdf.xacro
<robot name="car" xmlns:xacro="http://wiki.ros.org/xacro">

    <xacro:include filename="inertial_matrix.xacro" />

    <xacro:include filename="car_base.urdf.xacro" />

    <xacro:include filename="car_camera.urdf.xacro" />

    <xacro:include filename="car_laser.urdf.xacro" />

    <!-- move control  -->

     <xacro:include filename="../gazebo/move.xacro" />

    <!-- laser control  -->

     <xacro:include filename="../gazebo/laser.xacro" />

</robot>
step2: 运行
在终端启动roscore
roscore

启动gazebo
source ./devel/setup.bash

roslaunch mycar environment.launch

启动rviz
source ./devel/setup.bash

roslaunch mycar sensor.launch
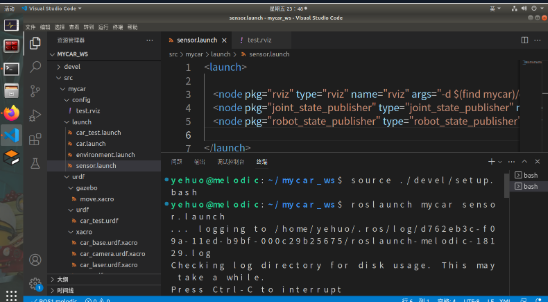
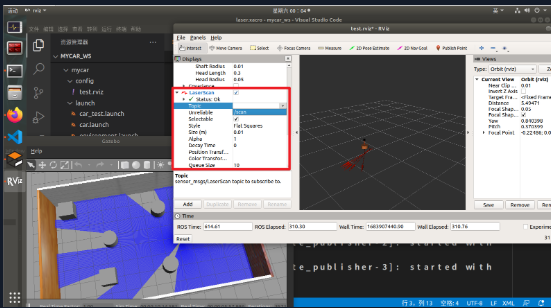
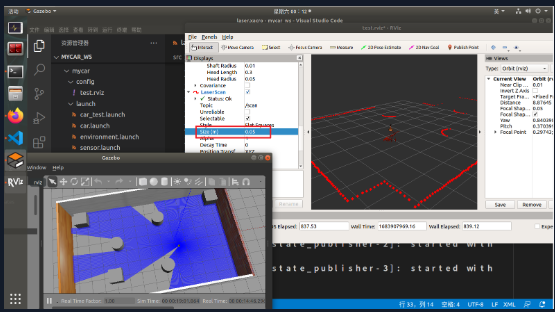
step3: 配置 rviz
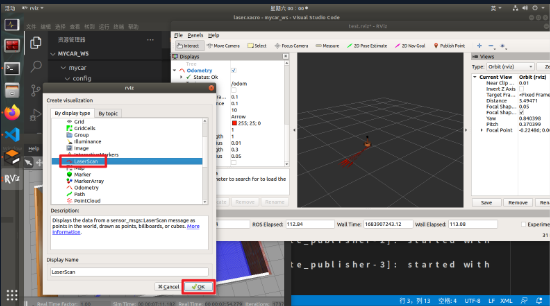
Part 3 : 摄像头仿真
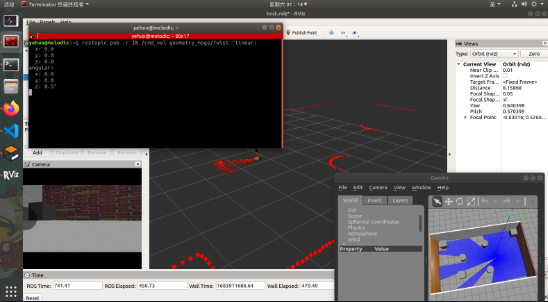
效果图
step1: 添加需要的文件
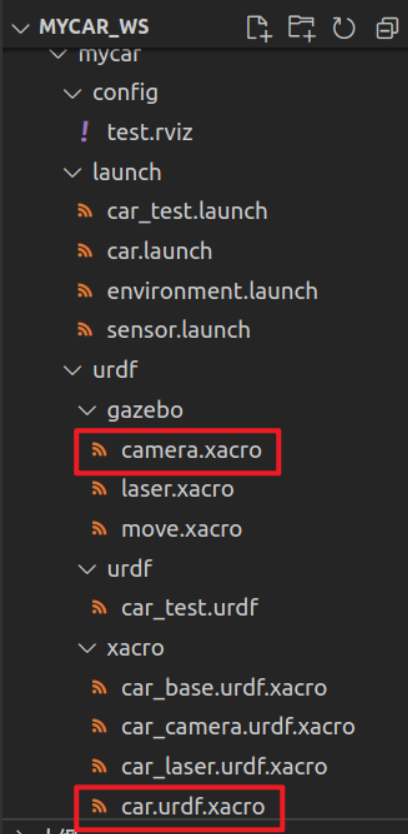
src/mycar/urdf/gazebo/camera.xacro
<robot name="my_sensors" xmlns:xacro="http://wiki.ros.org/xacro">

  <gazebo reference="camera">

    <sensor type="camera" name="camera_node">

      <update_rate>30.0</update_rate>

      <camera name="head">

        <horizontal_fov>1.3962634</horizontal_fov>

        <image>

          <width>1280</width>

          <height>720</height>

          <format>R8G8B8</format>

        </image>

        <clip>

          <near>0.02</near>

          <far>300</far>

        </clip>

        <noise>

          <type>gaussian</type>

          <mean>0.0</mean>

          <stddev>0.007</stddev>

        </noise>

      </camera>

      <plugin name="gazebo_camera" filename="libgazebo_ros_camera.so">

        <alwaysOn>true</alwaysOn>

        <updateRate>0.0</updateRate>

        <cameraName>/camera</cameraName>

        <imageTopicName>image_raw</imageTopicName>

        <cameraInfoTopicName>camera_info</cameraInfoTopicName>

        <frameName>camera</frameName>

        <hackBaseline>0.07</hackBaseline>

        <distortionK1>0.0</distortionK1>

        <distortionK2>0.0</distortionK2>

        <distortionK3>0.0</distortionK3>

        <distortionT1>0.0</distortionT1>

        <distortionT2>0.0</distortionT2>

      </plugin>

    </sensor>

  </gazebo>

</robot>
src/mycar/urdf/xacro/car.urdf.xacro
<robot name="car" xmlns:xacro="http://wiki.ros.org/xacro">

    <xacro:include filename="inertial_matrix.xacro" />

    <xacro:include filename="car_base.urdf.xacro" />

    <xacro:include filename="car_camera.urdf.xacro" />

    <xacro:include filename="car_laser.urdf.xacro" />

    <!-- move control  -->

     <xacro:include filename="../gazebo/move.xacro" />

    <!-- laser control  -->

     <xacro:include filename="../gazebo/laser.xacro" />

     <!-- camera control  -->

     <xacro:include filename="../gazebo/camera.xacro" />

</robot>
step2: 运行
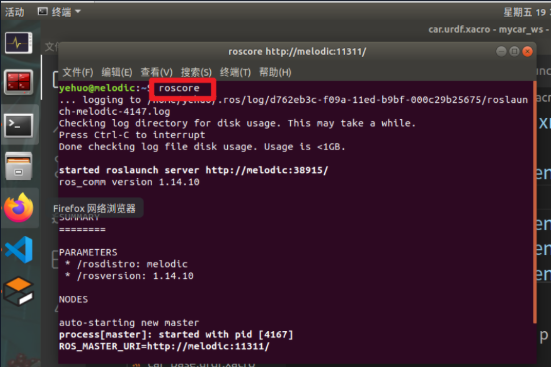
在终端启动roscore
roscore
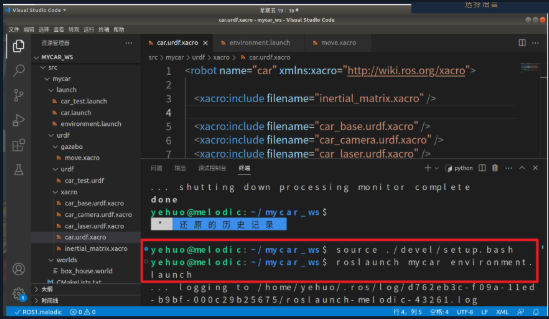
启动gazebo
source ./devel/setup.bash

roslaunch mycar environment.launch
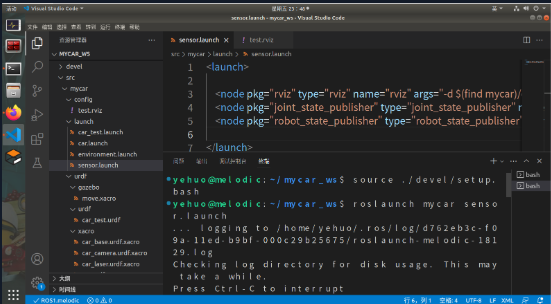
启动rviz
source ./devel/setup.bash

roslaunch mycar sensor.launch
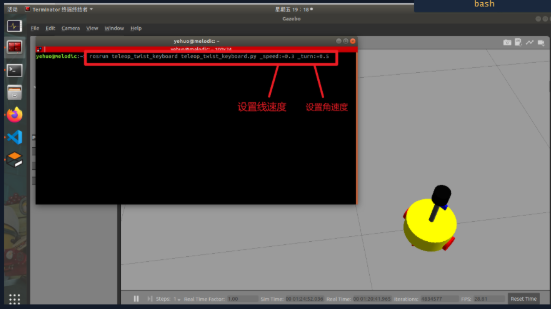
启动键盘控制
rosrun teleop_twist_keyboard teleop_twist_keyboard.py _speed:=0.3 _turn:=0.5
step3: 配置 rviz
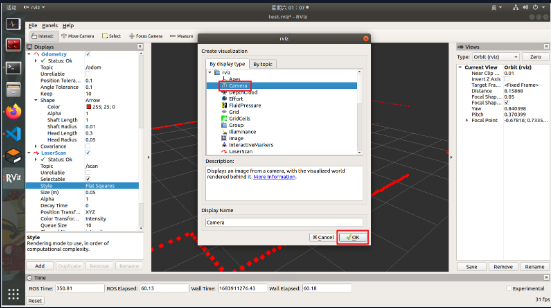

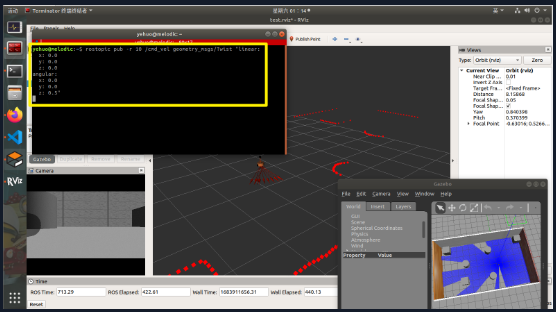
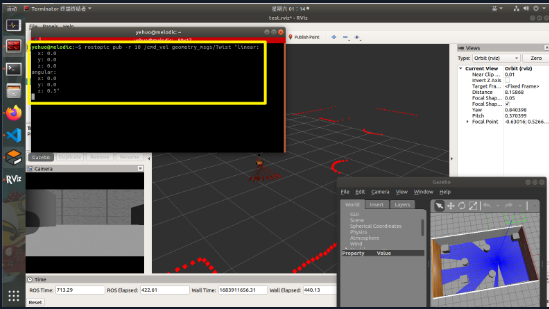
step4: 打开终端,使小车在rviz中旋转
输入以下指令
rostopic pub -r 10 /cmd_vel geometry_msgs/Twist "linear:

  x: 0.0

  y: 0.0

  z: 0.0

angular:

  x: 0.0

  y: 0.0

  z: 0.5"
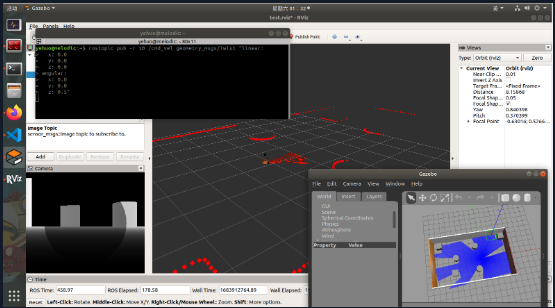
Part 4 : 深度相机仿真
效果图
step1: 添加需要的文件
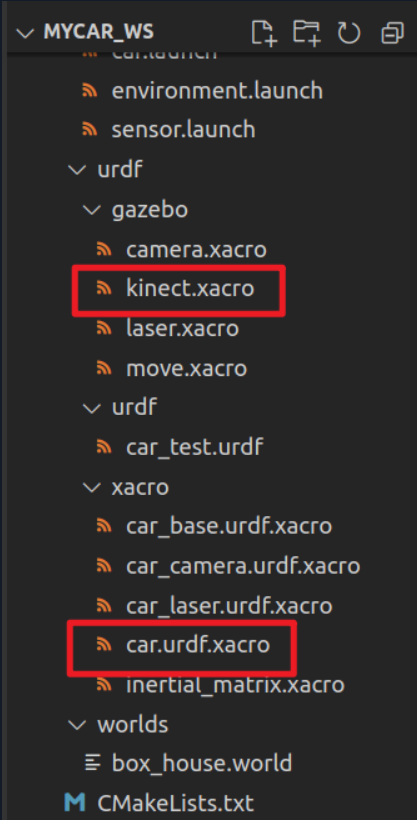
src/mycar/urdf/gazebo/kinect.xacro
<robot name="my_sensors" xmlns:xacro="http://wiki.ros.org/xacro">

    <gazebo reference="support">

      <sensor type="depth" name="camera">

        <always_on>true</always_on>

        <update_rate>20.0</update_rate>

        <camera>

          <horizontal_fov>${60.0*PI/180.0}</horizontal_fov>

          <image>

            <format>R8G8B8</format>

            <width>640</width>

            <height>480</height>

          </image>

          <clip>

            <near>0.05</near>

            <far>8.0</far>

          </clip>

        </camera>

        <plugin name="kinect_camera_controller" filename="libgazebo_ros_openni_kinect.so">

          <cameraName>camera</cameraName>

          <alwaysOn>true</alwaysOn>

          <updateRate>10</updateRate>

          <imageTopicName>rgb/image_raw</imageTopicName>

          <depthImageTopicName>depth/image_raw</depthImageTopicName>

          <pointCloudTopicName>depth/points</pointCloudTopicName>

          <cameraInfoTopicName>rgb/camera_info</cameraInfoTopicName>

          <depthImageCameraInfoTopicName>depth/camera_info</depthImageCameraInfoTopicName>

          <frameName>support</frameName>

          <baseline>0.1</baseline>

          <distortion_k1>0.0</distortion_k1>

          <distortion_k2>0.0</distortion_k2>

          <distortion_k3>0.0</distortion_k3>

          <distortion_t1>0.0</distortion_t1>

          <distortion_t2>0.0</distortion_t2>

          <pointCloudCutoff>0.4</pointCloudCutoff>

        </plugin>

      </sensor>

    </gazebo>

</robot>
src/mycar/urdf/xacro/car.urdf.xacro
<robot name="car" xmlns:xacro="http://wiki.ros.org/xacro">

    <xacro:include filename="inertial_matrix.xacro" />

    <xacro:include filename="car_base.urdf.xacro" />

    <xacro:include filename="car_camera.urdf.xacro" />

    <xacro:include filename="car_laser.urdf.xacro" />

    <!-- move control  -->

     <xacro:include filename="../gazebo/move.xacro" />

    <!-- laser control  -->

     <xacro:include filename="../gazebo/laser.xacro" />

     <!-- camera control  -->

     <xacro:include filename="../gazebo/camera.xacro" />

     <!-- kinect control  -->

     <xacro:include filename="../gazebo/kinect.xacro" />

</robot>
step2: 运行
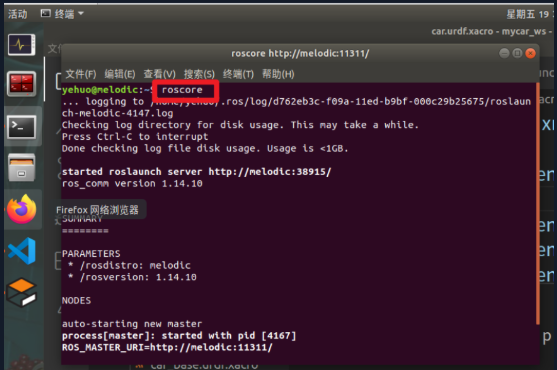
在终端启动roscore
roscore
启动gazebo
source ./devel/setup.bash

roslaunch mycar environment.launch

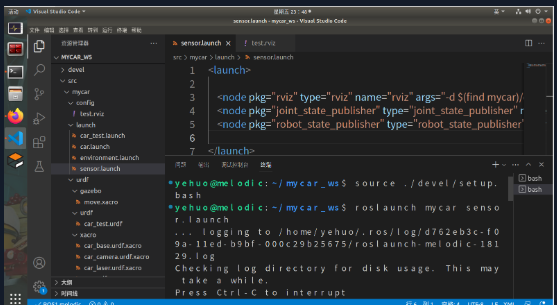
启动rviz
source ./devel/setup.bash

roslaunch mycar sensor.launch
启动键盘控制
rosrun teleop_twist_keyboard teleop_twist_keyboard.py _speed:=0.3 _turn:=0.5

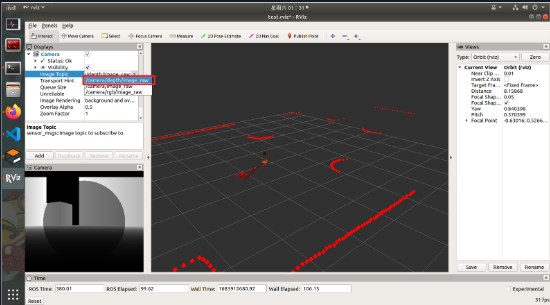
step3: 配置 rviz
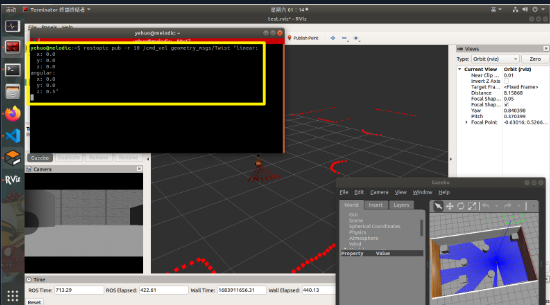
step4: 打开终端,使小车在rviz中旋转
输入以下指令
rostopic pub -r 10 /cmd_vel geometry_msgs/Twist "linear:

  x: 0.0

  y: 0.0

  z: 0.0

angular:

  x: 0.0

  y: 0.0

  z: 0.5"
Part 5 : 深度相机仿真(点云)
效果图

step1: 添加需要的文件

src/mycar/urdf/gazebo/kinect.xacro
<robot name="my_sensors" xmlns:xacro="http://wiki.ros.org/xacro">

    <gazebo reference="support">

      <sensor type="depth" name="camera">

        <always_on>true</always_on>

        <update_rate>20.0</update_rate>

        <camera>

          <horizontal_fov>${60.0*PI/180.0}</horizontal_fov>

          <image>

            <format>R8G8B8</format>

            <width>640</width>

            <height>480</height>

          </image>

          <clip>

            <near>0.05</near>

            <far>8.0</far>

          </clip>

        </camera>

        <plugin name="kinect_camera_controller" filename="libgazebo_ros_openni_kinect.so">

          <cameraName>camera</cameraName>

          <alwaysOn>true</alwaysOn>

          <updateRate>10</updateRate>

          <imageTopicName>rgb/image_raw</imageTopicName>

          <depthImageTopicName>depth/image_raw</depthImageTopicName>

          <pointCloudTopicName>depth/points</pointCloudTopicName>

          <cameraInfoTopicName>rgb/camera_info</cameraInfoTopicName>

          <depthImageCameraInfoTopicName>depth/camera_info</depthImageCameraInfoTopicName>

          <frameName>support_depth</frameName>

          <baseline>0.1</baseline>

          <distortion_k1>0.0</distortion_k1>

          <distortion_k2>0.0</distortion_k2>

          <distortion_k3>0.0</distortion_k3>

          <distortion_t1>0.0</distortion_t1>

          <distortion_t2>0.0</distortion_t2>

          <pointCloudCutoff>0.4</pointCloudCutoff>

        </plugin>

      </sensor>

    </gazebo>

</robot>
src/mycar/launch/sensor.launch
<launch>

    <!-- 添加点云坐标系到kinect连杆坐标系的变换 -->

    <node pkg="tf2_ros" name="static_transform_publisher" type="static_transform_publisher"  args="0 0 0 -1.57 0 -1.57 /support /support_depth" />

    <node pkg="rviz" type="rviz" name="rviz" args="-d $(find mycar)/config/test.rviz" />

    <node pkg="joint_state_publisher" type="joint_state_publisher" name="joint_state_publisher" output="screen" />

    <node pkg="robot_state_publisher" type="robot_state_publisher" name="robot_state_publisher" output="screen" />

</launch>
step2: 运行
在终端启动roscore
roscore

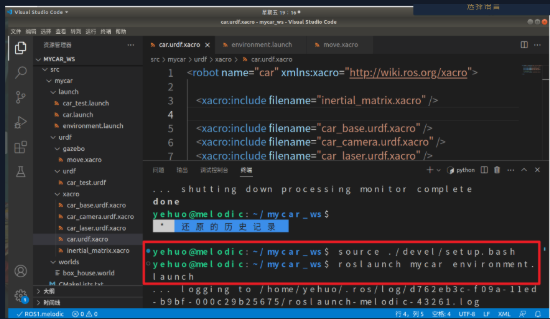
启动gazebo
source ./devel/setup.bash

roslaunch mycar environment.launch
启动rviz
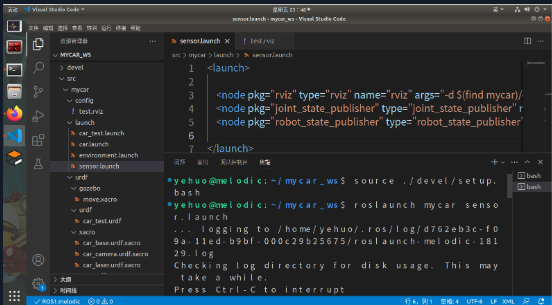
source ./devel/setup.bash

roslaunch mycar sensor.launch
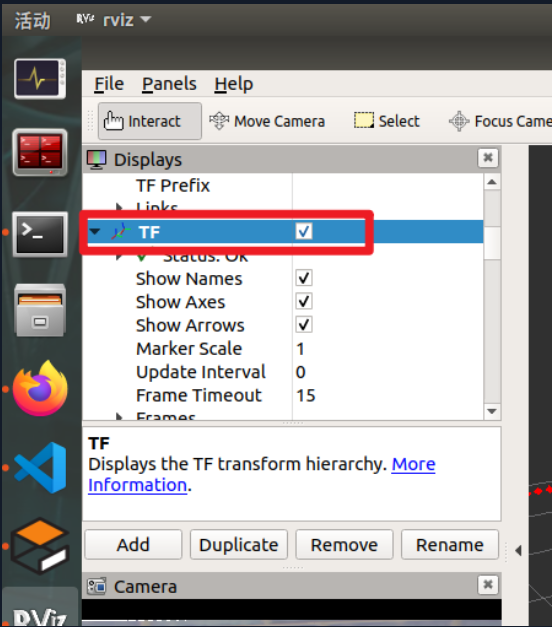
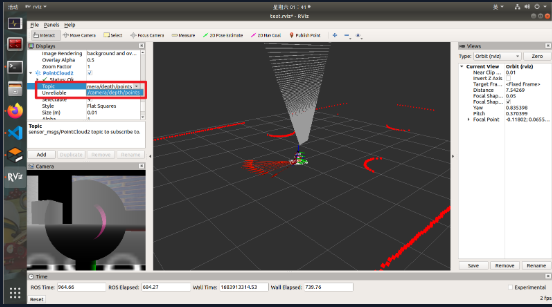
step3: 配置 rviz

step4: 打开终端,使小车在rviz中旋转
输入以下指令
rostopic pub -r 10 /cmd_vel geometry_msgs/Twist "linear:

  x: 0.0

  y: 0.0

  z: 0.0

angular:

  x: 0.0

  y: 0.0

  z: 0.3"
gazebo+rviz 仿真的更多相关文章
- 【探索之路】机器人篇(5)-Gazebo物理仿真环境搭建_让机器人运动起来
如果完成了前两步,那么其实我们已经可以去连接我们的现实中的机器人了. 但是,做机器人所需要的材料还没有到,所以我们这里先在电脑平台上仿真一下.这里我们用到的就算gazebo物理仿真环境,他能很好的和R ...
- 多指灵巧手MoveIt!与Gazebo联合仿真框架搭建
至于为什么叫框架,一是因为灵巧手的3维模型没有按照基本的设计要求画,正常来说,设计机器人机构之前应该设计好机构需要多少个自由度/DOF,每个自由度是旋转/revolute类型还是滑移/prismati ...
- Learning ROS for Robotics Programming Second Edition学习笔记(十) indigo Gazebo rviz slam navigation
中文译著已经出版,详情请参考:http://blog.csdn.net/ZhangRelay/article/category/6506865 moveit是书的最后一章,由于对机械臂完全不知,看不懂 ...
- ROS(indigo)国外开源示例包括多机器人控制等基于V-Rep和Gazebo的仿真
ROS(indigo)国外开源示例包括多机器人的V-Rep和Gazebo仿真等 1 micros_swarm_framework 使用超级经典的stage. http://wiki.ros.org/m ...
- Learning ROS for Robotics Programming Second Edition学习笔记(九) indigo Gazebo rviz slam navigation
中文译著已经出版,详情请参考:http://blog.csdn.net/ZhangRelay/article/category/6506865 书中三维环境gazebo,slam的仿真例子 --$ r ...
- ROS进阶学习手记 7.2 -- RViz仿真实例2:Create SmartCar
上一节玩了 exbot 在RViz里的仿真控制,这里我们用urdf文件写个自己的小车模型,ref: http://blog.csdn.net/hcx25909/article/details/8904 ...
- ROS进阶学习手记 7 -- RViz仿真实例1
[任务2]: 用simulator: RViz 工具,完成对小车的建模,名字drive RViz = dvrv, 用 dvrv_node 发布topic和数据格式,向它发送位置指令,使它能接受 ...
- 安卓手机与ROS通信遥控Gazebo中仿真机器人小车运动(ROS_indigo)
首先,先列出需要用到的一些文件: Gazebo中机器人模型及说明: http://wiki.ros.org/grizzly_simulator https://github.com/g/grizzly ...
- ROS机器人程序设计(原书第2版)补充资料 (柒) 第七章 3D建模与仿真 urdf Gazebo V-Rep Webots Morse
ROS机器人程序设计(原书第2版)补充资料 (柒) 第七章 3D建模与仿真 urdf Gazebo V-Rep Webots Morse 书中,大部分出现hydro的地方,直接替换为indigo或ja ...
- ROS和Gazebo进行机器人仿真(二)
一.在Gazebo中使用ROS控制器 在本节中,我们将讨论如何在Gazebo中让机器人的每个关节运动. 为了让关节动起来,我们需要分配一个ROS控制器,尤其是,我们需要为每个关节连上一个与transm ...
随机推荐
- dectron2框架export导出并使用 onnx 记录
python tools/deploy/export_model.py \ --sample-image /Users/gatilin/PycharmProjects/model-graphviz-p ...
- 【译】GitHub Copilot Free 在 Visual Studio 中
可能您还没有听说过,GitHub 刚刚宣布了 Copilot Free(免费版)!好消息是:您现在已经可以在 Visual Studio 中开始使用 Copilot Free 了.它现在已经可用了,我 ...
- Solution Set - “让朝阳洒向晚霞,在星空下涂鸦”
目录 0.「UR #12」「UOJ #182」a^-1 + b problem 1.「NOI Simu.」点 2.「集训队互测 2023」「QOJ #5100」卡牌游戏 3.「NOI Simu.」简单 ...
- 我的c语言笔记
1. 进制转换 二进制.八进制和十六进制向十进制转换都非常容易,就是"按权相加".如:1010.1101 = 1×23 + 0×22 + 1×21 + 0×20 + 1×2-1 + ...
- 开箱你的 AI 语音女友「GitHub 热点速览」
随着大模型 API 服务的不断丰富,开发者无需再依赖昂贵的硬件,也能轻松开发出拥有强大 AI 能力的应用.这不仅降低了技术门槛,也激发了极客们的创造力. 就比如上周飙升 1.5k Star 的开源项目 ...
- c# Moq Ref/out 参数
public interface IService { void DoSomething(ref string a); void DoSomething2(out string a); } [Test ...
- SM4代码实现
算法过程 更多的原理介绍参考:SM4原理介绍 代码实现 S盒实现 #include <stdio.h> /* SM4-S盒实现: 由三个复合函数组成,S(x)=L(I(L(x))),其中L ...
- BackupBuddy pg walkthrough Intermediate
nmap ┌──(root㉿kali)-[~/lab] └─# nmap -p- -A 192.168.189.43 Starting Nmap 7.94SVN ( https://nmap.org ...
- Cobweb Intermediate pg walkthrough
源码泄露 可以直接看到源码存在sql注入 反弹shellpayload http://192.168.167.162/phpinfo%22%20%20union%20select%20'system( ...
- 输入输出-python
输入输出-python 输入输出 输入 Python提供了input()函数用于从控制台输入数据. name = input("请输入您的姓名:") print("您输入 ...