iOS:quartz2D绘图小项目(涂鸦画板)
介绍:学了quartz2D的绘图知识后,我根据它的一些功能制作了一个小项目:涂鸦画板。
功能:绘制各种图形,还可以选取相册上的照片做涂鸦,然后保存到相册中。其中,还包括功能有:颜色的选取、线宽的选取、橡皮擦除、撤销上一次绘制痕迹、清除所有痕迹。
用到的自定义控件:工具栏控件(UIToolBar)、工具栏上的按钮控件(UIBarButtonItem)、警告框控件(UIAlertView、UIActionSheet)、图像选择器控制器控件(UIImagePickerController)等。
需要的类:除了应用程序代理类AppDelegate和控制器类ViewController外,还需要一个自定义的视图类DemoView和一个自定义的绘制路径类MyPath。MyPath类是用来封装绘制路径的,因为路径是结构体,所以不能直接动作对象使用,封装后可以将路径保存数组中,用来连续绘图。
具体操作如下:
1、创建如上介绍的类的截图为:
2、将自定义的视图类DemiView与控制器的视图关联起来:
3、下面就是具体针对每一个类的代码了:
<1>在MyPath.h文件中
#import <Foundation/Foundation.h>

#import <UIKit/UIKit.h>

#define PHOTO_RECT (CGRectMake(0,0,375,667))//绘制照片局域宏定义

@interface MyPath : NSObject

@property (assign,nonatomic)CGMutablePathRef path;   //可变的路径

@property (strong,nonatomic)UIColor *color;  //颜色

@property (assign,nonatomic)NSInteger lineWidth; //线宽

@property (strong,nonatomic)UIImage *image;//图像

@end
<2>在Application.m文件中:
- (BOOL)application:(UIApplication *)application didFinishLaunchingWithOptions:(NSDictionary *)launchOptions {

    //设置偏好

    NSUserDefaults *userDefaults = [NSUserDefaults standardUserDefaults];

    [userDefaults setBool:YES forKey:@"isDefualtColor"];

    [userDefaults setBool:YES forKey:@"isDefualtLine"];

    [userDefaults synchronize];

    return YES;

}
<3>在DemoView类中
DemoView.h文件
#import <UIKit/UIKit.h>

@interface DemoView : UIView

@property (strong,nonatomic)UIColor *color;        //颜色

@property (assign,nonatomic)NSInteger lineWidth;   //线宽

@property (strong,nonatomic)NSMutableArray *paths; //可变数组,用来保存路径

@property(assign,nonatomic)BOOL isUndo;  //标示符

@property (strong,nonatomic)UIImage *image; //图像

@property (assign,nonatomic)CGMutablePathRef path; //可变的路径

@end
DemoView.m文件
//懒加载
-(NSMutableArray*)paths

{

    if (!_paths)

    {

        _paths = [NSMutableArray array];

    }

    return _paths;

}
//画图
- (void)drawRect:(CGRect)rect

{

    //1.获取绘制图上下文

    CGContextRef context = UIGraphicsGetCurrentContext();

    //4.添加保存的路径到上下文

    for (MyPath *myPath in self.paths)

    {

        CGContextAddPath(context, myPath.path);

        if(myPath.image)

        {

            [myPath.image drawInRect:PHOTO_RECT];

        }

        //设置绘图属性

        [myPath.color set];

        CGContextSetLineWidth(context, myPath.lineWidth);

        //绘制路径

        CGContextDrawPath(context, kCGPathStroke);

    }

    //如果是清除或撤销,就不执行当前绘图

    if (!self.isUndo)

    {

        if(self.image)

        {

            [self.image drawInRect:PHOTO_RECT];

        }

        //添加当前路径

        CGContextAddPath(context, _path);

        //5.设置当前绘图属性

        [self.color set];

        CGContextSetLineWidth(context, self.lineWidth);

        //6.绘制路径

        CGContextDrawPath(context, kCGPathStroke);

    }

}
//开始触摸事件(设置绘制属性)
-(void)touchesBegan:(NSSet *)touches withEvent:(UIEvent *)event

{

    self.isUndo = NO;

    NSUserDefaults *userDefaults = [NSUserDefaults standardUserDefaults];

    if ([userDefaults boolForKey:@"isDefualtColor"])

    {

        //设置默认颜色

        self.color = [UIColor blackColor];

    }

    if ([userDefaults boolForKey:@"isDefualtLine"])

    {

        //设置默认线宽

        self.lineWidth = 1.0;

    }

    //接收颜色通知

    [[NSNotificationCenter defaultCenter]addObserver:self selector:@selector(seclectColor:) name:@"ColorNitification" object:nil];

    //接收线宽通知

    [[NSNotificationCenter defaultCenter]addObserver:self selector:@selector(selectedWidth:) name:@"WidthNitification"  object:nil];

    //创建路径

    _path = CGPathCreateMutable();

    //创建起始点

    UITouch *touch = [touches anyObject];

    CGPoint location = [touch locationInView:self];

    CGPathMoveToPoint(_path, nil, location.x, location.y);

}
//获取通知中的颜色和线宽数据
//从通知中获取颜色

-(void)seclectColor:(NSNotification*)notification

{

    self.color = notification.object;

    if (self.color == NULL)

    {

        self.color = [UIColor blackColor];

    }

}

//从通知中获取线宽

-(void)selectedWidth:(NSNotification*) notification

{

    NSNumber *number = notification.object;

    self.lineWidth = [number integerValue];

    if (self.lineWidth == )

    {

        self.lineWidth = 1.0;

    }

}
//触摸移动(添加新路径,刷新视图)
-(void)touchesMoved:(NSSet *)touches withEvent:(UIEvent *)event

{

    if (_path)

    {

        //向路径添加新的直线

        UITouch *touch = [touches anyObject];

        CGPoint location = [touch locationInView:self];

        CGPathAddLineToPoint(_path, nil, location.x, location.y);

        //让视图刷新

        [self setNeedsDisplay];

    }

}
//触摸结束(封装路径并保存到数组中)
-(void)touchesEnded:(NSSet *)touches withEvent:(UIEvent *)event

{

    if (_path)

    {

        //保存路径

        MyPath *myPath = [[MyPath alloc]init];

        myPath.path = self.path;

        myPath.color = self.color;

        myPath.lineWidth = self.lineWidth;

        if(self.image)

        {

            myPath.image = self.image;

            self.image = nil;

        }


        //保存路径

        [self.paths addObject:myPath];

    }

}
//清理路径
-(void)dealloc

{

    //清理保存的路径

    for (MyPath *myPath in self.paths)

    {

        CGPathRelease(myPath.path);

    }

}
<4>在ViewController.m文件中
//设置属性
@interface ViewController ()<UIAlertViewDelegate,UIActionSheetDelegate,UIImagePickerControllerDelegate,UINavigationControllerDelegate>

@property (strong,nonatomic)UIToolbar *toolBar;

@property (strong,nonatomic)NSMutableDictionary *DicM;

@end
//初始化和创建控件
- (void)viewDidLoad {

    [super viewDidLoad];

    //初始化

    self.DicM = [NSMutableDictionary dictionary];

    ((DemoView *)self.view).isUndo = NO;

    //创建工具栏对象

    self.toolBar = [[UIToolbar alloc]init];

    self.toolBar.barTintColor = [UIColor brownColor];

    self.toolBar.frame = CGRectMake(, , , );

    //创建工具栏项目

    UIBarButtonItem *colorItem = [[UIBarButtonItem alloc]initWithTitle:@"颜色" style:UIBarButtonItemStylePlain target:self action:@selector(SelectColor:)];

    UIBarButtonItem *lineWidthItem = [[UIBarButtonItem alloc]initWithTitle:@"线宽" style:UIBarButtonItemStylePlain target:self action:@selector(SelectWidth:)];

    UIBarButtonItem *clearpartItem = [[UIBarButtonItem alloc]initWithTitle:@"橡皮" style:UIBarButtonItemStylePlain target:self action:@selector(ClearPart:)];

    UIBarButtonItem *backdoneItem = [[UIBarButtonItem alloc]initWithTitle:@"撤销" style:UIBarButtonItemStylePlain target:self action:@selector(BackDone:)];

    UIBarButtonItem *clearallItem = [[UIBarButtonItem alloc]initWithTitle:@"清空" style:UIBarButtonItemStylePlain target:self action:@selector(ClearAll:)];

    UIBarButtonItem *photoItem = [[UIBarButtonItem alloc]initWithTitle:@"照片" style:UIBarButtonItemStylePlain target:self action:@selector(selectPhoto:)];

    UIBarButtonItem *saveItem = [[UIBarButtonItem alloc]initWithTitle:@"保存" style:UIBarButtonItemStylePlain target:self action:@selector(Save:)];

    UIBarButtonItem *flexibleItem = [[UIBarButtonItem alloc]initWithBarButtonSystemItem:UIBarButtonSystemItemFlexibleSpace target:nil action:nil];

    [self.toolBar setItems:@[colorItem,flexibleItem,lineWidthItem,flexibleItem,clearpartItem,flexibleItem,backdoneItem,flexibleItem,clearallItem,flexibleItem,photoItem,flexibleItem,saveItem]];

    [self.view addSubview:self.toolBar];


    //开始时隐藏工具栏

    self.toolBar.hidden = YES;

    //创建点击手势(双击时显示和隐藏工具栏)

    UITapGestureRecognizer *tap = [[UITapGestureRecognizer alloc]initWithTarget:self action:@selector(showToolBar:)];

    //设置点击次数

    tap.numberOfTapsRequired = ;

    //添加手势

    [self.view addGestureRecognizer:tap];

}
//设置颜色选项
//选择颜色

-(void)SelectColor:(UIBarButtonItem *)sender

{

    UIAlertView *alertView = [[UIAlertView alloc]initWithTitle:nil message:@"可选颜色" delegate:self cancelButtonTitle:@"取消" otherButtonTitles:@"红色",@"绿色",@"紫色",@"黄色",@"黑色",@"白色",@"蓝色",@"灰色",@"棕色",nil];

    [self.DicM setObject:[UIColor redColor]   forKey:@"红色"];

    [self.DicM setObject:[UIColor greenColor] forKey:@"绿色"];

    [self.DicM setObject:[UIColor purpleColor]forKey:@"紫色"];

    [self.DicM setObject:[UIColor yellowColor]forKey:@"黄色"];

    [self.DicM setObject:[UIColor blackColor] forKey:@"黑色"];

    [self.DicM setObject:[UIColor whiteColor] forKey:@"白色"];

    [self.DicM setObject:[UIColor blueColor]  forKey:@"蓝色"];

    [self.DicM setObject:[UIColor grayColor]  forKey:@"灰色"];

    [self.DicM setObject:[UIColor brownColor] forKey:@"棕色"];

    [alertView show];

}
//设置线宽选项
//选择线宽

-(void)SelectWidth:(UIBarButtonItem *)sender

{

    UIActionSheet *actionSheet = [[UIActionSheet alloc]initWithTitle:@"可选线宽" delegate:self cancelButtonTitle:@"取消" destructiveButtonTitle:nil otherButtonTitles:@"1号",@"2号",@"3号",@"4号",@"5号",@"6号",@"7号",@"8号",@"9号",@"10号",nil];

    [self.DicM setObject:[NSNumber numberWithInteger:]  forKey:@"1号"];

    [self.DicM setObject:[NSNumber numberWithInteger:]  forKey:@"2号"];

    [self.DicM setObject:[NSNumber numberWithInteger:]  forKey:@"3号"];

    [self.DicM setObject:[NSNumber numberWithInteger:]  forKey:@"4号"];

    [self.DicM setObject:[NSNumber numberWithInteger:]  forKey:@"5号"];

    [self.DicM setObject:[NSNumber numberWithInteger:]  forKey:@"6号"];

    [self.DicM setObject:[NSNumber numberWithInteger:]  forKey:@"7号"];

    [self.DicM setObject:[NSNumber numberWithInteger:]  forKey:@"8号"];

    [self.DicM setObject:[NSNumber numberWithInteger:]  forKey:@"9号"];

    [self.DicM setObject:[NSNumber numberWithInteger:] forKey:@"10号"];

    [actionSheet showInView:self.view];

}
//实现UIAlertView警告框协议
#pragma mark -<UIAlertViewDelegate>

-(void)alertView:(UIAlertView *)alertView clickedButtonAtIndex:(NSInteger)buttonIndex

{

    NSString *key = [alertView buttonTitleAtIndex:buttonIndex];

    UIColor *selectedcolor = [self.DicM objectForKey:key];

    //发送通知附带颜色数据

    [[NSNotificationCenter defaultCenter]postNotificationName:@"ColorNitification" object:selectedcolor];

    //重设偏好

    [[NSUserDefaults standardUserDefaults] setBool:NO forKey:@"isDefualtColor"];

    [[NSUserDefaults standardUserDefaults] synchronize];

}
//实现UIActionSheet警告框协议
#pragma mark -<UIActionSheetDelegate>

-(void)actionSheet:(UIActionSheet *)actionSheet clickedButtonAtIndex:(NSInteger)buttonIndex

{

    NSString *key = [actionSheet buttonTitleAtIndex:buttonIndex];

    NSNumber *number = [self.DicM objectForKey:key];

    //发送通知附带线宽数据

    [[NSNotificationCenter defaultCenter]postNotificationName:@"WidthNitification" object:number];

    //重设偏好

    [[NSUserDefaults standardUserDefaults] setBool:NO forKey:@"isDefualtLine"];

    [[NSUserDefaults standardUserDefaults] synchronize];

}
//擦除功能
//橡皮擦除(其实就是用白色重绘)

-(void)ClearPart:(UIBarButtonItem *)sender

{

    UIColor *selectedcolor = [UIColor whiteColor];

    [[NSNotificationCenter defaultCenter]postNotificationName:@"ColorNitification" object:selectedcolor];

    NSNumber *number = [NSNumber numberWithInteger:];

    [[NSNotificationCenter defaultCenter]postNotificationName:@"WidthNitification" object:number];

    //重设偏好

    [[NSUserDefaults standardUserDefaults] setBool:NO forKey:@"isDefualtColor"];

    [[NSUserDefaults standardUserDefaults] synchronize];

    [[NSUserDefaults standardUserDefaults] setBool:NO forKey:@"isDefualtLine"];

    [[NSUserDefaults standardUserDefaults] synchronize];

}
//撤销功能
//撤销

-(void)BackDone:(UIBarButtonItem *)sender

{

    //先做清理工作

    MyPath *path = [((DemoView *)self.view).paths lastObject];

    CGPathRelease(path.path);

    //删除最后一个路径

    [((DemoView *)self.view).paths removeLastObject];

    ((DemoView *)self.view).image = nil;

    ((DemoView *)self.view).isUndo = YES;

    //让视图重绘

    [self.view setNeedsDisplay];

}
//清空功能
//清空绘图

-(void)ClearAll:(UIBarButtonItem *)sender

{

    //先做清理工作

    for(MyPath *path in ((DemoView *)self.view).paths)

    {

        CGPathRelease(path.path);

    }

    //删除所有

    [((DemoView *)self.view).paths removeAllObjects];

    ((DemoView *)self.view).image = nil;

    ((DemoView *)self.view).isUndo = YES;

    //让视图重绘

    [self.view setNeedsDisplay];

}
//保存绘图功能
//保存绘图

-(void)Save:(UIBarButtonItem *)sender

{

    [self didSelectedSave];

}

-(void)didSelectedSave

{

    //开始图像绘制上下文

    UIGraphicsBeginImageContext(self.view.bounds.size);

    CGContextRef context = UIGraphicsGetCurrentContext();

    // 先画保存的path

    for(MyPath *myPath in ((DemoView *)self.view).paths)

    {

        if(myPath.image)

        {

            [myPath.image drawInRect: PHOTO_RECT ];

        }

        CGContextAddPath(context, myPath.path);

        [myPath.color set];

        CGContextSetLineWidth(context, myPath.lineWidth);

        CGContextStrokePath(context);

    }

    //获取绘制的图片

    UIImage *image = UIGraphicsGetImageFromCurrentImageContext();

    //结束图像绘制上下文

    UIGraphicsEndImageContext();

    //保存图片

    UIImageWriteToSavedPhotosAlbum(image, self, @selector(image:didFinishSavingWithError:contextInfo:), NULL);

}

- (void)image: (UIImage *) image

    didFinishSavingWithError: (NSError *) error

                 contextInfo: (void *) contextInfo

{

    NSString *msg = nil;

    if(error)

    {

        msg = @"图片保存失败";

    }

    else

    {

        msg = @"图片保存成功";

    }

    UIAlertView *alert = [[UIAlertView alloc]initWithTitle:@"保存图片" message:msg delegate:self cancelButtonTitle:@"OK" otherButtonTitles:nil];

    [alert show];

}
//选取照片功能
//选取照片

-(void)selectPhoto:(UIBarButtonItem*)sender

{

    [self didSelectedPhoto];

}

-(void)didSelectedPhoto

{

    //显示照片选择窗口

    UIImagePickerController *picker = [[UIImagePickerController alloc]init];

    //图片来源是相册

    picker.sourceType = UIImagePickerControllerSourceTypePhotoLibrary;

    picker.delegate = self;

    //以模态窗口的形式显示图片

    [self presentViewController:picker animated:YES completion:nil];

}
//图像选择器控制器协议方法
#pragma mark - imagePikerController 代理方法

//选取图片

-(void)imagePickerController:(UIImagePickerController *)picker didFinishPickingMediaWithInfo:(NSDictionary *)info

{

    //取出图片

    UIImage *image = [info objectForKey:UIImagePickerControllerOriginalImage];

    ((DemoView *)self.view).image = image;

    ((DemoView *)self.view).isUndo = NO;

    //创建路径

    ((DemoView *)self.view).path = CGPathCreateMutable();

    //关闭模态窗口

    [picker dismissViewControllerAnimated:YES completion:nil];

    //刷新视图

    [self.view setNeedsDisplay];

}
//手势事件,是否显示工具栏
//按钮事件是否显示工具栏

-(void)showToolBar:(UIButton *)sender

{

    self.toolBar.hidden = !self.toolBar.hidden;

}
演示截图如下:
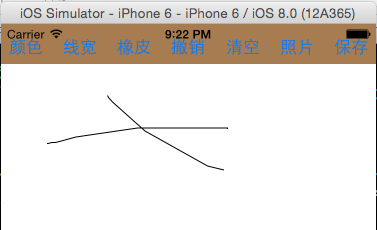
开始时: 双击显示工具栏:

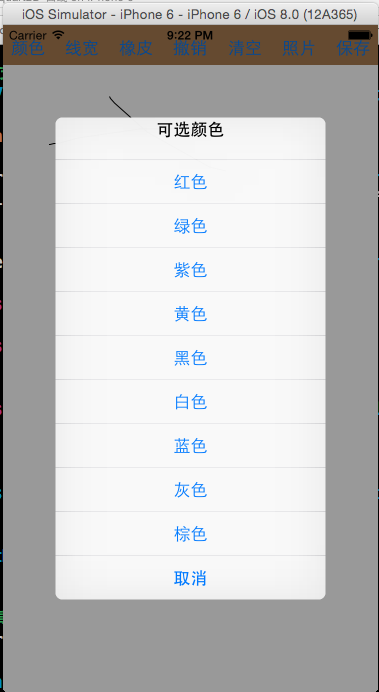
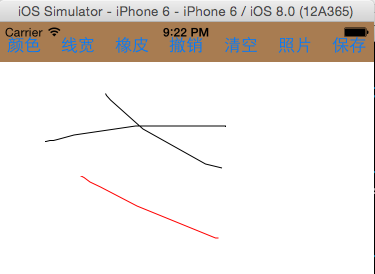
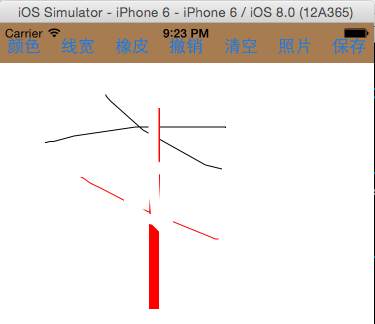
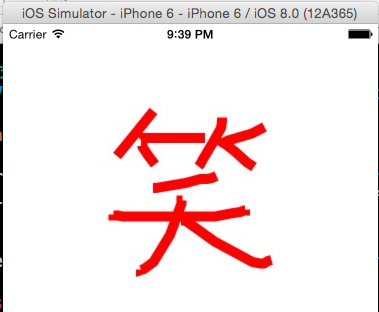
(使用默认颜色和线宽)绘制直线 选颜色绘制直线 ,选红色
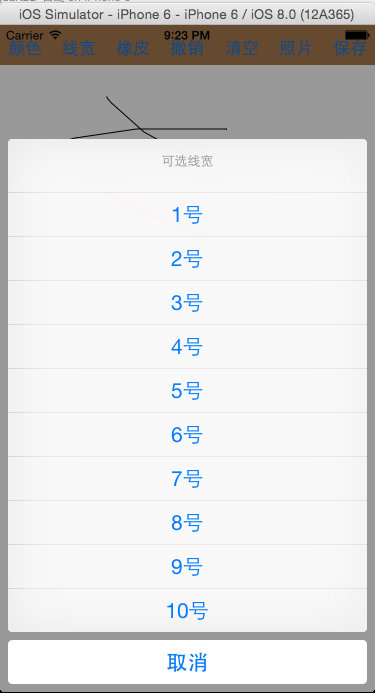
接着选择线宽绘制直线:选10号

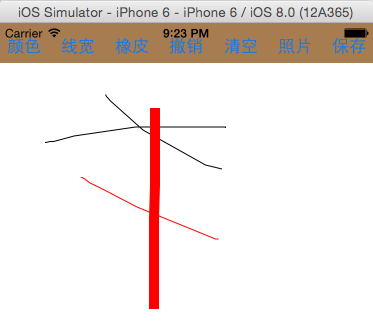
点击橡皮擦除: 点击撤销,被擦除部分还原
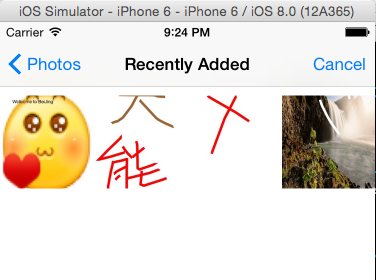
点击清空,什么都没有了: 点击照片,打开相册
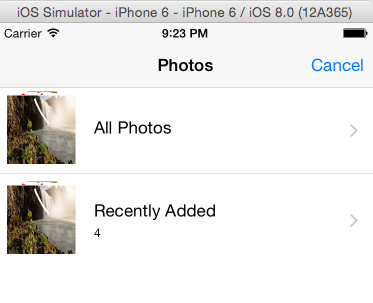
任意选取一张照片,选取X
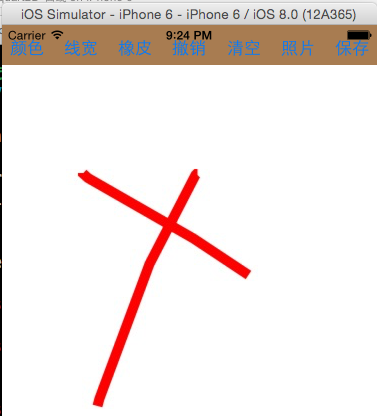
绘制图片并保存到相册:


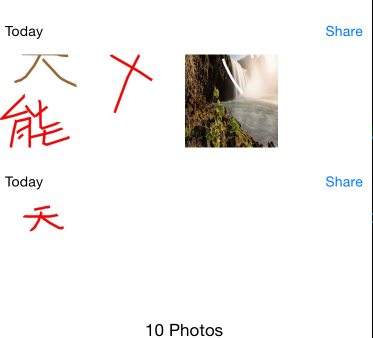
查看保存的图片
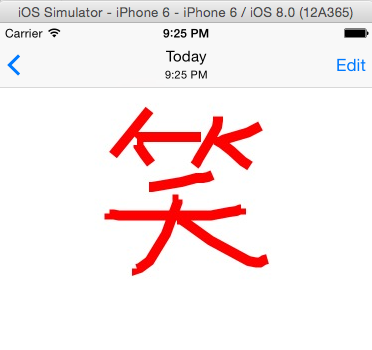
可以再双击隐藏工具栏:
iOS:quartz2D绘图小项目(涂鸦画板)的更多相关文章
- iOS 模仿一个小项目,总结一下里边的模块
ManoBoo: 参考链接:http://www.jianshu.com/p/fd4c46c31508 这个小的项目是参考ManoBoo的简书的,链接在上方,自己在仿做的过程中,也离不开Man ...
- iOS:quartz2D绘图 (动画)
quartz2D可以用来绘制自己需要的图形,它们绘制出来的是一个静态的图形,那么如何绘制一个动态的图形呢?动态的图形就是动画,所谓动画,其实就是很多张图片在短时间内不停的切换所产生的一种视觉效果.qu ...
- iOS:quartz2D绘图
Quartz-2D:绘图 一.介绍: •Quartz 2D是一个二维图形绘制引擎,支持iOS环境和Mac OS X环境 •Quartz 2D API可以实现许多功能,如基于路径的绘图.透明度.阴影 ...
- IOS-小项目(饿了么 网络部分 简单实现)
在介绍小项目之前,在此说明一下此代码并非本人所写,我只是随笔的整理者. 在介绍之前先展现一下效果图. 看过效果图大家应该很熟悉了,就是饿了么的一个界面而已,值得注意的是,实现时并没有采用本地连接,而是 ...
- Github上关于iOS的各种开源项目集合(强烈建议大家收藏,查看,总有一款你需要)
下拉刷新 EGOTableViewPullRefresh - 最早的下拉刷新控件. SVPullToRefresh - 下拉刷新控件. MJRefresh - 仅需一行代码就可以为UITableVie ...
- github上关于iOS的各种开源项目集合(转)
UI 下拉刷新 EGOTableViewPullRefresh - 最早的下拉刷新控件. SVPullToRefresh - 下拉刷新控件. MJRefresh - 仅需一行代码就可以为UITable ...
- 阶段性总结⓵触摸事件&手势识别⓶Quartz2D绘图⓷CALayer图层⓸CAAnimation⓹UIDynamic UI动力学⓺KVC&KVO
知识点复习 1. 触摸事件&手势识别 1> 4个触摸事件,针对视图的 2> 6个手势识别(除了用代码添加,也可以用Storyboard添加) 附加在某一个特定视图上的, ...
- 转: Github上关于iOS的各种开源项目集合
https://blog.csdn.net/jiashaoying/article/details/79079500 下拉刷新 EGOTableViewPullRefresh - 最早的下拉刷新控件. ...
- iOS及Mac开源项目和学习资料【超级全面】
UI 下拉刷新 EGOTableViewPullRefresh – 最早的下拉刷新控件. SVPullToRefresh – 下拉刷新控件. MJRefresh – 仅需一行代码就可以为UITable ...
随机推荐
- php的设计模式------工厂模式
1.工厂模式简介 属于创建型模式.定义一个创建对象的接口,让其子类自己决定实例化哪一个工厂类,工厂模式使其创建过程延迟到子类进行主要解决的问题:接口选择的问题. 2.分类 2.1 简单工厂模式 接口: ...
- linux命令(9):route命令
查看路由表:route –n //添加到主机的路由 # route add –host 192.168.168.110 dev eth0 # route add –host 192.168.168.1 ...
- 自定制Form组件
代码 import re import copy class ValidateError(Exception): def __init__(self,detail): self.detail = de ...
- 《逐梦旅程 WINDOWS游戏编程之从零开始》笔记1——创建窗口&GDI
第1章 创建窗口 步骤: 窗口类的设计 窗口类的注册 窗口的正式创建 窗口的显示与更新 消息循环体系 窗口过程函数处理消息 1. 设计:使用WNDCLASSEX结构体,这里注意的是C++中的结构体中的 ...
- hdu 1226(同余搜索)
超级密码 Time Limit: 20000/10000 MS (Java/Others) Memory Limit: 65536/32768 K (Java/Others)Total Subm ...
- 《深入理解Android2》读书笔记(七)
接上篇<深入理解Android2>读书笔记(六) 广播接受者 注册 ContextImpl @Override public Intent registerReceiver(Broadca ...
- C# 推送到极光
https://docs.jiguang.cn/jpush/resources/ 下载后有完整的例子 引用 Jiguang.JPush.dll using System; using Jiguang. ...
- 基于wsimport生成代码的客户端
概述 wsimport是jdk自带的命令,可以根据wsdl文档生成客户端中间代码,基于生成的代码编写客户端,可以省很多麻烦. wsimport命令 wsimport的用法 wsimport [opti ...
- 倚天屠龙(一):妙用IDA Pro--利用IDAPython编写调试插件
一:前言 虽然静态分析有Radare2,Hopper这种新星之秀,动态调试有Ollydbg,Windbg这种老牌霸主,但是IDA Pro仍然是大部分二进制安全工程师最喜爱的工具,除了价格过于昂贵,基本 ...
- 【数据结构】Not so Mobile (6-9)
[UVA839]Not so Mobile 算法入门经典第6章6-9(P157) 题目大意:输入一个树状天平,根据力矩相等原则判断是否平衡. 试题分析:貌似没有什么难点…… #include<i ...