Pyqt QSS简单的Ui美化
什么是QSS
QSS 是Qt StyleSheet 的简称,意思就是qt的样式表格,StyleSheet 可以像CSS一样的写样式。使页面美化跟代码层分开,利于维护。
QSS的语法
同css一样,他也是由一个selector与一个declaration形成,selector指定了是对哪一个控件发生后果,而declaration才是真实的发生作用的语句。如:
QPushButton { background-color: red }
QPushButton指定了是对所有的QPushButton或是其子类控件(如用户定义的MyPushButton)发生波及,而background-color:red阐明所有的受波及控件的背景都为red。除非“类名”,“对象名”,“Qt属性名”这三样东西是大小写敏感的外其余的东西都是大小写不敏感的,如color与Color代表统一属性。万一有几个selector指定了相像的declaration, 能够运用逗号(,各种绽放准绳驱动着ATM技巧不停变动,)将各个抉择器分离,如:
QPushButton, QLineEdit, QComboBox { color: blue }
他相当于:
QPushButton { color: red }

QLineEdit { color: red }

QComboBox { color: red }
declaration部份是一系列的(属性:值)对,使用分号(;)将各个不同的属性值对分离,使用大括号({})将所有declaration包括在同时。
1, 平常选择器(selector)
Qt扶持所有的CSS2定义的选择器,其祥细内容可以在w3c的网站上查找http://www.w3.org/TR/CSS2/selector.html, 中间对照常用的selector类别有:
1.1 通用类型选择器:*
会对所有控件有结果。
1.2 类别选择器:QPushButton
匹配所有QPushButton的实例和其子类的实例。
1.3 属性选择器:QPushButton[flat=”false”]
匹配所有QPushButton属性flat为false的实例,属性分为两种,静态的和动态的,静态属性可以通过Q_PROPERTY() 来指定,动态属性可以使用setProperty来指定,如:
QLineEdit *nameEdit = new QLineEdit(this);

nameEdit->setProperty("mandatoryField", true);
如果在设置了qss后Qt属性变动了,必要重新设置qss来使其见效,可以使用先unset再set qss。
1.4 类选择器:.QPushButton
所有QPushButton的实例,但不包括其子类,这相当于:
*[class~="QPushButton"]
~=的含义是测验一个QStringList类别的属性是否包罗给定的QString。
1.5 ID抉择器:QPushButton#okButton
对应Qt里面的object name设置,使用这条CSS之前要先设置对应控件的object name为okButton,如:
Ok->setObjectName(tr(“okButton”));
1.6 后代选择器:QDialog QPushButton
对于所有为QDialog后代(包括儿子,与儿子的儿子的递归)为QPushButton的实例
1.7 子选择器:QDialog > QPushButton
对于所有的QDialog直接子类QPushButton的实例,不包罗儿子的儿子的递归。
更多链接: http://www.360doc.com/content/13/1106/08/12424571_327060922.shtml
关于如何写样式可参考Qt Style Sheets Examples 地址:http://doc.qt.io/qt-4.8/stylesheet-examples.html#customizing-qscrollbar
Pyqt4 examples里面也有关于QSS的例子: 路径: pyqt4_examples\widgets\stylesheet\stylesheet.py
实例
样式可以添加到代码页面,也可以分离为单独文件
资源图片:


1. 这是一个样式和代码在同一页面的Example:
 # -*- coding: utf-8 -*-

 from PyQt4 import QtCore, QtGui

 from PyQt4.QtGui import *

 from PyQt4.QtCore import *

 import sys

 import qr

 try:

     _fromUtf8 = QtCore.QString.fromUtf8

 except AttributeError:

     def _fromUtf8(s):

         return s

 try:

     _encoding = QtGui.QApplication.UnicodeUTF8

     def _translate(context, text, disambig):

         return QtGui.QApplication.translate(context, text, disambig, _encoding)

 except AttributeError:

     def _translate(context, text, disambig):

         return QtGui.QApplication.translate(context, text, disambig)

 class MainStyle(QWidget):

     def __init__(self, parent=None):

         super(MainStyle, self).__init__(parent)

         self.setWindowFlags(Qt.FramelessWindowHint)

         self.resize(200, 300)

         self.btn_close = QPushButton()

         self.btn_close.setStyleSheet("""QPushButton{background-image:url(./img/btn_close_normal.png);width:39px;height:18px;padding-top:0px;border:0px;}

                                     QPushButton:hover{background-image:url(./img/btn_close_highlight.png);}

                                     QPushButton:pressed{background-image:url(./img/btn_close_down.png);}""")

         self.btn_min = QPushButton()

         self.btn_min.setStyleSheet("QPushButton{background-image:url(./img/btn_close_normal1.png);width:39px;height:18px;padding-top:0px;border:0px;}")

         self.btn_setting = QPushButton()

         self.btn_setting.setStyleSheet("""QPushButton{background-image:url(./img/icon_cog.png);width:16px;height:16px;padding-top:0px;border:0px;margin-right:15px;}

                                         QPushButton:hover{background-image:url(./img/icon_cogs.png);}""")

         self.btn_photo = QPushButton()

         self.btn_photo.setStyleSheet("""QPushButton{background-image:url(./img/photo.png);width:32px;height:26px; border-radius: 10px;

                                         margin-right:60px;}""")   # border-radius 元素添加圆角边框!

         #按钮样式一

         btn_one=QtGui.QPushButton(u"按钮样式一", self)

         btn_one.setGeometry(0, 100,100, 200)

         btn_one.setStyleSheet("QPushButton{background-color:blue;border:none;color:#ffffff;font-size:20px;}"

                                "QPushButton:hover{background-color:#333333;}")

         #按钮样式二

         btn_two=QtGui.QPushButton(u"按钮样式二", self)

         btn_two.setGeometry(100,100, 101, 200)

         btn_two.setStyleSheet("QPushButton{background-color:#D30000;border:none;color:#ffffff;font-size:20px;}"

                                  "QPushButton:hover{background-color:#333333;}")

         # 顶部布局

         self.topBarLayout = QtGui.QHBoxLayout()

         self.topBarLayout.addStretch()

         self.topBarLayout.addWidget(self.btn_photo,0,Qt.AlignRight | Qt.AlignHCenter)

         self.topBarLayout.addWidget(self.btn_setting,0,Qt.AlignRight | Qt.AlignHCenter)

         self.topBarLayout.addWidget(self.btn_min,0,Qt.AlignRight | Qt.AlignTop)

         self.topBarLayout.addWidget(self.btn_close,0,Qt.AlignRight | Qt.AlignTop)

         #main布局

         self.mainLayout = QtGui.QVBoxLayout()

         self.mainLayout.addLayout(self.topBarLayout,0)

         self.mainLayout.addStretch()

         self.mainLayout.addStretch()

         self.setLayout(self.mainLayout)

         self.mainLayout.setContentsMargins(0,0,0,0)

         self.mainLayout.setSpacing(0)

         self.connect(self.btn_close,QtCore.SIGNAL("clicked()"),QtGui.qApp,QtCore.SLOT("quit()"))

     def paintEvent(self,event):

         self.painter = QtGui.QPainter()

         self.painter.begin(self)

         self.painter.drawPixmap(self.rect(), QPixmap("./img/mianbg.png"))

         self.painter.end()

     #支持窗口拖动,重写两个方法

     def mousePressEvent(self, event):

         if event.button()==Qt.LeftButton:

             self.m_drag=True

             self.m_DragPosition=event.globalPos()-self.pos()

             event.accept()

     def mouseMoveEvent(self, QMouseEvent):

         if QMouseEvent.buttons() and Qt.LeftButton:

             self.move(QMouseEvent.globalPos()-self.m_DragPosition)

             QMouseEvent.accept()

     def mouseReleaseEvent(self, QMouseEvent):

         self.m_drag=False

 if __name__ == '__main__':

     app = QApplication(sys.argv)

     main = MainStyle()

     main.show()

     app.exec_()
效果:
2.这是一个样式和代码分离的Example:
在Qt Designer 中也可以添加样式
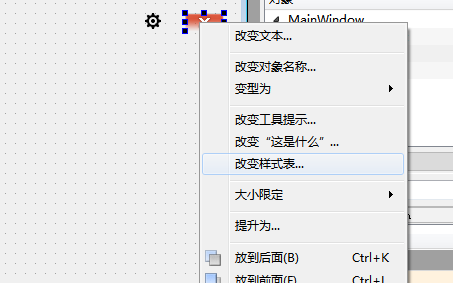
但,我们现在不使用Qt Designer 填写,我们使用外部qss文件
新建文件命名为css.qss
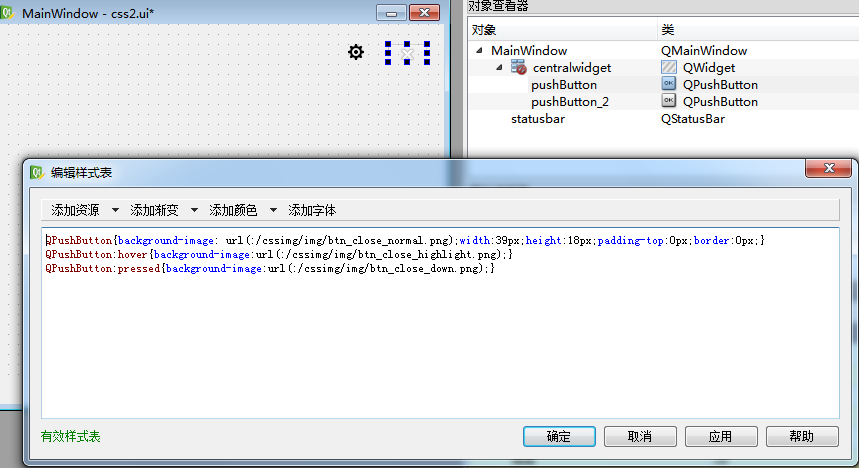
内容如下:
QPushButton#pushButton{background-image: url(:/cssimg/img/btn_close_normal.png);width:39px;height:18px;padding-top:0px;border:0px;}

QPushButton#pushButton:hover{background-image:url(:/cssimg/img/btn_close_highlight.png);}

QPushButton#pushButton:pressed{background-image:url(:/cssimg/img/btn_close_down.png);}

QPushButton#pushButton_2{background-image: url(:/cssimg/img/icon_cog.png);width:16px;height:16px;padding-top:0px;border:0px;margin-right:15px;}

QPushButton#pushButton_2:hover{background-image:url(:/cssimg/img/icon_cogs.png);}
通过传入路径\文件名的方式创建一个QFile对象,以readonly的方式打开,然后readAll,最后QtGui.qApp.setStyleSheet(styleSheet)就可以使qss生效。
在要引用的页面添加:
         file = QtCore.QFile('css.qss')

         file.open(QtCore.QFile.ReadOnly)

         styleSheet = file.readAll()

         styleSheet = unicode(styleSheet, encoding='utf8')

         QtGui.qApp.setStyleSheet(styleSheet)
完整代码如下:
 # -*- coding: utf-8 -*-

 # Form implementation generated from reading ui file 'css2.ui'

 #

 # Created: Sat May 30 15:47:25 2015

 #      by: PyQt4 UI code generator 4.10.3

 #

 # WARNING! All changes made in this file will be lost!

 from PyQt4 import QtCore, QtGui

 try:

     _fromUtf8 = QtCore.QString.fromUtf8

 except AttributeError:

     def _fromUtf8(s):

         return s

 try:

     _encoding = QtGui.QApplication.UnicodeUTF8

     def _translate(context, text, disambig):

         return QtGui.QApplication.translate(context, text, disambig, _encoding)

 except AttributeError:

     def _translate(context, text, disambig):

         return QtGui.QApplication.translate(context, text, disambig)

 class Ui_MainWindow(object):

     def setupUi(self, MainWindow):

         MainWindow.setObjectName(_fromUtf8("MainWindow"))

         MainWindow.resize(446, 380)

         self.centralwidget = QtGui.QWidget(MainWindow)

         self.centralwidget.setObjectName(_fromUtf8("centralwidget"))

         self.pushButton_2 = QtGui.QPushButton(self.centralwidget)

         self.pushButton_2.setGeometry(QtCore.QRect(350, 20, 31, 16))

         self.pushButton_2.setStyleSheet(_fromUtf8(""))

         self.pushButton_2.setText(_fromUtf8(""))

         self.pushButton_2.setObjectName(_fromUtf8("pushButton_2"))

         self.pushButton = QtGui.QPushButton(self.centralwidget)

         self.pushButton.setGeometry(QtCore.QRect(390, 20, 39, 18))

         self.pushButton.setCursor(QtGui.QCursor(QtCore.Qt.WaitCursor))

         self.pushButton.setMouseTracking(False)

         self.pushButton.setAutoFillBackground(False)

         self.pushButton.setStyleSheet(_fromUtf8(""))

         self.pushButton.setText(_fromUtf8(""))

         self.pushButton.setObjectName(_fromUtf8("pushButton"))

         MainWindow.setCentralWidget(self.centralwidget)

         self.statusbar = QtGui.QStatusBar(MainWindow)

         self.statusbar.setObjectName(_fromUtf8("statusbar"))

         MainWindow.setStatusBar(self.statusbar)

         self.retranslateUi(MainWindow)

         QtCore.QMetaObject.connectSlotsByName(MainWindow)

     def retranslateUi(self, MainWindow):

         MainWindow.setWindowTitle(_translate("MainWindow", "MainWindow", None))

         file = QtCore.QFile('css.qss')

         file.open(QtCore.QFile.ReadOnly)

         styleSheet = file.readAll()

         styleSheet = unicode(styleSheet, encoding='utf8')

         QtGui.qApp.setStyleSheet(styleSheet)

 import qr

 if __name__ == "__main__":

     import sys

     app = QtGui.QApplication(sys.argv)

     MainWindow = QtGui.QMainWindow()

     ui = Ui_MainWindow()

     ui.setupUi(MainWindow)

     MainWindow.show()

     sys.exit(app.exec_())
效果:
Pyqt QSS简单的Ui美化的更多相关文章
- HTML5小游戏UI美化版
HTML5小游戏[是男人就下一百层]UI美化版 之前写的小游戏,要么就比较简单,要么就是比较难看,或者人物本身是不会动的. 结合了其它人的经验,研究了一下精灵运动,就写一个简单的小游戏来试一下. 介绍 ...
- 安卓UI美化_drawable
UI美化 drawable资源 ------------------------------------------state drawable资源在不同状态下显示不同的图片在<selector ...
- C# Winfrom UI 美化
Winfrom UI 美化 此处只做演示,未进行页面布局.... 1.CSkin:此处只显示一种样式供参考,可继承其他样式——略 2.MetroFramework.Design 3.Ribbon 4. ...
- [安卓基础] 005.创建一个简单的UI
*:first-child { margin-top: 0 !important; } body > *:last-child { margin-bottom: 0 !important; } ...
- laya fgui 超简单的UI框架
FairyGUI 超简单的UI框架 Laya使用fgui的超简单UI框架 使用场景:用于使用fgui进行layaUI开发的程序人员 整个框架分为3个模块,共有4个类: FGUIManager :FGU ...
- Pyqt 一个简单的浏览器
使用QtWebKit 做一个简单的浏览器. mybrowserUI.ui <?xml version="1.0" encoding="UTF-8"?> ...
- Pyqt QTabWidget 简单的计算器集合
今天我们简单介绍下QTabWidget,然后在加入Demo计算器 首先我先讲下文件的结构: 文件分四部分, 一部分是Ui设计文件, 一部分是由Ui生成的py文件, 一部分是 计算器的逻辑文件, 最后 ...
- 安卓的一些UI美化框架的使用
目录 一.前言 二.Android-Bootstrap 三.Sweet Alert Dialog 四.ExplosionField 一.前言 在这里记录一些用到过的觉得还算不错的UI第三方开源美化框架 ...
- 简单登陆UI设计
简单UI设计 作品效果图: 关键技术: 用到了本地化控件:SharedPreferences,简单的说就是本地配置. 四大组件:Intent 基本思路请看代码: Java代码: import ...
随机推荐
- BZOJ 1090: [SCOI2003]字符串折叠
Sol 区间DP. 转移很简单,枚举会形成的断长转移就行,话说上一题我就跟这个是差不多的思路,转移改了改,然后死活过不了... 同样都是SCOI的题...相差4年... Code /********* ...
- 关于mysql安全
修改root用户密码: update mysql.user set password=password('new_passwd') where user='root'; flush privilege ...
- linux ssh 登录同时执行其他指令
目的:懒的敲一些重复的指令,比如登录后cd到某个目录. 咋办: ssh -t user@xxx.xxx.xxx.xxx "cd /directory_wanted ; bash" ...
- ios8 新增的 showViewController 和 showDetailViewController
1.showViewController 先看看说明: You use this method to decouple the need to display a view controller fr ...
- java 入门 第二季4
1. 多态 继承是多态的实现基础 引用的多态 父类的引用可以指向本类的对象 父类的引用可以指向子类的对象 方法的多态 创建本类对象时,调用本类方法 2种是调用子类的方法或继承的方法 子类中添加独有的方 ...
- shell脚本监控MySQL服务是否正常
监控MySQL服务是否正常,通常的思路为:检查3306端口是否启动,ps查看mysqld进程是否启动,命令行登录mysql执行语句返回结果,php或jsp程序检测(需要开发人员开发程序)等等: 方法1 ...
- Effective C++ -----条款21:必须返回对象时,别妄想返回其reference
绝不要返回pointer或reference指向一个local stack对象,或返回reference指向一个heap-allocated对象,或返回pointer或reference指向一个loc ...
- linux 解压缩
tar f 使用档案名字,这个参数是最后一个参数,后面只能接档案名 c 建立压缩档案 x 解压 t 查看内容 r 向压缩归档文件末尾追加文件 u 更新原压缩包中的文件 z 有gzip属性的 j 有bz ...
- JavaScript高级程序设计学习笔记--变量、作用域和内存问题
传递参数 function setName(obj){ obj.name="Nicholas"; obj=new object(); obj.name="Greg&quo ...
- struts2.0整合json
框架:struts2.0+hibernate2+spring 今天写代码时,需要用到json,我就直接加了两个jar包:json-lib-2.1-jdk15.jar,struts2-json-plug ...