SpringBoot集成Spring Security(6)——登录管理
文章目录
一、自定义认证成功、失败处理
1.1 CustomAuthenticationSuccessHandler
1.2 CustomAuthenticationFailureHandler
1.3 修改 WebSecurityConfig
1.4 运行程序
二、Session 超时
三、限制最大登录数
四、踢出用户
五、退出登录
六、Session 共享
6.1 配置 Redis
6.2 配置 Session 共享
6.3 运行程序
在本篇中,主要关注登录的管理,因此代码使用最原始版本的即可,即《SpringBoot集成Spring Security(1)——入门程序》源码即可。
源码地址:https://github.com/jitwxs/blog_sample
一、自定义认证成功、失败处理
有些时候我们想要在认证成功后做一些业务处理,例如添加积分;有些时候我们想要在认证失败后也做一些业务处理,例如记录日志。
在之前的文章中,关于认证成功、失败后的处理都是如下配置的:
http.authorizeRequests()

    // 如果有允许匿名的url,填在下面

//    .antMatchers().permitAll()

    .anyRequest().authenticated().and()

    // 设置登陆页

    .formLogin().loginPage("/login")

    .failureUrl("/login/error")

    .defaultSuccessUrl("/")

    .permitAll()

    ...;
即 failureUrl() 指定认证失败后Url,defaultSuccessUrl() 指定认证成功后Url。我们可以通过设置 successHandler()和 failureHandler() 来实现自定义认证成功、失败处理。
PS:当我们设置了这两个后,需要去除 failureUrl() 和 defaultSuccessUrl() 的设置,否则无法生效。这两套配置同时只能存在一套。
1.1 CustomAuthenticationSuccessHandler
自定义 CustomAuthenticationSuccessHandler 类来实现 AuthenticationSuccessHandler 接口,用来处理认证成功后逻辑:
@Component

public class CustomAuthenticationSuccessHandler implements AuthenticationSuccessHandler {

    private Logger logger = LoggerFactory.getLogger(getClass());

    @Override

    public void onAuthenticationSuccess(HttpServletRequest request, HttpServletResponse response, Authentication authentication) throws IOException, ServletException {

        logger.info("登录成功,{}", authentication);

        response.sendRedirect("/");

    }

}
onAuthenticationSuccess() 方法的第三个参数 Authentication 为认证后该用户的认证信息,这里打印日志后,重定向到了首页。
1.2 CustomAuthenticationFailureHandler
自定义 CustomAuthenticationFailureHandler 类来实现 AuthenticationFailureHandler 接口,用来处理认证失败后逻辑:
@Component
public class CustomAuthenticationFailureHandler implements AuthenticationFailureHandler {
@Autowired
private ObjectMapper objectMapper; private Logger logger = LoggerFactory.getLogger(getClass()); @Override
public void onAuthenticationFailure(HttpServletRequest request, HttpServletResponse response, AuthenticationException exception) throws IOException, ServletException {
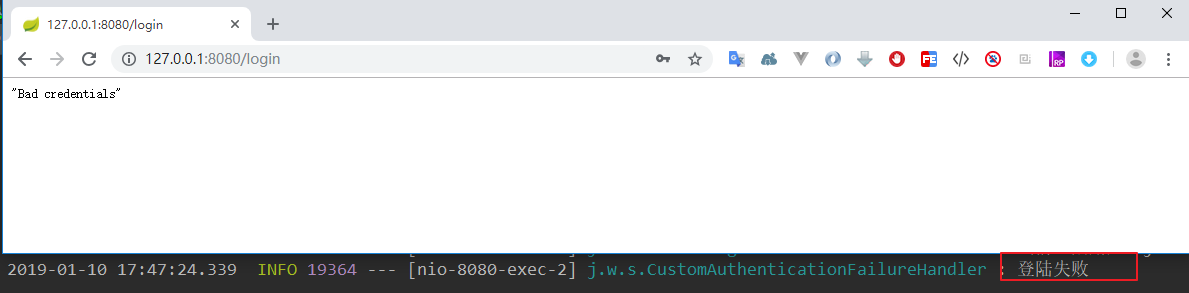
logger.info("登陆失败"); response.setStatus(HttpStatus.INTERNAL_SERVER_ERROR.value());
response.setContentType("application/json;charset=UTF-8");
response.getWriter().write(objectMapper.writeValueAsString(exception.getMessage()));
}
}
onAuthenticationFailure()方法的第三个参数 exception 为认证失败所产生的异常,这里也是简单的返回到前台。
1.3 修改 WebSecurityConfig
@Configuration

@EnableWebSecurity

@EnableGlobalMethodSecurity(prePostEnabled = true)

public class WebSecurityConfig extends WebSecurityConfigurerAdapter {

    @Autowired

    private CustomAuthenticationSuccessHandler customAuthenticationSuccessHandler;

    @Autowired

    private CustomAuthenticationFailureHandler customAuthenticationFailureHandler;

    ...

    @Override

    protected void configure(HttpSecurity http) throws Exception {

        http.authorizeRequests()

                // 如果有允许匿名的url,填在下面

//                .antMatchers().permitAll()

                .anyRequest().authenticated().and()

                // 设置登陆页

                .formLogin().loginPage("/login")

                .successHandler(customAuthenticationSuccessHandler).permitAll()

                .failureHandler(customAuthenticationFailureHandler)

//                .failureUrl("/login/error")

//                .defaultSuccessUrl("/")

                .permitAll()

                ...;

        // 关闭CSRF跨域

        http.csrf().disable();

    }

    ...

}
- 首先将 customAuthenticationSuccessHandler 和 customAuthenticationFailureHandler注入进来
- 配置 successHandler() 和 failureHandler()
- 注释 failureUrl() 和 defaultSuccessUrl()
1.4 运行程序
运行程序,当我们成功登陆后,发现日志信息被打印出来,页面被重定向到了首页:

当我们认证失败后,发现日志中“登陆失败”被打印出来,页面展示了认证失败的异常消息:
二、Session 超时
当用户登录后,我们可以设置 session 的超时时间,当达到超时时间后,自动将用户退出登录。
Session 超时的配置是 SpringBoot 原生支持的,我们只需要在 application.properties 配置文件中配置:
# session 过期时间,单位:秒

server.servlet.session.timeout=60
Tip:

从用户最后一次操作开始计算过期时间。

过期时间最小值为 60 秒,如果你设置的值小于 60 秒,也会被更改为 60 秒。
我们可以在 Spring Security 中配置处理逻辑,在 session 过期退出时调用。修改 WebSecurityConfig 的 configure()方法,添加:
.sessionManagement()

    // 以下二选一

    //.invalidSessionStrategy()

    //.invalidSessionUrl();
Spring Security 提供了两种处理配置,一个是 invalidSessionStrategy(),另外一个是 invalidSessionUrl()。
这两个的区别就是一个是前者是在一个类中进行处理,后者是直接跳转到一个 Url。简单起见,我就直接用 invalidSessionUrl()了,跳转到 /login/invalid,我们需要把该 Url 设置为免授权访问, 配置如下:
@Override

protected void configure(HttpSecurity http) throws Exception {

    http.authorizeRequests()

            // 如果有允许匿名的url,填在下面

            .antMatchers("/login/invalid").permitAll()

            .anyRequest().authenticated().and()

            ...

            .sessionManagement()

                .invalidSessionUrl("/login/invalid");

    // 关闭CSRF跨域

    http.csrf().disable();

}
在 controller 中写一个接口进行处理:
@RequestMapping("/login/invalid")
@ResponseStatus(HttpStatus.UNAUTHORIZED)
@ResponseBody
public String invalid() {
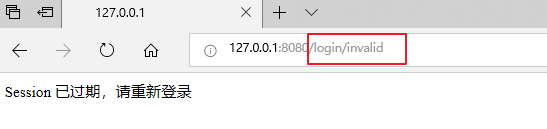
return "Session 已过期,请重新登录";
}
运行程序,登陆成功后等待一分钟(或者重启服务器),刷新页面:
三、限制最大登录数
接下来实现限制最大登陆数,原理就是限制单个用户能够存在的最大 session 数。
在上一节的基础上,修改 configure() 为:
.sessionManagement()

    .invalidSessionUrl("/login/invalid")

    .maximumSessions(1)

    // 当达到最大值时,是否保留已经登录的用户

    .maxSessionsPreventsLogin(false)

    // 当达到最大值时,旧用户被踢出后的操作

    .expiredSessionStrategy(new CustomExpiredSessionStrategy())
增加了下面三行代码,其中:
- maximumSessions(int):指定最大登录数
- maxSessionsPreventsLogin(boolean):是否保留已经登录的用户;为true,新用户无法登录;为 false,旧用户被踢出
- expiredSessionStrategy(SessionInformationExpiredStrategy):旧用户被踢出后处理方法
maxSessionsPreventsLogin()可能不太好理解,这里我们先设为 false,效果和 QQ 登录是一样的,登陆后之前登录的账户被踢出。
编写 CustomExpiredSessionStrategy 类,来处理旧用户登陆失败的逻辑:
public class CustomExpiredSessionStrategy implements SessionInformationExpiredStrategy {

    private ObjectMapper objectMapper = new ObjectMapper();

//    private RedirectStrategy redirectStrategy = new DefaultRedirectStrategy();

    @Override

    public void onExpiredSessionDetected(SessionInformationExpiredEvent event) throws IOException, ServletException {

        Map<String, Object> map = new HashMap<>(16);

        map.put("code", 0);

        map.put("msg", "已经另一台机器登录,您被迫下线。" + event.getSessionInformation().getLastRequest());

        // Map -> Json

        String json = objectMapper.writeValueAsString(map);

        event.getResponse().setContentType("application/json;charset=UTF-8");

        event.getResponse().getWriter().write(json);

        // 如果是跳转html页面,url代表跳转的地址

        // redirectStrategy.sendRedirect(event.getRequest(), event.getResponse(), "url");

    }

}
在 onExpiredSessionDetected() 方法中,处理相关逻辑,我这里只是简单的返回一句话。
执行程序,打开两个浏览器,登录同一个账户。因为我设置了 maximumSessions(1),也就是单个用户只能存在一个 session,因此当你刷新先登录的那个浏览器时,被提示踢出了。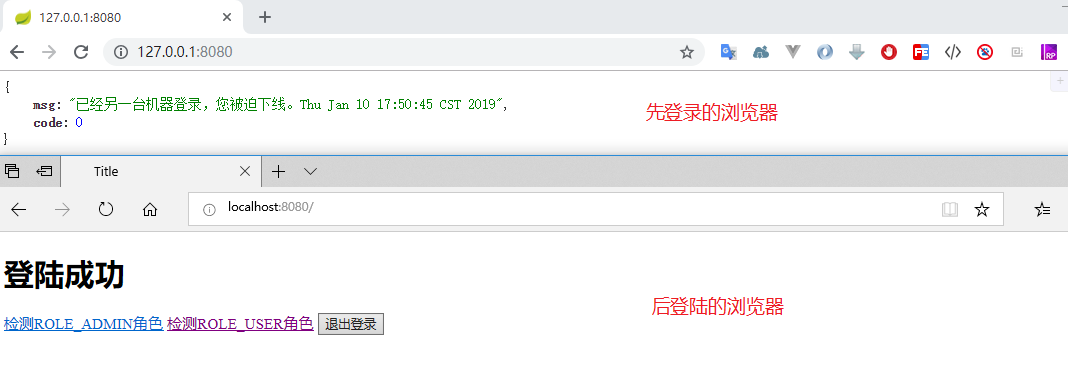
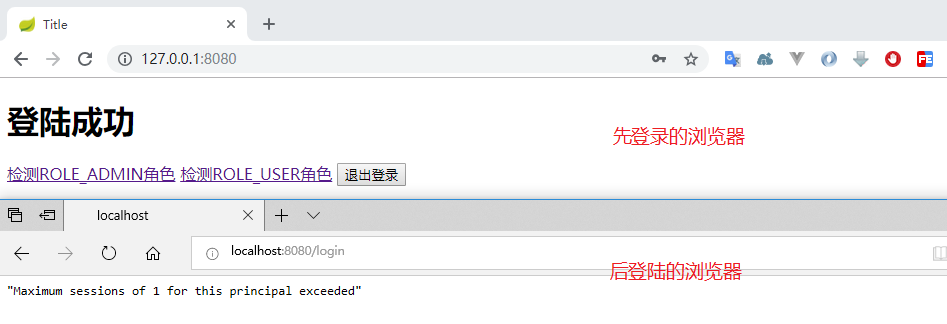
下面我们来测试下 maxSessionsPreventsLogin(true) 时的情况,我们发现第一个浏览器登录后,第二个浏览器无法登录:
四、踢出用户
下面来看下如何主动踢出一个用户。
首先需要在容器中注入名为 SessionRegistry 的 Bean,这里我就简单的写在 WebSecurityConfig 中:
@Bean

public SessionRegistry sessionRegistry() {

    return new SessionRegistryImpl();

}
修改 WebSecurityConfig 的 configure() 方法,在最后添加一行 .sessionRegistry():
public class WebSecurityConfig extends WebSecurityConfigurerAdapter {

    ...

    @Bean

    public SessionRegistry sessionRegistry() {

        return new SessionRegistryImpl();

    }

    @Override

    protected void configure(HttpSecurity http) throws Exception {

        http.authorizeRequests()

                // 如果有允许匿名的url,填在下面

                .antMatchers("/login/invalid").permitAll()

                .anyRequest().authenticated().and()

                // 设置登陆页

                .formLogin().loginPage("/login")

                .successHandler(customAuthenticationSuccessHandler)

                .failureHandler(customAuthenticationFailureHandler)

                .permitAll().and()

                .logout().and()

                .sessionManagement()

                    .invalidSessionUrl("/login/invalid")

                    .maximumSessions(1)

                    // 当达到最大值时,是否保留已经登录的用户

                    .maxSessionsPreventsLogin(false)

                    // 当达到最大值时,旧用户被踢出后的操作

                    .expiredSessionStrategy(new CustomExpiredSessionStrategy())

                    .sessionRegistry(sessionRegistry());

        // 关闭CSRF跨域

        http.csrf().disable();

    }

}
编写一个接口用于测试踢出用户:
@Controller

public class LoginController {

    @Autowired

    private SessionRegistry sessionRegistry;

    ...

    @GetMapping("/kick")

    @ResponseBody

    public String removeUserSessionByUsername(@RequestParam String username) {

        int count = 0;

        // 获取session中所有的用户信息

        List<Object> users = sessionRegistry.getAllPrincipals();

        for (Object principal : users) {

            if (principal instanceof User) {

                String principalName = ((User)principal).getUsername();

                if (principalName.equals(username)) {

                    // 参数二:是否包含过期的Session

                    List<SessionInformation> sessionsInfo = sessionRegistry.getAllSessions(principal, false);

                    if (null != sessionsInfo && sessionsInfo.size() > 0) {

                        for (SessionInformation sessionInformation : sessionsInfo) {

                            sessionInformation.expireNow();

                            count++;

                        }

                    }

                }

            }

        }

        return "操作成功,清理session共" + count + "个";

    }

}
- sessionRegistry.getAllPrincipals(); 获取所有 principal 信息
- 通过 principal.getUsername 是否等于输入值,获取到指定用户的 principal
- sessionRegistry.getAllSessions(principal, false)获取该 principal 上的所有 session
- 通过 sessionInformation.expireNow() 使得 session 过期
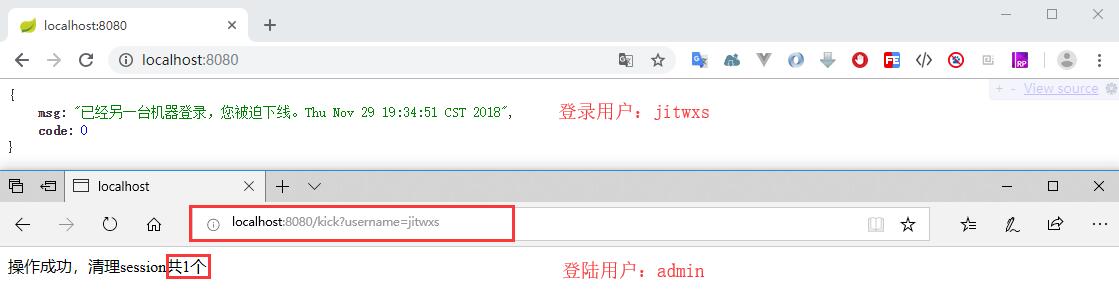
运行程序,分别使用 admin 和 jitwxs 账户登录,admin 访问 /kick?username=jitwxs 来踢出用户 jitwxs,jitwxs 刷新页面,发现被踢出。
五、退出登录
补充一下退出登录的内容,在之前,我们直接在 WebSecurityConfig 的 configure() 方法中,配置了:
http.logout();
这就是 Spring Security 的默认退出配置,Spring Security 在退出时候做了这样几件事:
- 使当前的 session 失效
- 清除与当前用户有关的 remember-me 记录
- 清空当前的 SecurityContext
- 重定向到登录页
Spring Security 默认的退出 Url 是 /logout,我们可以修改默认的退出 Url,例如修改为 /signout,那么在退出登录的按钮,地址也要改为/signout:
http.logout()

    .logoutUrl("/signout");
我们也可以配置当退出时清除浏览器的 Cookie,例如清除 名为 JSESSIONID 的 cookie:
http.logout()

    .logoutUrl("/signout")

    .deleteCookies("JSESSIONID");
我们也可以配置退出后处理的逻辑,方便做一些别的操作:
http.logout()

    .logoutUrl("/signout")

    .deleteCookies("JSESSIONID")

    .logoutSuccessHandler(logoutSuccessHandler);
创建类 DefaultLogoutSuccessHandler:
@Component

public class CustomLogoutSuccessHandler implements LogoutSuccessHandler {

    Logger log = LoggerFactory.getLogger(getClass());

    @Override

    public void onLogoutSuccess(HttpServletRequest request, HttpServletResponse response, Authentication authentication) throws IOException, ServletException {

        String username = ((User) authentication.getPrincipal()).getUsername();

        log.info("退出成功,用户名:{}", username);

        // 重定向到登录页

        response.sendRedirect("/login");

    }

}
最后把它注入到 WebSecurityConfig 即可:
@Autowired

private CustomLogoutSuccessHandler logoutSuccessHandler;
退出登录的比较简单,我就直接贴代码,不截图了。
六、Session 共享
在最后补充下关于 Session 共享的知识点,一般情况下,一个程序为了保证稳定至少要部署两个,构成集群。那么就牵扯到了 Session 共享的问题,不然用户在 8080 登录成功后,后续访问了 8060 服务器,结果又提示没有登录。
这里就简单实现下 Session 共享,采用 Redis 来存储。
6.1 配置 Redis
为了方便起见,我直接使用 Docker 快速部署,如果你需要传统方式安装,可以参考文章《Redis初探(1)——Redis的安装》。
docker pull redis

docker run --name myredis -p 6379:6379 -d redis

docker exec -it myredis redis-cli
这样就启动了 redis,并且进入到 redis 命令行中。
6.2 配置 Session 共享
首先需要导入依赖,因为我们采用 Redis 方式实现,因此导入:
<dependency>

    <groupId>org.springframework.boot</groupId>

    <artifactId>spring-boot-starter-data-redis</artifactId>

</dependency>

<dependency>

    <groupId>org.springframework.session</groupId>

    <artifactId>spring-session-data-redis</artifactId>

</dependency>
在 application.xml 中新增配置指定 redis 地址以及 session 的存储方式:
spring.redis.host=192.168.139.129

spring.redis.port=6379

spring.session.store-type=redis
然后为主类添加 @EnableRedisHttpSession 注解。
@EnableRedisHttpSession

@SpringBootApplication

public class Application {

    public static void main(String[] args) {

        SpringApplication.run(Application.class, args);

    }

}
如果在主类添加的@EnableRedisHttpSession 后,程序运行抛出异常,则取消上述注解,将@EnableRedisHttpSession 注解移交到RedisSessionConfig 类
@Configuration

@EnableRedisHttpSession

public class RedisSessionConfig {

}
6.3 运行程序
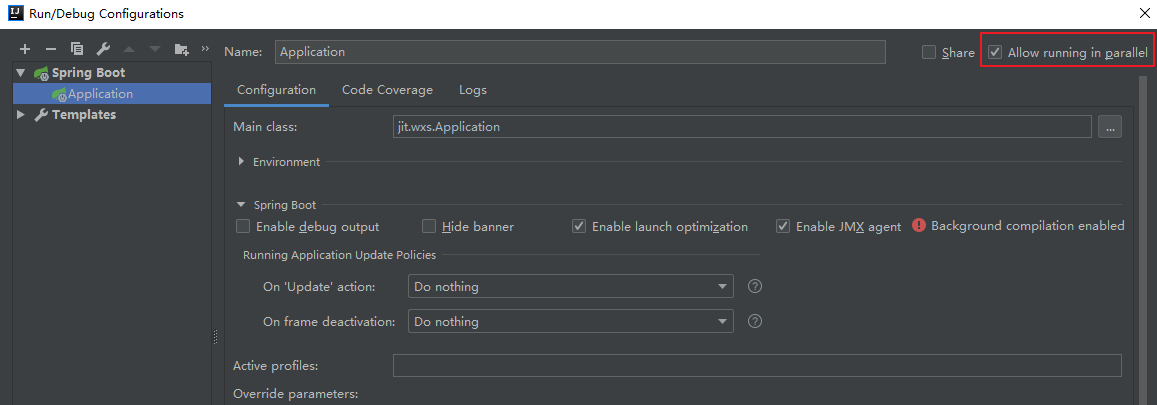
这样就完成了基于 Redis 的 Session 共享,下面来测试下。首先修改 IDEA 配置来允许项目在多端口运行,勾选 Allow running in parallel:
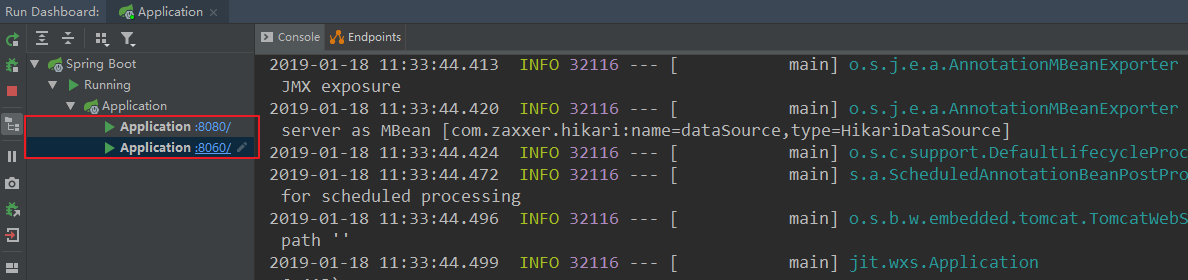
运行程序,然后修改配置文件,将 server.port 更改为 8060,再次运行。这样项目就会分别在默认的 8080 端口和 8060 端口运行。
先访问 localhost:8080,登录成功后,再访问 localhost:8060,发现无需登录。

然后我们进入 Redis 查看下 key:
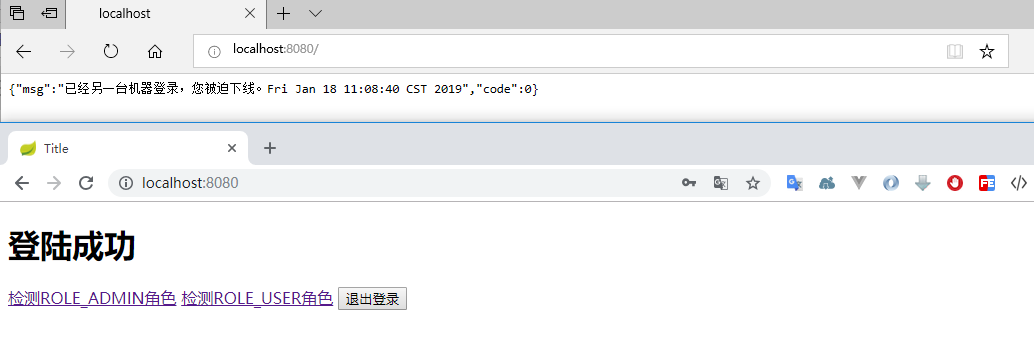
最后再测试下之前配置的 session 设置是否还有效,使用其他浏览器登陆,登陆成功后发现原浏览器用户的确被踢出。
---------------------
作者:Jitwxs
来源:CSDN
原文:https://blog.csdn.net/yuanlaijike/article/details/84638745
SpringBoot集成Spring Security(6)——登录管理的更多相关文章
- springboot集成spring security实现登录和注销
文章目录 一.导入坐标 二.Users实体类及其数据库表的创建 三.controller,service,mapper层的实现 四.核心–编写配置文件 五.页面的实现 运行结果 一.导入坐标 < ...
- SpringBoot集成Spring Security(4)——自定义表单登录
通过前面三篇文章,你应该大致了解了 Spring Security 的流程.你应该发现了,真正的 login 请求是由 Spring Security 帮我们处理的,那么我们如何实现自定义表单登录呢, ...
- SpringBoot集成Spring Security(2)——自动登录
在上一章:SpringBoot集成Spring Security(1)——入门程序中,我们实现了入门程序,本篇为该程序加上自动登录的功能. 文章目录 一.修改login.html二.两种实现方式 2. ...
- SpringBoot集成Spring Security(7)——认证流程
文章目录 一.认证流程 二.多个请求共享认证信息 三.获取用户认证信息 在前面的六章中,介绍了 Spring Security 的基础使用,在继续深入向下的学习前,有必要理解清楚 Spring Sec ...
- SpringBoot集成Spring Security入门体验
一.前言 Spring Security 和 Apache Shiro 都是安全框架,为Java应用程序提供身份认证和授权. 二者区别 Spring Security:重量级安全框架 Apache S ...
- SpringBoot集成Spring Security(5)——权限控制
在第一篇中,我们说过,用户<–>角色<–>权限三层中,暂时不考虑权限,在这一篇,是时候把它完成了. 为了方便演示,这里的权限只是对角色赋予权限,也就是说同一个角色的用户,权限是 ...
- SpringBoot集成Spring Security
1.Spring Security介绍 Spring security,是一个强大的和高度可定制的身份验证和访问控制框架.它是确保基于Spring的应用程序的标准 --来自官方参考手册 Spring ...
- SpringBoot 集成Spring security
Spring security作为一种安全框架,使用简单,能够很轻松的集成到springboot项目中,下面讲一下如何在SpringBoot中集成Spring Security.使用gradle项目管 ...
- springBoot整合spring security实现权限管理(单体应用版)--筑基初期
写在前面 在前面的学习当中,我们对spring security有了一个小小的认识,接下来我们整合目前的主流框架springBoot,实现权限的管理. 在这之前,假定你已经了解了基于资源的权限管理模型 ...
随机推荐
- 【UOJ#82】【UR #7】水题生成器(贪心)
[UOJ#82][UR #7]水题生成器(贪心) 题面 UOJ 题解 把\(n!\)的所有约数搜出来,这个个数不会很多. 然后从大往小能选则选就好了. #include<iostream> ...
- ASP.NET Core 开发人员异常页面
UseDeveloperExceptionPage 中间件 我们谈谈在 Startup 类的 Configure()方法中以下代码: public void Configure(IApplicatio ...
- CSS覆盖问题的说明
最近在写css的时候,由于经常使用到很长的多级选择器,而碰到一些样式被覆盖或者覆盖不了的情况是相当的郁闷,所以专门花了一些时间对一些选择器做了对比测试.这里先说明一下,由于ie6不支持css2.0选择 ...
- Java多线程——查看线程堆栈信息
Java多线程——查看线程堆栈信息 摘要:本文主要介绍了查看线程堆栈信息的方法. 使用Thread类的getAllStackTraces()方法 方法定义 可以看到getAllStackTraces( ...
- Java学习——内存机制
Java学习——内存机制 摘要:本文主要介绍了Java的内存机制. 部分内容来自以下博客: https://www.cnblogs.com/xrq730/p/4827590.html https:// ...
- Qt压缩和解压 zip
zlib编译详见 https://blog.csdn.net/zhangxuechao_/article/details/85049711 下载quazip https://github.com/st ...
- 考研辅助app的诞生!
背景: 去年下半年由于种种因素驱动下,准备去考研,在之前同事的推荐下,参加了考研培训班,培训班发了纸质书籍和线上视频观看账号,由于线上视频需要全程联网才能观看,突发奇想,要是我把这些视频下载下来,没网 ...
- 简单聊聊实时视频rtmp
背景: 由于经常接触实时视频, 对实时视频略有了解. 实时视频是将视频流实时上传到服务器端进行解析, 由RTMP服务器处理. RTMP 服务器 自己动手搭建一个rtmp, 本文在 Linux环境中搭建 ...
- sparkSQL中的example学习(3)
UserDefinedTypedAggregation.scala(用户可自定义类型) import org.apache.spark.sql.expressions.Aggregator impor ...
- itextpdf5操作表格
下面是一些对表格排版的常用方法,是在制作pdf的时候通过查看ipa和一些博客积累下来的. 包括,表格的宽度,对齐方式,表的页眉页脚,前后间距,padding: 单元格对齐方式,线条设置,段落于单元格之 ...