
[转]Using Angular in Visual Studio Code
本文转自:https://code.visualstudio.com/docs/nodejs/angular-tutorial
Using Angular in Visual Studio Code
Angular is a popular JavaScript library for building web application user interfaces developed by Google. The Visual Studio Code editor supports Angular IntelliSense and code navigation out of the box.
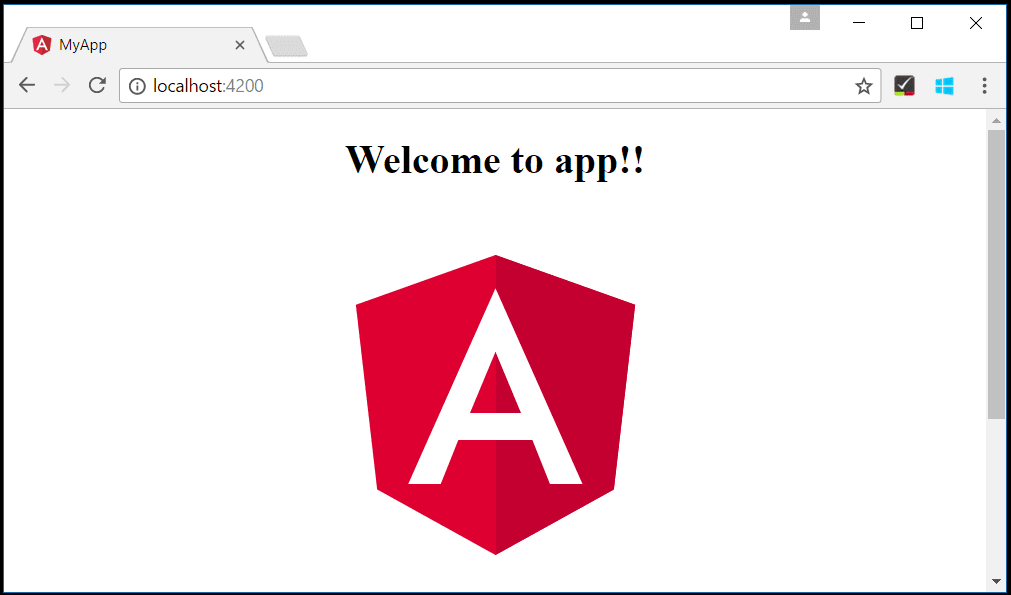
Welcome to Angular
We'll be using the Angular CLI for this tutorial. To install and use the command line interface as well as run the Angular application server, you'll need the Node.js JavaScript runtime and npm (the Node.js package manager) installed. npm is included with Node.js which you can install from here.
Tip: To test that you have Node.js and npm correctly installed on your machine, you can type
node --versionandnpm --version.
To install the Angular CLI, in a terminal or command prompt type:
npm install -g @angular/cli
This may take a few minutes to install. You can now create a new Angular application by typing:
ng new my-app
my-app is the name of the folder for your application. This may take a few minutes to create the Angular application in TypeScript and install its dependencies.
Let's quickly run our Angular application by navigating to the new folder and typing ng serve to start the web server and open the application in a browser:
cd my-app

ng serve
You should see "Welcome to app!!" on http://localhost:4200 in your browser. We'll leave the web server running while we look at the application with VS Code.
To open your Angular application in VS Code, open another terminal (or command prompt) and navigate to the my-app folder and type code .:
cd my-app

code .
Syntax highlighting and bracket matching
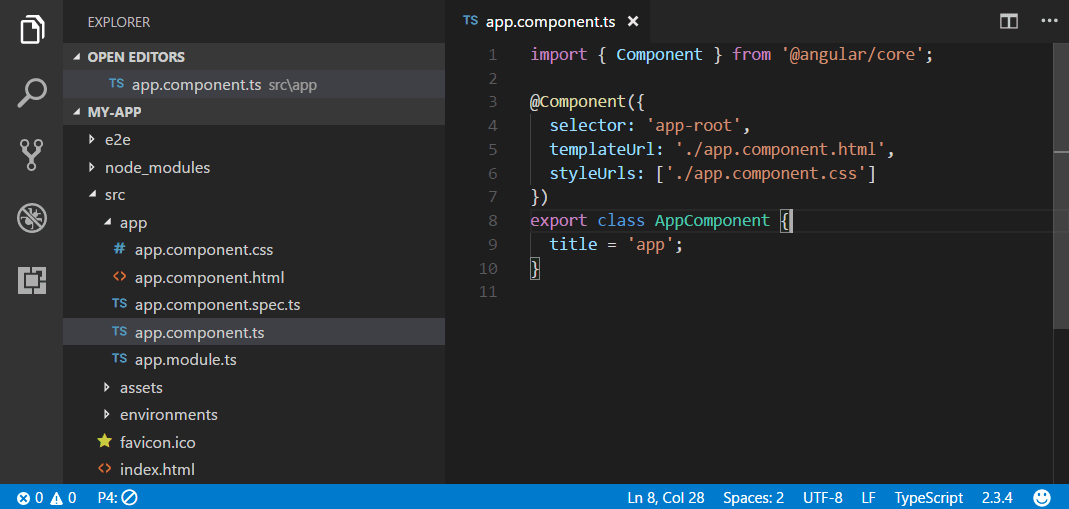
Now expand the src\app folder and select the app.component.ts file. You'll notice that VS Code has syntax highlighting for the various source code elements and, if you put the cursor on a parentheses, the matching bracket is also selected.
IntelliSense
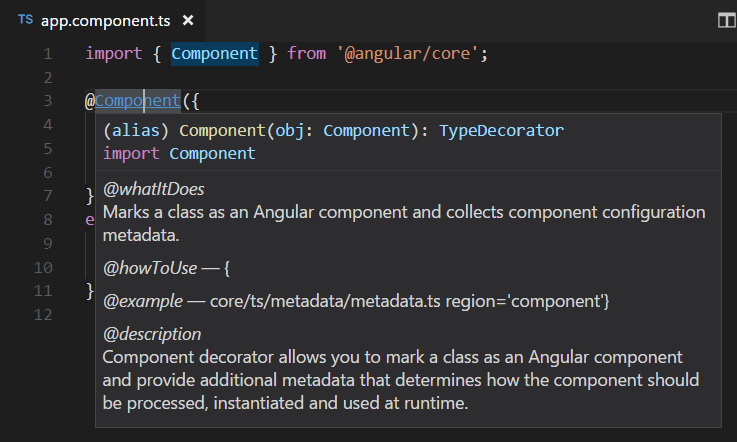
As you hover your mouse over text in the file, you'll see that VS Code gives you information about key items in your source code. Items such as variables, classes and Angular decorators are a few examples where you'll be presented with this information.
As you start typing in app.component.ts, you'll see smart suggestions and code snippets.
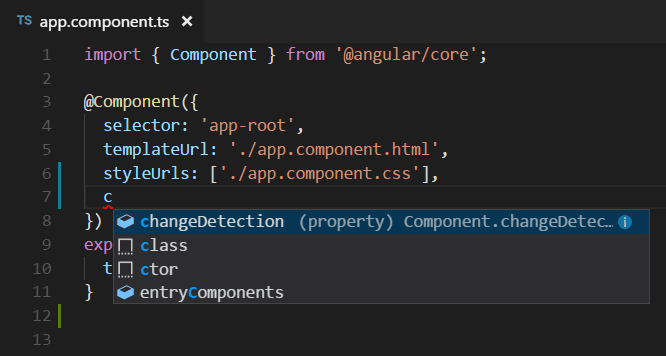
You can click the information button (i) to see a flyout with more documentation.
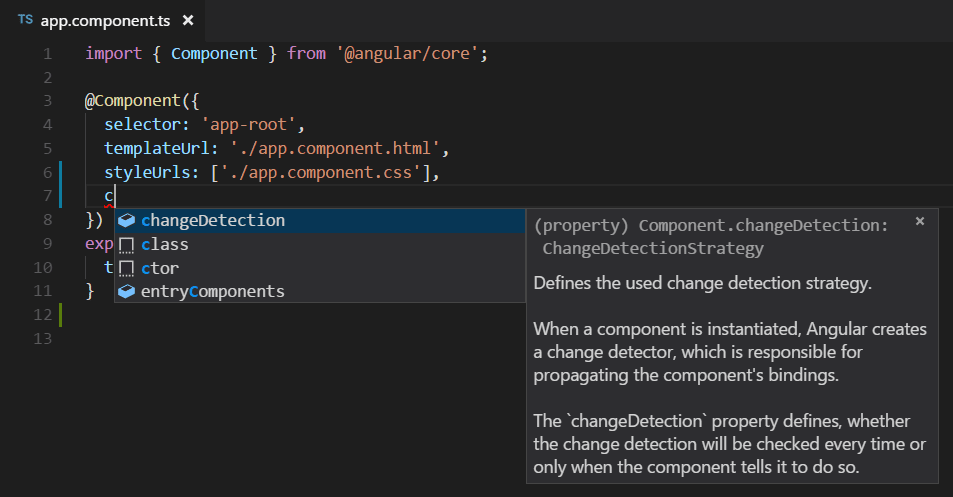
VS Code uses the TypeScript language service for code intelligence (IntelliSense) and it has a feature called Automatic Type Acquisition (ATA). ATA pulls down the npm Type Declaration files (*.d.ts) for the npm modules referenced in the package.json.
Go to Definition, Peek definition
Through the TypeScript language service, VS Code can also provide type definition information in the editor through Go to Definition (F12) or Peek Definition (Ctrl+Shift+F12). Open the app.module.tsfile and put the cursor over AppComponent in the bootstrap property declaration, right click and select Peek Definition. A Peek window will open showing the AppComponent definition from app.component.ts.
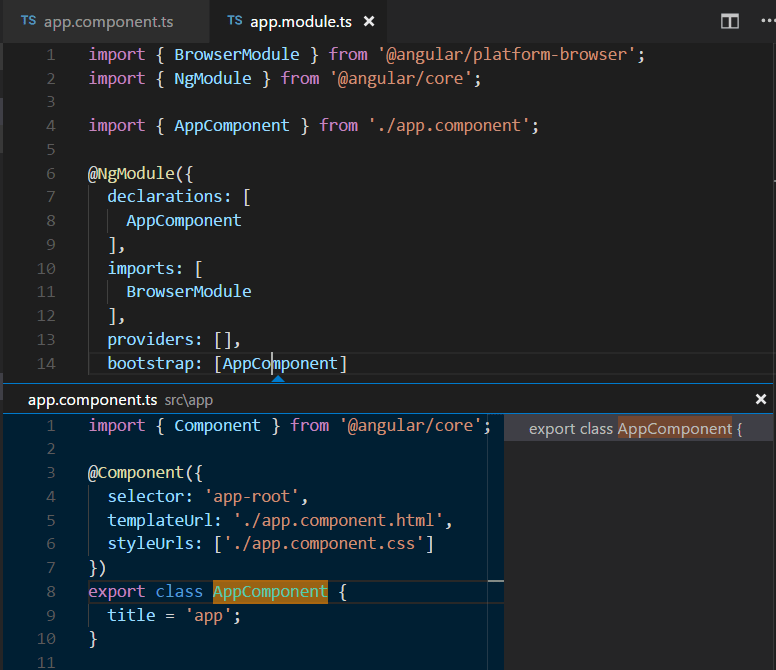
Press Escape to close the Peek window.
Hello World!
Let's update the sample application to "Hello World". Go back to the app.component.ts file and change the title string in AppComponent to "Hello World".
import { Component } from '@angular/core';

@Component({

  selector: 'app-root',

  templateUrl: './app.component.html',

  styleUrls: ['./app.component.css']

})

export class AppComponent {

  title = 'Hello World';

}
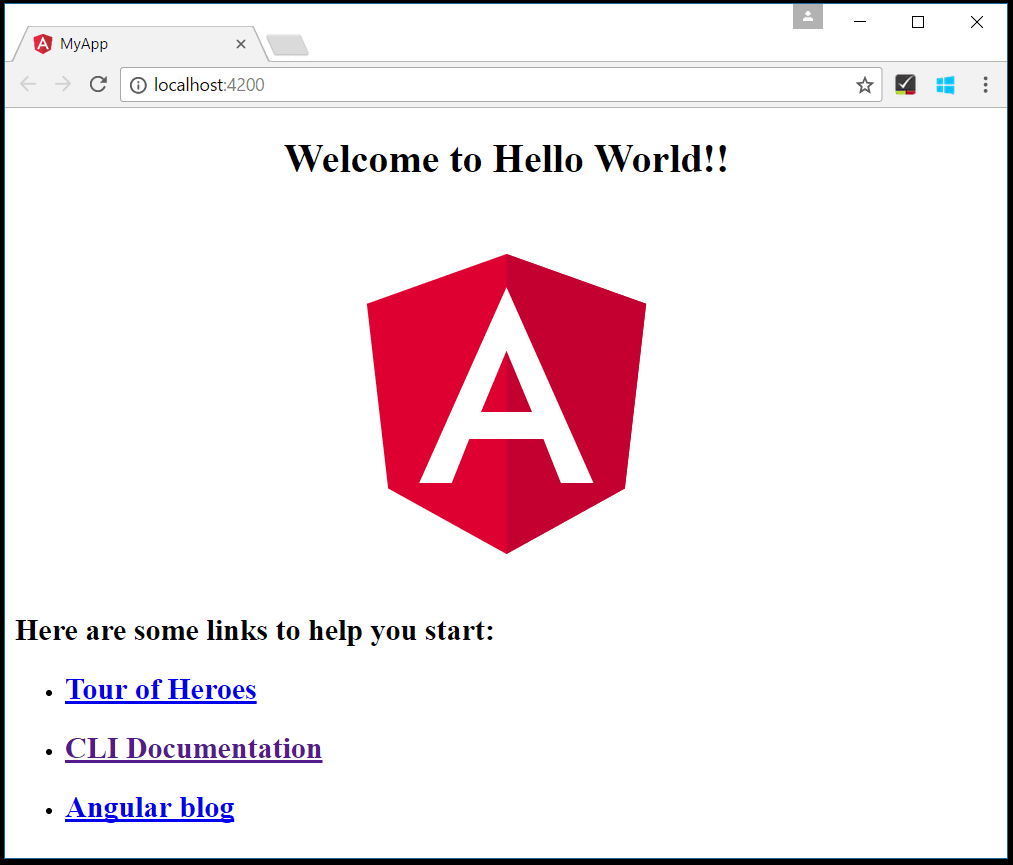
Once you save the app.component.ts file, the running instance of the server will update the web page and you'll see "Welcome to Hello World!!".
Tip: VS Code supports Auto Save, which by default saves your files after a delay. Check the Auto Save option in the File menu to turn on Auto Save or directly configure the
files.autoSaveuser setting.
Debugging Angular
To debug the client side Angular code, we'll need to install the Debugger for Chrome extension.
Note: This tutorial assumes you have the Chrome browser installed. The builders of the Debugger for Chrome extension also have versions for the Safari on iOS and Edge browsers.
Open the Extensions view (Ctrl+Shift+X) and type 'chrome` in the search box. You'll see several extensions which reference Chrome.

Press the Install button for Debugger for Chrome. The button will change to Installing then, after completing the installation, it will change to Reload. Press Reload to restart VS Code and activate the extension.
Set a breakpoint
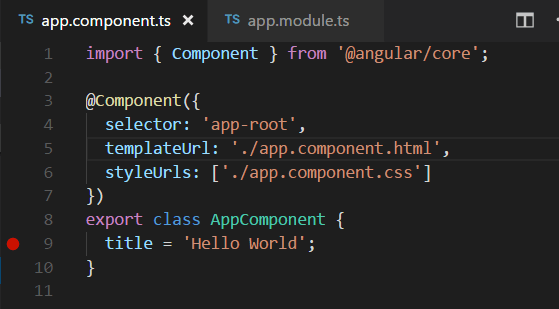
To set a breakpoint in app.component.ts, click on the gutter to the left of the line numbers. This will set a breakpoint which will be visible as a red circle.
Configure the Chrome debugger
We need to initially configure the debugger. To do so, go to the Debug view (Ctrl+Shift+D) and click on gear button to create a launch.json debugger configuration file. Choose Chrome from the Select Environment dropdown. This will create a launch.json file in a new .vscode folder in your project which includes a configuration to launch the website.
We need to make one change for our example: change the port of the url from 8080 to 4200. Your launch.json should look like this:
{

    "version": "0.2.0",

    "configurations": [

        {

            "type": "chrome",

            "request": "launch",

            "name": "Launch Chrome against localhost",

            "url": "http://localhost:4200",

            "webRoot": "${workspaceFolder}"

        }

    ]

}
Press F5 or the green arrow to launch the debugger and open a new browser instance. The source code where the breakpoint is set runs on startup before the debugger was attached so we won't hit the breakpoint until we refresh the web page. Refresh the page and you should hit your breakpoint.
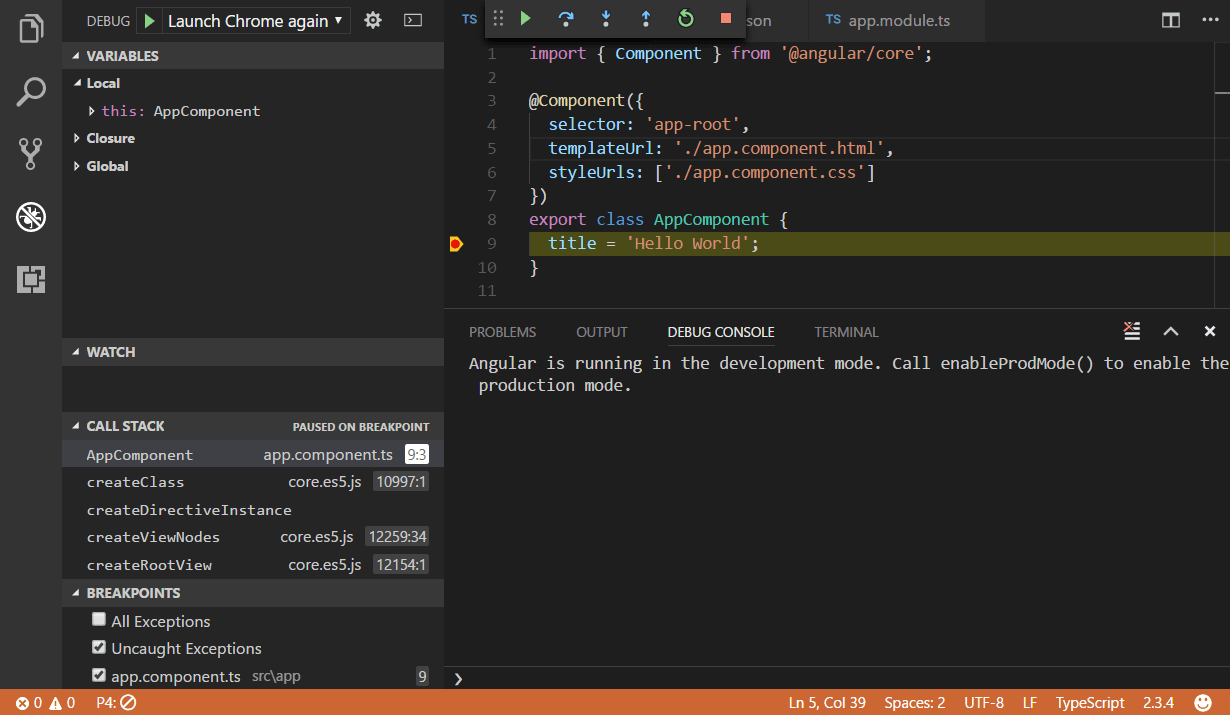
You can step through your source code (F10), inspect variables such as AppComponent, and see the call stack of the client side Angular application.
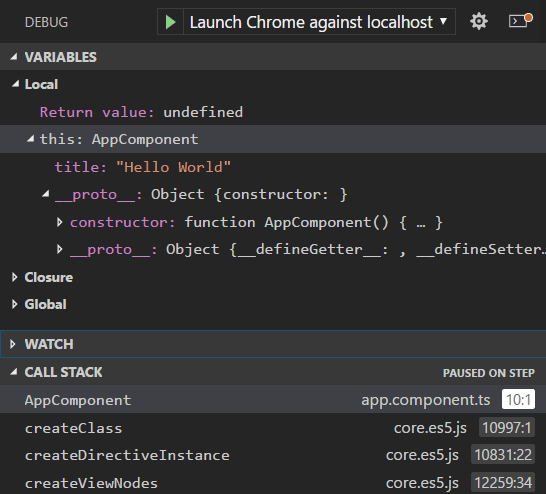
The Debugger for Chrome extension README has lots of information on other configurations, working with sourcemaps, and troubleshooting. You can review it directly within VS Code from the Extensions view by clicking on the extension item and opening the Details view.

Popular Starter Kits
In this tutorial, we used the Angular CLI to create a simple Angular application. There are lots of great samples and starter kits available to help build your first Angular application.
Recipes
The VS Code team has created recipes for more complex debugging scenarios. There you'll find the Chrome Debugging with Angular CLI recipe which also uses the Angular CLI and goes into detail on debugging the generated project's unit tests.
MEAN Starter
If you'd like to see a full MEAN (MongoDB, Express, Angular, Node.js) stack example, look at MEAN.IO. They have documentation and an application generator for a sample MEAN project. You'll need to install and start MongoDB, but you'll quickly have a MEAN application running. VS Code also has great MongoDB support through the Azure Cosmos DB extension.
React
React is another popular web framework. If you'd like to see an example of React working with VS Code, check out the Using React in VS Code tutorial. It will walk you through creating an React application and configuring the launch.json file for the Debugger for Chrome extension.
Angular Extensions
In addition to the functionality VS Code provides out of the box, you can install VS Code extensions for greater functionality.
Click on an extension tile above to read the description and reviews on the Marketplace.
To find other Angular extensions, open the Extensions view (Ctrl+Shift+X) and type 'angular' to see a filtered list of Angular extensions.
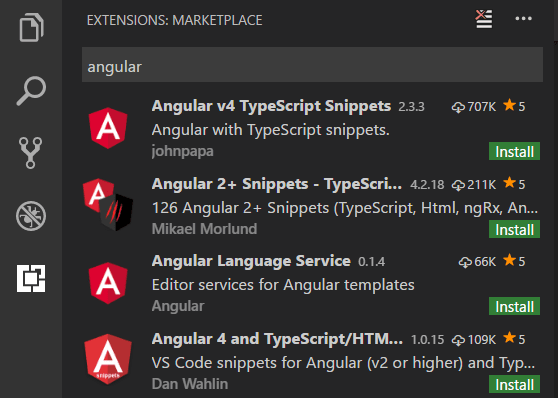
The community has also created "Extension Packs" which bundle useful extensions together (for example, a linter, debugger, and snippets) into a single download. To see available Angular extension packs, add the "extension packs" category to your filter (angular @category:"extension packs").
[转]Using Angular in Visual Studio Code的更多相关文章
- Visual Studio Code作为Angular开发工具常用插件安装、json-server安装与使用、angular/cli安装失败问题
前提准备: 搭建好Angular开发环境 1 安装Visual Studio Code 教程简单,不会的去问度娘 2 安装Chrome浏览器 教程简单,不会的趣闻度娘 3 Visual Studio ...
- Angular14 Visual Studio Code作为Angular开发工具常用插件安装、json-server安装与使用、angular/cli安装失败问题、emmet安装
前提准备: 搭建好Angular开发环境 1 安装Visual Studio Code 教程简单,不会的去问度娘 2 安装Chrome浏览器 教程简单,不会的趣闻度娘 3 Visual Studio ...
- Visual Studio Code 通过 Chrome插件Type Script断点调试Angular 2
1. 下载Visual Studio Code (https://code.visualstudio.com/) 2. 安装插件Debugger for chrome 3. 确定tsconfig.js ...
- Visual Studio Code——Angular2 Hello World 之 2.0
最近看到一篇用Visual Studio Code开发Angular2的文章,也是一篇入门教程,地址为:使用Visual Studio Code開發Angular 2專案.这里按部就班的做了一遍,感觉 ...
- 打造TypeScript的Visual Studio Code开发环境
打造TypeScript的Visual Studio Code开发环境 本文转自:https://zhuanlan.zhihu.com/p/21611724 作者: 2gua TypeScript是由 ...
- Visual Studio Code预览版Ver 0.3.0试用体验
当你开始阅读这篇文章时,请先不要把Visual Studio Code和.net.Windows联想到一起,因为VS Code是一个跨平台,支持30多种语言的开箱代码编辑器.不管你是.Net.Java ...
- Visual Studio Code 智能提示文件
Visual Studio Code 开发前端和node智能提示 visual studio code 是一个很好的编辑器,可以用来编写前端代码和nodejs. 我很喜欢使用VSC,现在流行框架对VS ...
- 使用Visual Studio Code开发AngularJS应用
(此文章同时发表在本人微信公众号"dotNET每日精华文章",欢迎右边二维码来关注.) 题记:VSC发布之后,尤其最近刚刚更新到0.3之后,社区出现了很多介绍VSC使用的好文章.比 ...
- 微软良心之作——Visual Studio Code 开源免费跨平台代码编辑器
微软良心之作——Visual Studio Code 开源免费跨平台代码编辑器 在 Build 2015 大会上,微软除了发布了 Microsoft Edge 浏览器和新的 Windows 10 预览 ...
随机推荐
- http协议介绍及get与post请求、响应状态码
HTTP: 通信双方如果想要通信就必须遵循一定的规则,我们把这个规则称之为HTTP协议! 报文: HTTP协议通信的内容我们称之为:报文 报文格式: 报文首部 空行 报文主体 1.请求报文 ...
- RQNOJ 3 Jam的计数法
一道模拟题,用的vector比用链表要方便很多,毕竟不需要自己写,因为是递增的,所以每一次你都要去检查最后一位加1之后有没有越界,如果没越界你就可以把他当前的字符删掉替换成他下一位的字符就可以了,如果 ...
- Codeforces Round #540 (Div. 3)--1118C - Palindromic Matrix
https://codeforces.com/contest/1118/problem/C 在查找元素的时候,必须按4,2,1的顺序进行.因为,如果先找1,可能就把原来的4拆散了,然后再找4,就找不到 ...
- 附加题2 :git 简单练习
目的: 练习git 基本操作 理解版本管理 Task 1:在码云上新建一个项目,项目命名 『Helloworld』 ,设置为公开访问. step 0: 在你计算机安装git.参照互联网教程<gi ...
- Windows核心编程:第1章 错误处理
Github https://github.com/gongluck/Windows-Core-Program.git //第1章 错误处理.cpp: 定义应用程序的入口点. // #include ...
- Java学习笔记31(集合框架五:set接口、哈希表的介绍)
set接口的特点: 1.不包含重复元素 2.set集合没有索引,只能用迭代器或增强for循环遍历 3.set的底层是map集合 方法和Collection的方法基本一样 set接口的实现类HashSe ...
- Django创建和配置文件
首先我们随便找一个文件 shift+鼠标右键 点击打开 Powershell 窗口 然后输入命令 django-admin startproject 项目名字 输入cd day 进入这个项目下 ...
- HoloLens开发手记-开发概述Development overview
开发HoloLens全息应用将使用UWP平台(Universal Windows Platform),所有的HoloLens应用都是Win10通用应用,所有UWP通用应用都可以在HoloLens上运行 ...
- Android生成自定义二维码
前面说过两种二维码扫描方式,现在说如何生成自定义酷炫二维码.二维码生成需要使用Google开源库Zxing,Zxing的项目地址:https://github.com/ZBar/ZBar,我们只需要里 ...
- 《Kubernetes权威指南》——Kubelet运行机制与安全机制
1 Kubelet运行机制 Kubenetes集群中的每个Node节点都会启动一个Kubelet服务进程用于处理Master下发到该节点的任务,管理Pod及其中的容器 Kubelet进程在API Se ...