ASP.NET Core3.1使用Identity Server4建立Authorization Server
前言
网上关于Identity Server4的资料有挺多的,之前是一直看杨旭老师的,最近项目中有使用到,在使用.NET Core3.1的时候有一些不同。所以在此记录一下。
预备知识: https://www.cnblogs.com/cgzl/p/9405796.html
本文内容参考
如杨旭老师所说,官方文档真的很详细,有时间建议大家看下官方文档。
建立Authorization Server
建立ASP.Net Core项目使用空模板。
项目建立之后,运行方式改为使用控制台运行而不是IIS Express,以便查看各种debug信息。
这个已成为习惯,也是学习杨老师的,确实比较方便,当然如果不喜欢可以不设置,只需要端口号配置的时候对应好就可以的。

修改后文件代码为:
{

  "profiles": {

    "IdentityServer4.AuthServer": {

      "commandName": "Project",

      "launchBrowser": true,

      "applicationUrl": "http://localhost:5000",

      "environmentVariables": {

        "ASPNETCORE_ENVIRONMENT": "Development"

      }

    }

  }

}
端口号为5000,此时运行程序,会显示出Hello World!,默认的,没有修改。
安装Identity Server4

点击安装就好啦。
配置Identity Server4
API和客户端
API的配置和之前有所不同,之前是
ApiResources,现在分为ApiResources和ApiScopes,后续会说到。
using IdentityServer4.Models;

using IdentityServer4.Test;

using System.Collections.Generic;

namespace IdentityServer4.AuthServer.Configuration

{

    public class InMemoryConfiguration

    {

        /// <summary>

        /// Api Scopes

        /// </summary>

        /// <returns></returns>

        public static IEnumerable<ApiScope> ApiScopes()

        {

            return new List<ApiScope>

            {

                new ApiScope("scope1","scope1")

            };

        }

        /// <summary>

        /// ApiResources

        /// </summary>

        /// <returns></returns>

        public static IEnumerable<ApiResource> ApiResources()

        {

            return new[]

            {

                new ApiResource

                {

                    Name = "api1",

                    DisplayName = "My Api1",

                    Scopes = { "scope1" }

                }

            };

        }

        /// <summary>

        /// Clients

        /// </summary>

        /// <returns></returns>

        public static IEnumerable<Client> Clients()

        {

            return new[]

            {

                new Client

                {

                    ClientId = "client",

                    AllowedGrantTypes = GrantTypes.ResourceOwnerPasswordAndClientCredentials,

                    ClientSecrets =

                    {

                        new Secret("secret".Sha256())

                    },

                    AllowedScopes = { "scope1" }

                }

            };

        }

        /// <summary>

        /// Users

        /// </summary>

        /// <returns></returns>

        public static IEnumerable<TestUser> Users()

        {

            return new[]

            {

                new TestUser

                {

                    SubjectId = "1",

                    Username = "mail@qq.com",

                    Password = "password"

                }

            };

        }

    }

}
ApiScopes: 这个应该怎么翻译我也不清楚,API范围?如果没理解错的话,就是给之前的ApiResources进行了一个分组。授权的时候会验证Scope。
ApiResources:比如官网的第一个demo,可能会有疑问,你怎么知道我是api1呢?其实,就没有验证,只要有授权码就可以访问的。如果说,我只要api1的话,那就用到ApiResources了,生产环境中,也必然是需要用到的。
加载资源和客户端
修改Startup.cs
public void ConfigureServices(IServiceCollection services)

{

    services.AddIdentityServer()

        .AddDeveloperSigningCredential()

        .AddTestUsers(InMemoryConfiguration.Users().ToList())

        .AddInMemoryClients(InMemoryConfiguration.Clients())

        .AddInMemoryApiScopes(InMemoryConfiguration.ApiScopes())

        .AddInMemoryApiResources(InMemoryConfiguration.ApiResources());

}
当然,也需要app.UseIdentityServer();
首次启动时,Identity Server4将创建一个开发人员签名密钥,该文件名为
tempkey.rsa。不必将该文件签入源代码管理中,如果不存在该文件将被重新创建。也就是AddDeveloperSigningCredential()。 这个方法只适合用于Identity Server4在单个机器运行, 如果是生产环境你得使用AddSigningCredential()这个方法.
运行一下,发现并没有什么改变,不过打开:http://localhost:5000/.well-known/openid-configuration,则应该看到所谓的发现文档。发现文档是身份服务器中的标准端点。客户端和API将使用发现文档来下载必要的配置数据。

获取Token
打开Postman,按照配置的输入然后试一下
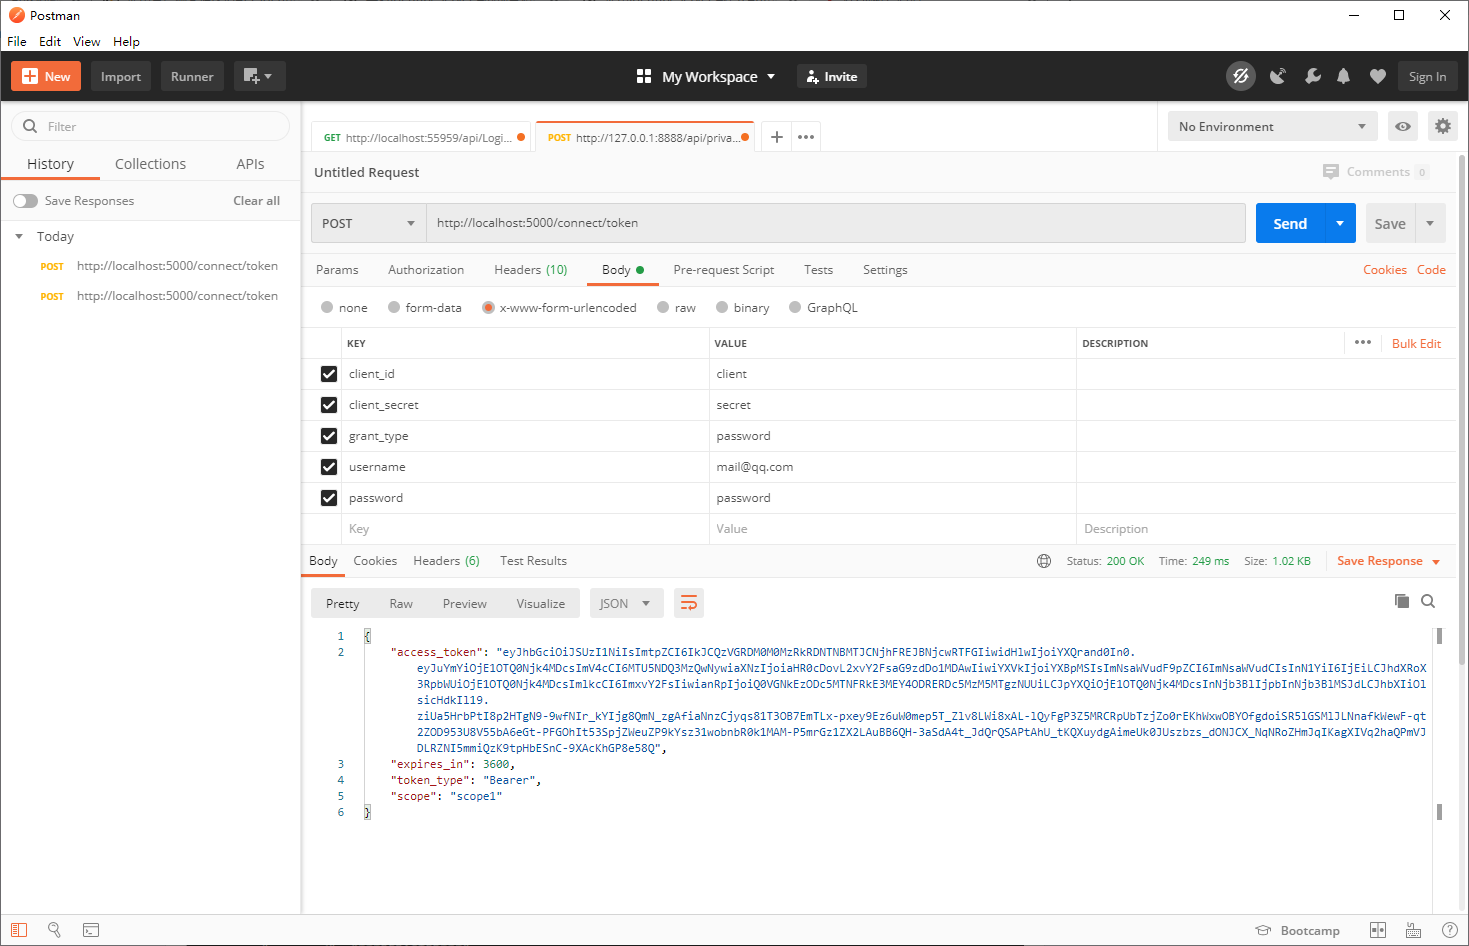
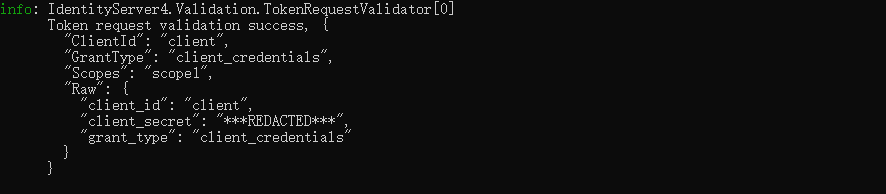
获取到Token,控制台输出如下:
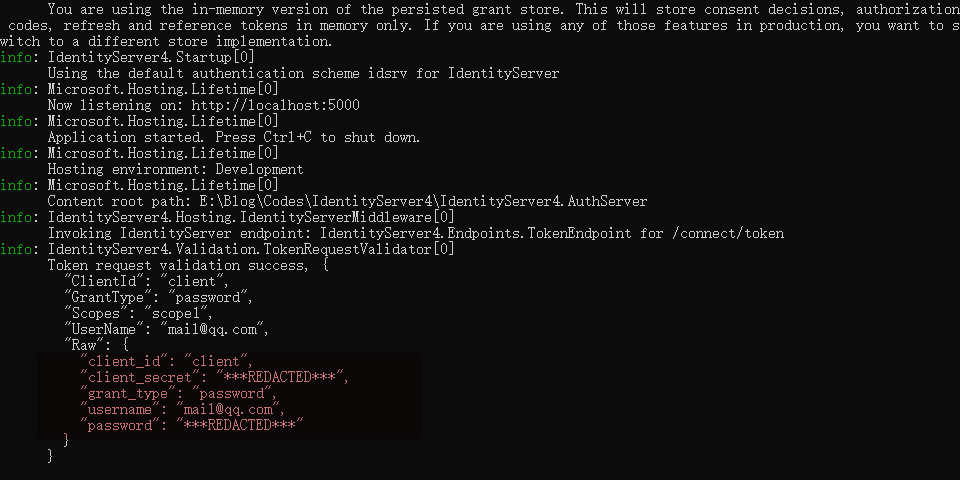
这里是有用户的信息的,但是我们可以把用户信息去掉,然后GrantType改为client_credentials,我们设置的是 ResourceOwnerPasswordAndClientCredentials 这个GrantType,所以使用用户名密码以及使用ClientCredentials都可以。
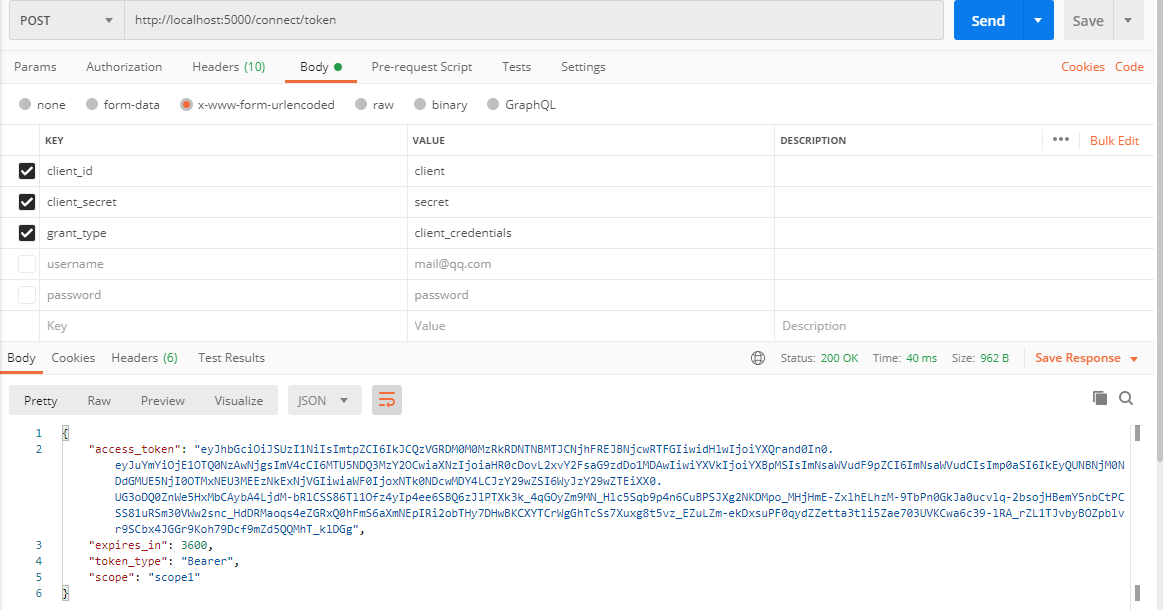
不过此时控制台会有区别,没有用户信息了。
美化美化UI
Identity Server 4 提供了一套QuickStart UI
https://github.com/IdentityServer/IdentityServer4.Quickstart.UI
此存储库包含UI所需的控制器,模型,视图和CSS文件。只需下载/克隆并将其复制到Web项目中即可。
打开项目根目录,运行Powershell,然后输入命令:
iex ((New-Object System.Net.WebClient).DownloadString('https://raw.githubusercontent.com/IdentityServer/IdentityServer4.Quickstart.UI/main/getmain.ps1'))

不过可能你会遇到我前三次那种错误,嗯,访问不了,那就全局或者先下载下来人工粘贴过去吧~
好了以后我们的项目是酱紫的:
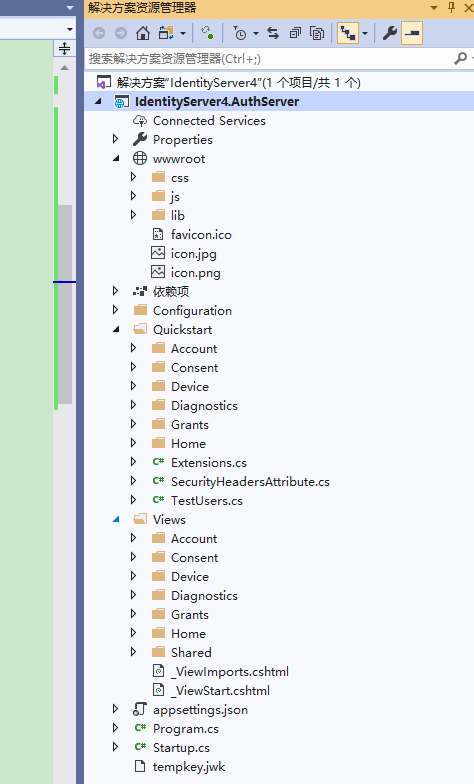
由于有wwwroot下很多静态文件, 所以asp.net core 需要启用服务静态文件的功能: 修改Startup的Configure方法
先看修改前的样子吧
        public void Configure(IApplicationBuilder app, IWebHostEnvironment env)

        {

            if (env.IsDevelopment())

            {

                app.UseDeveloperExceptionPage();

            }

            app.UseIdentityServer();

            app.UseRouting();

            app.UseEndpoints(endpoints =>

            {

                endpoints.MapGet("/", async context =>

                {

                    await context.Response.WriteAsync("Hello World!");

                });

            });

        }
修改后
        public void Configure(IApplicationBuilder app, IWebHostEnvironment env)

        {

            if (env.IsDevelopment())

            {

                app.UseDeveloperExceptionPage();

            }

            app.UseIdentityServer();

            app.UseStaticFiles();

            app.UseRouting();

            app.UseAuthorization();

            app.UseEndpoints(endpoints =>

            {

                endpoints.MapControllerRoute(

                   name: "default",

                   pattern: "{controller=Home}/{action=Index}/{id?}"

               );

            });

        }
是不是抛异常了?
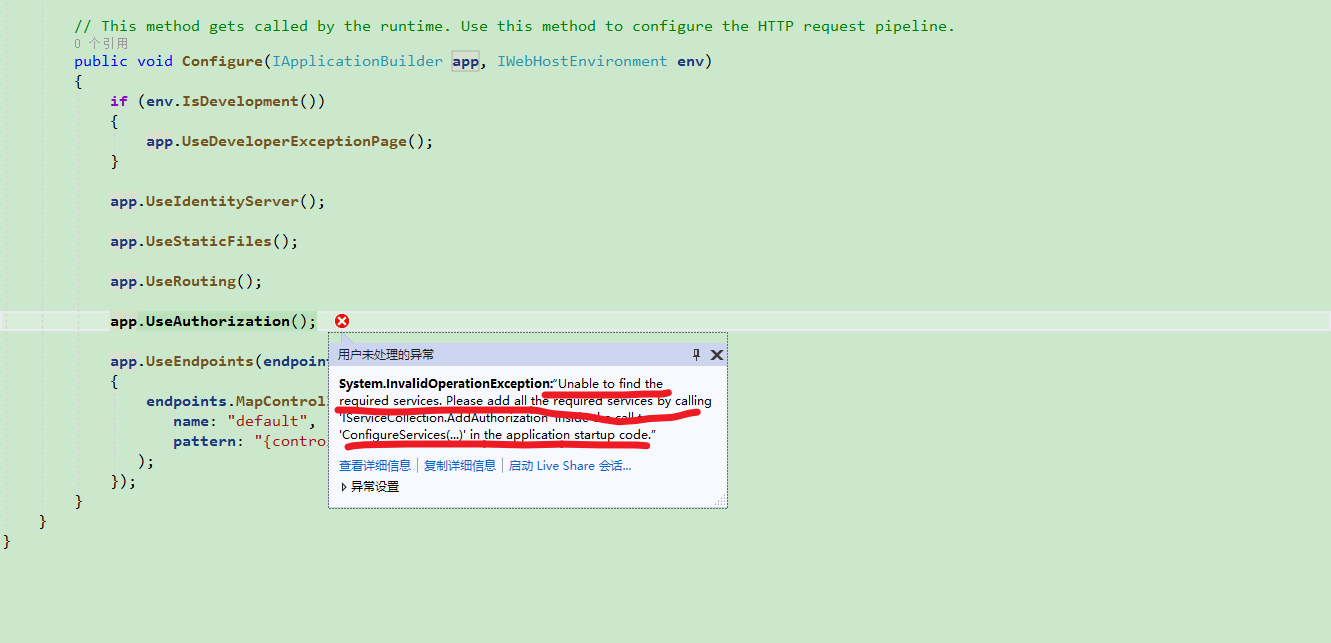
因为我们现在有UI了,所以不要忘记在ConfigureServices里面注册MVC。
        public void ConfigureServices(IServiceCollection services)

        {

            services.AddControllersWithViews();

            services.AddIdentityServer()

              .AddDeveloperSigningCredential()

              .AddTestUsers(InMemoryConfiguration.Users().ToList())

              .AddInMemoryClients(InMemoryConfiguration.Clients())

              .AddInMemoryApiScopes(InMemoryConfiguration.ApiScopes())

              .AddInMemoryApiResources(InMemoryConfiguration.ApiResources());

        }
然后运行一下试试:
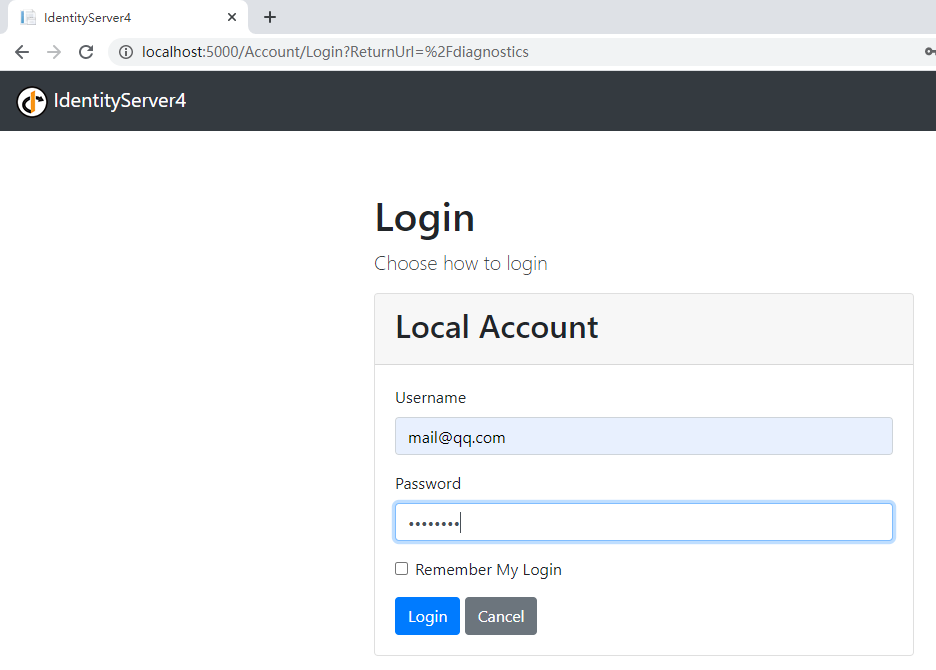
登录一下~
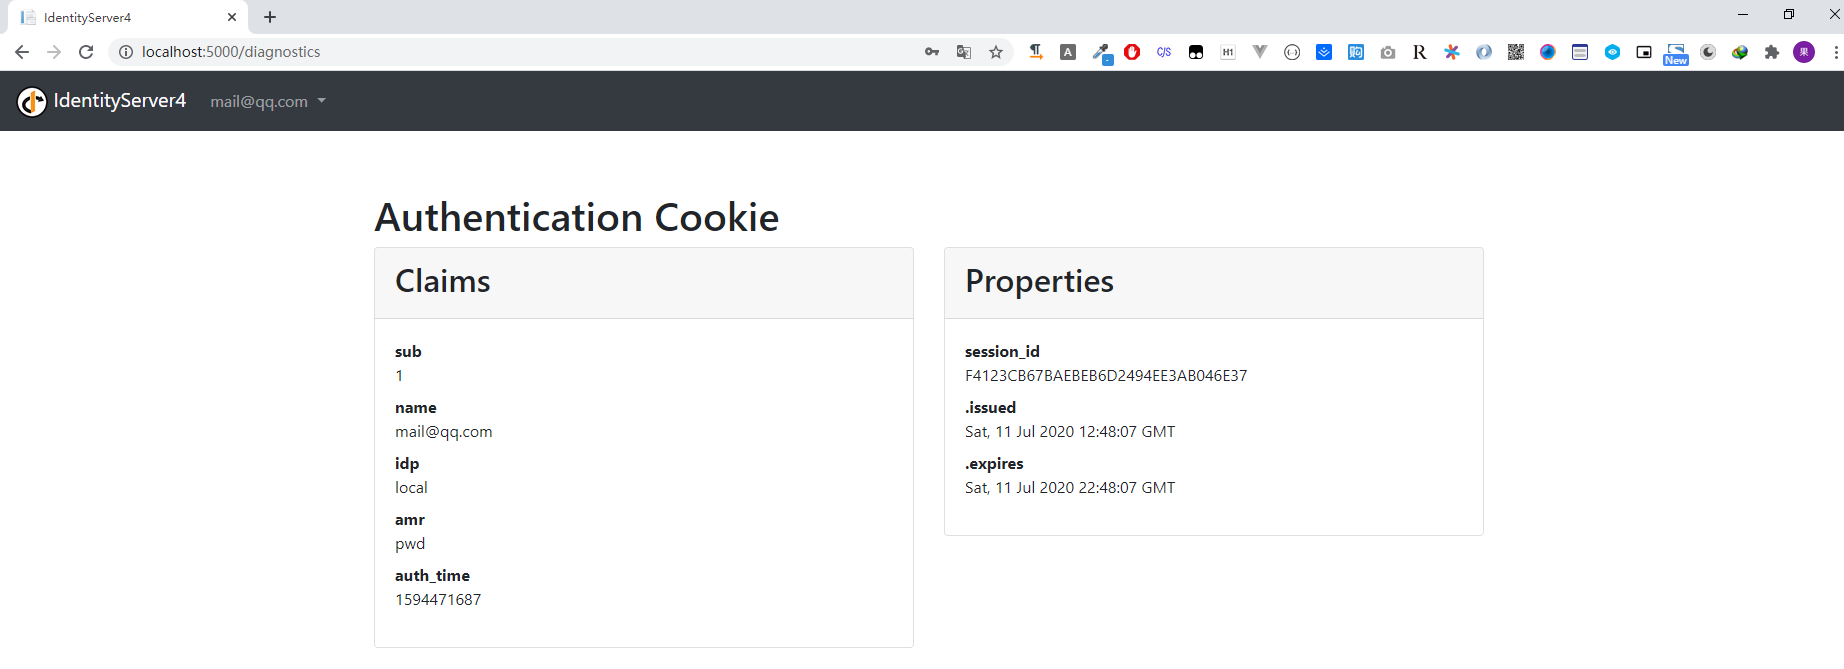
好了,现在我们已经可以登录成功了。
登录界面可以自定义的~,OK,今天就到这里
计划
接下来会说一下
- 建立我们的API项目并使用Token测试接口
- 建立一个MVC客户端项目访问我们的API
- 建立一个JS(Vue)客户端访问我们的API项目
End
推广下自己的公众号一个逗逼的程序员,主要记录自己工作中解决问题的思路分享及学习过程中的笔记。绝对不会程序员贩卖程序员的焦虑来割韭菜。

ASP.NET Core3.1使用Identity Server4建立Authorization Server的更多相关文章
- ASP.NET Core3.1使用Identity Server4建立Authorization Server-2
前言 建立Web Api项目 在同一个解决方案下建立一个Web Api项目IdentityServer4.WebApi,然后修改Web Api的launchSettings.json.参考第一节,当然 ...
- 从头编写asp.net core 2.0 web api 基础框架 (5) + 使用Identity Server 4建立Authorization Server (7) 可运行前后台源码
前台使用angular 5, 后台是asp.net core 2.0 web api + identity server 4. 从头编写asp.net core 2.0 web api 基础框架: 第 ...
- 使用Identity Server 4建立Authorization Server (1)
预备知识: http://www.cnblogs.com/cgzl/p/7746496.html 本文内容基本完全来自于Identity Server 4官方文档: https://identitys ...
- 使用Identity Server 4建立Authorization Server
使用Identity Server 4建立Authorization Server (6) - js(angular5) 客户端 摘要: 预备知识: http://www.cnblogs.com/cg ...
- 三、IDS4建立authorization server
建立authorization server 一.环境搭建 1.创建项目 2.引用NuGet的identityserver4 3.配置asp.net core 管道 打开Startup.cs, 编辑C ...
- 使用Identity Server 4建立Authorization Server (3)
预备知识: http://www.cnblogs.com/cgzl/p/7746496.html 第一部分: http://www.cnblogs.com/cgzl/p/7780559.html 第二 ...
- 使用Identity Server 4建立Authorization Server (5)
预备知识: http://www.cnblogs.com/cgzl/p/7746496.html 第一部分: http://www.cnblogs.com/cgzl/p/7780559.html 第二 ...
- 使用Identity Server 4建立Authorization Server (6) - js(angular5) 客户端
预备知识: http://www.cnblogs.com/cgzl/p/7746496.html 第一部分: http://www.cnblogs.com/cgzl/p/7780559.html 第二 ...
- 使用Identity Server 4建立Authorization Server (2)
第一部分: http://www.cnblogs.com/cgzl/p/7780559.html 第一部分主要是建立了一个简单的Identity Server. 接下来继续: 建立Web Api项目 ...
随机推荐
- 让人又爱又恨的Lombok,到底该不该用
1 简介 Lombok,印尼的一个岛屿,龙目岛.但在Java的世界里,它是一个方便的类库,能提供很多便利,因此得到许多人的青睐.但也有不少反对声音.这是为什么呢? 之前去龙目岛拍的日落. 2 Lomb ...
- mysql索引小总结
MySql 1.索引 mysql索引默认使用的是B+Tree(B-树的变种版).也可以使用HASH表. 二叉树: 二叉树又称二叉搜索树,二叉排序树,特点如下: 左子树上所有结点值均小于根结点 右子树上 ...
- cookie与session区别?
参考 cookie与session的区别是什么 Java中Cookie的使用(Cookie 和Session的区别) 什么是会话? 用户开一个浏览器,点击多个超链接,访问服务器多个web资源,然后关闭 ...
- selenium(6)-截取完整页面和指定元素并保存为图片
截图操作 截取整个页面 截取指定元素 只有这2个方法 比较简单,见下图代码 from selenium import webdriver driver = webdriver.Chrome(" ...
- leetcode 6 z字型变换
执行用时 :64 ms, 在所有 Python3 提交中击败了99.74%的用户由题目可知 我们的最终字符串会被摆成 numRows 行,那我们理解为 最终结果是numRows个字符串相加 先建立等于 ...
- mac下创建安卓应用 hello-world
教程 https://www.jianshu.com/p/bf77cb5ce70b 需要注意的地方 jdk目录查找 jdk目录拷贝到tool目录下面(jdk可以拷贝,没有其他牵扯) https://w ...
- 音视频前沿:新一代 AV1 视频标准究竟是怎样一种存在?
AV1是开放媒体联盟Alliance for Open Media (AOM) 开发的第一代视频编码标准,自推出以来获得了产业界巨大关注和支持.腾讯多媒体实验室也加入进来和其他公司团队一同积极推动AV ...
- JavaScript中bool类型的转化
JavaScript 中 if() 圆括号中的表达式将被看做布尔值来处理.这时就涉及到一些转化的问题. 1.特殊值undefined和null变成false. 2.数字0和NaN变成false. 3. ...
- Unity ugui Anchor锚点自动适配画布中的相对位置
本随笔参考了以下博客,在此基础上进行优化和改进: https://blog.csdn.net/qq_39640124/article/details/88284191 ugui中的Anchor预设如下 ...
- 谈谈javaSE中的==和equals的联系与区别
前言 ==和equals是我们面试中经常会碰到的问题.那么它们之间有什么联系和区别呢?今天我们就来聊聊吧! 问题 这里先抛出一些比较典型笔试问题: int x = 10; int y = 10; St ...