第21章—websocket
spring boot 系列学习记录:http://www.cnblogs.com/jinxiaohang/p/8111057.html
码云源码地址:https://gitee.com/jinxiaohang/springboot
一、引入依赖
如果是新建项目的,可以在这页添加依赖;

如果是原有项目,还可以在pom.xml 引入Websocket的依赖。
<?xml version="1.0" encoding="UTF-8"?>
<project xmlns="http://maven.apache.org/POM/4.0.0" xmlns:xsi="http://www.w3.org/2001/XMLSchema-instance"
         xsi:schemaLocation="http://maven.apache.org/POM/4.0.0 http://maven.apache.org/xsd/maven-4.0.0.xsd">
    <modelVersion>4.0.0</modelVersion>
    <parent>
        <groupId>org.springframework.boot</groupId>
        <artifactId>spring-boot-starter-parent</artifactId>
        <version>1.5.19.BUILD-SNAPSHOT</version>
        <relativePath/> <!-- lookup parent from repository -->
    </parent>
    <groupId>com.xiaohang</groupId>
    <artifactId>springboot-websocket</artifactId>
    <version>0.0.1-SNAPSHOT</version>
    <name>springboot-websocket</name>
    <description>Demo project for Spring Boot</description>

    <properties>
        <java.version>1.8</java.version>
    </properties>

    <dependencies>
        <dependency>
            <groupId>org.springframework.boot</groupId>
            <artifactId>spring-boot-starter-web</artifactId>
        </dependency>
<!--websocket 依赖-->
        <dependency>
            <groupId>org.springframework.boot</groupId>
            <artifactId>spring-boot-starter-websocket</artifactId>
        </dependency>
<!--websocket 依赖-->
        <dependency>
            <groupId>org.springframework.boot</groupId>
            <artifactId>spring-boot-devtools</artifactId>
            <scope>runtime</scope>
        </dependency>
        <dependency>
            <groupId>org.projectlombok</groupId>
            <artifactId>lombok</artifactId>
            <optional>true</optional>
        </dependency>
        <dependency>
            <groupId>org.springframework.boot</groupId>
            <artifactId>spring-boot-starter-test</artifactId>
            <scope>test</scope>
        </dependency>
    </dependencies>

    <build>
        <plugins>
            <plugin>
                <groupId>org.springframework.boot</groupId>
                <artifactId>spring-boot-maven-plugin</artifactId>
            </plugin>
        </plugins>
    </build>

    <repositories>
        <repository>
            <id>spring-snapshots</id>
            <name>Spring Snapshots</name>
            <url>https://repo.spring.io/snapshot</url>
            <snapshots>
                <enabled>true</enabled>
            </snapshots>
        </repository>
        <repository>
            <id>spring-milestones</id>
            <name>Spring Milestones</name>
            <url>https://repo.spring.io/milestone</url>
        </repository>
    </repositories>
    <pluginRepositories>
        <pluginRepository>
            <id>spring-snapshots</id>
            <name>Spring Snapshots</name>
            <url>https://repo.spring.io/snapshot</url>
            <snapshots>
                <enabled>true</enabled>
            </snapshots>
        </pluginRepository>
        <pluginRepository>
            <id>spring-milestones</id>
            <name>Spring Milestones</name>
            <url>https://repo.spring.io/milestone</url>
        </pluginRepository>
    </pluginRepositories>

</project>
二、创建websocket接口
创建WebSocketServer类
/**
 * @ServerEndpoint 注解是一个类层次的注解,它的功能主要是将目前的类定义成一个websocket服务器端,
 * 注解的值将被用于监听用户连接的终端访问URL地址,客户端可以通过这个URL来连接到WebSocket服务器端
 */

@Slf4j
@Component
@ServerEndpoint("/websocket")
public class WebSocketServer {
    //静态变量,用来记录当前在线连接数。应该把它设计成线程安全的。
    private static int onlineCount = 0;

    //concurrent包的线程安全Set,用来存放每个客户端对应的MyWebSocket对象。若要实现服务端与单一客户端通信的话,可以使用Map来存放,其中Key可以为用户标识
    private static CopyOnWriteArraySet<WebSocketServer> webSocketSet = new CopyOnWriteArraySet<WebSocketServer>();

    //与某个客户端的连接会话,需要通过它来给客户端发送数据
    private Session session;

    /**
     * 连接建立成功调用的方法
     * @param session  可选的参数。session为与某个客户端的连接会话,需要通过它来给客户端发送数据
     */
    @OnOpen
    public void onOpen(Session session){
        this.session = session;
        webSocketSet.add(this);     //加入set中
        addOnlineCount();           //在线数加1
        System.out.println("有新连接加入!当前在线人数为" + getOnlineCount());
    }

    /**
     * 连接关闭调用的方法
     */
    @OnClose
    public void onClose(){
        webSocketSet.remove(this);  //从set中删除
        subOnlineCount();           //在线数减1
        System.out.println("有一连接关闭!当前在线人数为" + getOnlineCount());
    }

    /**
     * 收到客户端消息后调用的方法
     * @param message 客户端发送过来的消息
     * @param session 可选的参数
     */
    @OnMessage
    public void onMessage(String message, Session session) {
        System.out.println("来自客户端的消息:" + message);
        //群发消息
        for(WebSocketServer item: webSocketSet){
            try {
                item.sendMessage(message);
            } catch (IOException e) {
                e.printStackTrace();
                continue;
            }
        }
    }

    /**
     * 发生错误时调用
     * @param session
     * @param error
     */
    @OnError
    public void onError(Session session, Throwable error){
        System.out.println("发生错误");
        error.printStackTrace();
    }

    /**
     * 这个方法与上面几个方法不一样。没有用注解,是根据自己需要添加的方法。
     * @param message
     * @throws IOException
     */
    public void sendMessage(String message) throws IOException{
        this.session.getBasicRemote().sendText(message);
        //this.session.getAsyncRemote().sendText(message);
    }

    public static synchronized int getOnlineCount() {
        return onlineCount;
    }

    public static synchronized void addOnlineCount() {
        WebSocketServer.onlineCount++;
    }

    public static synchronized void subOnlineCount() {
        WebSocketServer.onlineCount--;
    }
}
三、将websocket接口注入
@Configuration
public class WebSocketConfig {

    @Bean
    public ServerEndpointExporter serverEndpointExporter(){
        return new ServerEndpointExporter();
    }
}
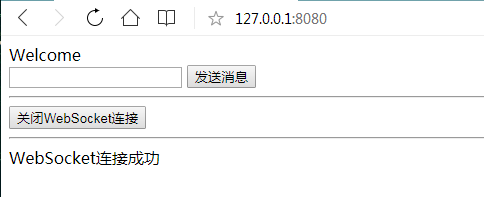
四、创建前端访问页面
<!DOCTYPE html>
<html>
<head>
    <meta charset="utf-8">
    <title>Java后端WebSocket的Tomcat实现</title>
</head>
<body>
    Welcome<br/><input id="text" type="text"/>
    <button onclick="send()">发送消息</button>
    <hr/>
    <button onclick="closeWebSocket()">关闭WebSocket连接</button>
    <hr/>
    <div id="message"></div>
</body>

<script type="text/javascript">
    var websocket = null;
    //判断当前浏览器是否支持WebSocket
    if ('WebSocket' in window) {
        websocket = new WebSocket("ws://localhost:8080/websocket");
    }
    else {
        alert('当前浏览器 Not support websocket')
    }

    //连接发生错误的回调方法
    websocket.onerror = function () {
        setMessageInnerHTML("WebSocket连接发生错误");
    };

    //连接成功建立的回调方法
    websocket.onopen = function () {
        setMessageInnerHTML("WebSocket连接成功");
    }

    //接收到消息的回调方法
    websocket.onmessage = function (event) {
        setMessageInnerHTML(event.data);
    }

    //连接关闭的回调方法
    websocket.onclose = function () {
        setMessageInnerHTML("WebSocket连接关闭");
    }

    //监听窗口关闭事件,当窗口关闭时,主动去关闭websocket连接,防止连接还没断开就关闭窗口,server端会抛异常。
    window.onbeforeunload = function () {
        closeWebSocket();
    }

    //将消息显示在网页上
    function setMessageInnerHTML(innerHTML) {
        document.getElementById('message').innerHTML += innerHTML + '<br/>';
    }

    //关闭WebSocket连接
    function closeWebSocket() {
        websocket.close();
    }

    //发送消息
    function send() {
        var message = document.getElementById('text').value;
        websocket.send(message);
    }
</script>
</html>
五、启动项目
第21章—websocket的更多相关文章
- 第21章 策略模式(Strategy Pattern)
原文 第21章 策略模式(Strategy Pattern) 策略模式 导读:策略模式看完之后,大多数人都会感觉有点混了,包括我,感觉策略模式是一种OO思想的体现(纯属个人拙见). 概述: ...
- 【RL-TCPnet网络教程】第21章 RL-TCPnet之高效的事件触发框架
第21章 RL-TCPnet之高效的事件触发框架 本章节为大家讲解高效的事件触发框架实现方法,BSD Socket编程和后面章节要讲解到的FTP.TFTP和HTTP等都非常适合使用这种方式 ...
- 【Android】第21章 2D图形和动画
分类:C#.Android.VS2015: 创建日期:2016-03-19 一.简介 Android系统定义了一系列独立的图形处理类,其中,2D图形处理类分别位于以下命名空间: Android.Gra ...
- [Real World Haskell翻译]第21章 使用数据库
第21章 使用数据库 从网络论坛到播客采集软件甚至备份程序的一切频繁地使用持久存储的数据库.基于SQL的数据库往往是相当方便:速度快,可扩展从微小到巨大的尺寸,可以在网络上运行,经常帮助处理锁定和事务 ...
- 第21章 DMA—直接存储区访问—零死角玩转STM32-F429系列
第21章 DMA—直接存储区访问 全套200集视频教程和1000页PDF教程请到秉火论坛下载:www.firebbs.cn 野火视频教程优酷观看网址:http://i.youku.com/fi ...
- 设计模式之第21章-状态模式(Java实现)
设计模式之第21章-状态模式(Java实现) “what are you 干啥了?怎么这么萎靡不振?”“昨晚又是补新番,又是补小笼包,睡得有点晚啊.话说杨过的那个雕兄真是太好了,每天给找蛇胆,又陪练武 ...
- 【STM32H7教程】第21章 STM32H7的NVIC中断分组和配置(重要)
完整教程下载地址:http://www.armbbs.cn/forum.php?mod=viewthread&tid=86980 第21章 STM32H7的NVIC中断分组和配置( ...
- Java编程思想 第21章 并发
这是在2013年的笔记整理.现在重新拿出来,放在网上,重新总结下. 两种基本的线程实现方式 以及中断 package thread; /** * * @author zjf * @create_tim ...
- 第21章 DMA—直接存储区访问
本章参考资料:<STM32F76xxx参考手册>DMA控制器章节. 学习本章时,配合<STM32F76xxx参考手册>DMA控制器章节一起阅读,效果会更佳,特别是涉及到寄存器说 ...
随机推荐
- 文本处理三剑客与shell正则表达式
文本处理三剑客 提到对于文本的处理上,除了vim这个强大的编辑器之外,还有使用命令的形式去处理你要处理的文本,而不需要手动打开文本再去编辑.这样做的好处是能够以shell命令的形式将编辑和处理文本的工 ...
- angular.js开发 将多页面开发成单页面
用angulara.js做单页面开发时,由于不能跨页面取数据,又需要传参,可以采用:$scope.step=0/1来解决这个问题,设置初始值为想要的页面即可.
- Oracle自动备份bat
很多时候我们需要自动备份数据库这边推荐bat+Windows计划任务实现 方案1 创建以下bat 然后添加到TaskSchedule(路径最好不要包含中文) @echo off @echo ===== ...
- MQ的调用
mq调用(相关dll) using RabbitMQ.Client; using RabbitMQ.Client.Events; using System; using System.Collecti ...
- 构造方法与setter方法
上一个随笔提到了constructor-arg子标签,此随笔将会介绍一些类型的赋值方法 ①String类型.基本数据类型或其包装类都可以使用value标签属性赋值 String类型和基本类型的操作如下 ...
- 数据结构第二版之(课后题)BF算法病毒感染检测
//vs2013下编译通过.换别的编译器自行补充头文件和修改源代码#include<iostream> #include<fstream> #include <strin ...
- Exchange Server备份与恢复
本文档描述了Exchange 2003.Exchange Server 2007/2010的备份与恢复操作,涉及的内容包括: 1.使用NTBackup 备份与恢复Exchange 2007/2003 ...
- VS Code 单文件、多文件(工程) 配置文件
针对于单文件编译运行,需要在代码文件夹下建立子文件夹 .vscode ,并放置三个文件 1:c_cpp_properties.json,注意更改7.8.11行的路径 { "configura ...
- 【转载】redis.windows.conf 参数说明
1. Redis默认不是以守护进程的方式运行,可以通过该配置项修改,使用yes启用守护进程 daemonize no 2. 当Redis以守护进程方式运行时,Redis默认会把pid写入/var/ru ...
- 八十七、SAP中ALV事件之一,事件的声明
一.我们双击"REUSE_ALV_GRID_DISPLAY",来到SE37界面, 二,来到这儿,点击SLIS_T_EVENT, 三.可以看到SLIS_T_EVENT的定义,有一个n ...