react-native底部导航栏实现
- react-native-tab-navigator实现:
bottom.js代码如下:
import React, {Component} from 'react';

import {StyleSheet, View,Text,Image} from 'react-native';

import TabNavigator from 'react-native-tab-navigator'

export default class Bottom extends Component {

  /*初始化state*/

  constructor(props){

      super();

      this.state={

        selectedTab:'tb_msg',

      }

  }

    /**

     * 公共组件方法

     * @param selectedTab 选中的tab

     * @param title

     * @param icon

     * @param selectedIcon

     * @param imageStyle  选中时渲染图标的颜色

     * @param mark  角标

     * @param viewContent  页面内容

     * @returns {*}

     */

  tabNavigatorItems(selectedTab,title,icon,selectedIcon,imageStyle,mark,viewContent){

      return (

          <TabNavigator.Item

              selected={this.state.selectedTab === selectedTab }

              title={title}

              renderIcon={()=> <Image style={styles.myImage} source={icon}/> }

              renderSelectedIcon={()=> <Image style={[styles.myImage,{tintColor:imageStyle}]} source={selectedIcon}/> }

              badgeText={mark}

              onPress={()=> this.setState({selectedTab:selectedTab}) }>

              <View style={{flex:1}}><Text>{viewContent}</Text></View>

          </TabNavigator.Item>

      )

  }

  render() {

    return (

      <View style={styles.container}>

         <TabNavigator>

            {this.tabNavigatorItems('tb_msg',"消息",require('../../assets/img/zhuye.png'),require("../../assets/img/zhuyesl.png"),'#622193',"","消息页面内容")}

            {this.tabNavigatorItems('tb_contacts',"联系人",require('../../assets/img/zhuye.png'),require("../../assets/img/zhuye.png"),'#65bb74',"","联系人页面内容")}

            {this.tabNavigatorItems('tb_watch',"看点",require('../../assets/img/zhuye.png'),require("../../assets/img/zhuye.png"),'#6ebef3',"","看点页面内容")}

            {this.tabNavigatorItems('tb_dynamic',"动态",require('../../assets/img/zhuye.png'),require("../../assets/img/zhuye.png"),'#622193',"","动态页面内容")}

         </TabNavigator>

      </View>

    );

  }

}

const styles = StyleSheet.create({

    container: {

        flex: 1,

        backgroundColor: '#F5FCFF',

    },

    myImage:{

        width:22,

        height:22,

    }

});
运行:react-native run-android
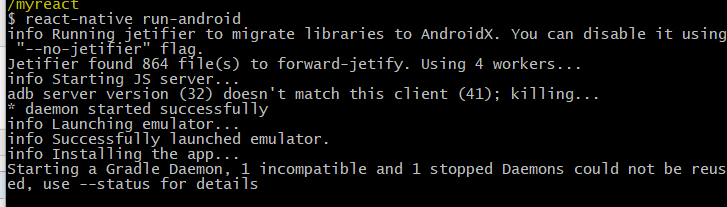
运行结果:

方法二:
import React, { Component } from 'react';

import {

  Platform,

  StyleSheet,

  Text,

  View,

  Image

} from 'react-native';

import TabNavigator from 'react-native-tab-navigator';

import Home from './component/bottom/home';

import Article from './component/bottom/article';

import Order from './component/bottom/order';

import Owner from './component/bottom/owner';

const dataSource = [

                    {icon:require('./assets/img/zhuye.png'),selectedIcon:require('./assets/img/zhuyesl.png'),tabPage:'Home',tabName:'首页',component:Home},

                    {icon:require('./assets/img/zhuye.png'),selectedIcon:require('./assets/img/zhuyesl.png'),tabPage:'Article',tabName:'文章',component:Article},

                    {icon:require('./assets/img/zhuye.png'),selectedIcon:require('./assets/img/zhuyesl.png'),tabPage:'Order',tabName:'订单',component:Order},

                    {icon:require('./assets/img/zhuye.png'),selectedIcon:require('./assets/img/zhuyesl.png'),tabPage:'Owner',tabName:'我的',component:Owner}

                 ]

var navigation = null;

type Props = {};

export default class App extends Component<Props> {

  constructor(props){

    super(props);

    navigation = this.props.navigation;

    this.state = {

      selectedTab:'Home'

    }

  }

  render() {

    let tabViews = dataSource.map((item,i) => {

      return (

          <TabNavigator.Item

            title={item.tabName}

            selected={this.state.selectedTab===item.tabPage}

            titleStyle={{color:'black'}}

            selectedTitleStyle={{color:'#7A16BD'}}

            renderIcon={()=><Image style={styles.tabIcon} source={item.icon}/>}

            renderSelectedIcon = {() => <Image style={styles.tabIcon} source={item.selectedIcon}/>}

            tabStyle={{alignSelf:'center'}}

            onPress = {() => {this.setState({selectedTab:item.tabPage})}}

            key={i}

            >

            <item.component  navigation={navigation}/>

        </TabNavigator.Item>

      );

    })

    return (

      <View style={styles.container}>

        <TabNavigator

          hidesTabTouch={true}

          >

            {tabViews}

        </TabNavigator>

      </View>

    );

  }

}

const styles = StyleSheet.create({

  container: {

    flex: 1,

    backgroundColor: '#F5FCFF',

  },

  tabIcon:{

    width:23,

    height:23,

  }

});
出现问题1:
黄色警告
解决方法:
index.js文件中,放在AppRegistry.registerComponent('App', () => App)之前即可
console.ignoredYellowBox = ['Warning: BackAndroid is deprecated. Please use BackHandler instead.','source.uri should not be an empty string','Invalid props.style key'];
console.disableYellowBox = true // 关闭全部黄色警告
react-native底部导航栏实现的更多相关文章
- React Native 底部导航栏
首先安装:npm install react-native-tab-navigator 然后再引入文件中 import TabNavigator from 'react-native-tab ...
- [RN] React Native 自定义导航栏随滚动渐变
React Native 自定义导航栏随滚动渐变 实现效果预览: 代码实现: 1.定义导航栏 NavPage.js import React, {Component} from 'react'; im ...
- React Native自定义导航栏
之前我们学习了可触摸组件和页面导航的使用的使用: 从零学React Native之09可触摸组件 - 从零学React Native之03页面导航 - 经过之前的学习, 我们可以完成一个自定义导航栏了 ...
- react native底部tab栏切换
1.安装tab栏插件 npm i react-native-tab-navigator --save 2.引入对应的组件和tab插件 import { Platform, StyleSheet, Te ...
- React Native 之导航栏
一定要参考官网: https://reactnavigation.org/docs/en/getting-started.html 代码来自慕课网:https://www.imooc.com/cour ...
- React Native(四)——顶部以及底部导航栏实现方式
效果图: 一步一步慢慢来: 其实刚入手做app的时候,就应该做出简单的顶部以及底部导航栏.无奈又在忙其他事情,导致这些现在才整理出来. 1.顶部导航栏:react-native-scrollable- ...
- React-native 底部导航栏(二)
1.组件安装:npm install react-native-router-flux --save 2.定义菜单图片和文字: import React, { Component } from 're ...
- TextView+Fragment实现底部导航栏
前言:项目第二版刚上线没多久,产品又对需求进行了大改动,以前用的是左滑菜单,现在又要换成底部导航栏,于是今天又苦逼加班了.花了几个小时实现了一个底部导航栏的demo,然后总结一下.写一篇博客.供自己以 ...
- Android应用底部导航栏(选项卡)实例
现在很多android的应用都采用底部导航栏的功能,这样可以使得用户在使用过程中随意切换不同的页面,现在我采用TabHost组件来自定义一个底部的导航栏的功能. 我们先看下该demo实例的框架图: 其 ...
- Android 修改底部导航栏navigationbar的颜色
Android 修改底部导航栏navigationbar的颜色 getWindow().setNavigationBarColor(Color.BLUE); //写法一 getWindow().set ...
随机推荐
- Redis数据结构常用命令
Redis数据结构--字符串
- vue-cli构建一个工程
使用前,必须要先按照 node:安装node Vue CLI官方文档:https://cli.vuejs.org/zh/ 安装node地址:https://nodejs.org/zh-cn/downl ...
- 第七周学习总结&JAVA实验五报告。
JAVA实验报告五: 实验四 类的继承 实验目的 理解抽象类与接口的使用: 了解包的作用,掌握包的设计方法. 实验要求 掌握使用抽象类的方法. 掌握使用系统接口的技术和创建自定义接口的方法. 了解 J ...
- ASP.NET中的物理路径与虚拟路径
物理路径:c:\PathsAndURLs\Content\Colors.html虚拟路径:(http://localhost:53274/Content/Colors.html)路径中端口号后面的那部 ...
- DataV数据可视化功能特性
使用DataV制作实时销售数据可视化大屏 (本课程可以帮助数据分析师学习数据可视化大屏的制作,包括制作的方法.设计原则等基础知识,并提供一个微项目,使用数加的DataV基于ABC公司的经营数据,快速构 ...
- 后盾网lavarel视频项目---3、lavarel中子控制器继承父控制器以判断是否登录
后盾网lavarel视频项目---3.lavarel中子控制器继承父控制器以判断是否登录 一.总结 一句话总结: 在common控制器的构造方法中验证登录中间件,其它的控制器继承common控制器 p ...
- 常用javaScript小常识
javascript数据类型强制转换 一.转换为数值类型 Number(参数) 把任何的类型转换为数值类型 A.如果是布尔值,false为0,true为1 B.如果是数字,转换成为本身.将无意义的后导 ...
- Origin 2017 给曲线加标记符号
最近在用Origin 2017画曲线图,需要给图像得曲线加上不同得标记符号用以区分,把操作步骤记录下来,免得忘了. 1.用Origin 2017打开一个曲线图,在任意一条曲线上点击右键弹出菜单,选择[ ...
- springboot2.0+mycat实验读写分离
声明:用户到达一定程度,架构就必须要考虑,因为在这个前提下,读写分离,尤为重要. 1.搭建mysql主从复制 https://www.cnblogs.com/ywjfx/p/10264383.html ...
- http协议详解之响应报文 3
--------------响应示例--------------------------response#状态行HTTP/1.1 200 OK #协议及版本号.状态码.状态描述 #消息报头Date: ...