
Quickstart: Create and publish a package using Visual Studio (.NET Framework, Windows)
Creating a NuGet package from a .NET Framework Class Library involves creating the DLL in Visual Studio on Windows, then using the nuget.exe command line tool to create and publish the package.
Note
This Quickstart applies to Visual Studio 2017 for Windows only. Visual Studio for Mac does not include the capabilities described here. Use the dotnet CLI tools instead.
Prerequisites
Install any edition of Visual Studio 2017 from visualstudio.com with any .NET-related workload. Visual Studio 2017 automatically includes NuGet capabilities when a .NET workload is installed.
Install the
nuget.exeCLI by downloading it from nuget.org, saving that.exefile to a suitable folder, and adding that folder to your PATH environment variable.Register for a free account on nuget.org if you don't have one already. Creating a new account sends a confirmation email. You must confirm the account before you can upload a package.
Create a class library project
You can use an existing .NET Framework Class Library project for the code you want to package, or create a simple one as follows:
In Visual Studio, choose File > New > Project, select the Visual C# node, select the "Class Library (.NET Framework)" template, name the project AppLogger, and click OK.
Right-click on the resulting project file and select Build to make sure the project was created properly. The DLL is found within the Debug folder (or Release if you build that configuration instead).
Within a real NuGet package, of course, you implement many useful features with which others can build applications. You can also set the target frameworks however you like. For example, see the guides for UWP and Xamarin.
For this walkthrough, however, you won't write any additional code because a class library from the template is sufficient to create a package. Still, if you'd like some functional code for the package, use the following:
using System;

namespace AppLogger

{

    public class Logger

    {

        public void Log(string text)

        {

            Console.WriteLine(text);

        }

    }

}
Tip
Unless you have a reason to choose otherwise, .NET Standard is the preferred target for NuGet packages, as it provides compatibility with the widest range of consuming projects. See Create and publish a package using Visual Studio (.NET Standard).
Configure project properties for the package
A NuGet package contains a manifest (a .nuspec file), that contains relevant metadata such as the package identifier, version number, description, and more.
Some of these can be drawn from the project properties directly, which avoids having to separately update them in both the project and the manifest.
This section describes where to set the applicable properties.
Select the Project > Properties menu command, then select the Application tab.

2. In the Assembly name field, give your package a unique identifier.
Important
You must give the package an identifier that's unique across nuget.org or whatever host you're using. For this walkthrough we recommend including "Sample" or "Test" in the name as the later publishing step does make the package publicly visible (though it's unlikely anyone will actually use it).
If you attempt to publish a package with a name that already exists, you see an error.
3. Select the Assembly Information... button, which brings up a dialog box in which you can enter other properties that carry into the manifest (see .nuspec file reference - replacement tokens). The most commonly used fields are Title, Description, Company, Copyright, and Assembly version. These properties ultimately appear with your package on a host like nuget.org, so make sure they're fully descriptive.

4. Optional: to see and edit the properties directly, open the Properties/AssemblyInfo.cs file in the project.
5. When the properties are set, set the project configuration to Release and rebuild the project to generate the updated DLL.
Generate the initial manifest
With a DLL in hand and project properties set, you now use the nuget spec command to generate an initial .nuspec file from the project. This step includes the relevant replacement tokens to draw information from the project file.
You run nuget spec only once to generate the initial manifest. When updating the package, you either change values in your project or edit the manifest directly.
Open a command prompt and navigate to the project folder containing
AppLogger.csprojfile.Run the following command:
nuget spec AppLogger.csproj. By specifying a project, NuGet creates a manifest that matches the name of the project, in this caseAppLogger.nuspec. It also include replacement tokens in the manifest.Open
AppLogger.nuspecin a text editor to examine its contents, which should appear as follows:
<?xml version="1.0"?>

<package >

  <metadata>

    <id>Package</id>

    <version>1.0.0</version>

    <authors>clu</authors>

    <owners>clu</owners>

    <licenseUrl>http://LICENSE_URL_HERE_OR_DELETE_THIS_LINE</licenseUrl>

    <projectUrl>http://PROJECT_URL_HERE_OR_DELETE_THIS_LINE</projectUrl>

    <iconUrl>http://ICON_URL_HERE_OR_DELETE_THIS_LINE</iconUrl>

    <requireLicenseAcceptance>false</requireLicenseAcceptance>

    <description>Package description</description>

    <releaseNotes>Summary of changes made in this release of the package.</releaseNotes>

    <copyright>Copyright 2019</copyright>

    <tags>Tag1 Tag2</tags>

    <dependencies>

      <dependency id="SampleDependency" version="1.0" />

    </dependencies>

  </metadata>

</package>
Edit the manifest
NuGet produces an error if you try to create a package with default values in your
.nuspecfile, so you must edit the following fields before proceeding. See .nuspec file reference - optional metadata elements for a description of how these are used.- licenseUrl
- projectUrl
- iconUrl
- releaseNotes
- tags
For packages built for public consumption, pay special attention to the Tags property, as tags help others find your package on sources like nuget.org and understand what it does.
- <tags>Socket, Socket Server, SuperSocket, Network Protocol</tags>
You can also add any other elements to the manifest at this time, as described on .nuspec file reference.
Save the file before proceeding.
https://github.com/kerryjiang/SuperSocket/blob/master/SuperSocket.nuspec we can learn how to edit spec from supersocket project.
Run the pack command
From a command prompt in the folder containing your
.nuspecfile, run the commandnuget pack.NuGet generates a
.nupkgfile in the form of identifier-version.nupkg, which you'll find in the current folder.
https://stackoverflow.com/questions/6536629/packing-nuget-projects-compiled-in-release-mode
You can solve it like this: NuGet.exe pack Foo.csproj -Prop Configuration=Release(the reference).
PS C:\repository\GitHub\HearthSim\HearthDb\HearthDb> nuget pack .\HearthDb.csproj -Prop Configuration=Release
Attempting to build package from 'HearthDb.csproj'.
MSBuild auto-detection: using msbuild version '4.0' from 'C:\Windows\Microsoft.NET\Framework64\v4.0.30319'.
Packing files from 'C:\repository\GitHub\HearthSim\HearthDb\HearthDb\bin\Release'.
Found packages.config. Using packages listed as dependencies
WARNING: NU5115: Description was not specified. Using 'Description'.
Successfully created package 'C:\repository\GitHub\HearthSim\HearthDb\HearthDb\Chuck-HearthDb.15.0.0.32708.nupkg'.
PS C:\repository\GitHub\HearthSim\HearthDb\HearthDb> nuget pack .\HearthDb.csproj -Prop Configuration=Release
Attempting to build package from 'HearthDb.csproj'.
MSBuild auto-detection: using msbuild version '4.0' from 'C:\Windows\Microsoft.NET\Framework64\v4.0.30319'.
Packing files from 'C:\repository\GitHub\HearthSim\HearthDb\HearthDb\bin\Release'.
WARNING: NU5115: Description was not specified. Using 'Description'.
Successfully created package 'C:\repository\GitHub\HearthSim\HearthDb\HearthDb\Chuck-HearthDb.15.0.4.33402.nupkg'.
Publish the package
Once you have a .nupkg file, you publish it to nuget.org using nuget.exe with an API key acquired from nuget.org. For nuget.org you must use nuget.exe 4.1.0 or higher.
Note
Virus scanning: All packages uploaded to nuget.org are scanned for viruses and rejected if any viruses are found. All packages listed on nuget.org are also scanned periodically.
Packages published to nuget.org are also publicly visible to other developers unless you unlist them. To host packages privately, see Hosting packages.
Acquire your API key
Sign into your nuget.org account or create an account if you don't have one already.
For more information on creating your account, see Individual accounts.
Select your user name (on the upper right), then select API Keys.
Select Create, provide a name for your key, select Select Scopes > Push. Enter * for Glob pattern, then select Create. (See below for more about scopes.)
Once the key is created, select Copy to retrieve the access key you need in the CLI:
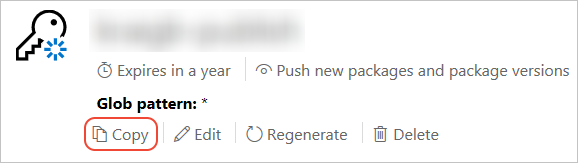
Important: Save your key in a secure location because you cannot copy the key again later on. If you return to the API key page, you need to regenerate the key to copy it. You can also remove the API key if you no longer want to push packages via the CLI.
Scoping allows you to create separate API keys for different purposes. Each key has its expiration timeframe and can be scoped to specific packages (or glob patterns). Each key is also scoped to specific operations: push of new packages and updates, push of updates only, or delisting. Through scoping, you can create API keys for different people who manage packages for your organization such that they have only the permissions they need. For more information, see scoped API keys.
Publish with nuget push
Open a command line and change to the folder containing the
.nupkgfile.Run the following command, specifying your package name and replacing the key value with your API key:
we can use the following command to configure api key, then we can push without explicitly specified api key
nuget setApiKey <your_API_key>nuget push AppLogger.1.0.0.nupkg qz2jga8pl3dvn2akksyquwcs9ygggg4exypy3bhxy6w6x6 -Source https://api.nuget.org/v3/index.json
PS C:\repository\GitHub\HearthSim\HearthDb\HearthDb> nuget push .\Chuck-HearthDb.15.0.0.32708.nupkg apikey -Source https://api.nuget.org/v3/index.json
Pushing Chuck-HearthDb.15.0.0.32708.nupkg to 'https://www.nuget.org/api/v2/package'...
PUT https://www.nuget.org/api/v2/package/
Created https://www.nuget.org/api/v2/package/ 6307ms
Your package was pushed.
PS C:\repository\GitHub\HearthSim\HearthDb\HearthDb> nuget push .\Chuck-HearthDb.15.0.4.33402.nupkg -Source https://api.nuget.org/v3/index.json
Pushing Chuck-HearthDb.15.0.4.33402.nupkg to 'https://www.nuget.org/api/v2/package'...
PUT https://www.nuget.org/api/v2/package/
WARNING: All published packages should have license information specified. Learn more: https://aka.ms/deprecateLicenseUrl.
Created https://www.nuget.org/api/v2/package/ 75410ms
Your package was pushed.
https://www.nuget.org/packages/Chuck-HearthDb/ 发布完成,还需要有一段时间来审核
状态1
This package has not been published yet. It will appear in search results and will be available for install/restore after both validation and indexing are complete. Package validation and indexing may take up to an hour. Read more.
状态2
This package has not been indexed yet. It will appear in search results and will be available for install/restore after indexing is complete.

发布错误了,无法删除
How to remove NuGet Package from server?
Permanently deleting packages is not supported, but you can control how they are listed. (assuming you're talking about nuget.org).
After signing in, in there is additional information on the delete package page. e.g. https://nuget.org/packages/Parser/1.0.0.0/Delete.
Quoting nuget's explanation from the delete package page :
"Why can’t I delete my package? Our policy is to only permanently delete NuGet packages that really need it, such as packages that contain passwords, malicious/harmful code, etc. This policy is very similar to the policies employed by other package managers such as Ruby Gems.
Unlisting the package will remove the package from being available in the NuGet. The package is still available for download as a dependency for three main reasons.
Other packages may depend on that package. Those packages might not necessarily be in this gallery. Ensures that folks using NuGet without committing packages (package restore) will not be broken. Helps ensure that important community owned packages are not mass deleted."
I would suggest unlisting the previous package and bumping the version to 1.0.0.1 after adding the dependency.
Quickstart: Create and publish a package using Visual Studio (.NET Framework, Windows)的更多相关文章
- Visual Studio Entity Framework (EF) 生成SQL 代码 性能查询
Visual Studio Entity Framework (EF) 生成SQL 代码 性能查询 SQL 中,有SQL Server Profiler可以用来查询性能以及查看外部调用的SQL ...
- Visual Studio Package 插件开发(Visual Studio SDK)
背景 这段时间公司新做了一个支付系统,里面有N个后台服务,每次有更新修改,拷贝打包发布包“不亦乐乎”...于是我想要不要自己定制个打包插件. 部分朋友可能会认为,有现成的可以去找一个,干嘛不用持续集成 ...
- Visual Studio GitHub For Windows部署
使用GitHub For Windows部署Visual Studio项目 因为最近同时再看很多技术方面的书,书上的例子有很多自己想亲自尝试一下,但是每次写例子都得创建一个新项目未免太麻烦,索性就整理 ...
- How to debug .NET Core RC2 app with Visual Studio Code on Windows?
Simone Chiaretta (http://codeclimber.net.nz/archive/2016/05/20/How-to-debug-NET-Core-RC2-app-with-Vi ...
- Setup QT 5.5.1 + OpenCV 3.0 + Visual Studio 2013 on windows 10
1. Install Visual studio 2013 community version which is free to use for personal usage. 2. Setup th ...
- Visual Studio 2005 搭建Windows CE 6.0环境之准备
Microsoft Visual Studio 2005 Visual Studio 2005 Professional 官方90天试用版英文版:http://download.microsoft.c ...
- Visual Studio 2017 调试 windows server 2016 Docker Container
网上很多文章都是在win10下,用Docker for windows工具进行Docker的安装部署的.用知道windows server 2016已经原生支持Docker了,其windows Con ...
- visual studio 2013 for windows desk报error MSB8020: The build tools for v141错误
由于硬件限制,学习在touchgfx暂时在Windows下模拟仿真,了解其基本原理和有一个基本感性认识,因此安装了VS Express 2013 for Desktop轻量级编译器. 有TouchGF ...
- Visual Studio Code create the aps.net core project(Visual Studio Code 创建asp.net core项目)
Install the C# plug-in as shown below: Perfom the dotnet new --help command as shown below: Enter a ...
随机推荐
- 苹果发布app,上传ipa,不显示问题
用Xcode或者leader上传ipa,提示是上传成功,但是在网页上不显示构建版本.如下图: 那么,你先点击“活动”,进去后,如果显示你的app正在审核,那么表示上传成功,等待:如果“活动”中不显示你 ...
- 第四章、drf框架 - 三大认证组件 | 认证组件 | 权限组件 | 频率组件
目录 RBAC 基于用户权限访问控制的认证 - Role-Based Access Control 三大认证组件 源码分析 一.认证组件 自定义认证类 使用: 二.权限组件 自定义权限类 三.频率组件 ...
- Web Api 创建及其使用
由于创建博客,我需要尝试一些新的技术,新的思路,所以我没规规矩矩的写博客,用上了诸多以前没用的东西,比如现在这个(我只是听过web api 我连 web server 都只是用过两三次/手动滑稽) 昨 ...
- rsync 应用总结
rysnc server端 1.vim /etcrsyncd.conf (用户rsync,目录,模块,非系统虚拟用户及密码文件) 2.创建共享目录 /data/www/{www,bbs,blog} 3 ...
- C++ 输出PPM格式图片文件
PPM简介 学习图形学时为了直观地观察结果,需要输出图片,而PPM是一种最简单的图片格式,非常适合新手使用. PPM文件的内容大概是这样的: 第一行固定为P3,代表写入的是PPM格式的RGB图像,除此 ...
- HDU 6741 树上删叶子节点博弈
假设现在有一颗树A 我们在他非叶子节点上加一个点变成树B 则此时树B必为先手必胜 假设A为先手必胜 则先手直接把加入的点一同删去 假设A为先手必败 则先手可以只删加入的点 与后手位置互换 把必败态留给 ...
- jmeter非GUI的运行命令
jmeter 的参数 参数说明: -h 帮助 -> 打印出有用的信息并退出 -n 非 GUI 模式 -> 在非 GUI 模式下运行 JMeter -t 测试文件 -> 要运行的 JM ...
- gdb设置条件断点
b +行号 if i==9:设置条件断点 finish:执行到当前函数返回处(退出函数) bt:打印栈帧关系
- jface viewer 全选
viewer.setSelection(new StructuredSelection(((List)viewer.getInput()))); StructuredSelection有多个构造方法, ...
- (Java基础--反射)框架的概念及用反射技术开发框架的原理
一.概述 1.框架:通过反射调用Java类的一种方式. (框架与房子非常类似,使用的用户写的程序写配置文件,就相当于给房子装修) 如房地产商造房子用户住,门窗和空调等等内部都是由用户自己安装,房子就 ...