Spring Cloud Alibaba 之 user服务
项目技术选型
- Spring Boot
- Spring MVC
- MyBatis + 通用Mapper (官网信息https://mapperhelper.github.io/docs/)
- Spring Cloud Alibaba
项目结构

pom 文件
<?xml version="1.0" encoding="UTF-8"?>

<project xmlns="http://maven.apache.org/POM/4.0.0" xmlns:xsi="http://www.w3.org/2001/XMLSchema-instance"

         xsi:schemaLocation="http://maven.apache.org/POM/4.0.0 https://maven.apache.org/xsd/maven-4.0.0.xsd">

    <modelVersion>4.0.0</modelVersion>

    <parent>

        <groupId>org.springframework.boot</groupId>

        <artifactId>spring-boot-starter-parent</artifactId>

        <version>2.1.9.RELEASE</version>

        <relativePath/> <!-- lookup parent from repository -->

    </parent>

    <groupId>com.laiya</groupId>

    <artifactId>user-center</artifactId>

    <version>0.0.1-SNAPSHOT</version>

    <name>user-center</name>

    <description>Demo project for Spring Boot</description>

    <properties>

        <java.version>1.8</java.version>

    </properties>

    <dependencies>

        <!--Sporing Boot-->

        <dependency>

            <groupId>org.springframework.boot</groupId>

            <artifactId>spring-boot-starter-web</artifactId>

        </dependency>

        <!--Nacos-->

        <dependency>

            <groupId>com.alibaba.cloud</groupId>

            <artifactId>spring-cloud-starter-alibaba-nacos-discovery</artifactId>

        </dependency>

        <!--feign-->

        <dependency>

            <groupId>org.springframework.cloud</groupId>

            <artifactId>spring-cloud-starter-openfeign</artifactId>

        </dependency>

        <dependency>

            <groupId>io.github.openfeign</groupId>

            <artifactId>feign-httpclient</artifactId>

        </dependency>

        <!-- nacos 动态配置-->

        <!--        <dependency>-->

        <!--            <groupId>com.alibaba.cloud</groupId>-->

        <!--            <artifactId>spring-cloud-starter-alibaba-nacos-config</artifactId>-->

        <!--        </dependency>-->

        <!--Redis-->

<!--        <dependency>-->

<!--            <groupId>org.springframework.boot</groupId>-->

<!--            <artifactId>spring-boot-starter-data-redis-reactive</artifactId>-->

<!--        </dependency>-->

        <!--Mysql-->

        <dependency>

            <groupId>mysql</groupId>

            <artifactId>mysql-connector-java</artifactId>

        </dependency>

        <!--Mybatis-->

        <dependency>

            <groupId>org.mybatis.spring.boot</groupId>

            <artifactId>mybatis-spring-boot-starter</artifactId>

            <version>2.1.2</version>

        </dependency>

        <!--Lombok-->

        <dependency>

            <groupId>org.projectlombok</groupId>

            <artifactId>lombok</artifactId>

            <optional>true</optional>

        </dependency>

        <dependency>

            <groupId>org.springframework.boot</groupId>

            <artifactId>spring-boot-starter-thymeleaf</artifactId>

        </dependency>

        <dependency>

            <groupId>org.springframework.boot</groupId>

            <artifactId>spring-boot-starter-websocket</artifactId>

        </dependency>

        <!--Test-->

        <dependency>

            <groupId>org.springframework.boot</groupId>

            <artifactId>spring-boot-starter-test</artifactId>

            <scope>test</scope>

            <exclusions>

                <exclusion>

                    <groupId>org.junit.vintage</groupId>

                    <artifactId>junit-vintage-engine</artifactId>

                </exclusion>

            </exclusions>

        </dependency>

        <dependency>

            <groupId>org.springframework</groupId>

            <artifactId>spring-websocket</artifactId>

            <version>5.2.6.RELEASE</version>

        </dependency>

        <dependency>

            <groupId>org.springframework.cloud</groupId>

            <artifactId>spring-cloud-starter-zipkin</artifactId>

        </dependency>

        <dependency>

            <groupId>org.springframework.boot</groupId>

            <artifactId>spring-boot-starter-actuator</artifactId>

        </dependency>

        <dependency>

            <groupId>com.alibaba.cloud</groupId>

            <artifactId>spring-cloud-alibaba-sentinel</artifactId>

        </dependency>

    </dependencies>

    <dependencyManagement>

        <dependencies>

            <!--整合Spring Cloud-->

            <dependency>

                <groupId>org.springframework.cloud</groupId>

                <artifactId>spring-cloud-dependencies</artifactId>

                <version>Greenwich.SR3</version>

                <type>pom</type>

                <scope>import</scope>

            </dependency>

            <!--整合Spring Cloud Alibaba-->

            <dependency>

                <groupId>com.alibaba.cloud</groupId>

                <artifactId>spring-cloud-alibaba-dependencies</artifactId>

                <version>2.1.0.RELEASE</version>

                <type>pom</type>

                <scope>import</scope>

            </dependency>

        </dependencies>

    </dependencyManagement>

    <!--分别设置开发,测试,生产环境-->

    <profiles>

        <!-- 开发环境 -->

        <profile>

            <id>dev</id>

            <activation>

                <activeByDefault>true</activeByDefault>

            </activation>

            <properties>

                <environment>dev</environment>

            </properties>

        </profile>

        <!-- 测试环境 -->

        <profile>

            <id>test</id>

            <activation>

                <activeByDefault>false</activeByDefault>

            </activation>

            <properties>

                <environment>test</environment>

            </properties>

        </profile>

        <!-- 生产环境 -->

        <profile>

            <id>pro</id>

            <activation>

                <activeByDefault>false</activeByDefault>

            </activation>

            <properties>

                <environment>pro</environment>

            </properties>

        </profile>

    </profiles>

    <build>

        <plugins>

            <plugin>

                <groupId>org.springframework.boot</groupId>

                <artifactId>spring-boot-maven-plugin</artifactId>

                <dependencies>

                    <dependency>

                        <groupId>mysql</groupId>

                        <artifactId>mysql-connector-java</artifactId>

                        <version>8.0.16</version>

                    </dependency>

                </dependencies>

            </plugin>

            <plugin>

                <groupId>org.apache.maven.plugins</groupId>

                <artifactId>maven-compiler-plugin</artifactId>

                <configuration>

                    <source>8</source>

                    <target>8</target>

                </configuration>

            </plugin>

        </plugins>

        <!-- 打包后文件名称:项目名-环境-版本 -->

        <finalName>${project.artifactId}-${environment}-${project.version}</finalName>

        <resources>

            <resource>

                <directory>src/main/resources</directory>

                <!-- 开启过滤替换功能-->

                <filtering>true</filtering>

                <includes>

                    <!-- 项目打包完成的包中只包含当前环境文件 -->

                    <include>application.yml</include>

                    <include>application-${environment}.yml</include>

                    <include>bootstrap.yml</include>

                    <include>mybatis/*/*.xml</include>

                    <include>templates/*.html</include>

                    <include>static/</include>

                </includes>

            </resource>

        </resources>

    </build>

</project>
pom 里配置了多环境打包,openfeign,zipkin,actuator,sentinel,websocket,lombok 等组件下面对这些组件
- openfeign 是用来为微服务架构下服务之间的调用提供了解决方案,可以理解为被封装的请求模式。
- zipkin 是用来做链路跟踪的工具,是一个开放源代码分布式的跟踪系统,每个服务向zipkin报告计时数据,zipkin会根据调用关系通过Zipkin UI生成依赖关系图(以后的博客里会将)
- actuator 是用来做应用的健康检查,Spring Boot Actuator可以帮助你监控和管理Spring Boot应用,比如健康检查、审计、统计和HTTP追踪等。所有的这些特性可以通过JMX或者HTTP endpoints来获得。
- sentinel 是面向分布式服务架构的高可用流量防护组件,主要以流量为切入点,从限流、流量整形、熔断降级、系统负载保护、热点防护等多个维度来帮助开发者保障微服务的稳定性。
- websocket 全双工通讯协议,可简单理解为服务端可以主动向客户端发送请求
实现多环境打包需要配置多个*.yml 配置文件,配置文件
- application.yml 内容
spring:

  profiles:

    active: "@environment@"
application-dev内容
#======================================#

#========== Server settings ==========#

#======================================#

server:

  port: 8086

  #  servlet:

  #    context-path: /user-center

  tomcat:

    uri-encoding: UTF-8

spring:

  #server name

  application:

    name: user-center

  #======================================#

  #========== Database settings ==========#

  #======================================#

  datasource:

    driver-class-name: com.mysql.cj.jdbc.Driver

    username:

    password: xxxxx

    url: jxxxxx

    #======================================#

    #========== Nacos ==========#

    #======================================#

  cloud:

    nacos:

      discovery:

        # nacos server address

        server-addr: xxxx

  thymeleaf:

    prefix: classpath:/templates/

    check-template-location: true

    suffix: .html

    encoding: utf-8

    servlet:

      content-type: text/html

    mode: HTML5

    cache: false

  #======================================#

  #========== zipkin ==========#

  #======================================#

  zipkin:

    base-url:xxx

    discovery-client-enabled: false

  sleuth:

    sampler:

      #      抽样率 10%

      probability: 1.0

#======================================#

#========== MyBatis settings ==========#

#======================================#

mybatis:

  mapper-locations: classpath:templates/*/*.xml

  #======================================#

  #========== Redis settings ==========#

  #======================================#

#  redis:

#    enabled: true

#    host: xxx

#    port: 6379

#    ssl: false

#    database: 0

#    password: x'x'x'x

#    jedis:

#      pool:

#        # 最大空闲连接数

#        maxIdle: 3

#        # 最大活动连接数

#        maxActive: 20

feign:

  client:

    config:

      #      想要配置的微服务 名称    全局配置 default

      user-center:

        loggerLevel: full

  #        httpclient  连接池

  httpclient:

    enabled: true

    #    feign 的最大连接数

    max-connections: 200

    #    feign 的单个路径最大连接数

    max-connections-per-route: 50

#======================================#

#========== Config sttings ==========#

#======================================#

#

body:

  controllerMethodList:

    swaggerResources,

    getDocumentation

management:

  endpoints:

    web:

      exposure:

        include: '*'
mysql 配置信息说明
 datasource:

    driver-class-name: com.mysql.cj.jdbc.Driver

    username:

    password: xxxxx

    url: jxxxxx
mysql 版本>= 6.x 需要用 com.mysql.cj.jdbc.Driver
mysql 版本<= 5.x 需要用 com.mysql.jdbc.Driver
** com.mysql.jdbc.Driver 源码 如下**
public class Driver extends com.mysql.cj.jdbc.Driver {

    public Driver() throws SQLException {

        super();

    }

    static {

        System.err.println("Loading class `com.mysql.jdbc.Driver'. This is deprecated. The new driver class is `com.mysql.cj.jdbc.Driver'. "

                + "The driver is automatically registered via the SPI and manual loading of the driver class is generally unnecessary.");

    }

}
通过源码我们可以看到 Driver 继承了 com.mysql.cj.jdbc.Driver,如果不加 cj 项目也可以运行但是会打印出一句警告的话,大概意思是说驱动版本需要升级
所以在出现这句话的时候大家不要谎。
另外需要注意的是在为应用起名字的时候尽量不要用_ 和特殊字符,可以用-,否则在启动的时候会打印出警告
针对微服务,我们在新增微服务组件的时候尽量遵循三个步骤
1 pom 文件引入依赖
2 yml 写配置
3 项目加注解
用户微服务引入Nacos 步骤
- 引入依赖
   <!--Nacos-->

        <dependency>

            <groupId>com.alibaba.cloud</groupId>

            <artifactId>spring-cloud-starter-alibaba-nacos-discovery</artifactId>

        </dependency>
- yml写配置
    #=========================#

    #========== Nacos =========#

    #=========================#

spring:

  cloud:

    nacos:

      discovery:

        server-addr: (nacos 请求地址,格式为 ip[域名]:port; 例如 xxx.com:8848,注意 地址前面不要加http 后者https)

        # namespace: (Nacos 命名空间的uuid  不是名称)

        # cluster-name: xxx
- 项目加注解(没有注解,不需要)
** 启动当前项目后,成功后会先发现Nacos 控制台服务管理里会有一个user-center 的服务**
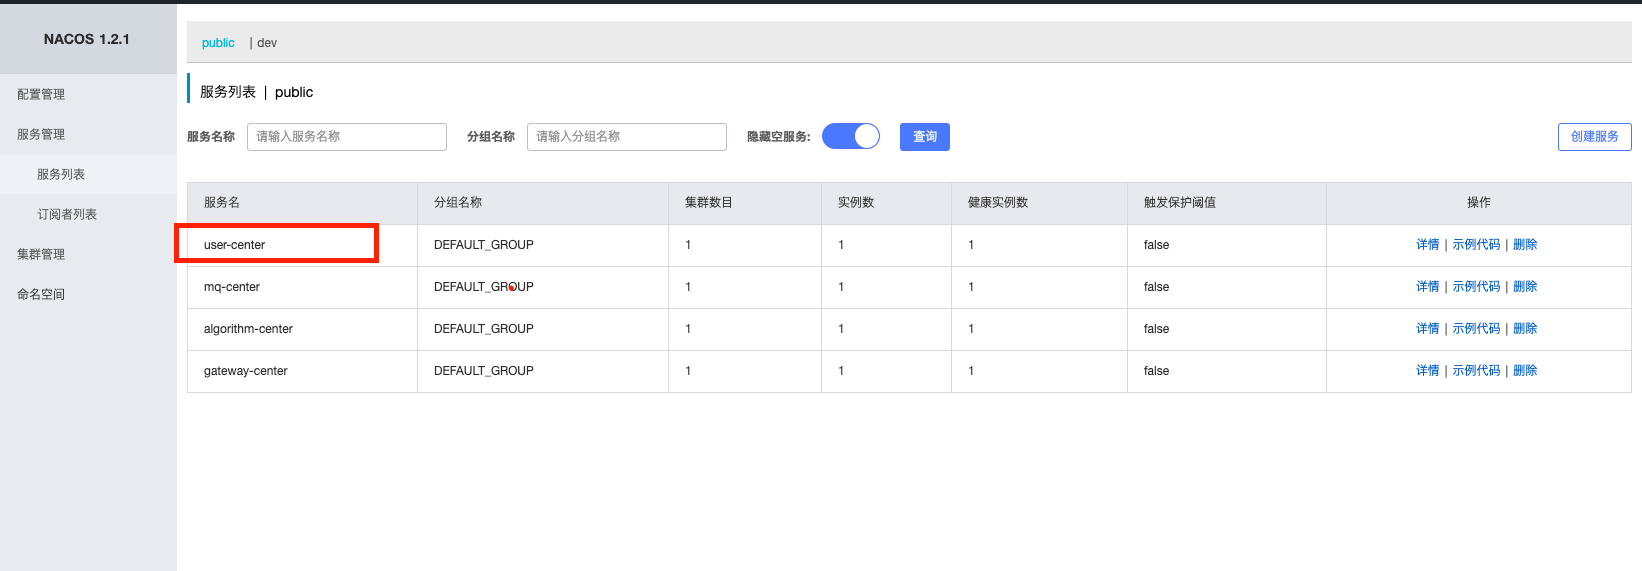
至此 微服务注册到Nacos 便成功了,我们发现服务注册很简单,只需要简单的两步,加依赖,写配置
针对不同环境打包的命令为 mvn install -Ppro/-Pdev/-Ptest,需要哪个环境就打哪个环境的包
下一节会为大家讲解服务和服务之间的调用,希望能够帮助大家搭建一个简单的微服务系统。
Spring Cloud Alibaba 之 user服务的更多相关文章
- Spring Cloud Alibaba 新一代微服务解决方案
本篇是「跟我学 Spring Cloud Alibaba」系列的第一篇, 每期文章会在公众号「架构进化论」进行首发更新,欢迎关注. 1.Spring Cloud Alibaba 是什么 Spring ...
- Spring Cloud Alibaba(8)---Feign服务调用
Feign服务调用 有关Spring Cloud Alibaba之前写过五篇文章,这篇也是在上面项目的基础上进行开发. Spring Cloud Alibaba(1)---入门篇 Spring Clo ...
- 7.【Spring Cloud Alibaba】微服务的用户认证与授权
有状态 vs 无状态 有状态 那么Session在何时创建呢? 当然还是在服务器端程序运行的过程中创建的,不同语言实现的应用程序有不同创建Session的方法,而在Java中是通过调用HttpServ ...
- Spring Cloud Alibaba微服务生态的基础实践
目录 一.背景 二.初识Spring Cloud Alibaba 三.Nacos的基础实践 3.1 安装Nacos并启动服务 3.2 建立微服务并向Nacos注册服务 3.3 建立微服务消费者进行服务 ...
- Spring Cloud Alibaba(1)---入门篇
Spring Cloud Alibaba入门篇 有关微服务的一些概念的东西我这里就不再阐述了,因为之前在写Spring Cloud系列的时候都有详细写过. 具体地址: Spring Cloud系列博客 ...
- 详细剖析Spring Cloud 和Spring Cloud Alibaba的前世今生
我们知道spring cloud可以用来开发微服务,但是应该很少有人真正知道Spring Cloud是什么. 官方的解释是:spring cloud提供了一些可以让开发者快速构建分布式应用的工具,这些 ...
- Spring Cloud Alibaba 之 Nacos
Nacos 技术讲解 一提到分布式系统就不的不提一下 CAP 原则 什么是CAP CAP原则又称CAP定理,指的是在一个分布式系统中,一致性(Consistency).可用性(Availability ...
- Spring Cloud Alibaba基础教程:支持的几种服务消费方式(RestTemplate、WebClient、Feign)
通过<Spring Cloud Alibaba基础教程:使用Nacos实现服务注册与发现>一文的学习,我们已经学会如何使用Nacos来实现服务的注册与发现,同时也介绍如何通过LoadBal ...
- Spring Cloud Alibaba基础教程:使用Nacos实现服务注册与发现
自Spring Cloud Alibaba发布第一个Release以来,就备受国内开发者的高度关注.虽然Spring Cloud Alibaba还没能纳入Spring Cloud的主版本管理中,但是凭 ...
随机推荐
- 14.深入k8s:kube-proxy ipvs及其源码分析
转载请声明出处哦~,本篇文章发布于luozhiyun的博客:https://www.luozhiyun.com 源码版本是1.19 这一篇是讲service,但是基础使用以及基本概念由于官方实在是写的 ...
- 手把手教你安装TensorFlow2 GPU 版本
参考博客:https://blog.csdn.net/weixin_44170512/article/details/103990592 (本文中部分内容引自参考博客,请大家支持原作者!) 感谢大佬的 ...
- MLHPC 2018 | Aluminum: An Asynchronous, GPU-Aware Communication Library Optimized for Large-Scale Training of Deep Neural Networks on HPC Systems
这篇文章主要介绍了一个名为Aluminum通信库,在这个库中主要针对Allreduce做了一些关于计算通信重叠以及针对延迟的优化,以加速分布式深度学习训练过程. 分布式训练的通信需求 通信何时发生 一 ...
- git检出某文件的指定版本
比如当时文件所处的版本id是27e6266d86de3e6da6e1e7a8c43a8b51d6a87032 文件名是system/models/waimai/huodongdiscount.mdl. ...
- 53.Qt-QPdfWriter绘制PDF,支持表单输出
之前打印PDF都是通过html形式来实现的,但是这次要做的东西,需要打印界面控件,所以需要使用QPdfWriter. 通过QPdfWriter来获取QPainter对象,就能实现在PDF上来画画啦. ...
- C#实现迭代器
迭代器模式(Iterator),提供一种方法顺序访问一个聚合对象中的各种元素,而又不暴露该对象的内部表示.C#中使用IEnumerator接口实现,Java中使用Iterator接口实现,其中原理都差 ...
- 使用Python对植物大战僵尸学习研究
根据上一篇 使用Python读写游戏1 中,使用Python win32库,对一款游戏进行了读内存 操作. 今天来写一下对内存进行写的操作 正文 要进行32位的读写,首先了解一下要用到的几个函数,通过 ...
- day17 Pyhton学习 内置函数继续
1. locals 本地作用域/局部作用域 会随着位置的改变而改变 2.globals 全局作用域 永远不变,永远是全局 3.complex:复数 实数(有理数和无理数) 某一个数的平方是-1 ...
- 《python 网络数据采集》代码更新
<python 网络数据采集>这本书中会出现很多这一段代码: 1 from urllib.request import urlopen 2 from bs4 import Beautifu ...
- 扫描仪扫描文件处理-A4分辨率
转换公式:毫米转英寸,英寸乘以DPI(每英寸点数) 1英寸 = 2.54 厘米 = 25.4 毫米 例子(600dpi):mm: 210x297 = px: 4961(210/25.4*600)x70 ...