android开发基础(ViewModel)
今天学习了ViewModel,其是Jetpack的一个类,它可以将界面中的数据独立出来,这样不会造成页面上信息的丢失。
我跟着视频做了一个简单的实例:
首先创建项目的时候它和以往的项目会有些不一样,因为需要使用Jetpack库,所以需要勾选上Use legacy android.support libraries。

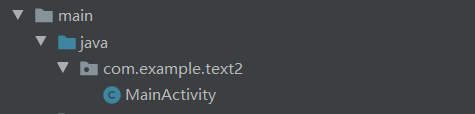
我们需要再com....这个文件夹下新建一个Jjava class.来表示实物类。

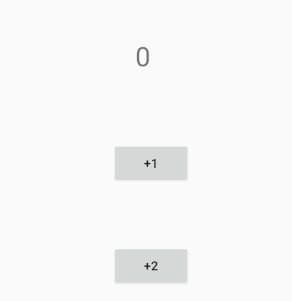
我的例子就是实现按+1按钮或着+2按钮,再Textview 上显示i相应的数值。
MainActivity:
package com.example.viewmodeltext;

import android.arch.lifecycle.ViewModel;

import android.arch.lifecycle.ViewModelProviders;

import android.support.v7.app.AppCompatActivity;

import android.os.Bundle;

import android.view.View;

import android.widget.Button;

import android.widget.TextView;

public class MainActivity extends AppCompatActivity {

MyViewModel myViewModel;

TextView textView;

Button button1,button2;

    @Override

    protected void onCreate(Bundle savedInstanceState) {

        super.onCreate(savedInstanceState);

        setContentView(R.layout.activity_main);

        myViewModel = ViewModelProviders.of(this).get(MyViewModel.class);//获取对象

        textView = findViewById(R.id.textView);

        textView.setText(String.valueOf(myViewModel.number));

        button1 = findViewById(R.id.button);

        button2 = findViewById(R.id.button2);

        button1.setOnClickListener(new View.OnClickListener() {

            @Override

            public void onClick(View v) {

                myViewModel.number+=1;

                textView.setText(String.valueOf(myViewModel.number));

            }

        });

        button2.setOnClickListener(new View.OnClickListener() {

            @Override

            public void onClick(View v) {

                myViewModel.number+=2;

                textView.setText(String.valueOf(myViewModel.number));

            }

        });

    }

}
新建的类(MyViewModel):
package com.example.viewmodeltext;

import android.arch.lifecycle.ViewModel;

public class MyViewModel extends ViewModel {

    public int number = 0;

}
activity_main.xml:
<?xml version="1.0" encoding="utf-8"?>

<android.support.constraint.ConstraintLayout xmlns:android="http://schemas.android.com/apk/res/android"

    xmlns:app="http://schemas.android.com/apk/res-auto"

    xmlns:tools="http://schemas.android.com/tools"

    android:layout_width="match_parent"

    android:layout_height="match_parent"

    tools:context=".MainActivity">

    <TextView

        android:id="@+id/textView"

        android:layout_width="wrap_content"

        android:layout_height="wrap_content"

        android:text="@string/textview"

        android:textSize="30sp"

        app:layout_constraintBottom_toBottomOf="parent"

        app:layout_constraintEnd_toEndOf="parent"

        app:layout_constraintHorizontal_bias="0.475"

        app:layout_constraintStart_toStartOf="parent"

        app:layout_constraintTop_toTopOf="parent"

        app:layout_constraintVertical_bias="0.144" />

    <Button

        android:id="@+id/button"

        android:layout_width="wrap_content"

        android:layout_height="wrap_content"

        android:text="@string/button1"

        app:layout_constraintBottom_toBottomOf="parent"

        app:layout_constraintEnd_toEndOf="parent"

        app:layout_constraintHorizontal_bias="0.498"

        app:layout_constraintStart_toStartOf="parent"

        app:layout_constraintTop_toTopOf="parent"

        app:layout_constraintVertical_bias="0.355" />

    <Button

        android:id="@+id/button2"

        android:layout_width="wrap_content"

        android:layout_height="wrap_content"

        android:text="@string/button2"

        app:layout_constraintBottom_toBottomOf="parent"

        app:layout_constraintEnd_toEndOf="parent"

        app:layout_constraintHorizontal_bias="0.498"

        app:layout_constraintStart_toStartOf="parent"

        app:layout_constraintTop_toTopOf="parent"

        app:layout_constraintVertical_bias="0.562" />

</android.support.constraint.ConstraintLayout>
android开发基础(ViewModel)的更多相关文章
- 20145213 《Java程序设计》实验四 Android开发基础
20145213 <Java程序设计>实验四 Android开发基础 说在前面的话 不同以往实验,对于这次实验具体内容我是比较茫然的.因为点我,打开实验四的链接居然能飘出一股熟悉的味道,这 ...
- 20145206实验四《Android开发基础》
20145206 实验四<Android开发基础> 实验内容 ·安装Android Studio ·运行安卓AVD模拟器 ·使用安卓运行出虚拟手机并显示HelloWorld以及自己的学号 ...
- 实验四 Android开发基础
实验四 Android开发基础 实验内容 1.安装Android Studio 2.运行安卓AVD模拟器 3.使用安卓运行出虚拟手机并显示HelloWorld以及自己的学号 (一)SDK的安装 (二) ...
- 20145337实验四Android开发基础
20145337实验四Android开发基础 实验内容 基于Android Studio开发简单的Android应用并部署测试; 了解Android组件.布局管理器的使用: 掌握Android中事件处 ...
- 20145225《Java程序设计》 实验四 Android开发基础
20145225<Java程序设计> 实验四 Android开发基础 实验报告 实验内容 安装Android Studio 运行安卓AVD模拟器 使用安卓运行出虚拟手机并显示HelloWo ...
- 20145208 实验四 Android开发基础
20145208 实验四 Android开发基础 安装Android Studio 安装的具体步骤在老师的链接中已经很详细了,在此就不做赘述了. 在此提出我觉得安装的时候需要注意的两个地方 一是安装地 ...
- 20145215实验四 Android开发基础
20145215实验四 Android开发基础 实验内容 基于Android Studio开发简单的Android应用并部署测试; 了解Android组件.布局管理器的使用: 掌握Android中事件 ...
- 20165223 实验四 Android开发基础
实验四 Android开发基础 目录 一.实验报告封面 二.具体实验内容 (一)Android Stuidio的安装测试 (二)Activity测试 (三)UI测试 (四)布局测试 (五)教材代码测试 ...
- 20155324 《Java程序设计》实验四 Android开发基础
20155324 <Java程序设计>实验四 Android开发基础 实验内容 1.基于Android Studio开发简单的Android应用并部署测试; 2.了解Android.组件. ...
- 2017-2018-2 20165237 实验四《Android开发基础》实验报告
2017-2018-2 20165237 实验四<Android开发基础>实验报告 实验报告表头: No.1 实验要求: Android程序设计-1 实验要求: 参考<Java和An ...
随机推荐
- 为QT应用程序添加图标 转
第1,第2种方法经本人验证可行 1:通过qmake生成makefile实现过程: (1) 找到一张图片.ico,名字改为myappico.ico: (2) 创建一个新的文本文档,内部添加 IDI_I ...
- HTML的文档设置标记
1.格式标记 <br/> 强制换行标记 <p> 换段落标记 换段落,由于多个空格和回车在HTML中会被等效为一个空格,所以HTML中要换段落就要用<p>,<p ...
- pve apt-get update error 升级报错-文章未完工和验证
pve: apt-get update error 升级报错 提示如下报错 Hit: http://security.debian.org buster/updates InRelease Hit: ...
- 【Python】random库
种子相同,随机数相同
- 执行yum命令报错"Unable to connect to Registration Management Service"
问题描述 linux上执行yum相关命令时,报无法连接到注册管理服务的错误,具体报错信息如下 [root@aijihe-core-zy-2-3 ~]# yum install gcc Loaded p ...
- MODBUS TCP/IP协议规范详细介绍
1.该规范的发展概况 原始版本1997年9月3日作为公共评论的草案. 再版1999年3月29日,即修订版1.0. ...
- VMare安装及虚拟机的安装
VMware安装 1.下载安装包安装 2.安装虚拟机 ,他管不了,只能跟着变. 用处:很少用,用不同账号关联共享: import copyhusband= ['chen','123', ...
- Windows10安装node.js
1.下去官网下载node.js https://nodejs.org/zh-cn/download/ 2.安装,直接默认即可,安装路径也可以自己选择 3.设置环境变量 1.安装软件,若是-g,则是全局 ...
- Android Socket 通信
Android socket 通信 安卓编写Socket客户端,实现连接Socket服务端通信. 创建Socket连接并获取服务端数据 先创建几个全局变量吧 private BufferedWrite ...