tensorflow 1.0 学习:用别人训练好的模型来进行图像分类
谷歌在大型图像数据库ImageNet上训练好了一个Inception-v3模型,这个模型我们可以直接用来进来图像分类。
下载地址:https://storage.googleapis.com/download.tensorflow.org/models/inception_dec_2015.zip
下载完解压后,得到几个文件:
其中的classify_image_graph_def.pb 文件就是训练好的Inception-v3模型。
imagenet_synset_to_human_label_map.txt是类别文件。
随机找一张图片:如
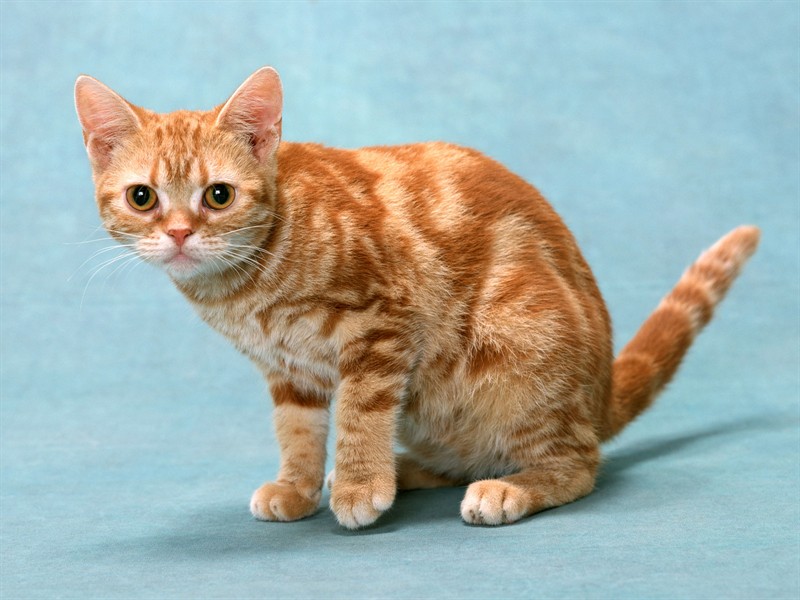
对这张图片进行识别,看它属于什么类?
代码如下:先创建一个类NodeLookup来将softmax概率值映射到标签上。
然后创建一个函数create_graph()来读取模型。
最后读取图片进行分类识别:
# -*- coding: utf-8 -*-

import tensorflow as tf

import numpy as np

import re

import os

model_dir='D:/tf/model/'

image='d:/cat.jpg'

#将类别ID转换为人类易读的标签

class NodeLookup(object):

  def __init__(self,

               label_lookup_path=None,

               uid_lookup_path=None):

    if not label_lookup_path:

      label_lookup_path = os.path.join(

          model_dir, 'imagenet_2012_challenge_label_map_proto.pbtxt')

    if not uid_lookup_path:

      uid_lookup_path = os.path.join(

          model_dir, 'imagenet_synset_to_human_label_map.txt')

    self.node_lookup = self.load(label_lookup_path, uid_lookup_path)

  def load(self, label_lookup_path, uid_lookup_path):

    if not tf.gfile.Exists(uid_lookup_path):

      tf.logging.fatal('File does not exist %s', uid_lookup_path)

    if not tf.gfile.Exists(label_lookup_path):

      tf.logging.fatal('File does not exist %s', label_lookup_path)

    # Loads mapping from string UID to human-readable string

    proto_as_ascii_lines = tf.gfile.GFile(uid_lookup_path).readlines()

    uid_to_human = {}

    p = re.compile(r'[n\d]*[ \S,]*')

    for line in proto_as_ascii_lines:

      parsed_items = p.findall(line)

      uid = parsed_items[0]

      human_string = parsed_items[2]

      uid_to_human[uid] = human_string

    # Loads mapping from string UID to integer node ID.

    node_id_to_uid = {}

    proto_as_ascii = tf.gfile.GFile(label_lookup_path).readlines()

    for line in proto_as_ascii:

      if line.startswith('  target_class:'):

        target_class = int(line.split(': ')[1])

      if line.startswith('  target_class_string:'):

        target_class_string = line.split(': ')[1]

        node_id_to_uid[target_class] = target_class_string[1:-2]

    # Loads the final mapping of integer node ID to human-readable string

    node_id_to_name = {}

    for key, val in node_id_to_uid.items():

      if val not in uid_to_human:

        tf.logging.fatal('Failed to locate: %s', val)

      name = uid_to_human[val]

      node_id_to_name[key] = name

    return node_id_to_name

  def id_to_string(self, node_id):

    if node_id not in self.node_lookup:

      return ''

    return self.node_lookup[node_id]

#读取训练好的Inception-v3模型来创建graph

def create_graph():

  with tf.gfile.FastGFile(os.path.join(

      model_dir, 'classify_image_graph_def.pb'), 'rb') as f:

    graph_def = tf.GraphDef()

    graph_def.ParseFromString(f.read())

    tf.import_graph_def(graph_def, name='')

#读取图片

image_data = tf.gfile.FastGFile(image, 'rb').read()

#创建graph

create_graph()

sess=tf.Session()

#Inception-v3模型的最后一层softmax的输出

softmax_tensor= sess.graph.get_tensor_by_name('softmax:0')

#输入图像数据,得到softmax概率值(一个shape=(1,1008)的向量)

predictions = sess.run(softmax_tensor,{'DecodeJpeg/contents:0': image_data})

#(1,1008)->(1008,)

predictions = np.squeeze(predictions)

# ID --> English string label.

node_lookup = NodeLookup()

#取出前5个概率最大的值(top-5)

top_5 = predictions.argsort()[-5:][::-1]

for node_id in top_5:

  human_string = node_lookup.id_to_string(node_id)

  score = predictions[node_id]

  print('%s (score = %.5f)' % (human_string, score))

sess.close()
最后输出:
tiger cat (score = 0.40316)
Egyptian cat (score = 0.21686)
tabby, tabby cat (score = 0.21348)
lynx, catamount (score = 0.01403)
Persian cat (score = 0.00394)
tensorflow 1.0 学习:用别人训练好的模型来进行图像分类的更多相关文章
- 三分钟快速上手TensorFlow 2.0 (中)——常用模块和模型的部署
本文学习笔记参照来源:https://tf.wiki/zh/basic/basic.html 前文:三分钟快速上手TensorFlow 2.0 (上)——前置基础.模型建立与可视化 tf.train. ...
- 三分钟快速上手TensorFlow 2.0 (上)——前置基础、模型建立与可视化
本文学习笔记参照来源:https://tf.wiki/zh/basic/basic.html 学习笔记类似提纲,具体细节参照上文链接 一些前置的基础 随机数 tf.random uniform(sha ...
- tensorflow 1.0 学习:模型的保存与恢复(Saver)
将训练好的模型参数保存起来,以便以后进行验证或测试,这是我们经常要做的事情.tf里面提供模型保存的是tf.train.Saver()模块. 模型保存,先要创建一个Saver对象:如 saver=tf. ...
- tensorflow 1.0 学习:用CNN进行图像分类
tensorflow升级到1.0之后,增加了一些高级模块: 如tf.layers, tf.metrics, 和tf.losses,使得代码稍微有些简化. 任务:花卉分类 版本:tensorflow 1 ...
- tensorflow 1.0 学习:模型的保存与恢复
将训练好的模型参数保存起来,以便以后进行验证或测试,这是我们经常要做的事情.tf里面提供模型保存的是tf.train.Saver()模块. 模型保存,先要创建一个Saver对象:如 saver=tf. ...
- TensorFlow 同时调用多个预训练好的模型
在某些任务中,我们需要针对不同的情况训练多个不同的神经网络模型,这时候,在测试阶段,我们就需要调用多个预训练好的模型分别来进行预测. 调用单个预训练好的模型请点击此处 弄明白了如何调用单个模型,其实调 ...
- tensorflow 2.0 学习(四)
这次的mnist学习加入了测试集,看看学习的准确率,代码如下 # encoding: utf-8 import tensorflow as tf import matplotlib.pyplot as ...
- Tensorflow 2.0 学习资源
我从换了新工作才开始学习使用Tensorflow,感觉实在太难用了,sess和graph对 新手很不友好,各种API混乱不堪,这些在tf2.0都有了重大改变,2.0大量使用keras的 api,初步使 ...
- tensorflow 1.0 学习:十图详解tensorflow数据读取机制
本文转自:https://zhuanlan.zhihu.com/p/27238630 在学习tensorflow的过程中,有很多小伙伴反映读取数据这一块很难理解.确实这一块官方的教程比较简略,网上也找 ...
随机推荐
- Extjs6.2 项目学习系列(一)
1. Extjs开发准备 (1).下载ExtJS SDK GPL版 (本测试用版本 ext-6.2.0) : https://www.sencha.com/legal/gpl/ (2).下载Se ...
- UOJ#435. 【集训队作业2018】Simple Tree 树链剖分,分块
原文链接www.cnblogs.com/zhouzhendong/p/UOJ435.html 前言 分块题果然是我这种蒟蒻写不动的.由于种种原因,我写代码的时候打错了很多东西,最致命的是数组开小了.* ...
- python @property的用法及含义全面解析
在接触python时最开始接触的代码,取长方形的长和宽,定义一个长方形类,然后设置长方形的长宽属性,通过实例化的方式调用长和宽,像如下代码一样. class Rectangle(object): de ...
- python 配置文件__ConfigParser
基础读取配置文件 -read(filename) 直接读取文件内容 -sections() 得到所有的section,并以列表的形 ...
- Codeforces.1129E.Legendary Tree(交互 二分)
题目链接 \(Description\) 有一棵\(n\)个点的树.你需要在\(11111\)次询问内确定出这棵树的形态.每次询问你给定两个非空且不相交的点集\(S,T\)和一个点\(u\),交互库会 ...
- Typescript骚操作,在TS里面直接插入HTML
Typescript骚操作,在TS里面直接插入HTML,还有语法提示 先给大家看一个图 因为我不喜欢用很重的框架,主要是并非专业UI,但是偶尔会用到,还是觉得直接element组装受不了,想想能在ts ...
- 电梯模拟系统——BUAA OO第二单元作业总结
需求分析 官方需求 本次作业需要模拟一个多线程实时多电梯系统,从标准输入中输入请求信息,程序进行接收和处理,模拟电梯运行,将必要的运行信息通过输出接口进行输出. 本次作业电梯系统具有的功能为:上下行, ...
- Zathura: 轻巧好用的 PDF 查看器]
[Zathura: 轻巧好用的 PDF 查看器](https://linuxtoy.org/archives/zathura.html) 这个文件很轻巧,且支持VIM方式的 快捷键
- JS 存储
1. 描述cookie ,sessionStorage 和 localStorage 的区别? cookie : 本身用于客户端和服务器端通信, 但是有本身存储的功能,就被‘借用’ 使用documen ...
- iview安装使用
iView 是一套基于 Vue.js 的开源 UI 组件库,主要服务于 PC 界面的中后台产品. 安装 cd 项目 cnpm install iview -S 在项目中引入iview 在入口文件mai ...